Topic autocad drawing is not valid: Encountering the "AutoCAD Drawing Is Not Valid" error can be frustrating, but don"t worry! This article offers effective solutions to quickly restore your valuable drawings and ensure your projects remain on track.
Table of Content
- How to fix the AutoCAD drawing file is not valid error?
- Understanding the \"AutoCAD Drawing Is Not Valid\" Error
- Common Reasons for AutoCAD Drawing Corruption
- Step-by-Step Guide to Repair a Corrupt AutoCAD Drawing
- Using the RECOVER Command to Fix Drawings
- Deleting DWL and DWL2 Files to Resolve Issues
- YOUTUBE: Autocad Error: Drawing File is Not Valid - Autocad 2019
- Ensuring Compatibility with DWG and DXF File Formats
- Inserting Affected Drawings into a Current File
- Recovering Drawings with the DRAWINGRECOVERY Command
- Manual Recovery Methods for Advanced Users
- Utilizing Volume Shadow Copies for Recovery
- Preventive Measures to Avoid Future Drawing Corruption
- Optimizing AutoCAD Settings for Better Stability
How to fix the AutoCAD drawing file is not valid error?
To fix the \"AutoCAD drawing file is not valid\" error, you can follow these steps:
- First, make sure that you are using a compatible version of AutoCAD or DWG TrueView.
- Try repairing the drawing file using the RECOVER command.
- Delete any DWL or DWL2 files associated with the drawing.
- If the issue persists, try opening the drawing file on a different computer or AutoCAD installation to see if the problem is specific to your machine.
- If the drawing file opens with errors, it is possible that third-party software is interfering with AutoCAD. Disable or uninstall any non-Autodesk or non-essential software running within AutoCAD.
- Make sure that the drawing files are not corrupted or damaged. If necessary, try restoring from a backup or contacting the original source for a valid copy.
- If none of the above steps resolves the issue, you may need to consult AutoCAD support or forums for further assistance.
READ MORE:
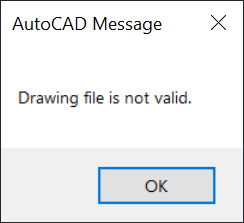
Understanding the \"AutoCAD Drawing Is Not Valid\" Error
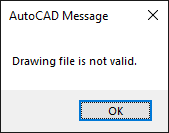
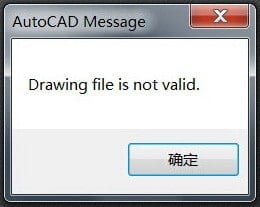
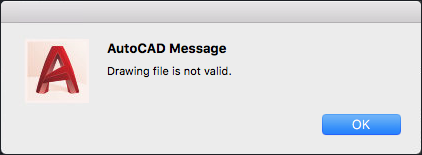
The \"AutoCAD Drawing Is Not Valid\" error is a common issue that AutoCAD users may encounter. This error indicates that AutoCAD cannot open a drawing file because it has been corrupted or damaged in some way. There are several reasons why this error may occur, ranging from software glitches to issues with the drawing file itself.
- Corruption due to unexpected closure of AutoCAD or computer crashes while a drawing is open.
- Compatibility issues with different versions of AutoCAD.
- Problems arising from transferring files between different operating systems or through email.
- Hardware failures, such as bad sectors on a hard drive where the drawing is stored.
Understanding the root cause of this error is the first step in resolving it and recovering your work. The following sections will guide you through various methods to repair corrupted AutoCAD drawings and prevent the error from occurring in the future.
Common Reasons for AutoCAD Drawing Corruption
Drawing corruption in AutoCAD can stem from a variety of sources, impacting your workflow and project timelines. Recognizing these common causes is crucial for prevention and effective resolution.
- Improper Shutdown: Abruptly closing AutoCAD or experiencing a system crash while a drawing is open can corrupt files.
- Network Issues: Working on drawings directly from network locations or during unstable network connections may lead to corruption.
- Hardware Failures: Bad sectors on hard drives, failing memory, or other hardware issues can corrupt drawings stored or accessed on the affected hardware.
- Software Conflicts: Third-party applications or outdated drivers can interfere with AutoCAD operations, potentially corrupting drawings.
- File Transfer Errors: Corruption may occur when transferring files via email or removable media, especially if files are not properly compressed or decompressed.
- Version Incompatibility: Opening drawings in different versions of AutoCAD without proper conversion processes can lead to corruption.
- Virus or Malware: Malicious software can corrupt or delete AutoCAD files, among other damaging effects.
Understanding these factors is a vital step towards safeguarding your AutoCAD projects against potential corruption, ensuring the integrity and accessibility of your drawings.

Step-by-Step Guide to Repair a Corrupt AutoCAD Drawing
Repairing a corrupt AutoCAD drawing file can be a detailed process, but following these steps can help you recover your work and prevent data loss. Here\"s a comprehensive guide to troubleshooting and fixing a corrupt AutoCAD drawing:
- Use the RECOVER Command: Begin by attempting to repair the drawing with AutoCAD\"s RECOVER command. This will try to recover as much data as possible from the corrupted file.
- Delete DWL/DWL2 Files: Next, look for and delete any .DWL and .DWL2 files associated with the corrupt drawing. These are temporary lock files that might prevent the drawing from opening properly.
- Check File Format: Ensure the file you\"re working with is a genuine DWG or DXF file. This involves checking the file extension and possibly the file\"s internal structure with a text editor for a specific version code.
- Insert Drawing: If direct recovery attempts fail, try inserting the corrupted drawing into a new drawing using the INSERT command, which may bypass the corruption.
- Use DRAWINGRECOVERY: The DRAWINGRECOVERY command can be used to access and recover drawings after a system failure, via the Drawing Recovery Manager.
- Manual Recovery: Explore manual recovery options, such as locating and renaming backup (.bak) files or using AutoCAD\"s automatic save files (.sv$), converting them back to .dwg format.
- Utilize Volume Shadow Copies: If available, use Windows\" Volume Shadow Copy service to restore a previous version of the drawing file.
- Explore Other Solutions: Consider other solutions, such as ensuring the file is stored locally for access, checking for software updates, or trying to open the file with different CAD software.
Each step offers a potential solution to recover your drawing and mitigate the impact of the corruption. It\"s crucial to follow these steps systematically to ensure the best chance of recovery.
Remember to regularly back up your work and keep your software up to date to prevent such issues in the future.
Using the RECOVER Command to Fix Drawings
The RECOVER command in AutoCAD is a powerful tool designed to repair corrupt or damaged DWG files. When a drawing cannot be opened due to corruption, the RECOVER command attempts to open the file and correct its errors. Follow these steps to use the RECOVER command effectively:
- Open AutoCAD: Start by launching AutoCAD. You do not need to open a drawing file at this point.
- Access the Command Line: Use the command line at the bottom of the AutoCAD interface. If the command line is not visible, use the keyboard shortcut CTRL+9 to toggle its visibility.
- Enter the RECOVER Command: Type \"RECOVER\" in the command line and press Enter. This action prompts you to select a file to repair.
- Select the Corrupt File: Use the file dialog box to navigate to and select the corrupt DWG file you wish to repair. Once selected, click \"Open\" to start the recovery process.
- Review the Recovery Process: AutoCAD will attempt to repair the drawing and may display messages in the command line or a dialog box about the repairs it is making. Pay close attention to these messages as they can provide insights into what went wrong and what actions the software is taking to correct the issues.
- Save the Repaired Drawing: Once the recovery process is complete, AutoCAD will open the repaired drawing. It is highly recommended to save this drawing immediately. Use the \"SAVEAS\" command to save the file with a new name or location to avoid overwriting the original corrupted file.
Using the RECOVER command can save you significant time and effort by automatically fixing common issues in corrupt DWG files. However, it may not be able to fix all problems, especially in severely damaged files. In such cases, exploring additional recovery methods or seeking professional data recovery services may be necessary.
Remember, regularly backing up your AutoCAD drawings and following best practices for file management can help minimize the risk of file corruption and the need for recovery.

_HOOK_
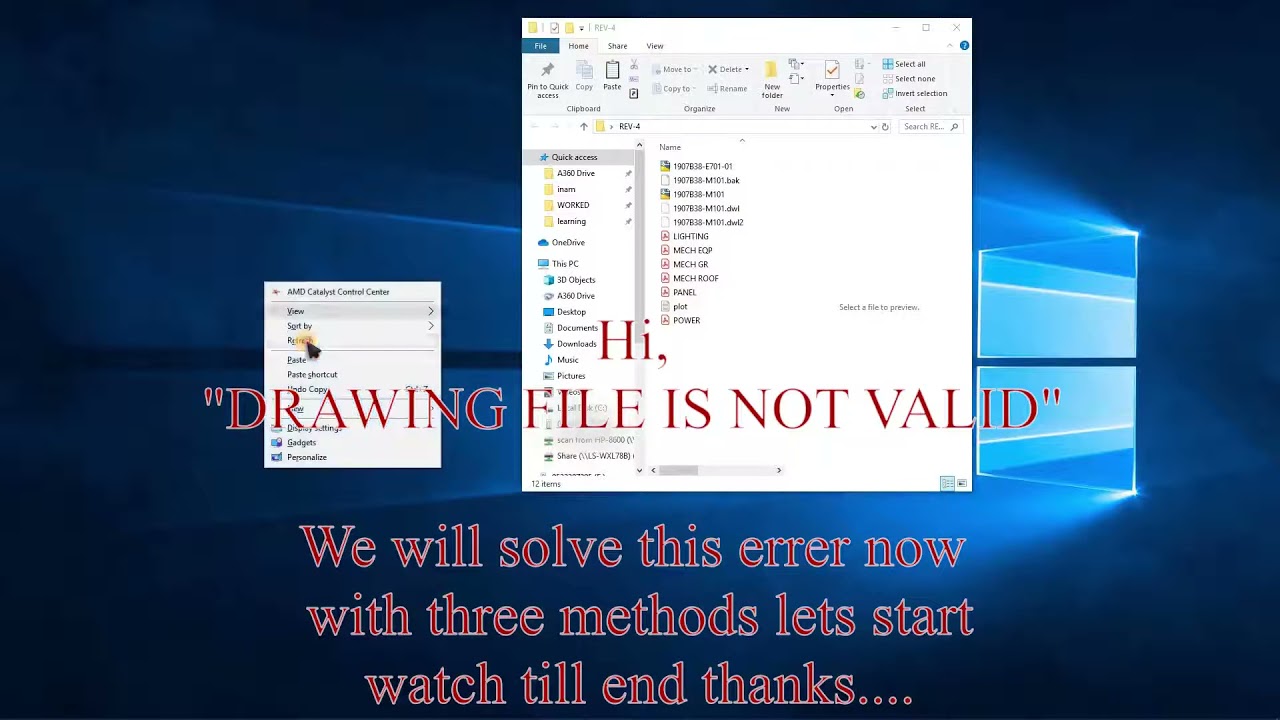
Deleting DWL and DWL2 Files to Resolve Issues
When working with AutoCAD, you may encounter situations where a drawing cannot be opened or is behaving unexpectedly. One common troubleshooting step is to delete the DWL and DWL2 files associated with the problematic drawing. These files are lock files created by AutoCAD when a drawing is opened, ensuring that no other user can edit the drawing simultaneously. However, if AutoCAD closes unexpectedly, these files may not be deleted automatically, leading to potential access issues or file corruption signals.
- Close AutoCAD: Ensure that AutoCAD is completely closed before attempting to delete DWL and DWL2 files. This prevents any potential conflicts while deleting these files.
- Enable Hidden Files View: DWL and DWL2 files are usually hidden. To view these files in Windows Explorer, you must enable the \"Hidden items\" option. This can be done in the View tab of the File Explorer.
- Locate the Drawing Files: Navigate to the folder where the problematic drawing is stored. You will be looking for files with the same name as your drawing but with the extensions .dwl and .dwl2.
- Delete DWL and DWL2 Files: Once you find the DWL and DWL2 files, select them and press the Delete key on your keyboard. Confirm the deletion if prompted.
- Reopen Your Drawing: After successfully deleting the DWL and DWL2 files, try reopening your drawing in AutoCAD. In many cases, this will resolve the issue, allowing you to access your drawing.
Deleting these lock files can resolve issues related to file access and corruption signals. However, it\"s important to note that this method should be used as a troubleshooting step and not a regular practice. Always ensure your work is saved and AutoCAD is closed properly to avoid needing to delete DWL and DWL2 files frequently.
Autocad Error: Drawing File is Not Valid - Autocad 2019
\"Learn how to troubleshoot and resolve Autocad Error messages with ease in this educational video. Unlock the full potential of your Autocad software and say goodbye to frustrating error pop-ups!\"
How to Recover a Corrupt AutoCAD Drawing
\"Discover effective strategies to recover lost or accidentally deleted files in this informative video. Whether it\'s a crashed hard drive or an accidental deletion, this video has got you covered with step-by-step guidance on data recovery.\"
Ensuring Compatibility with DWG and DXF File Formats
Ensuring compatibility with DWG and DXF file formats is crucial for smooth operations within AutoCAD and other CAD software. These formats are widely used in the industry for sharing and archiving designs. Compatibility issues can lead to errors, such as the \"AutoCAD Drawing is Not Valid\" message. Here\"s how you can ensure compatibility:
- Understand File Formats: DWG is AutoCAD\"s native file format, while DXF (Drawing Exchange Format) allows for the interchange of drawings between AutoCAD and other software. Knowing which format your work requires can prevent compatibility issues.
- Use Save As for Different Versions: AutoCAD allows you to save a drawing in formats compatible with earlier versions of the software. Using the \"Save As\" command, you can select an older DWG or DXF format to ensure compatibility with recipients using older versions of AutoCAD.
- Check for Software Updates: Ensure you\"re using the latest version of AutoCAD, as Autodesk regularly updates its software to improve compatibility with DWG and DXF files. Keeping your software up to date can prevent many compatibility issues.
- Utilize Data Conversion Tools: For files not originally created in AutoCAD, use data conversion tools to convert them into compatible DWG or DXF formats. Autodesk and other vendors offer tools and services for this purpose.
- Audit and Recover Files: Use the AUDIT and RECOVER commands within AutoCAD to check and repair DWG files. This can fix minor corruptions and compatibility issues within the file.
- Test Files Before Sharing: Before distributing DWG or DXF files, open them in AutoCAD to ensure they\"re not corrupted and are fully compatible. This step is especially important when sharing files across different CAD platforms.
By following these steps, you can significantly reduce the risk of encountering compatibility issues with DWG and DXF files, ensuring smooth collaboration and file sharing with clients and colleagues.
Inserting Affected Drawings into a Current File
When an AutoCAD drawing file becomes corrupt or is displaying the \"not valid\" error, one effective workaround can be to insert the affected drawing into a new, blank drawing file. This method can bypass certain issues preventing the file from being opened directly. Here’s how to do it:
- Open a New Drawing: Start by launching AutoCAD and opening a new, blank drawing file. This will serve as the host for the affected drawing.
- Use the INSERT Command: Type \"INSERT\" into the command line or access it through the \"Insert\" tab on the ribbon. This opens the Insert dialog box.
- Select the Affected Drawing: In the Insert dialog box, click \"Browse\" to locate and select the corrupt or invalid drawing file. Once selected, click \"Open\" to add it to the list of files to be inserted.
- Insertion Options: Before inserting, you\"ll have the option to specify insertion point, scale, and rotation. You can choose to use the default settings by clicking \"OK\" or adjust as needed for your specific situation.
- Review and Save: After the affected drawing has been inserted into the new file, carefully review it to ensure that it appears as expected. If satisfied, save the new drawing file under a different name to preserve the original data.
This method can be particularly useful for recovering data from a drawing that cannot be opened in the usual way. It\"s also a good practice to use the AUDIT and RECOVER commands on the newly created file to check for and repair any remaining issues.
Remember, while this method can help salvage a corrupt file, it\"s also important to address the underlying cause of the corruption to prevent future occurrences. Regularly updating AutoCAD, maintaining system health, and adhering to best practices for file management can help minimize the risk of drawing file corruption.
Recovering Drawings with the DRAWINGRECOVERY Command
The DRAWINGRECOVERY command in AutoCAD is a dedicated feature designed to assist users in recovering drawings that have been corrupted or cannot be opened normally due to system crashes or other issues. This command initiates the Drawing Recovery Manager, which provides a user-friendly interface for accessing backup files and autosave files of corrupted drawings. Here\"s how to use the DRAWINGRECOVERY command to recover your drawings:
- Launch AutoCAD: Open AutoCAD. You do not need to open a specific drawing file to access the recovery options.
- Execute the Command: Type \"DRAWINGRECOVERY\" in the command line and press Enter. This action opens the Drawing Recovery Manager.
- Navigate Through Recovery Manager: The Drawing Recovery Manager will display a list of drawings that have encountered errors recently. It includes both the autosaved versions (.sv$ files converted to .dwg) and any backup files (.bak) associated with the affected drawings.
- Select the Drawing to Recover: Choose the drawing you wish to recover. You will see the available versions based on the autosave and backup files. Select the most recent or appropriate version for recovery.
- Preview and Open: Before recovery, you can preview the selected version to ensure it is the correct one. After confirming, click \"Open\" to load the drawing into AutoCAD.
- Inspect and Save the Drawing: After opening the recovered drawing, thoroughly inspect it for any missing elements or errors. If the drawing looks correct, use the \"SAVEAS\" command to save the recovered drawing to a new file to avoid overwriting any existing files.
Utilizing the DRAWINGRECOVERY command is an effective way to regain access to important work that was thought to be lost due to software crashes or drawing corruption. It\"s an essential tool for AutoCAD users, offering a straightforward solution for drawing recovery.
Remember, regular saving and the use of AutoCAD\"s autosave feature can greatly reduce the risk of significant data loss, complementing the DRAWINGRECOVERY command as part of a comprehensive data management strategy.

Manual Recovery Methods for Advanced Users
For advanced AutoCAD users, there are manual methods to recover corrupted or inaccessible drawings that go beyond the standard recovery commands. These methods require a deeper understanding of AutoCAD\"s file structure and system settings. Here\"s a step-by-step guide to manually recover your AutoCAD drawings:
- Recover Using .bak Files: AutoCAD automatically creates backup files with a .bak extension. Locate the .bak file in the same directory as the corrupted file, rename its extension to .dwg, and try opening it in AutoCAD.
- Accessing Autosave Files: AutoCAD\"s autosave files are saved with a .sv$ extension. Find these files in the AutoCAD autosave directory, rename the file extension to .dwg, and attempt to open them.
- DXF Format Export: If you can open the corrupted file in AutoCAD but encounter errors, try exporting the drawing to DXF format. Open the new DXF file and then save it back to DWG format.
- Use the PURGE Command: The PURGE command can help remove unused objects from the drawing, potentially eliminating sources of corruption. Open the drawing in AutoCAD, execute the PURGE command, and then save the file.
- Audit the Drawing: Use the AUDIT command to examine the drawing for errors. AutoCAD will attempt to repair any errors found. After running AUDIT, save the drawing.
- Detach External References: Corrupted external references (Xrefs) can cause issues. Detach any Xrefs from the drawing and then attempt to save it.
- Reset System Variables: Some system variables may affect drawing stability. Resetting system variables to their default settings can sometimes resolve drawing issues.
- Custom Scripts and LISP Routines: Advanced users can write custom scripts or use AutoLISP routines to automate the recovery process, addressing specific issues within the drawing.
These manual recovery methods are powerful tools in the hands of experienced AutoCAD users. However, they should be used with caution, as improper manipulation of system settings or file structures can lead to further data loss. Always ensure you have backups of your work before attempting any recovery procedure.
_HOOK_
Utilizing Volume Shadow Copies for Recovery
For advanced AutoCAD users, there are manual methods to recover corrupted or inaccessible drawings that go beyond the standard recovery commands. These methods require a deeper understanding of AutoCAD\"s file structure and system settings. Here\"s a step-by-step guide to manually recover your AutoCAD drawings:
- Recover Using .bak Files: AutoCAD automatically creates backup files with a .bak extension. Locate the .bak file in the same directory as the corrupted file, rename its extension to .dwg, and try opening it in AutoCAD.
- Accessing Autosave Files: AutoCAD\"s autosave files are saved with a .sv$ extension. Find these files in the AutoCAD autosave directory, rename the file extension to .dwg, and attempt to open them.
- DXF Format Export: If you can open the corrupted file in AutoCAD but encounter errors, try exporting the drawing to DXF format. Open the new DXF file and then save it back to DWG format.
- Use the PURGE Command: The PURGE command can help remove unused objects from the drawing, potentially eliminating sources of corruption. Open the drawing in AutoCAD, execute the PURGE command, and then save the file.
- Audit the Drawing: Use the AUDIT command to examine the drawing for errors. AutoCAD will attempt to repair any errors found. After running AUDIT, save the drawing.
- Detach External References: Corrupted external references (Xrefs) can cause issues. Detach any Xrefs from the drawing and then attempt to save it.
- Reset System Variables: Some system variables may affect drawing stability. Resetting system variables to their default settings can sometimes resolve drawing issues.
- Custom Scripts and LISP Routines: Advanced users can write custom scripts or use AutoLISP routines to automate the recovery process, addressing specific issues within the drawing.
These manual recovery methods are powerful tools in the hands of experienced AutoCAD users. However, they should be used with caution, as improper manipulation of system settings or file structures can lead to further data loss. Always ensure you have backups of your work before attempting any recovery procedure.

Preventive Measures to Avoid Future Drawing Corruption
To safeguard your AutoCAD drawings from corruption and ensure their integrity over time, adopting preventive measures is essential. By following these guidelines, you can minimize the risk of drawing corruption and maintain a smooth workflow. Here are key strategies to prevent future drawing corruption:
- Regular Backups: Consistently back up your drawings and project files. Utilize AutoCAD\"s automatic backup features and consider external backup solutions for added security.
- Keep Software Updated: Always use the latest version of AutoCAD. Autodesk regularly releases updates and patches that fix known bugs and improve stability.
- Avoid Large File Sizes: Large drawings can become unwieldy and more prone to corruption. Use the PURGE command to remove unnecessary elements and layers that are not in use to reduce file size.
- Use Trusted Sources: Be cautious about importing blocks or drawings from unknown sources, as these could carry corrupted data. Only use trusted libraries and exchange files with known partners.
- Check for External References: External references (xrefs) can sometimes cause issues. Ensure all xrefs are properly attached and paths are correctly set.
- Maintain System Health: Regularly update your operating system and hardware drivers, especially graphics and storage subsystems, to ensure they are fully compatible with AutoCAD.
- Close Drawings Properly: Always close your drawings and AutoCAD properly to ensure that all data is correctly written and saved.
- Network Stability: For networked environments, ensure a stable and reliable connection. Disruptions in network connectivity can lead to file corruption, especially when working directly off network locations.
Implementing these measures can significantly reduce the likelihood of encountering drawing corruption issues, allowing for a more reliable and efficient design process. Remember, prevention is always better than cure, especially in the context of safeguarding your valuable CAD data.
READ MORE:
Optimizing AutoCAD Settings for Better Stability
Optimizing AutoCAD settings is crucial for enhancing performance and ensuring better stability while working on your projects. Adjusting these settings can help in preventing crashes, reducing file corruption, and improving overall efficiency. Here are steps and tips for optimizing AutoCAD for better stability:
- Update Graphics Drivers: Ensure your graphics drivers are up to date. Outdated drivers can lead to performance issues and instability within AutoCAD.
- Adjust AutoCAD\"s Options: Navigate to the \"Options\" dialog in AutoCAD. Here, you can adjust settings for better performance, such as the graphics performance, selection effects, and file save options.
- Manage File Size: Use the \"PURGE\" command to remove unused objects and \"AUDIT\" to fix errors in the drawing. Smaller file sizes are less prone to corruption and load faster.
- Control System Variables: Certain system variables can impact AutoCAD\"s performance. For example, setting the WHIPARC variable to 1 improves the display of arcs and circles but might slow down the software on older systems.
- Optimize Hardware Acceleration: Enable or disable hardware acceleration based on your system\"s capability. This can be found under the \"Graphics Performance\" dialog box. Some systems might perform better with it turned off.
- Use Workspaces Wisely: Customize your workspaces to include only the tools you use frequently. Overloading AutoCAD with unnecessary toolbars and palettes can impact performance.
- Regular Maintenance: Regularly perform maintenance on your computer, such as disk cleanup and defragmentation. Keeping your system in good health can contribute to the stability of AutoCAD.
- Network Considerations: If you are working over a network, ensure the connection is stable. Working on files over a slow or unstable network can lead to performance issues and file corruption.
By following these steps, you can optimize your AutoCAD settings for better stability, ensuring a smoother workflow and reducing the likelihood of software crashes or drawing file corruption.
Unlock the full potential of your AutoCAD projects by mastering the solutions to the \"Drawing Not Valid\" error. Explore our comprehensive guide for effective repair techniques, prevention strategies, and optimization tips to ensure your drawings remain corruption-free and stable.