Topic how to convert dwg to pdf in autocad: Discover the simplest methods to convert DWG files to PDF in AutoCAD, ensuring high-quality outputs with our comprehensive guide. Master the conversion process to streamline your workflow and enhance your project delivery.
Table of Content
- How to convert DWG to PDF in AutoCAD?
- Understanding DWG to PDF Conversion in AutoCAD
- Step-by-Step Guide to Convert DWG to PDF Directly in AutoCAD
- Using the DWG to PDF.pc3 Printer in AutoCAD for PDF Conversion
- Batch Conversion of DWG Files to PDFs
- Adjusting PDF Output Settings for Quality and File Size
- Converting DWG Files to PDF Without AutoCAD
- YOUTUBE: Convert AutoCAD DWG to PDF - Tutorial
- Best Practices for DWG to PDF Conversion
- Troubleshooting Common Issues During Conversion
- Advanced PDF Export Options: Layers, Bookmarks, and Metadata
- Optimizing PDF Files for Printing and Sharing
How to convert DWG to PDF in AutoCAD?
To convert DWG to PDF in AutoCAD, you can follow these steps:
- Open AutoCAD software on your computer.
- Click on the \"File\" menu at the top left corner of the program.
- Select \"Open\" and browse your computer to locate the DWG file you want to convert.
- Once you have opened the DWG file, click on the \"File\" menu again.
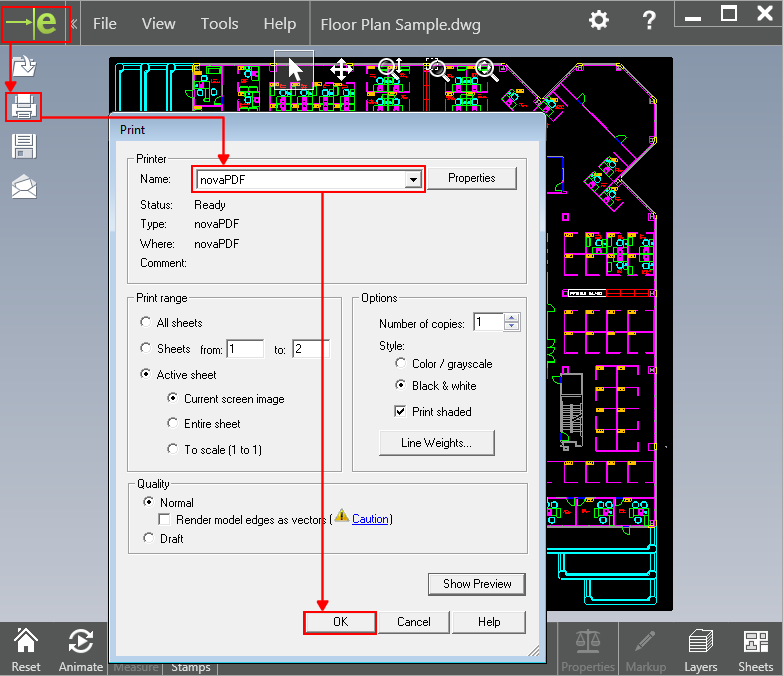
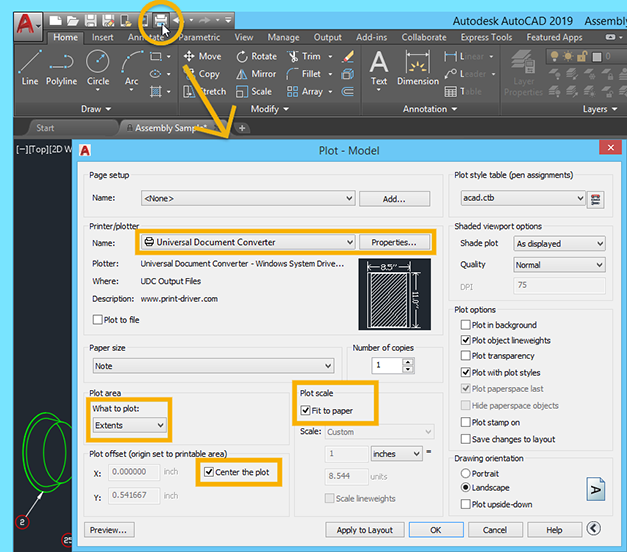
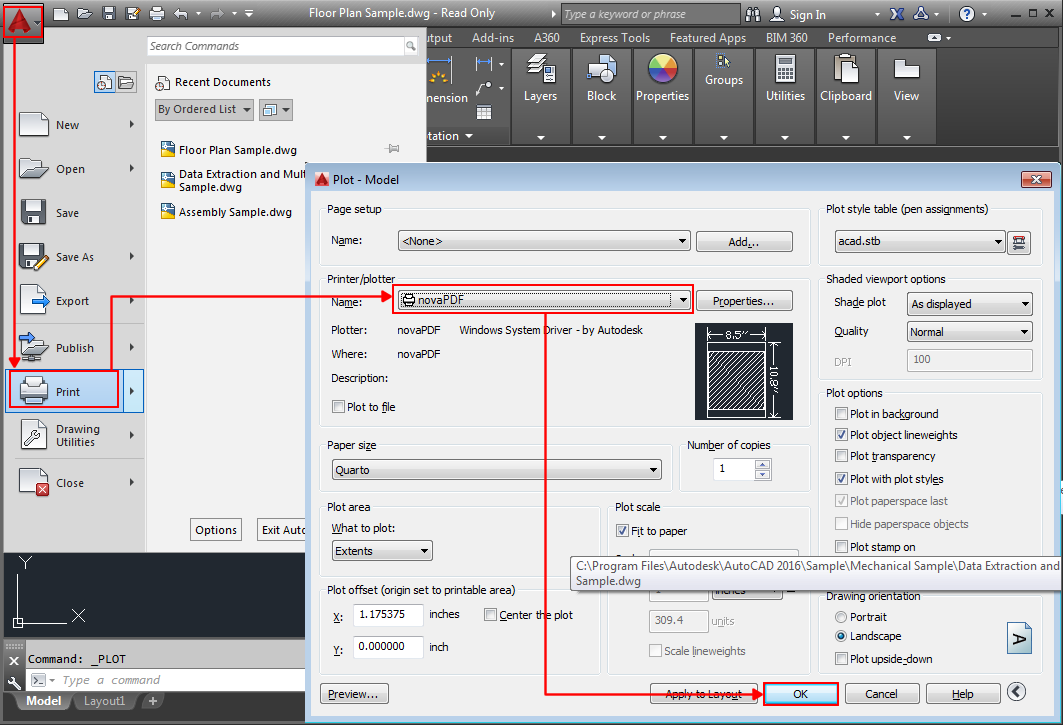
- Now choose \"Plot\" from the dropdown menu. This will open the Plot dialog box.
- In the Plot dialog box, under the \"Printer/Plotter\" section, select the printer named \"DWG to PDF.pc3\".
- Next, specify the layout that you want to convert to PDF in the \"Plot Area\" section.
- In the \"Plot Scale\" section, choose a suitable scale for the PDF.
- Under the \"Plot Options\" section, you can customize settings such as plot style, plot transparency, and plot quality.
- Once you have made all the necessary selections, click on the \"OK\" button to proceed.
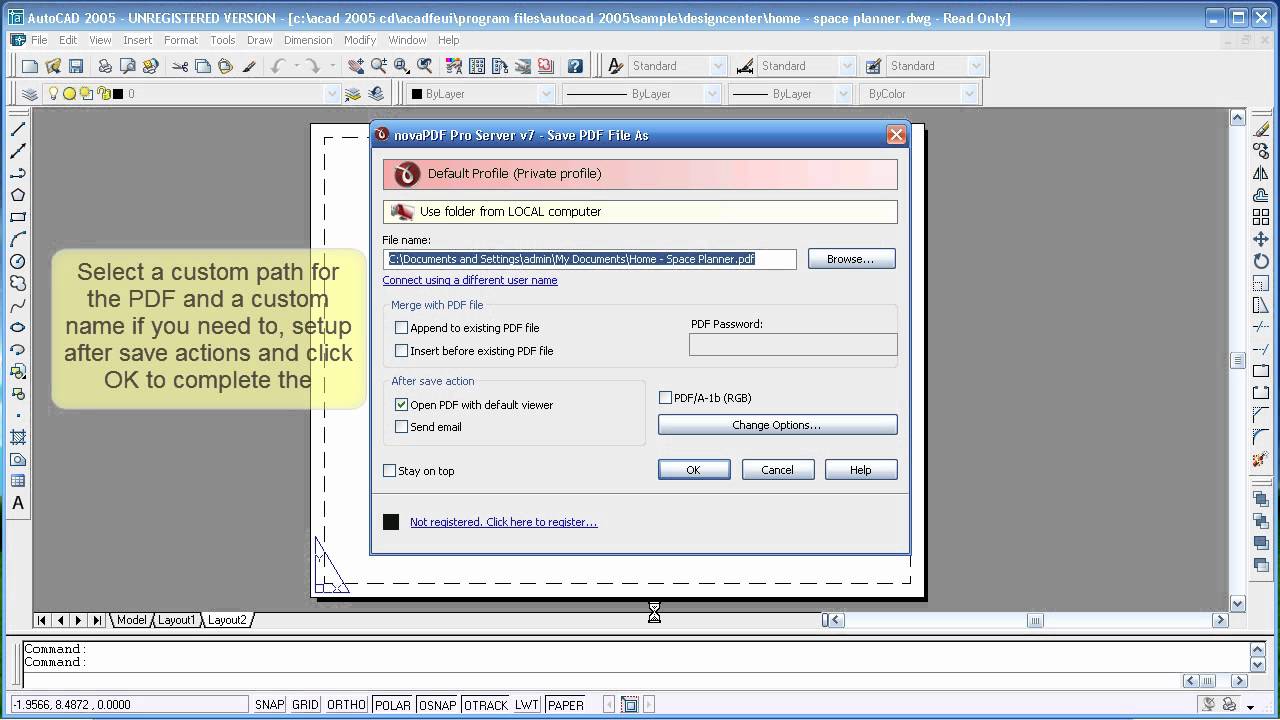
- Finally, specify a name and location to save the PDF file and click on \"Save\".
By following these steps, you will be able to convert a DWG file to PDF using AutoCAD.
READ MORE:
Understanding DWG to PDF Conversion in AutoCAD
Converting DWG files to PDF in AutoCAD is a crucial skill for architects, engineers, and designers. This process allows for easier sharing and printing of drawings while preserving the integrity and details of the original DWG files. Understanding the conversion process is the first step towards ensuring your documents are accessible and professionally presented.
- What is DWG? DWG is a native file format used by AutoCAD to store design data, including geometric information, maps, and photos.
- Why Convert to PDF? PDFs are widely used for distributing documents due to their portability, small file size, and ability to be viewed on any device without the need for AutoCAD.
- Conversion Methods: AutoCAD offers several methods to convert DWG files to PDF, including direct export, using the DWG to PDF.pc3 printer, and batch conversion for multiple files.
By converting DWG files to PDF, professionals can ensure their designs are easily shared with clients, contractors, and team members, maintaining clarity and detail regardless of the viewer\"s software capabilities.
Step-by-Step Guide to Convert DWG to PDF Directly in AutoCAD
Converting your DWG files to PDF directly in AutoCAD can be done effortlessly by following these detailed steps, ensuring your documents are ready for sharing and printing.
- Open Your DWG File: Launch AutoCAD and open the DWG file you wish to convert.
- Adjust Your View: Zoom and pan to ensure the drawing fits within your desired frame or layout. This view will be captured in the PDF.
- Access the Export Function: Click on \"Application menu\" (the big A button), hover over \"Export\", and select \"PDF\".
- Choose PDF Options: In the dialog box that appears, you can select from a variety of settings, including the location to save the PDF, the paper size, and whether to include layer information.
- Use the DWG to PDF.pc3 Printer: AutoCAD includes a virtual printer named \"DWG to PDF.pc3\" designed specifically for converting DWG files to PDF. Selecting this printer can enhance the quality of your PDF.
- Finalize Your Settings: Adjust the resolution and other settings as needed. Higher resolutions are better for detailed drawings but will result in a larger file size.
- Export Your PDF: Once you are satisfied with the settings, click \"OK\" to convert your DWG file to a PDF. The process may take a few moments depending on the complexity and size of the file.
Following these steps will produce a high-quality PDF version of your DWG file, ready for sharing, printing, or archiving.

Using the DWG to PDF.pc3 Printer in AutoCAD for PDF Conversion
The DWG to PDF.pc3 printer is a powerful feature in AutoCAD that facilitates high-quality PDF conversions. By using this virtual printer, users can achieve precise control over the output, including layer information, line weights, and more.
- Open Your DWG File: Start by opening the DWG file you want to convert in AutoCAD.
- Go to Plot or Print: Access the plot setting by typing \"PLOT\" into the command line or navigating through the application menu to the \"Plot\" option.
- Select DWG to PDF.pc3: In the printer/plotter section, select \"DWG to PDF.pc3\" from the drop-down menu. This action sets the virtual printer as your output device.
- Configure Plot Settings: Adjust the paper size, plot area, plot scale, and orientation to match your needs. These settings will affect how your drawing is framed in the PDF.
- Advanced Options: Click on the \"Properties\" or \"Advanced\" button to fine-tune the PDF output. Here, you can manage options such as line weights, color, and quality.
- Save the PDF: Choose where to save your PDF file. Provide a filename and select a location on your computer or network.
- Plot Your Drawing: After configuring all settings, click \"OK\" or \"Plot\" to start the conversion process. Your DWG file will be converted into a PDF using the specified settings.
Utilizing the DWG to PDF.pc3 printer not only ensures a seamless conversion but also guarantees that your PDFs maintain the visual fidelity of your original AutoCAD drawings.
Batch Conversion of DWG Files to PDFs
Batch conversion is a time-saving method to convert multiple DWG files to PDF format simultaneously in AutoCAD. This process is ideal for users who need to convert several drawings at once, streamlining their workflow efficiently.
- Prepare Your Files: Organize the DWG files you wish to convert into a single folder for easy access.
- Use the Publish Command: Open AutoCAD, type \"PUBLISH\" in the command line, or access it through the application menu under \"Publish\" to open the Publish dialog box.
- Add DWG Files to the List: Click \"Add Sheets\" and select the DWG files you want to convert. You can also drag and drop files directly into the Publish dialog box.
- Choose PDF Output: In the Publish dialog, set \"DWG to PDF.pc3\" as the printer/plotter. Ensure the \"Publish to\" option is set to \"PDF\" and select your output location.
- Configure the Settings: Adjust the page setup for each DWG file if needed. You can set different page sizes or plot settings for individual files or apply one setup to all files.
- Start the Batch Conversion: Once all settings are configured, click \"Publish\". AutoCAD will begin converting all the added DWG files to PDF format, saving them to your chosen location.
This batch conversion method is highly effective for managing large projects or archiving purposes, ensuring consistent PDF output across multiple AutoCAD drawings.
_HOOK_
Adjusting PDF Output Settings for Quality and File Size
Optimizing the quality and file size of your PDF documents is essential for ensuring they meet your needs, whether for high-quality printouts or for sharing online. AutoCAD\"s PDF export options provide flexibility in balancing these factors.
- Select the DWG to PDF.pc3 Printer: When converting your DWG file, choose the \"DWG to PDF.pc3\" printer to access advanced settings.
- Access the Properties: Before exporting, click on the \"Properties\" button next to the printer selection to open the PDF options dialog.
- Adjust the DPI Settings: In the PDF options, you can adjust the dots per inch (DPI) setting. A higher DPI results in better image quality but larger file size. For sharing online, a lower DPI may suffice.
- Vector vs Raster Images: Decide whether to keep your images as vector or raster. Vector images retain clarity at any zoom level but may increase file size. Raster images are pixel-based and can be compressed more effectively.
- Include Layer Information: You can choose to include AutoCAD layer information in your PDF. While this increases the file size, it can be useful for editing and viewing purposes.
- Compress PDF File: Look for an option to compress the PDF file. Some settings automatically reduce the file size by compressing images and text.
- Preview Before Saving: If available, use the preview feature to check the output quality and make any necessary adjustments before finalizing the PDF.
By carefully adjusting these settings, you can create PDFs that are perfectly suited to your requirements, balancing between high-quality presentations and manageable file sizes for sharing and storage.
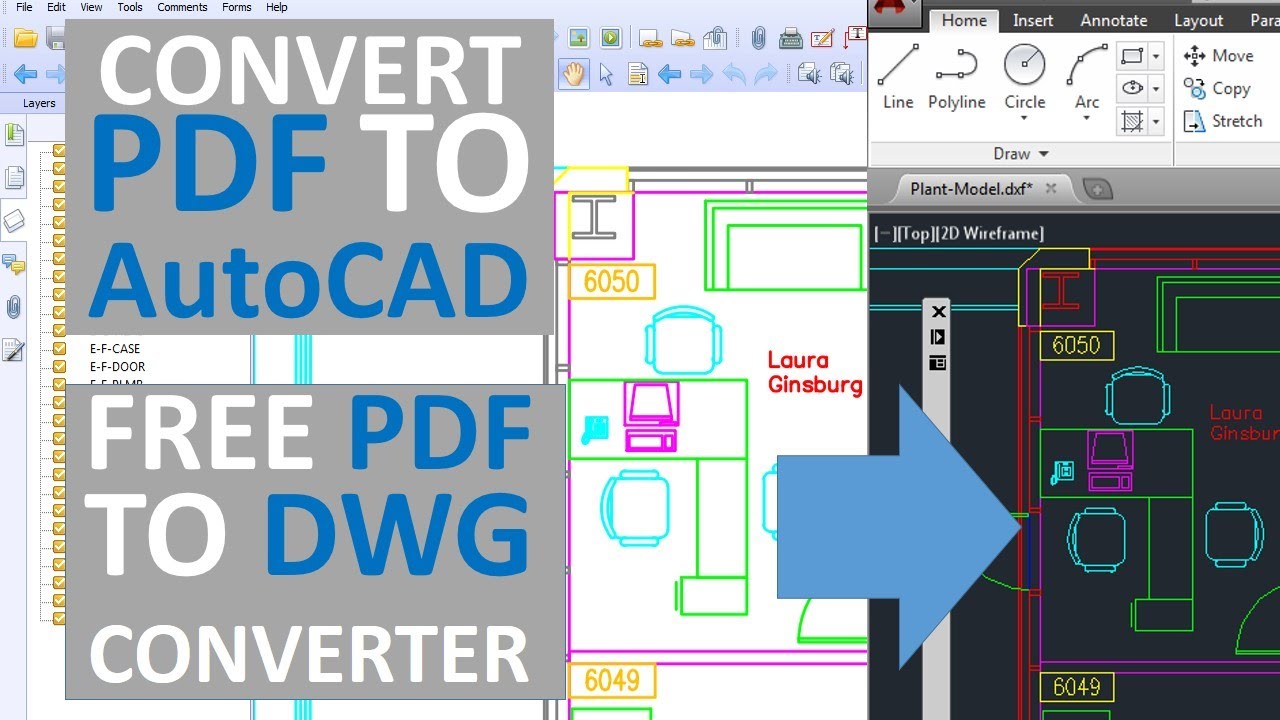
Converting DWG Files to PDF Without AutoCAD
For users without access to AutoCAD, converting DWG files to PDF remains possible through various alternative methods and tools. These options ensure that you can still share and view your CAD drawings in a universally accessible format.
- Use Online Conversion Tools: There are numerous online services that offer free DWG to PDF conversion. Simply upload your DWG file, select PDF as the output format, and download the converted file.
- Download Third-Party Software: Some software applications specialize in file conversion, including DWG to PDF. These programs often provide additional features, such as batch conversion and file compression.
- Utilize Free CAD Viewers: Some free CAD viewers also offer the ability to export or print drawings to PDF. While these might not offer the full range of editing capabilities, they are sufficient for conversion purposes.
- Consider Open Source Alternatives: Open source CAD programs can open DWG files and often include an export or save as PDF option, providing a cost-effective solution for conversion.
- Check Your Office Printer: If you have a PDF printer installed on your computer, you can use it to convert DWG files by opening them in a compatible viewer and printing to PDF.
This variety of methods ensures that even without AutoCAD, you can convert your DWG files to PDF, making them easier to share and view across different platforms and devices.
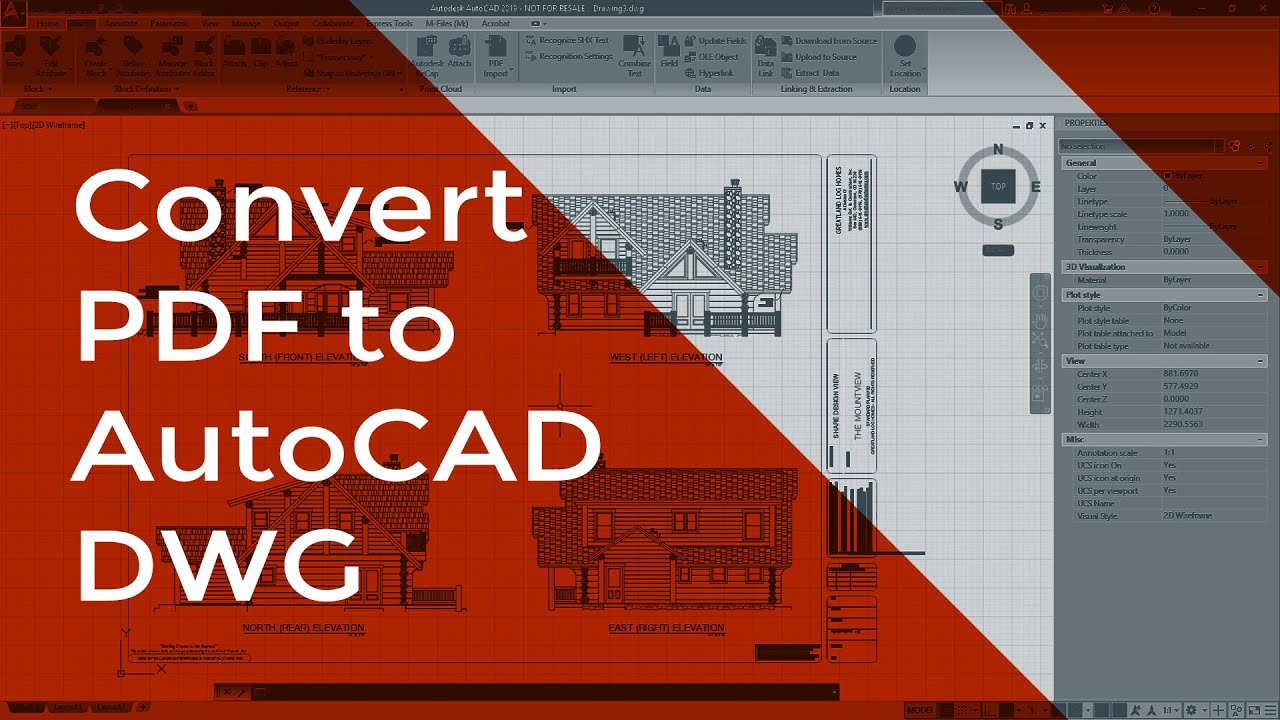
Convert AutoCAD DWG to PDF - Tutorial
\"Learn how to effortlessly convert files with our step-by-step video tutorial. Unlock the power of file conversion and save time and effort with our easy-to-follow guide.\"
Convert DWG to PDF in AutoCAD - Engineering Tactics
\"Discover the secrets of working with DWG files in our comprehensive video tutorial. From understanding the basics to mastering advanced techniques, our video has got you covered.\"
Best Practices for DWG to PDF Conversion
Adhering to best practices during the DWG to PDF conversion process can significantly enhance the quality and usability of your PDF documents. Here are key strategies to ensure optimal results.
- Use the Latest Version of AutoCAD: Always work with the latest version of AutoCAD for improved features and stability during conversion.
- Clean Up Your Drawing: Before conversion, remove unnecessary layers, objects, and clutter from your DWG file to reduce the file size and improve clarity.
- Adjust Your Page Setup: Carefully select the paper size, orientation, and plot area to ensure your drawing fits well on the page without unnecessary margins.
- Choose the Right DPI: Adjust the DPI settings based on your needs. Higher DPI is better for detailed prints, while lower DPI suffices for web viewing and reduces file size.
- Preserve Layer Information: If your PDF viewer supports it, preserving layer information can be beneficial for document navigation and editing.
- Review PDF Settings: Take advantage of the DWG to PDF.pc3 printer’s advanced settings to customize output quality, including line weights and plot styles.
- Test Print Your PDF: After conversion, do a test print of your PDF on paper to check for any discrepancies in scale, colors, and details.
- Secure Your PDF: If your document contains sensitive information, consider using PDF security features such as encryption, password protection, or watermarking.
By following these best practices, you can ensure that your DWG to PDF conversions meet your professional standards, with high-quality, accurate, and secure PDF documents.

Troubleshooting Common Issues During Conversion
Encountering issues during the DWG to PDF conversion process can be frustrating. However, most problems can be easily resolved with the right approach. Here are solutions to common issues you might face.
- PDF Output is Blank: Ensure your drawing content is within the plot area. Adjust the plot area settings to include all relevant objects.
- Missing Lines or Details: Increase the DPI in the PDF export options for higher detail. Check if layer visibility is turned on for all necessary layers.
- File Size Too Large: Reduce the DPI setting for lower file size, and clean up unnecessary data from your DWG file before conversion.
- Fonts Not Displaying Correctly: Embed all necessary fonts within the DWG file or convert text to geometry before exporting.
- Colors Not Matching: Adjust the color settings in the DWG to PDF.pc3 file or ensure that the color table matches your requirements.
- Error Messages During Conversion: Update or reinstall the DWG to PDF.pc3 printer driver, and ensure your AutoCAD is up to date.
- PDF Viewer Compatibility Issues: If your PDF does not display correctly in one viewer, try another. Compatibility can vary between PDF readers.
By systematically addressing these common issues, you can streamline your DWG to PDF conversion process, ensuring a smooth transition from CAD drawings to shareable PDF documents.
Advanced PDF Export Options: Layers, Bookmarks, and Metadata
AutoCAD\"s advanced PDF export options enhance the functionality and navigability of your PDFs, making them more than just simple drawings. Utilizing layers, bookmarks, and metadata effectively can transform your PDFs into interactive, easily navigable documents.
- Exporting Layers: When using the DWG to PDF.pc3 printer, you have the option to include drawing layers in your PDF. This allows users to toggle the visibility of different layers in a PDF viewer that supports this feature, enhancing the document\"s interactivity.
- Creating Bookmarks: AutoCAD can automatically create bookmarks in your PDF based on the drawing\"s layout names or other criteria. This makes navigating through multiple pages or sections of your PDF effortless.
- Adding Metadata: Metadata such as the document title, author, subject, and keywords can be included during the export process. This information is invaluable for document management systems, improving searchability and organization.
- Customizing Output Quality: Beyond the standard settings, you can fine-tune the vector and raster quality, ensuring that your PDF looks crisp, whether it\"s being viewed on a screen or printed out.
- Configuring Line Weights and Colors: Adjust line weights and colors to ensure that your PDF accurately represents the visual intent of your design. These settings can help differentiate between various elements of your drawing.
By taking advantage of these advanced export options, you can create PDF documents that are not only visually accurate but also rich in features that facilitate easier viewing, navigation, and understanding of your designs.
_HOOK_
READ MORE:
Optimizing PDF Files for Printing and Sharing
Ensuring your PDF files are optimized for printing and sharing is crucial for maintaining the integrity of your designs and making sure they are accessible to all intended recipients. Follow these steps to optimize your PDFs effectively.
- Choose the Right Resolution: For printing, a higher resolution (at least 300 DPI) is recommended to ensure clarity and detail. For sharing online, a lower resolution may suffice to reduce file size.
- Compress Images Wisely: Use image compression settings to reduce file size without significantly impacting image quality. This is especially important for large architectural or engineering drawings.
- Embed Fonts: Ensure all fonts used in the drawing are embedded into the PDF. This prevents issues with font substitution, which can alter the appearance of your document.
- Minimize Layers: While layers can be useful, excessive layers can increase file size. Flatten layers where possible, especially for final versions intended for sharing or printing.
- Secure Your Documents: Use PDF security features to protect sensitive information. Password protection, watermarking, and disabling copying or editing can be crucial for proprietary designs.
- Include Necessary Metadata: Metadata such as the project title, document version, and author can be helpful for document management and retrieval. This is particularly useful in collaborative environments.
- Test Print Your Document: Before finalizing your PDF for printing, conduct a test print to ensure that the document prints as expected, with all elements clearly visible and accurately represented.
By optimizing your PDF files for both printing and sharing, you can ensure that your documents are of the highest quality, secure, and easily accessible to your audience, regardless of the platform or device they use to view them.
Mastering the conversion of DWG to PDF in AutoCAD enhances your workflow, ensuring your designs are shared and printed with precision. Embrace these techniques to elevate your project presentations and collaborations to new heights.