Topic how to make a character in blender for beginners: Embark on a creative journey with our guide on "How to Make a Character in Blender for Beginners," unlocking the secrets of 3D modeling, sculpting, and animation to bring your visions to life in Blender.
Table of Content
- How to make a character in Blender for beginners?
- Understanding Blender’s Interface and Basics
- Setting Up Your Project and Reference Images
- Modeling the Basic Shape of Your Character
- Refining the Model with Sculpting Tools
- Creating and Editing Materials for Texturing
- UV Unwrapping and Texture Painting
- YOUTUBE: Blender Modelling Tutorial for Absolute Beginners: Simple Human
- Adding Details with Sculpting and Retopology
- Rigging Your Character for Animation
- Weight Painting for Realistic Movement
- Animating Your Character
- Lighting, Camera Setup, and Rendering
How to make a character in Blender for beginners?
Creating a character in Blender can be an exciting project for beginners. Follow these steps to get started:
- Step 1: Open Blender and delete the default cube by selecting it and pressing the \"Delete\" key.
- Step 2: Click on \"File\" in the top-left corner of the screen and select \"Import\". Choose a reference image of the character you want to create and import it as a background image.
- Step 3: Press the \"NumPad 7\" key to switch to the top view and press the \"NumPad 5\" key to switch to orthographic view.
- Step 4: Start modeling the character\'s body by adding a mesh primitive like a cube or a cylinder. Use the various transformation tools (Grab, Rotate, and Scale) to shape the mesh according to the reference image.
- Step 5: Use the \"Tab\" key to switch to Edit Mode and manipulate the vertices, edges, and faces of the mesh to refine the character\'s shape.
- Step 6: Add details to the character by extruding, scaling, and subdividing parts of the mesh. This can include adding limbs, facial features, and other distinctive elements.
- Step 7: Create separate objects for different parts of the character, such as the head, body, and limbs. This will allow for easier manipulation and animation later on.
- Step 8: Once you are satisfied with the overall shape and details of the character, you can move on to texturing. UV unwrap the character and apply materials or textures to different parts using Blender\'s Material Editor.
- Step 9: Add rigging to the character by creating an armature with bones. This will enable you to pose and animate the character later on.
- Step 10: Animate the character by creating keyframes for different poses or movements. Use Blender\'s animation tools and timeline to bring your character to life.
- Step 11: Render your final character by setting up the scene with proper lighting and camera angles. Adjust the render settings and click on \"Render\" to generate the final image or animation.
- Step 12: Save your work and export the character to various file formats if needed.
Remember, character creation in Blender requires practice and patience. Don\'t be afraid to experiment and explore different techniques to develop your skills. Have fun and enjoy the process!
READ MORE:
Understanding Blender’s Interface and Basics
Blender\"s interface may seem daunting at first, but with a basic understanding, you\"ll quickly find your way around and start creating. Here\"s how to get started:
- Layout: Blender\"s default layout features several areas including the 3D viewport, timeline, outliner, and properties panel. You can customize the layout by dragging the edges of these areas.
- 3D Viewport: This is where you\"ll spend most of your time, viewing and editing your 3D scene. You can rotate, pan, and zoom the view with mouse controls.
- Object Mode and Edit Mode: Blender operates in different modes. In Object Mode, you manipulate entire objects, while Edit Mode allows for more detailed mesh editing.
- Adding Objects: You can add objects to your scene by pressing Shift+A and selecting from the menu. This is how you\"ll start building your character.
- Basic Transformations: Learn to move (G key), rotate (R key), and scale (S key) objects. These are fundamental for shaping your character.
- Shading and Wireframe: Toggle between different view modes in the viewport to see your model in wireframe or with solid shading, which can help with detailed editing.
As you become more familiar with Blender\"s interface and basic functions, you\"ll find it an incredibly powerful tool for creating detailed characters and scenes. Start experimenting and have fun learning!

Setting Up Your Project and Reference Images
Starting your character creation in Blender begins with proper setup and reference images. Here\"s a guide to streamline your workflow:
- Organize Your Workspace: Before adding any models, ensure Blender\"s interface is tailored to your needs. Consider opening a dedicated UV/Image Editor window for your reference images.
- Import Reference Images: To import a reference image, go to the 3D Viewport, press Shift+A, choose Image > Reference, and select your image file. Position the image where it will be most helpful.
- Adjust Image Transparency: For easier modeling, adjust the transparency of your reference image through the Object Data properties panel under the \"Visibility\" section.
- Setup Front and Side Views: Ideally, have at least two reference images: one for the front view and one for the side. This will help in creating a more accurate 3D model of your character.
- Use Collections for Organization: Organize your reference images and models in different collections within the Outliner. This helps in toggling visibility and keeps the workspace uncluttered.
- Save Your Project: Remember to frequently save your project. Use a naming convention that makes sense for easy retrieval and version control.
With your project properly set up and your reference images in place, you\"re now ready to begin the exciting process of modeling your character in Blender.

Modeling the Basic Shape of Your Character
Modeling the basic shape of your character is the first step in bringing your vision to life. Follow these steps to create a solid foundation for your character in Blender:
- Start with a Simple Shape: Begin by adding a simple mesh, like a cube or sphere, to represent the main body of your character. Use Shift+A to add the mesh in Object Mode.
- Edit the Mesh: Switch to Edit Mode (Tab key) to start shaping your character. Use vertex, edge, or face selection to modify the mesh. Extrude (E key), move (G key), rotate (R key), and scale (S key) the geometry to match your reference images.
- Use Mirror Modifier: For characters with symmetrical features, apply a Mirror Modifier to half of your model. This ensures any edits on one side are automatically reflected on the other, saving time and ensuring symmetry.
- Block Out Major Forms: Focus on the major forms of your character first, such as the torso, head, arms, and legs. Don\"t worry about details at this stage; just get the proportions and overall shape right.
- Refine the Shape: Once the basic form is in place, start refining the shape. Adjust the mesh to define muscles, clothing folds, or other features loosely. This stage is about getting closer to your character\"s final silhouette.
- Check Proportions: Frequently compare your model to your reference images from various angles. Ensure the proportions and overall look align with your vision and adjust as necessary.
Modeling the basic shape of your character is a crucial step in the creation process. Take your time to refine this foundation, as it sets the stage for more detailed sculpting and texturing work ahead.

Refining the Model with Sculpting Tools
After establishing the basic shape of your character, the next step is to refine your model using Blender\"s sculpting tools. This process allows you to add detailed features and textures, bringing your character to life. Follow these steps to sculpt your character:
- Switch to Sculpt Mode: With your model selected, switch from Object Mode to Sculpt Mode. This mode provides a variety of brushes for detailed sculpting.
- Select a Brush: Blender offers different sculpting brushes for various effects. Use the Grab brush to adjust large areas, the Clay brush to add volume, and the Smooth brush to refine surfaces.
- Adjust Brush Settings: Tailor the brush size and strength to suit the level of detail you\"re working on. Smaller brush sizes are great for fine details, while larger sizes work well for shaping broad areas.
- Add Detail: Begin sculpting your character by focusing on key features such as the face, hands, and clothing. Use your reference images as a guide to accurately shape these elements.
- Dynotopo for Dynamic Topology: Enable Dynotopo (Dynamic Topology) if you need to add more geometry to your model as you sculpt. This feature automatically subdivides the mesh where you sculpt, allowing for intricate detail.
- Smooth and Refine: Use the Smooth brush to soften any harsh edges or transitions. Pay attention to muscle definition, facial expressions, and other subtleties that make your character unique.
- Check Proportions: Regularly switch views and compare your sculpt to your reference images to ensure accuracy in proportions and detail.
Sculpting is a powerful technique to add realism and personality to your character. Experiment with different brushes and techniques to achieve the desired effect, and remember, patience and practice are key to mastering sculpting in Blender.

_HOOK_
Creating and Editing Materials for Texturing
Creating and editing materials are key steps in giving your character its unique look and feel. Texturing adds color, realism, and depth to your model. Follow these steps to create and edit materials in Blender:
- Switch to Shading Workspace: Blender’s Shading workspace provides a node-based interface for creating and editing materials. Switch to this workspace to start working on your character’s materials.
- Add a New Material: In the Properties panel, under the Material tab, click the ‘New’ button to add a new material to your selected object. This will be the base for your texture.
- Configure Material Properties: Use the nodes in the Shader Editor to adjust the material’s properties. The Principled BSDF shader is versatile for creating a wide range of materials by adjusting parameters like Base Color, Roughness, and Metallic.
- Apply Textures: To add textures, you can either use procedural textures available in Blender or import image textures. Add an Image Texture node and connect it to the Base Color input of the Principled BSDF shader for color textures.
- UV Unwrapping: For image textures to correctly map onto your model, you need to unwrap your model. This process projects the 3D model onto a 2D surface to apply the texture accurately. Use the UV Editing workspace for this task.
- Edit UV Maps: Adjust the UV map in the UV Editor to ensure the texture aligns correctly with your model. You can move, rotate, and scale UV islands to match the model’s geometry.
- Preview and Adjust: Regularly preview your model in the 3D Viewport with the material applied. Make adjustments to the material settings and UV maps as necessary to achieve the desired look.
Creating and editing materials is a process of experimentation and adjustment. Take your time to explore different settings and textures to bring your character to life with vibrant colors and realistic materials.
UV Unwrapping and Texture Painting
UV Unwrapping and Texture Painting are crucial for adding intricate details and colors to your character. These steps allow you to apply textures accurately and paint directly onto your 3D model. Follow this guide to master UV unwrapping and texture painting in Blender:
- Prepare Your Model for UV Unwrapping: Ensure your model is properly cleaned up, with unnecessary vertices removed, to make the unwrapping process smoother.
- Mark Seams: Identify and mark seams on your model where the mesh will be \"cut\" for unwrapping. This is similar to cutting a 3D object into a flat, 2D pattern. Use the Edge select mode, select edges for seams, and then press Ctrl+E > Mark Seam.
- UV Unwrap Your Model: With seams marked, select all faces of your model in Edit Mode and press U > Unwrap. Adjust the resulting UV map in the UV/Image Editor to ensure it efficiently covers the texture space without overlapping.
- Switch to Texture Paint Workspace: Blender’s Texture Paint workspace provides tools for painting directly on your 3D model. Switch to this workspace to start adding colors and details.
- Create a New Texture: Before painting, create a new image texture to paint on. This will be applied to your model’s UV map. Set the image resolution according to the detail level you need.
- Paint Your Model: Use the various brushes available to paint colors, shadows, highlights, and textures directly onto your model. You can also use stencils or clone tools for more complex patterns.
- Save Your Texture: Regularly save your texture work to avoid losing progress. You can then apply this texture to your material’s Base Color to see it on your model in the 3D Viewport.
UV unwrapping and texture painting are art forms that give your character its final appearance. Take your time to experiment with different techniques and brushes to achieve the desired outcome, making your character truly stand out.

Blender Modelling Tutorial for Absolute Beginners: Simple Human
Get ready to dive into the world of modelling! This captivating video will walk you through the essentials of the industry, revealing insider tips and tricks to help you become the next supermodel. Whether you are stepping into the spotlight or simply looking to enhance your skills, this video is a must-see for all aspiring models!
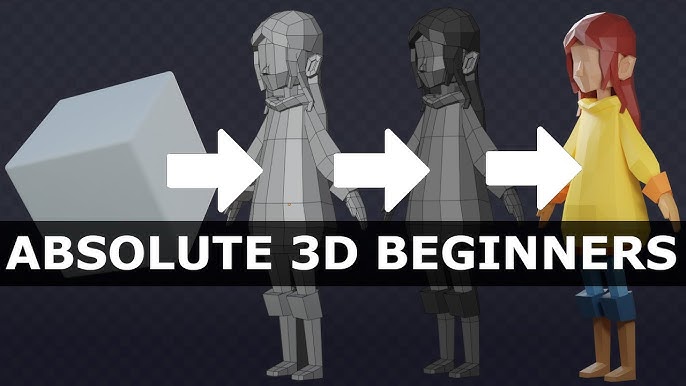
Blender Character Modeling Tutorial for Absolute Beginners: Part 1
Unleash your creativity and bring characters to life with the fascinating art of character modelling! Join this mesmerizing video and discover the secrets behind crafting stunning 3D characters from scratch. From building their anatomy to adding intricate details, this tutorial will equip you with the knowledge and techniques needed to excel in character modelling. Don\'t miss this opportunity to explore the limitless possibilities of this captivating craft!
Adding Details with Sculpting and Retopology
After creating the basic shape of your character and applying initial textures, the next steps are to add fine details through sculpting and improve mesh flow with retopology. These processes enhance realism and ensure your model is animation-ready. Follow these steps for sculpting and retopology in Blender:
- Detail Sculpting: Return to Sculpt Mode to add finer details like wrinkles, scales, or fabric textures. Use high-resolution brushes and consider enabling Dyntopo for dynamic topology if more geometry is needed for details.
- Retopology Basics: Retopology is the process of creating a new, cleaner mesh over your detailed sculpt. This is important for animation, as it ensures the mesh deforms properly. Start with a new layer and use the Shrinkwrap modifier to snap the new geometry to the sculpt.
- Use Retopology Tools: Blender offers tools like F2 and poly build for retopology. These allow you to draw new topology by hand, focusing on maintaining quads and proper edge flow for deformation.
- Focus on Key Areas: Pay special attention to areas of high deformation, like joints and facial features. These areas require more loops for smooth animation.
- Test Deformations: Before finalizing the retopology, test how the mesh deforms with simple armatures or shape keys. This can highlight areas that need more refinement.
- Bake Details: Once retopology is complete, you can bake the high-resolution details from your sculpt onto the new, cleaner mesh using normal or displacement maps. This retains the visual complexity without the high geometry count.
Adding details with sculpting and retopology not only enhances the visual appeal of your character but also ensures it is ready for animation. While these steps can be time-consuming, they are crucial for creating a professional-quality character in Blender.

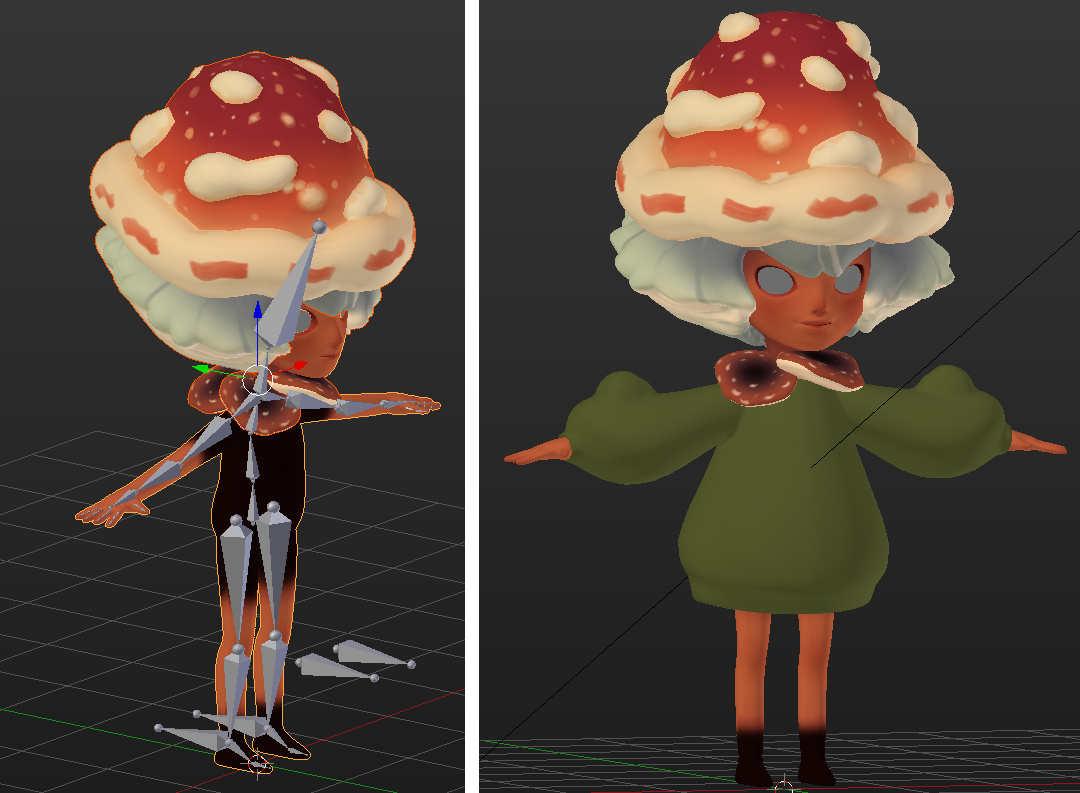
Rigging Your Character for Animation
Rigging is the process of creating a skeleton for your character so that it can be animated. A well-rigged character can move realistically, allowing for expressive animations. Follow these steps to rig your character in Blender:
- Create Armature: Start by adding an armature to your scene. Armatures are Blender\"s version of bones. Place the first bone at the base of the spine or another central location of your character.
- Edit Bones to Fit Character: In Edit Mode, adjust the bones to match your character’s anatomy. Ensure each major part (e.g., limbs, spine, head) is represented by bones. Use extrusion (E key) to create new bones from existing ones.
- Parent Mesh to Armature: Once your armature closely matches the character\"s structure, select your mesh, then Shift-select the armature, and use Ctrl+P to parent the mesh to the armature. Choose \"With Automatic Weights\" for Blender to attempt to automatically assign vertex weights.
- Adjust Weight Paint: Switch to Weight Paint Mode to manually adjust the influence bones have on the mesh. This step is crucial for ensuring natural movement. Areas painted red are fully influenced by the selected bone, while blue areas are not influenced.
- Add Inverse Kinematics (IK): For easier animation, add IK constraints to limbs. This allows for more intuitive control over movements, such as walking or running.
- Test Rig: Before finalizing, animate your character with simple movements to test the rig. Look for unnatural deformations or areas where the mesh doesn’t move as expected and adjust the weights or bone placement accordingly.
Rigging is a blend of art and science, requiring attention to the anatomical accuracy and movement mechanics of your character. With practice, you can create a rig that brings your character to life in the most natural and expressive way possible.
Weight Painting for Realistic Movement
Weight painting is an essential step in rigging that defines how different parts of your character\"s mesh move in relation to the bones of the armature. This process ensures that your character moves realistically. Follow these detailed steps to effectively use weight painting in Blender:
- Select Your Character Mesh: Start by selecting the mesh of your character. Then, switch to Weight Paint Mode from the interaction mode menu.
- Choose a Bone to Paint: Select a bone in the armature to begin weight painting for it. The areas of the mesh influenced by this bone will be highlighted in a gradient from blue (no influence) to red (full influence).
- Adjust Brush Settings: In the tool settings, adjust your brush size and weight to suit the level of influence you want to paint with. Lower weights are good for gradual transitions, while higher weights are used for areas that should closely follow the bone\"s movement.
- Paint the Weights: Paint on the mesh to adjust the influence of the selected bone. Use red to increase influence and blue to decrease. Aim for smooth gradients for natural movement, especially around joints.
- Use the Subtract Brush: If you need to reduce the influence of a bone over certain areas, switch to the subtract mode of the brush and paint over those areas to reduce their weight.
- Test the Deformations: After painting weights for a bone, pose the bone to test how the mesh deforms. This helps identify areas that need more weight adjustment for realistic movement.
- Repeat for Other Bones: Continue selecting each bone and weight painting its influence on the mesh, testing the movements as you go to ensure realistic deformations throughout the character.
Weight painting is a meticulous but rewarding process that brings your character to life. By carefully adjusting the weights, you can achieve smooth and realistic movements that make your animations more believable.

_HOOK_
Animating Your Character
Animating your character is the exciting process of bringing it to life through motion. Whether you\"re aiming for subtle gestures or dynamic action sequences, Blender provides the tools needed for expressive animation. Follow these steps to animate your character:
- Set Up the Timeline: First, adjust the timeline at the bottom of the Blender interface. Set your start and end frames according to the length of your animation sequence.
- Insert Keyframes: In Pose Mode, select a bone and move it to the starting position of your animation. Press I to insert a keyframe, choosing the type of keyframe (e.g., LocRotScale for location, rotation, and scale).
- Create Your First Pose: Move the playhead on the timeline to where you want the first major movement or pose to end, adjust your character\"s bones to create the pose, and insert another keyframe.
- Add Intermediate Poses: Continue moving the playhead and adjusting your character\"s bones to create intermediate poses. Insert keyframes for each significant pose to define the motion.
- Preview the Animation: Use the play button to preview your animation. Adjust the timing and poses as needed by moving or adding keyframes on the timeline.
- Refine the Movement: For smoother transitions, use the Graph Editor to adjust the interpolation curves between keyframes. This can help you achieve more natural movements.
- Add Facial Expressions: If your character has a facial rig, animate the face alongside the body to enhance emotion and expression in your animation.
- Synchronize with Audio: If your animation includes dialogue or sound effects, import the audio file into Blender and synchronize the character\"s movements with the audio for added impact.
Animation is a blend of technical skill and creativity. Experiment with different movements and expressions to discover what works best for your character and story. With practice, you\"ll be able to create compelling animations that bring your characters to life.
READ MORE:
Lighting, Camera Setup, and Rendering
The final steps in bringing your character to life involve setting up lighting, camera angles, and rendering your scene. These elements are crucial for showcasing your character in its best light. Follow these steps to complete your Blender project:
- Lighting Your Scene: Begin by adding lights to your scene. Use three-point lighting (key light, fill light, and back light) for a balanced and professional look. Adjust the color, intensity, and position of each light to enhance the mood and detail of your character.
- Setting Up the Camera: Add a camera to your scene if one isn\"t already present. Position the camera to frame your character effectively, considering the rule of thirds for a pleasing composition. Adjust the focal length and depth of field for artistic effect.
- Choose Your Render Engine: Blender offers several render engines, including Eevee (real-time) and Cycles (ray-traced). Choose the one that best suits your project\"s needs. Cycles is more realistic but takes longer to render, while Eevee is faster but less detailed.
- Material and Texture Check: Ensure all materials and textures are correctly applied and visible in your chosen render engine. Make any necessary adjustments to materials to achieve the desired appearance under your scene’s lighting.
- Rendering Settings: In the Render Properties panel, adjust settings such as resolution, sampling, and output format. Higher sampling rates improve quality but increase render times.
- Test Renders: Perform test renders at lower resolution or sampling to quickly see how lighting, materials, and camera angles come together. Make adjustments as needed.
- Final Render: Once satisfied with the setup, perform the final render. This process can take some time, especially for high-quality or complex scenes.
- Post-Processing: Use Blender’s Compositor or an external image editor to add finishing touches to your render, such as color correction, brightness/contrast adjustments, or special effects.
Lighting, camera setup, and rendering are the final steps in the 3D creation process, transforming your work into a polished piece ready for presentation or animation. Take your time to experiment with different settings to achieve the best possible result for your character and scene.
Embarking on the journey of creating a character in Blender opens a world of creativity and technical skill. With patience and practice, beginners can bring their unique visions to life, ready to animate, render, and share with the world.