Topic how to create animation in blender: Embark on a creative journey to master the art of animation with Blender, unlocking endless possibilities for storytelling and visual expression. Discover the tools and techniques to bring your ideas to life in this comprehensive guide.
Table of Content
- How to create animation in Blender?
- Understanding the Blender Interface
- Setting Up Your Project
- Introduction to Keyframing
- Working with the Timeline
- Animating Objects and Characters
- YOUTUBE: Animation for Beginners | Blender Tutorial
- Using the Graph Editor for Fine-tuning
- Implementing Rigging and Weight Painting
- Creating and Animating with Shape Keys
- Utilizing the Dope Sheet for Animation Management
- Exploring Non-Linear Animation (NLA)
- Adding Sound and Synchronizing Audio
- Rendering Your Animation
How to create animation in Blender?
To create animation in Blender, follow these steps:
- Open Blender and create or import the objects or characters you want to animate.
- Select the object that you want to animate by clicking on it in the 3D viewport.
- Go to the \"Animation\" tab in the top toolbar and click \"Auto Keyframe\" to enable keyframing.
- Move the playhead (the green line on the timeline) to the starting frame of your animation.
- Make any changes to the object\'s position, rotation, or scale that you want for the start of the animation.
- Click the \"Insert Keyframe\" button, and select the properties you want to keyframe (Location, Rotation, Scale, etc.).
- Move the playhead to a later frame in the timeline.
- Make the necessary changes to the object\'s properties for that frame.
- Click the \"Insert Keyframe\" button again to add a keyframe at the current frame.
- Repeat steps 7-9 for all the frames you want in your animation.
- After adding all the keyframes, you can preview your animation by scrubbing the timeline or pressing the play button.
- You can further refine your animation by adjusting the timing of keyframes, adding more keyframes, or using animation curves.
- Once you are satisfied with your animation, you can render it as a video file or export it in a compatible format.
READ MORE:
Understanding the Blender Interface
Mastering Blender\"s interface is the first step towards becoming proficient in creating animations. Blender offers a comprehensive and customizable interface that caters to both beginners and professionals.
- Layout: Familiarize yourself with the default layout, which includes 3D Viewport, Timeline, Outliner, and Properties editor.
- 3D Viewport: This is where you\"ll spend most of your time, modeling, animating, and viewing your scenes.
- Timeline: Essential for animation, the Timeline allows you to scrub through your animation, set keyframes, and control playback.
- Outliner: The Outliner displays a hierarchical list of all objects in your scene, making it easy to select and organize your models.
- Properties Editor: Here, you can access and adjust all the properties of your selected object, including materials, modifiers, and physics settings.
Begin by customizing the interface to suit your workflow. Blender allows you to drag and resize windows, and even save custom layouts for different tasks such as modeling, animating, or texturing.
- Start Blender and explore the default cube in the 3D Viewport.
- Use the middle mouse button to orbit, scroll to zoom, and shift + middle mouse button to pan the view.
- Experiment with selecting objects in the Outliner and manipulating them in the 3D Viewport.
- Practice using the Timeline to play and pause the default animation.
- Adjust properties of the default cube in the Properties Editor, noting how changes affect the object.
As you become comfortable with Blender\"s interface, you\"ll find that navigating and utilizing its tools becomes second nature, laying a solid foundation for your animation projects.

Setting Up Your Project
Properly setting up your Blender project is crucial for a smooth animation process. This step ensures that your work environment is optimized for efficiency and creativity.
- Choose the Right Template: Start by selecting an appropriate template for your project. Blender offers different templates for various needs, such as 2D animation, sculpting, VFX, and more.
- Set Up Your Scene: Adjust the default cube or delete it to start fresh. Set up your camera and lighting according to the requirements of your animation.
- Import Assets: If you have models, textures, or any other assets you plan to use, import them into your project. Blender supports various file formats for easy integration.
- Configure Render Settings: Before you start animating, decide on your render settings. This includes resolution, frame rate, and render engine (Eevee or Cycles).
- Organize Your Workspace: Use Blender\"s layout customization features to organize your workspace. Create separate windows for the 3D viewport, timeline, dope sheet, and other frequently used panels.
- Save Your Project: Establish a good habit of saving your project regularly. Use descriptive file names and organize your files in a way that makes sense for your workflow.
By carefully setting up your project, you\"re laying the groundwork for a successful animation. Each of these steps is designed to help you maintain focus on creativity and productivity, ensuring a seamless animation process.

Introduction to Keyframing
Keyframing is a fundamental aspect of animation in Blender, allowing you to define the start and end points of any animation. This process involves specifying the values of an object\"s properties (such as location, rotation, and scale) at certain frames, with Blender interpolating the values in between to create smooth motion.
- Position Your Object: Start by placing your object in the desired starting position.
- Insert the First Keyframe: Move to the frame where you want your animation to start, select your object, and press I to insert a keyframe. Choose the property you wish to animate (e.g., location).
- Set the Ending Position: Move to the frame where your animation will end, reposition or transform your object as desired, and insert another keyframe.
- Review the Animation: Scrub through the timeline or press Space to play the animation, observing the object\"s motion between the keyframes.
Blender offers various keyframe interpolation types, such as Linear, Bezier, and Constant, allowing for control over how the animation transitions between keyframes.
- Linear Interpolation: Creates a uniform motion between keyframes.
- Bezier Interpolation: Allows for smoother, more natural transitions, with adjustable handles for fine-tuning the motion curve.
- Constant Interpolation: Jumps from one keyframe value to the next with no in-between motion, useful for snappy, stylized animations.
Experiment with different types of interpolation and keyframe settings to achieve the desired effect in your animations. Understanding and mastering keyframing will greatly enhance your ability to create dynamic and engaging animations in Blender.

Working with the Timeline
The Timeline is a crucial tool in Blender for animators, providing a visual representation of your animation\"s timing and sequence. Learning to navigate and use the Timeline effectively is key to creating dynamic animations.
- Understanding the Timeline Interface: Familiarize yourself with the Timeline\"s layout, including the playhead, frame numbers, and keyframe markers.
- Navigating Frames: Use the scrubbing feature to move the playhead back and forth, allowing you to view your animation frame by frame.
- Setting Keyframes: Keyframes can be added directly in the Timeline by selecting a frame and pressing I to insert a keyframe for selected properties of your objects.
- Editing Keyframes: Move or delete keyframes within the Timeline to adjust the timing and sequence of your animation.
- Playback Controls: Utilize the play, pause, rewind, and fast-forward buttons to review your animation. Loop playback can also be enabled for continuous review.
- Frame Range: Adjust the start and end frames to define the length of your animation. This is useful for isolating specific sections for detailed work.
Experimenting with the Timeline will enhance your understanding of animation flow and timing in Blender, enabling you to craft more precise and expressive animations.
_HOOK_
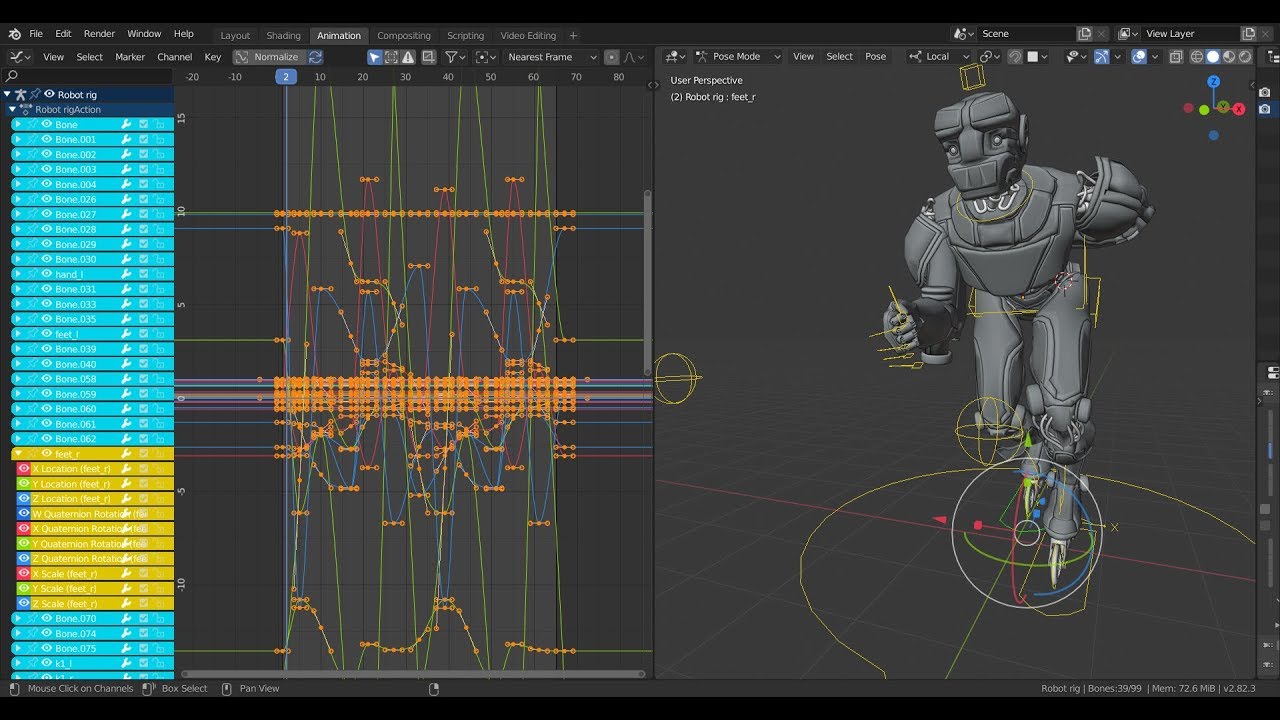
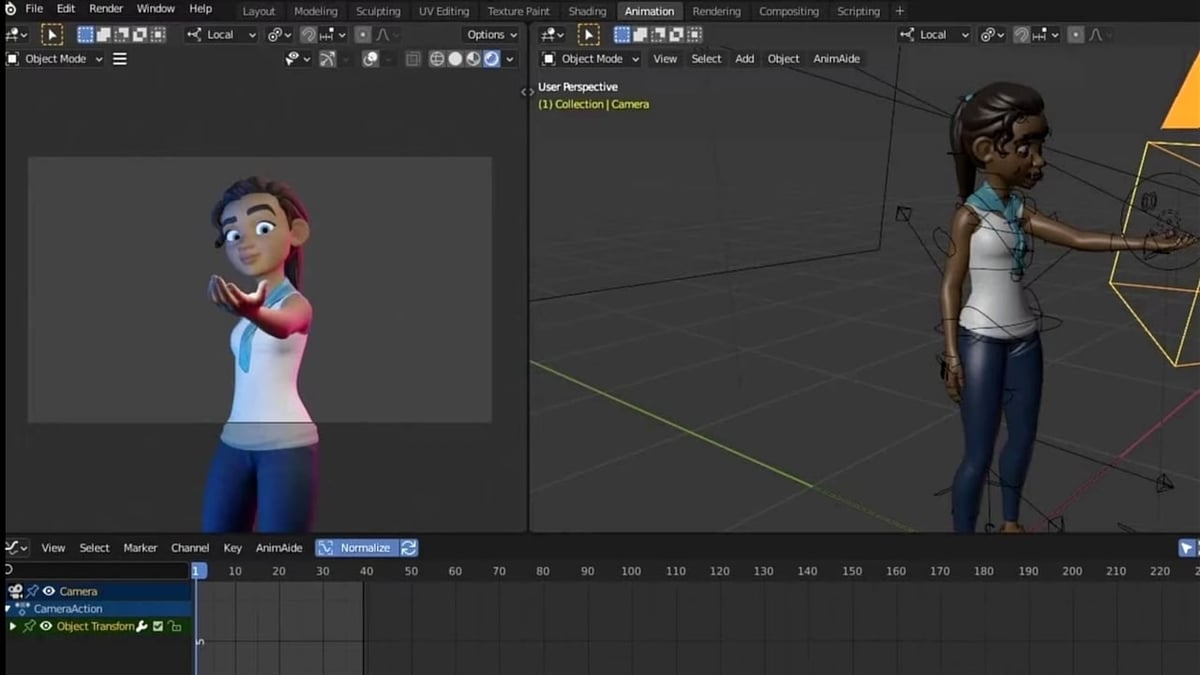
Animating Objects and Characters
Animating objects and characters in Blender brings your creations to life. This process involves manipulating objects and character models over time to create movement. Whether you\"re animating a simple object or a complex character, the principles of animation remain the same.
- Start with a Rig: For characters, begin by applying a rig. A rig is a skeletal structure that allows for easier manipulation of your character\"s pose.
- Understanding Posing: Position the rig\"s bones to create poses for your character. Use the pose mode for this purpose.
- Insert Keyframes: With your character or object in the initial pose, insert a keyframe to start the animation. Move to another frame, change the pose or position, and insert another keyframe.
- Playback and Refine: Use the Timeline to play back your animation. Watch for smoothness of motion and adjust the keyframes and poses as needed for natural movement.
- Use the Graph Editor: For detailed control over the animation, use the Graph Editor to fine-tune the velocity and timing between keyframes.
- Adding Secondary Motions: Once your primary animation is set, add secondary motions such as facial expressions, hair movement, or clothing dynamics to enhance realism.
Animating in Blender is a blend of technical skill and creative artistry. By understanding the basics of rigging, posing, and keyframing, you can start bringing your 3D models to life with engaging animations.
Animation for Beginners | Blender Tutorial
Animation: Immerse yourself in a mesmerizing world of vibrant colors and captivating stories with our amazing animation video. Get ready to be whisked away on an unforgettable journey filled with imagination and wonder.
Become a Pro at Animation in 25 Minutes | Blender Tutorial
Pro: Elevate your skills to the next level with our expert-led video that is designed for professionals like you. Discover industry secrets, master new techniques, and unlock your true potential to become a pro in your field. Don\'t miss out on this transformative opportunity!
Using the Graph Editor for Fine-tuning
The Graph Editor in Blender is a powerful tool for fine-tuning animations, allowing you to adjust the interpolation and timing of keyframes with precision. It provides a detailed view of the animation curves, which represent how animated properties change over time.
- Accessing the Graph Editor: Switch to the Graph Editor by selecting it from the editor type menu in any window.
- Understanding the Graph: The vertical axis represents the value of the animated property, while the horizontal axis represents time (in frames).
- Selecting Keyframes: Click on a curve to select it. Use Box Select (B) to select multiple keyframes.
- Adjusting Curves: Move keyframes by clicking and dragging them. Adjust the handles on either side of a keyframe to change the interpolation type and create smoother animations.
- Interpolation Types: Experiment with different interpolation types (e.g., Linear, Bezier, Constant) to see how they affect the motion.
- F-Curve Modifiers: Add modifiers (e.g., Noise, Cycles) to your curves for automated adjustments and effects, such as repeating a motion or adding randomness.
By mastering the Graph Editor, you can achieve more nuanced and controlled animations. It allows for the manipulation of the speed and timing of movements, essential for creating lifelike and dynamic animations in Blender.

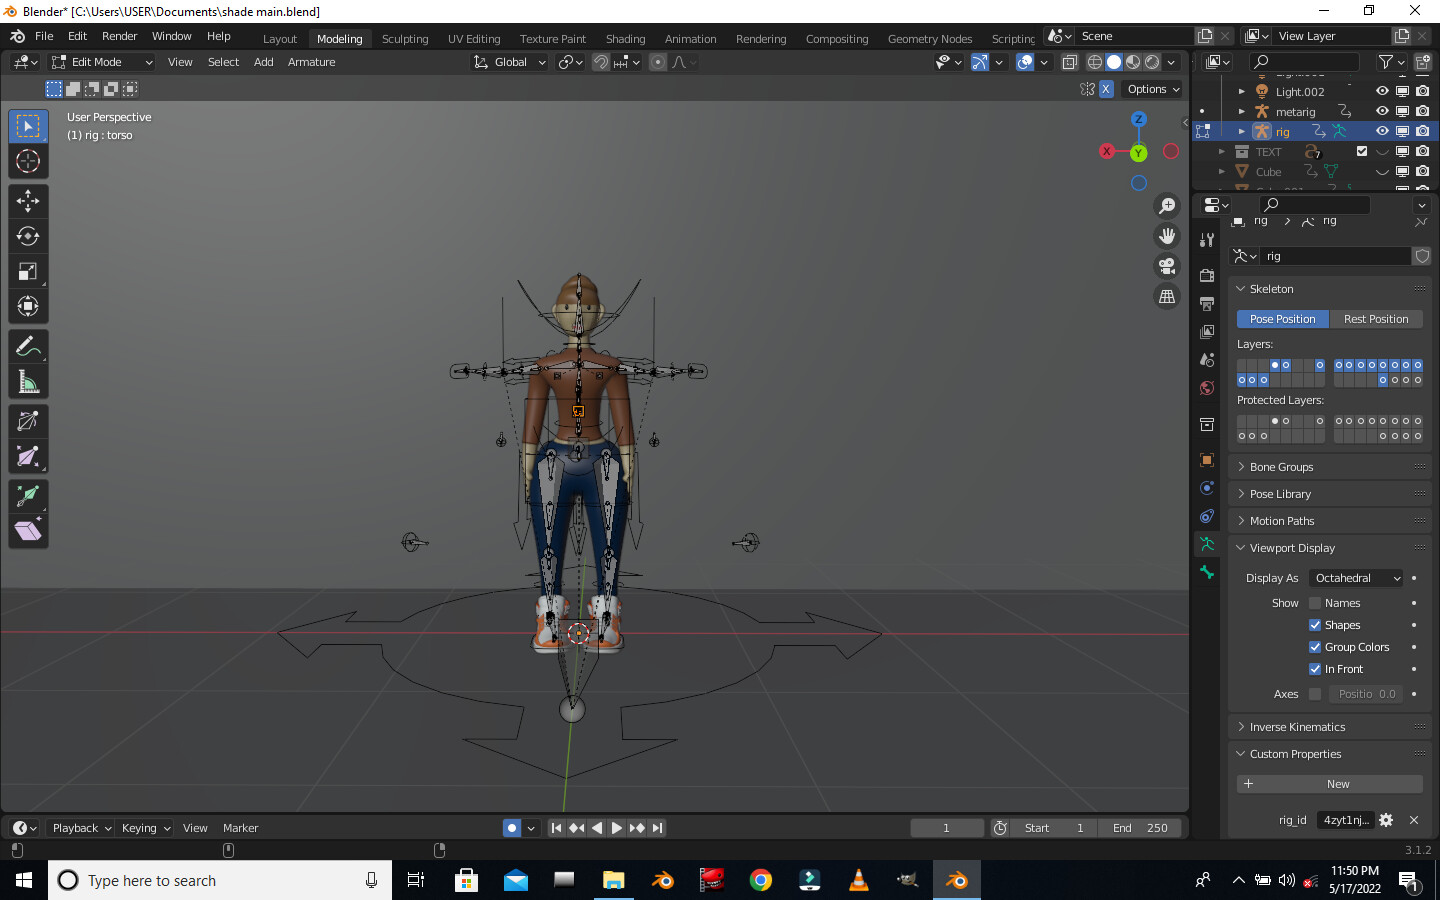
Implementing Rigging and Weight Painting
Rigging and weight painting are essential steps in animating characters in Blender, allowing for realistic movements. Rigging involves creating a skeleton that defines how your character moves, while weight painting controls how much each part of the mesh is influenced by the bones of the rig.
- Creating the Rig: Start by adding an Armature object to your scene. This will serve as the skeleton for your character. Adjust the bones to match the character\"s structure.
- Parenting Mesh to Armature: With your character\"s mesh selected, shift-select the armature and use Ctrl+P to parent the mesh to the armature. Choose \"With Automatic Weights\" for Blender to initially calculate the influence of each bone on the mesh.
- Weight Painting: Select the armature, enter Pose Mode, and then select the mesh and switch to Weight Paint mode. Here, you can fine-tune how each bone affects the mesh. Use brushes to paint the influence areas, with red indicating high influence and blue indicating low influence.
- Testing the Rig: After weight painting, pose your character by selecting bones in Pose Mode and rotating or moving them. Adjust the weight painting as needed to ensure smooth deformations.
- Adding Constraints and Controls: For more advanced rigging, add constraints to the bones for realistic movements, and custom controls to make animating easier.
Rigging and weight painting are meticulous processes that require patience and attention to detail. However, they are crucial for creating believable and controllable character animations in Blender.
Creating and Animating with Shape Keys
Shape keys in Blender are a versatile tool for animating deformations and expressions, allowing for smooth transitions between different states of a mesh. They are particularly useful for facial expressions, morphing objects, or any situation where you need to interpolate between shapes.
- Creating Shape Keys: With your object selected, go to the Object Data properties tab and find the Shape Keys panel. Press the \"+\" button to add a Basis key, which represents the original shape of your mesh. Add another key for your target shape.
- Editing Shape Keys: Select the new shape key and enter Edit Mode to modify the mesh. Any changes you make will be stored in this shape key. Switch back to Object Mode to see the effect.
- Animating Shape Keys: To animate the transition, go to the frame where you want the animation to start and insert a keyframe on the shape key value slider at 0. Move to the frame where the transition should end, change the value to 1 (or any value you prefer), and insert another keyframe.
- Adjusting the Influence: You can adjust the influence of each shape key by changing its value from 0 (no influence) to 1 (full influence), allowing for smooth transitions.
- Combining Shape Keys: You can create multiple shape keys for different expressions or transformations and combine them for complex animations.
Shape keys offer a powerful method for adding nuance and complexity to your animations, enabling you to create detailed and dynamic movements and expressions with ease.
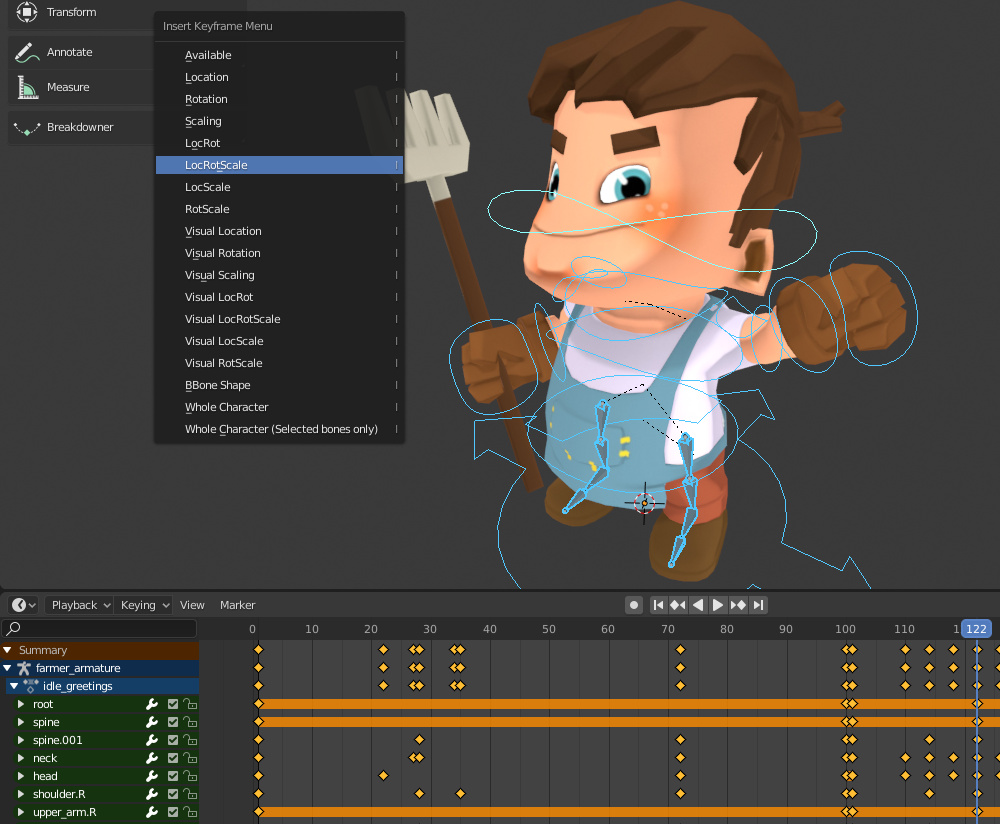
Utilizing the Dope Sheet for Animation Management
The Dope Sheet in Blender is an essential tool for managing and editing keyframes across multiple objects and animations. It provides a bird\"s-eye view of all the animation data in your scene, making it easier to synchronize movements and adjust timings.
- Accessing the Dope Sheet: Switch to the Dope Sheet by selecting it from the editor type menu. It displays all keyframes for the selected objects.
- Navigating Keyframes: Use the Dope Sheet to quickly navigate through keyframes. Click and drag to select multiple keyframes, or use the A key to select/deselect all.
- Moving Keyframes: Move selected keyframes by clicking and dragging them left or right to adjust their timing.
- Duplicating Keyframes: Duplicate keyframes by selecting them, then pressing Shift+D and dragging to the new location.
- Deleting Keyframes: Delete selected keyframes by pressing X or the Delete key.
- Keyframe Types: The Dope Sheet shows different types of keyframes, such as location, rotation, and scale, allowing you to manage specific aspects of your animation.
- Summary Channel: At the top of the Dope Sheet, the Summary channel displays a combined view of all keyframes, useful for global edits.
By mastering the Dope Sheet, animators can streamline their workflow, ensuring that animations are both efficient and precisely timed. This tool is invaluable for complex scenes with multiple animated elements.
_HOOK_
Exploring Non-Linear Animation (NLA)
Non-Linear Animation (NLA) in Blender is a powerful feature that allows animators to blend, mix, and layer different animation sequences to create complex animations efficiently. This section will guide you through the basics of using NLA in Blender to enhance your animation projects.
- Understanding NLA Tracks and Strips
- NLA works by organizing animations into tracks and strips. Each strip represents an animation action, and tracks are layers that can contain multiple strips. This setup lets you combine and manipulate several animations.
- Adding Actions to the NLA Editor
- To start with NLA, you first need to create or have pre-existing actions in the Action Editor. Once you have an action, you can push it down to the NLA editor, turning it into an NLA strip.
- Blending Animations
- In the NLA editor, you can blend animations together. By adjusting the blending mode and influence of each strip, you can create smooth transitions between actions or layer multiple animations on top of each other.
- Tweaking Strips for Better Control
- Each NLA strip can be tweaked for timing, repetition, and more. You can adjust the start and end frames, play the animation in reverse, or set the strip to repeat a specific number of times.
- Animating with NLA Tracks
- To animate with NLA tracks, simply arrange your strips in the desired order and tweak them as needed. You can add multiple tracks to separate different aspects of your animation, such as movement, facial expressions, and more.
- Using Modifiers for Advanced Effects
- NLA also supports modifiers that can add non-destructive effects to your strips, such as noise, for more dynamic and interesting animations.
By mastering NLA in Blender, you unlock a versatile toolset for creating sophisticated animations with ease. Experiment with blending modes, tweak your strips, and explore the power of non-linear animation to bring your creative visions to life.
Adding Sound and Synchronizing Audio
Integrating sound and synchronizing audio with your animations can significantly enhance the overall impact and storytelling. This section provides a step-by-step guide to adding sound and syncing audio in Blender, ensuring your animations come to life with the added depth that audio brings.
- Importing Audio Files
- To add sound to your project, switch to the Video Sequencer editor in Blender. Use the \"Add\" menu to select \"Sound\" and then navigate to the audio file you want to import. Blender supports various audio formats, including WAV, MP3, and OGG.
- Adjusting Sound in the Timeline
- Once your audio is imported, you can see it as a waveform in the timeline. This visual representation allows you to match audio cues with animation events precisely. You can move the sound strip to align it with specific frames or animations.
- Synchronizing Sound with Animation
- To synchronize sound with animation, play your project in the timeline and listen for key moments in the audio. Pause and position the playhead at these moments, then adjust your animation keyframes to match these audio cues. This step may require tweaking the timing of your animation for perfect synchronization.
- Editing Audio Properties
- In the Sound properties tab, you can edit various properties of your audio file, including volume, pitch, and pan. Use these settings to fine-tune how your audio integrates with the animation, ensuring it complements the visual elements without overpowering them.
- Animating to Music or Dialogue
- For animations set to music or dialogue, it\"s crucial to ensure that movements or lip-syncing precisely match the audio. Break down the audio into segments and synchronize each animation phase with the corresponding audio segment for accurate timing.
- Previewing and Adjusting
- Regularly preview your animation with the sound to ensure they are in sync. Adjust the animation or sound strip as needed. This iterative process is key to achieving a seamless blend of visual and auditory elements in your project.
Adding and synchronizing sound with your animation in Blender not only enhances the viewer\"s experience but also brings an added layer of realism and immersion to your work. With careful attention to timing and the use of Blender\"s audio tools, you can create compelling animations that engage both the eyes and ears of your audience.
READ MORE:
Rendering Your Animation
Rendering is the final step in the animation process, where your 3D scenes are converted into a series of images or a video file. This section covers the essential steps and settings for rendering your animation in Blender, ensuring the best possible output quality.
- Choosing the Right Render Engine
- Blender offers several render engines, including Eevee, Cycles, and Workbench. Eevee is a real-time render engine offering faster results, while Cycles is a ray-traced engine that produces more realistic images but takes longer. Choose the engine that best fits your project\"s needs.
- Setting Up Render Properties
- In the Render Properties tab, adjust settings like resolution, frame rate, and aspect ratio to match your animation\"s intended output. Higher resolutions and frame rates will improve quality but increase rendering time and file size.
- Configuring Output Settings
- Decide on your animation\"s output format in the Output Properties tab. For high-quality edits, consider rendering to a sequence of PNG images. For direct video output, formats like MPEG-4 can be selected, including options for encoding and quality.
- Applying Sampling Settings
- For Cycles, the number of samples per pixel significantly affects image quality and render time. Increase the sample count for final renders to reduce noise, especially in scenes with complex lighting.
- Optimizing Lighting and Materials
- Before rendering, ensure that your scene\"s lighting and materials are finalized. Proper lighting and material settings can greatly enhance the realism and appeal of your rendered animation.
- Performing a Test Render
- It\"s advisable to perform a test render of a few frames before rendering the entire animation. This step allows you to spot and correct any issues without wasting time on a full render.
- Rendering the Animation
- When you\"re satisfied with the setup, go to Render > Render Animation or press Ctrl+F12 to start the rendering process. Depending on your settings and the complexity of the scene, rendering can take anywhere from minutes to hours.
- Post-Processing and Editing
- After rendering, you may need to perform post-processing or video editing to add titles, transitions, or adjust colors. Blender\"s Video Sequencer Editor can be used for basic edits, or you can use external video editing software for more complex tasks.
Rendering your animation is a crucial step that transforms your work from a 3D project into a shareable format. By carefully adjusting render settings and preparing your scene, you can achieve stunning results that bring your creative vision to life.
Embark on a creative journey with Blender and unlock the full potential of your animation skills. From mastering the interface to rendering stunning visuals, this guide ensures a rewarding experience in bringing your imaginative worlds to life.