Topic sims 4 blender animation tutorial: Unlock the world of animation in The Sims 4 with our Blender tutorial, designed to guide both beginners and advanced users through the exciting process of creating lifelike animations for characters and objects. Start your creative journey today!
Table of Content
- How to render Sims 4 animations in Blender?
- Getting Started with Blender for Sims 4 Animations
- Basic Animation Techniques in Blender
- Importing Sims 4 Characters and Objects into Blender
- Animating Multiple Characters and Objects
- Advanced Keyframe Animation Techniques
- Creating and Animating Custom Objects
- YOUTUBE: How to Animate in the Sims 4 Fast and Easy
- Exporting Animations from Blender to Sims 4
- Using Sims 4 Studio for Animation Conversion
- Additional Resources and Tools for Animation
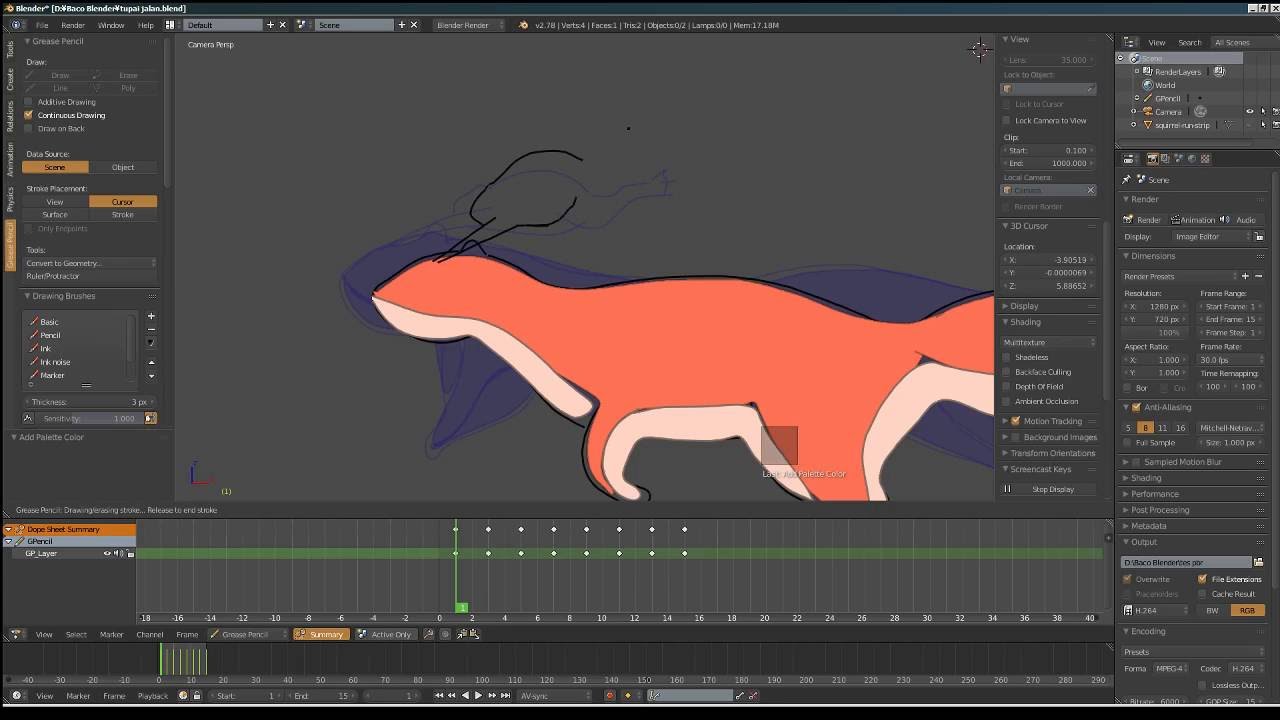
How to render Sims 4 animations in Blender?
To render Sims 4 animations in Blender, you can follow the steps below:
- First, make sure you have Blender installed on your computer. If not, you can download it from the official Blender website and install it.
- Open Blender and go to the \"File\" menu, then select \"Import\" and choose \"Sims 4 Animation\" from the available options. This will allow you to import the Sims 4 animation file into Blender.
- Once the animation file is imported, you can adjust the camera, lighting, and other settings according to your preferences.
- Next, set up the render settings by selecting the \"Render\" tab in the properties panel. Choose the desired output format, resolution, and other relevant options.
- If needed, you can also add materials or textures to the objects in the scene to enhance the visual quality of the animation.
- After setting everything up, click on the \"Render\" button to start the rendering process. Blender will start rendering the animation frame by frame.
- Once the rendering is finished, you can save the rendered animation as a video file or in any other format supported by Blender.
- Finally, you can preview the rendered animation to make sure it looks as expected. If needed, you can make further adjustments or re-render specific frames.
By following these steps, you should be able to render Sims 4 animations in Blender successfully. Remember to save your work regularly and experiment with different settings to achieve the desired results.
READ MORE:
Getting Started with Blender for Sims 4 Animations
Creating animations for The Sims 4 with Blender opens up a world of customization and creativity. This guide will help you embark on your animation journey, covering everything from setting up Blender to exporting your first animation into The Sims 4. Follow these steps to bring your Sims 4 animations to life.
- Download and Install Blender: Ensure you have the latest version of Blender installed. Blender is free and available for download from the official Blender website.
- Download Sims 4 Studio: Sims 4 Studio is essential for importing and exporting animations to The Sims 4. Download and install it from the official website.
- Setup Blender for Sims 4: You may need to install specific plugins or scripts that enable Blender to work with Sims 4 assets. Look for Sims 4 Blender plugins online and follow the installation instructions carefully.
- Import Sims 4 Models: Use Sims 4 Studio to export the models you want to animate into a format that Blender can import. Then, open Blender and import these models to start animating.
- Learn Blender Basics: If you\"re new to Blender, take some time to familiarize yourself with the interface and basic animation tools. Many free tutorials are available online to help you get started.
- Create Your Animation: Use Blender\"s animation tools to create your animation. This can involve posing your model, keyframing movements, and adjusting timings to get everything just right.
- Export Your Animation: Once you\"re happy with your animation, export it from Blender using the Sims 4 Studio plugin or tool you installed earlier. This will ensure it\"s in the correct format for The Sims 4.
- Test Your Animation in The Sims 4: Use Sims 4 Studio to import your animation into the game. Test it to make sure it looks as expected and make any necessary adjustments.
With patience and practice, you\"ll be able to create custom animations that bring new life to your Sims 4 gameplay. Remember, the key to mastering Blender animations is experimentation and continuous learning.

Basic Animation Techniques in Blender
Mastering basic animation techniques in Blender is essential for creating dynamic Sims 4 animations. This guide introduces the foundational skills needed to start animating your Sims 4 characters and objects effectively.
- Understanding Keyframes: Keyframes are the cornerstone of animation in Blender. They mark the start and end points of any animation, defining the position, rotation, and scale of objects at given times.
- Manipulating the Timeline: The Timeline is where you control the timing of your animation. Learn how to navigate it, set keyframes, and adjust their spacing to change the speed of your animation.
- Using the Dope Sheet: The Dope Sheet is a powerful tool for managing keyframes and animation sequences. It allows you to easily view and edit the timing and order of keyframes.
- Graph Editor for Fine-tuning: The Graph Editor gives you detailed control over the interpolation of keyframes, enabling you to smooth out or sharpen the transitions between them.
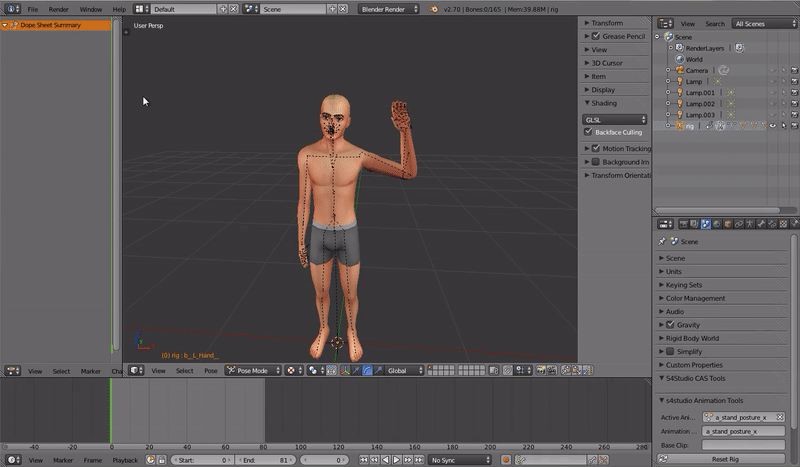
- Pose Mode for Character Animation: When animating Sims 4 characters, use Pose Mode to manipulate the bones of your rig. This is crucial for creating natural movements.
- Animating with Bones and Rigs: Learn how to use armatures (bones) to create rigs for your characters. Rigs are essential for posing and animating characters in a realistic manner.
- Basics of Motion Paths: Motion paths help visualize the trajectory of an object or character limb over time. Use them to refine your animations for smoother, more lifelike movements.
- Looping Animations: For animations that need to repeat, such as walking cycles, learn how to loop your sequences seamlessly within Blender.
By mastering these basic techniques, you\"ll be well on your way to creating custom animations for The Sims 4. Practice each skill to build a strong foundation for more advanced animation projects.
Importing Sims 4 Characters and Objects into Blender
Bringing Sims 4 characters and objects into Blender is a crucial step for animation. This section guides you through the process, ensuring a smooth transition from game to animation platform.
- Prepare Your Files: Before importing, ensure you have the Sims 4 Studio and Blender installed. You\"ll also need the necessary Blender addons for Sims 4 content, which can be found online.
- Exporting from Sims 4 Studio: Open Sims 4 Studio, choose the \"Create 3D Mesh\" option, and select the character or object you wish to animate. Export the mesh and textures.
- Converting Files for Blender: Some files may need conversion to formats compatible with Blender. Use a converter if necessary, ensuring textures are correctly mapped.
- Importing into Blender: In Blender, go to \"File\" > \"Import\" and select the appropriate format for your exported files. Navigate to your files and import them into your project.
- Adjusting Textures: After import, textures may need adjustment. Check the \"Shading\" tab to ensure textures are properly connected to your mesh.
- Setting Up the Rig: If importing characters, you may need to set up or adjust the rig for animation. Ensure bones are correctly aligned and parented to the mesh for effective animation.
- Testing the Import: Move parts of the character or object to ensure the import was successful and the rig functions as expected. Make any necessary adjustments.
Following these steps will enable you to successfully import Sims 4 characters and objects into Blender, ready for animation. Patience and attention to detail during the import process will save time and ensure a high-quality animation project.

Animating Multiple Characters and Objects
Animating multiple characters and objects in Blender for Sims 4 can add depth and complexity to your scenes. This guide walks you through the process of creating dynamic interactions between various elements in your animations.
- Planning Your Scene: Start by sketching out your scene to understand the interaction between characters and objects. Planning helps in visualizing the end result and organizing your workflow.
- Importing Assets: Import all the characters and objects needed for the scene into Blender. Ensure that each asset is correctly rigged for animation.
- Positioning Your Elements: Position your characters and objects in the initial pose or starting point of your animation. Use Blender\"s 3D Viewport to adjust the placements precisely.
- Animating Characters: Begin animating your characters one at a time. Use keyframes to define movements, ensuring to pay attention to timing and interaction between characters.
- Incorporating Objects: Animate objects that interact with your characters. This could be anything from simple props to complex machinery, depending on your scene\"s requirements.
- Synchronizing Movements: Pay special attention to the timing of interactions. Characters interacting with objects or each other must have synchronized movements to create a believable scene.
- Using Layers and Groups: Organize your characters and objects in layers or groups. This organization helps manage complex scenes, making it easier to edit specific parts without affecting others.
- Previewing and Adjusting: Regularly preview your animation to check the fluidity of movements and interactions. Make adjustments as needed to improve the overall flow and realism of the scene.
- Finalizing the Animation: Once satisfied with the interaction between characters and objects, finalize your animation. Ensure all movements are smooth and natural, and render your scene to check the final output.
Animating multiple characters and objects requires patience and practice. As you become more comfortable with Blender\"s tools and features, you\"ll be able to create increasingly complex and engaging animations for your Sims 4 projects.

_HOOK_
Advanced Keyframe Animation Techniques
Enhance your Sims 4 animations with advanced keyframe techniques in Blender. This section dives into the complexities of keyframe manipulation to bring more life and realism to your animations.
- Interpolation and Easing: Learn to adjust the interpolation mode between keyframes for smoother transitions. Experiment with Bezier interpolation to refine the speed and timing of your animations.
- F-curves for Precise Control: Utilize the Graph Editor to manipulate F-curves, giving you precise control over the acceleration and deceleration of movements.
- Keyframe Cycling: For repetitive actions, like walking or breathing, use the cycling feature to repeat keyframes over a duration, saving time and ensuring consistency.
- Blocking to Splining: Start with a stepped (blocking) approach to outline major poses, then transition to splining for smooth transitions between keyframes.
- Secondary Motion: Add realism by incorporating secondary motions such as hair sway or cloth movement, timed slightly after the primary action for natural effect.
- Layering Animations: Layer multiple animation actions (e.g., walking and waving) by using the NLA (Non-Linear Animation) Editor to blend them seamlessly.
- Breaking Down Poses: Break down complex movements into simpler poses to focus on the timing and spacing of each action, enhancing the animation\"s realism.
- Anticipation and Follow-through: Incorporate anticipation poses before major actions and follow-through to carry the momentum, adding dynamism to your animations.
- Using Markers for Organization: Utilize timeline markers to denote significant points or changes in the animation, aiding in organization and timing adjustments.
Mastering these advanced techniques requires practice but will significantly improve the quality of your Sims 4 animations. Push your creative boundaries and experiment with different methods to see what best suits your animation style.
Creating and Animating Custom Objects
Adding custom objects to your Sims 4 animations can bring unique flair and personality to your scenes. This guide outlines the process of creating and animating these objects in Blender.
- Designing Your Object: Begin by sketching your object concept. Planning your design ahead of time ensures a clear direction when modeling in Blender.
- Modeling in Blender: Use Blender\"s modeling tools to create your object. Start with a basic shape and refine it by adding details. Pay attention to topology for smooth animations.
- Texturing and Materials: Apply textures and materials to your object to give it a realistic or stylized look. UV mapping ensures your textures fit the model correctly.
- Rigging Your Object: If your object requires movement, you\"ll need to rig it. Create a simple armature for basic movements or a more complex one for intricate animations.
- Animating Your Object: With your object rigged, animate it by setting keyframes for the armature\"s bones. Use the principles of animation to guide your object\"s movement.
- Exporting for Sims 4: Once your animation is complete, export your object and its animation into a format compatible with Sims 4. This may require specific plugins or tools.
- Testing in Game: Import your custom object into Sims 4 to test the animation. Ensure it behaves as expected within the game environment, making any necessary adjustments.
Creating and animating custom objects for The Sims 4 in Blender is a rewarding process that allows for endless creativity. With practice, you can add a personal touch to your Sims 4 projects with unique animated objects.

How to Animate in the Sims 4 Fast and Easy
\"Sit back, relax, and prepare to be captivated as this incredible animation brings characters to life right before your eyes. Don\'t miss out on the magic of animation!\"
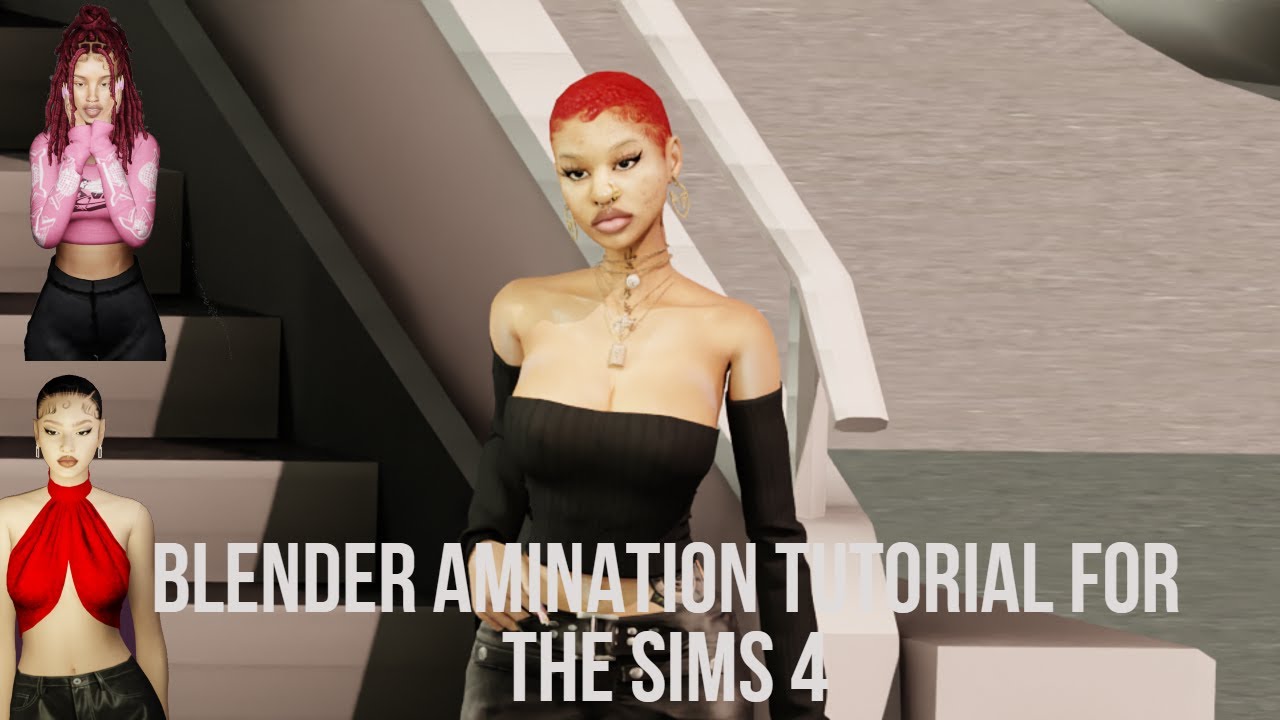
How to Use Blender with Sims 4 Studio - Sims 4 Animation Tutorial
\"Discover the endless possibilities of 3D modeling and visual effects with Blender. From stunning landscapes to incredible characters, this video will take you on a journey through the world of digital artistry.\"
Exporting Animations from Blender to Sims 4
Transferring your custom animations from Blender into The Sims 4 allows you to see your creations come to life in-game. This process involves several key steps to ensure compatibility and functionality within The Sims 4 environment.
- Finalize Your Animation: Ensure your animation is complete and plays smoothly in Blender. Check for any issues in timing, motion, or rigging.
- Choose the Correct Export Format: Sims 4 animations typically require a specific format. Use the Sims 4 Studio Blender Plugin to export your animation in the .s4a format, which is recognized by Sims 4 Studio.
- Prepare Your Animation for Export: Before exporting, make sure your animation is within the frame range Sims 4 can handle. Adjust the frame rate if necessary to match Sims 4\"s animation standards.
- Exporting Your Animation: With your animation ready and settings adjusted, export your animation using the Blender plugin. Save it in a location you\"ll remember for the next steps.
- Importing into Sims 4 Studio: Open Sims 4 Studio, and create a new animation or override an existing one. Import your .s4a file when prompted.
- Testing in Sims 4 Studio: Use the animation preview feature in Sims 4 Studio to ensure your animation plays correctly. Make any necessary adjustments.
- Finalizing and Packaging: Once satisfied with the animation preview, save your work in Sims 4 Studio. Package the animation for use in The Sims 4, following the prompts provided by Sims 4 Studio.
- Testing in-game: Finally, test your animation in The Sims 4. This will help you see how your animation interacts with the game environment and other game elements.
Exporting animations from Blender to The Sims 4 involves careful preparation and attention to detail. By following these steps, you can ensure that your custom animations integrate seamlessly into the game, bringing your creative visions to life.

Using Sims 4 Studio for Animation Conversion
Sims 4 Studio is a vital tool for animators looking to bring their Blender creations into The Sims 4. This section outlines how to use Sims 4 Studio for converting and importing animations, ensuring they are playable in the game.
- Download and Install Sims 4 Studio: Ensure you have the latest version of Sims 4 Studio installed. It\"s available for free on the official Sims 4 Studio website.
- Open Sims 4 Studio: Launch Sims 4 Studio and select \"Animation\" from the options to create a new animation project or modify an existing one.
- Importing Blender Animations: Use the \"Import\" feature in Sims 4 Studio to bring your exported Blender animation files (.s4a) into the project.
- Animation Clip Editing: Within Sims 4 Studio, you can preview your animation, adjust timings, and make edits directly to ensure it integrates well with Sims 4 gameplay.
- Setting Up Animation Properties: Configure the necessary properties for your animation, such as age, gender specifications, and whether the animation is looped or a single play.
- Testing Your Animation: Utilize the built-in testing features of Sims 4 Studio to preview how your animation will look in-game. Make any necessary adjustments based on this preview.
- Exporting for The Sims 4: Once satisfied with your animation, export it from Sims 4 Studio. The tool will package the animation into a format that can be easily imported into The Sims 4.
- Adding Your Animation to The Sims 4: Place the exported file into your Sims 4 Mods folder. Then, start the game and test the animation within your Sims environment.
Using Sims 4 Studio for animation conversion bridges the gap between Blender\"s powerful animation capabilities and The Sims 4\"s immersive gameplay. With practice, you can streamline the process of bringing your animated visions to life in the game.
READ MORE:
Additional Resources and Tools for Animation
Expanding your animation toolkit can enhance your Sims 4 projects. Here are some essential resources and tools that can aid in your animation journey, from beginner tutorials to advanced techniques.
- Blender Tutorials: The official Blender Foundation and Blender Guru offer comprehensive guides and tutorials, perfect for mastering both basic and advanced animation techniques.
- Sims 4 Studio Forums: A vibrant community where creators share insights, tips, and tricks for Sims 4 animation and modding. It\"s an excellent place for seeking advice and collaboration.
- Blender Add-ons for Sims 4: Tools like the Sims 4 Studio Blender Plugin simplify the process of creating animations compatible with The Sims 4, streamlining import/export tasks.
- Online Courses: Platforms like Udemy and Coursera offer courses on Blender animations, including specific lessons on character rigging and motion capture editing.
- YouTube Channels: Content creators specializing in Blender and Sims 4 animations regularly post tutorials, workflow tips, and project breakdowns that can provide new insights and techniques.
- Animation Libraries: Websites like Mixamo offer pre-made animations that can be customized in Blender, offering a quick way to learn about different animation styles and techniques.
- Books and eBooks: Comprehensive guides and reference books on Blender are available for those who prefer written instructions, covering everything from beginner basics to professional tips.
Utilizing these resources can significantly improve your animation skills and broaden your creative possibilities within The Sims 4. Whether you\"re a beginner or an experienced animator, there\"s always something new to learn and explore.
Embark on your journey to mastering Sims 4 animations with Blender today. With dedication and creativity, you can bring your unique visions to life, enhancing your Sims 4 experience. Start exploring, learning, and creating now!
_HOOK_