Topic blender text animation tutorial: Embark on a creative journey with our Blender Text Animation Tutorial, designed to equip you with the skills to bring your texts to life in stunning 3D animations.
Table of Content
- How to create a cinematic text animation in Blender using UV tricks and a custom camera rig?
- Getting Started with Blender for Text Animation
- Understanding the Basics of Text Animation
- Key Techniques for Animating Text: Rotation and Scale
- Advanced Text Animation Effects: Extruding, Alignment, and Physics
- Utilizing Blender Add-ons for Text Animation: Text FX and More
- Creating Realistic Animations: Water, Cutting, and Trees
- YOUTUBE: Stylized Text Transition Tutorial for Blender VFX
- Project-Based Tutorials: Cannon, Rolling Dice, and Wood Chipping Text
- Additional Resources and Tools for Blender Text Animation
How to create a cinematic text animation in Blender using UV tricks and a custom camera rig?
To create a cinematic text animation in Blender using UV tricks and a custom camera rig, follow these steps:
- Open Blender and import your text.
- Select the text object and go to the \"Object Data\" tab in the Properties panel. Under the \"Geometry\" section, increase the \"Extrude\" value to give the text some depth.
- Next, switch to the \"UV Editing\" workspace. In the UV Editor, select your text and press \"U\" to unwrap it. Choose either \"Unwrap\" or \"Smart UV Project\" to create UV coordinates for your text.
- In the 3D Viewport, switch to the \"Shader Editor\" workspace. Add a \"Texture Coordinate\" node and connect the \"UV\" output to a \"Mapping\" node.
- Connect the \"Mapping\" node to a \"Texture\" node of your choice. This will be used to add a texture to your text.
- Add a \"Math\" node and set it to \"Multiply\". Connect the \"Vector\" output of the \"Mapping\" node to the first input of the \"Math\" node, and set the second input of the \"Math\" node to a value greater than 1. This will exaggerate the texture on the text.
- Connect the \"Math\" node to the \"Color\" input of a \"Diffuse BSDF\" node, and connect the \"Shader\" output of the \"Diffuse BSDF\" node to the \"Surface\" input of the \"Material Output\" node.
- Switch back to the \"Layout\" workspace and select your text object. Assign the material you just created to the text by clicking on the \"Assign\" button in the \"Material\" section of the \"Object Properties\" panel.
- Now it\'s time to set up the camera rig. Add an empty object to the scene by pressing \"Shift + A\" and selecting \"Empty\".
- Select the camera and then the empty object. Press \"Ctrl + P\" and choose \"Object\" to parent the camera to the empty. This will allow you to control the camera\'s movement.
- Select the empty object and go to the \"Object Properties\" panel. Under the \"Constraints\" section, add a \"Follow Path\" constraint.
- Create a curve (e.g., a Bezier curve) that you want the camera to follow.
- In the \"Follow Path\" constraint settings, select the curve as the target and adjust the \"Offset\" to control the camera\'s position along the path.
- To animate the camera, go to the frame where you want the animation to start. Move the empty object along the path until you reach the desired position.
- Set a keyframe for the empty object\'s location and rotation by pressing \"I\" and choosing \"Location\" and \"Rotation\" respectively.
- Go to the frame where you want the animation to end. Move the empty object to the final position along the path and set keyframes again.
- To render the animation, go to the \"Render\" tab in the Properties panel. Set the output path and file format, adjust other settings as needed, and click on the \"Render Animation\" button.
READ MORE:
Getting Started with Blender for Text Animation
Beginning your journey into text animation with Blender opens up a world of creative possibilities. This section will guide you through the initial steps necessary to start animating text in Blender, ensuring you have a solid foundation for more advanced projects.
- Download and Install Blender: Start by downloading the latest version of Blender from the official website. Ensure your system meets the minimum requirements for a smooth experience.
- Familiarize Yourself with Blender’s Interface: Blender’s comprehensive interface can be overwhelming at first. Spend some time learning about the layout, key areas such as the 3D viewport, timeline, and properties panel.
- Create Your First Text Object: Learn how to add a text object to your scene. This can typically be done by pressing Shift + A in the 3D viewport, selecting Text, and then entering edit mode (Tab) to change the text.
- Basic Text Formatting: Explore the properties panel to adjust the font, size, and alignment of your text. Blender allows you to import custom fonts, giving you the flexibility to match the style of your project.
- Introduction to Animation: Animate your text using keyframes. With your text object selected, go to a specific frame in the timeline, change a property (like location, rotation, or scale), and press I to insert a keyframe. Change the frame, modify the property again, and insert another keyframe.
- Rendering Your Animation: Once satisfied with your animation, it’s time to render it. Explore the render settings in Blender to choose the output format, resolution, and frame rate. Then, render your animation to create the final video.
By following these steps, you\"ll be well on your way to creating dynamic text animations in Blender. Remember, practice and experimentation are key to mastering Blender\"s vast toolset.

Understanding the Basics of Text Animation
Mastering text animation in Blender starts with understanding its foundational concepts. This section delves into the basics, ensuring you grasp the essential techniques and principles that will guide your animation projects.
- Text Objects vs. Mesh Objects: Recognize the difference between text objects, which are specifically designed for typography, and mesh objects. Text objects offer unique properties like font selection and text editing directly within Blender.
- Keyframe Animation: Learn the importance of keyframes in animation. Keyframes are markers that define the start and end points of any transition, allowing you to animate properties such as location, rotation, scale, and even text-specific attributes over time.
- Interpolation: Understand interpolation, which is how Blender calculates the movement between keyframes. It can create smooth transitions and is adjustable through the Graph Editor for more complex animations.
- Using the Graph Editor: Get familiar with the Graph Editor. It’s a powerful tool for refining animations, allowing you to manually adjust the interpolation curves between keyframes for precise control over the animation’s pacing and timing.
- Text Effects and Modifiers: Explore text effects and modifiers that Blender offers. From simple transformations like rotation and scaling to more complex deformations and particle systems, these tools can add depth and dynamism to your text animations.
- Materials and Lighting: Discover how to apply materials and lighting to text to enhance its visual impact. Adjusting these properties can dramatically affect the mood and readability of your animated text.
By familiarizing yourself with these basic concepts, you\"ll be well-prepared to create engaging and dynamic text animations in Blender. Experimentation and practice are key to becoming proficient in these techniques.
Key Techniques for Animating Text: Rotation and Scale
Animating text using rotation and scale in Blender can transform simple messages into compelling visual stories. This section focuses on utilizing these fundamental techniques to create dynamic text animations.
- Setting Up Your Text: Begin by adding a text object to your scene. Access the properties panel to adjust your text\"s font, size, and alignment to fit your project\"s theme.
- Animating Rotation:
- Select your text object and move to the frame where you want the rotation animation to start.
- Press R to activate rotation mode, then X, Y, or Z to choose the axis of rotation.
- Rotate your text to the desired starting orientation and press I to insert a rotation keyframe.
- Move to the end frame of your animation, rotate the text to the final orientation, and insert another rotation keyframe.
- Animating Scale:
- With the text object selected, go to the frame where the scale animation will begin.
- Press S to activate scale mode. Scale your text to the starting size and press I, then choose \"Scale\" to insert a scale keyframe.
- Navigate to the frame where the scale animation will end, adjust the scale of your text, and insert another scale keyframe.
- Adjusting Animation Speed and Timing: Use the Graph Editor to fine-tune the speed and timing of your animations. This allows for smoother transitions and more control over the animation\"s flow.
- Experimenting with Combinations: Combine rotation and scale animations to create more complex and engaging text effects. Experiment with different keyframe placements to vary the animation\"s rhythm and pace.
By mastering these techniques, you can create text animations in Blender that capture attention and convey your message with impact. Practice with different texts, animations, and combinations to discover the full potential of your creativity.

Advanced Text Animation Effects: Extruding, Alignment, and Physics
Advancing your Blender skills to include text animation effects such as extruding, alignment adjustments, and the application of physics can significantly enhance the visual appeal of your projects. This section will guide you through these sophisticated techniques.
- Extruding Text for 3D Effects:
- With your text object selected, go to the object data properties panel.
- Locate the \"Geometry\" section and adjust the \"Extrude\" value to give your text depth.
- To animate the extrusion, hover over the \"Extrude\" field, right-click, and choose \"Insert Keyframe\" at the start and end points of your animation timeline.
- Aligning Text Dynamically:
- Alignment changes can dramatically affect the presentation of your text. Access the alignment settings in the object data properties panel under the \"Paragraph\" section.
- To animate alignment, manually insert keyframes for alignment properties by right-clicking the alignment options and selecting \"Insert Keyframe\".
- Applying Physics to Text:
- Blender\"s physics engine allows for realistic animations involving forces, collisions, and other physical interactions.
- To apply physics to text, first convert the text to a mesh by pressing Alt+C and selecting \"Mesh from Curve/Meta/Surf/Text\".
- With the mesh selected, go to the Physics Properties panel and choose a physics type, like \"Rigid Body\", to apply physical properties to the text.
- Animate the physics simulation by adjusting the physics properties over time and using the timeline to preview the effects.
These advanced techniques provide a gateway to creating more complex and visually engaging text animations. Experimentation and practice with extruding, alignment, and physics will open up new creative possibilities in your Blender projects.

_HOOK_
Utilizing Blender Add-ons for Text Animation: Text FX and More
Blender\"s extensibility through add-ons can significantly enhance your text animation capabilities. This section explores how to leverage popular add-ons such as Text FX for creating dynamic text animations with ease.
- Discovering Text FX:
- Text FX is a powerful add-on designed specifically for animating text in Blender. It provides a range of pre-set animations and effects that can be applied directly to text objects.
- To use Text FX, first ensure it\"s installed. You can find it on the Blender Market or through the Blender add-on repository. Once downloaded, install it via the Add-ons section in Blender\"s Preferences.
- Exploring Text FX Features:
- Typewriter Effect: Animates text as if it\"s being typed out letter by letter.
- Wave Effect: Adds a wave-like motion to the text, customizable in amplitude and frequency.
- Scramble Effect: Randomly scrambles letters in the text before settling on the final text.
- These effects and more can be easily applied and adjusted within the Text FX panel in Blender.
- Using Other Add-ons for Text Animation: Blender\"s community has developed various other add-ons that can be useful for text animation.
- Animation Nodes: A node-based visual scripting system that can be used for procedural animations, including complex text animations.
- Blender\"s Motion Tool: Provides advanced motion graphics tools that can enhance text animation projects.
- Finding and Installing Add-ons: Most add-ons can be found on the Blender Market, GitHub, or through the Blender Foundation\"s official website. Installation typically involves downloading a ZIP file and using the Install button in Blender\"s Add-ons preferences.
By incorporating these add-ons into your workflow, you can unlock new creative possibilities and streamline the text animation process in Blender. Experiment with different add-ons and their features to find what best suits your project needs.

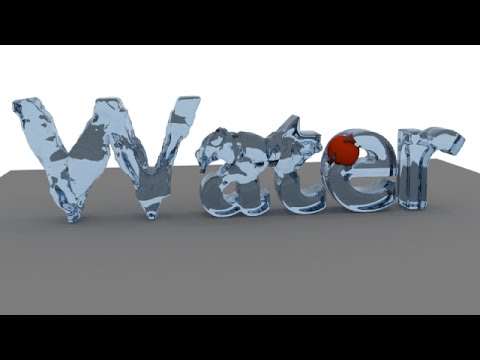
Creating Realistic Animations: Water, Cutting, and Trees
Blender is renowned for its ability to create highly realistic animations. This section covers the techniques for animating three specific elements: water, cutting actions, and trees, which can add a significant level of detail and realism to your projects.
- Animating Water:
- Start by using Blender’s fluid simulation system. Access it by adding a Fluid Domain to encompass your scene where water will interact.
- Within the domain, add a Fluid object to act as the source of your water. Adjust the fluid\"s properties to match the desired flow and behavior.
- Experiment with the domain’s resolution settings for higher quality simulations, keeping in mind the trade-off with processing time.
- Use materials and lighting to enhance the water\"s appearance, adding realism through reflections and transparency.
- Creating Cutting Animations:
- For animations involving cutting, such as slicing through objects, start by modeling the objects to be cut.
- Use Blender’s Boolean modifier to simulate the cutting process, animating the modifier’s parameters to reveal the cut over time.
- For added realism, incorporate particle systems to simulate debris or fragments resulting from the cutting action.
- Animating Trees:
- To create realistic tree animations, begin with the Sapling Tree Gen add-on in Blender, which allows for procedural tree creation.
- Adjust the tree parameters to fit your scene, from trunk thickness to leaf density.
- For animations, use the wind force field to simulate natural tree and leaf movements, keyframing the strength and direction for dynamic effects.
By mastering these techniques, you can enhance your Blender animations with realistic elements that bring your scenes to life. Whether it\"s the gentle flow of water, the precise action of cutting, or the natural sway of trees, each element offers unique challenges and opportunities for creativity.

Stylized Text Transition Tutorial for Blender VFX
Get ready to be mesmerized by the art of transition in this incredible video. Watch as scenes seamlessly blend into one another, creating a visual masterpiece that will leave you in awe. Don\'t miss out on this captivating display of creativity!
Blender Cinematic Movie Text Animation Using Eevee
Step into the world of cinema with this cinematic video experience. Immerse yourself in breathtaking visuals and cinematic storytelling that will transport you to another dimension. Whether you\'re a film enthusiast or simply appreciate stunning visuals, this video is a must-watch.
Project-Based Tutorials: Cannon, Rolling Dice, and Wood Chipping Text
Blender is not just about creating isolated effects; it\"s also an excellent tool for comprehensive project-based learning. This section will guide you through three engaging projects: animating a cannon, creating rolling dice, and simulating wood chipping text. Each tutorial is designed to build your skills in a practical context, applying a range of techniques to produce impressive results.
- Animating a Cannon:
- Begin by modeling the cannon, focusing on the barrel, base, and wheels. Use reference images to ensure accuracy.
- Create a simple cannonball and position it at the cannon\"s mouth. Use the Rigid Body physics engine to simulate the cannonball\"s motion.
- Animate the cannon\"s recoil using keyframes to mimic the backward movement upon firing.
- Apply materials and textures to the cannon and cannonball for a realistic appearance. Simulate a smoke effect using Blender\"s particle system for the firing effect.
- Creating Rolling Dice:
- Model a dice with correct proportions and mark the faces with dots or numbers.
- Use the Rigid Body physics to simulate realistic dice rolls on a surface. Adjust the mass and friction for natural movement.
- Set up a camera and lighting to highlight the dice as they roll and come to rest.
- Animate the camera to follow the dice or capture the action from multiple angles for added dynamism.
- Simulating Wood Chipping Text:
- Create a text object and apply a wood texture to give it a realistic wooden appearance.
- Use Blender\"s particle system and cell fracture to simulate the text breaking apart as if chipped away.
- Animate the chipping process, starting with small chips and gradually increasing until the text is fully fragmented.
- Incorporate sound effects for wood chipping to enhance the realism of your animation.
These project-based tutorials offer a hands-on approach to learning Blender, providing you with valuable experience in animation, physics simulations, and visual effects. By completing these projects, you\"ll gain a deeper understanding of Blender\"s capabilities and how to apply them to your own creative ideas.
READ MORE:
Additional Resources and Tools for Blender Text Animation
Enhancing your Blender text animation skills requires access to a variety of resources and tools. Below is a compilation of additional resources that can help you deepen your understanding and refine your techniques in text animation.
- Blender Official Documentation: A comprehensive guide to all Blender features, including text animation. It\"s an essential resource for understanding the fundamentals and advanced functionalities.
- Blender Artists Community: Engage with a community of Blender users, ask questions, share your projects, and receive feedback. The forums are a great place to find tips and tricks tailored to text animation.
- Blender Guru Tutorials: Offers detailed video tutorials on Blender, including text animation. These tutorials range from beginner to advanced levels, providing insights into creative uses of Blender’s text tools.
- CG Cookie: A learning platform offering Blender courses, including text animation. CG Cookie provides structured learning paths to improve your animation skills systematically.
- BlenderNation: Stay updated with the latest Blender news, tutorials, and articles. It’s a valuable resource for finding inspiration and new techniques.
- YouTube Channels: Numerous YouTube channels are dedicated to Blender tutorials, including text animation. Channels like Blender Guru, CG Geek, and Ducky 3D offer project-based tutorials that cover various text effects and animations.
- Blender Add-ons: Explore add-ons designed for text animation to streamline your workflow. These can include tools for typographic effects, automated animations, and more. Check the Blender Market or Blender Artists forums for recommendations.
By leveraging these resources and tools, you can continuously expand your skill set in Blender text animation. Whether you\"re a beginner or looking to advance your techniques, the Blender community and its wealth of resources offer endless opportunities for growth and creativity.
Embark on your Blender text animation journey today and unlock the door to endless creative possibilities. Master the art of bringing text to life, enhancing your projects with dynamic effects and captivating visuals.