Topic blender tutorial animation character: Discover the world of character animation with our Blender tutorial, guiding beginners through every step to bring imaginative characters to life.
Table of Content
- Where can I find a tutorial for animating characters in Blender?
- Getting Started with Blender for Character Animation
- Understanding Blender\"s Interface and Basic Tools
- Modeling Your First Character in Blender
- Rigging Your Character for Animation
- Creating Basic Animations and Understanding Keyframes
- Advanced Animation Techniques: Walk Cycles and Facial Expressions
- YOUTUBE: Character Animation for Impatient People - Blender Tutorial
- Adding Materials and Textures to Bring Your Character to Life
- Lighting and Rendering Your Animated Character
- Tips for Realistic Animations: Weight, Timing, and Anticipation
- Exporting Your Animation for the World to See
Where can I find a tutorial for animating characters in Blender?
You can find tutorials for animating characters in Blender on various platforms. Here are some options:
- Blender\'s official website offers a wide range of tutorials, including character animation. You can find step-by-step guides and video tutorials to help you learn the basics and advanced techniques.
- YouTube is a great resource for finding Blender tutorials. There are many channels dedicated to teaching animation in Blender, such as Blender Guru, CG Cookie, and CG Geek. You can search for specific keywords like \"Blender character animation tutorial\" to find relevant videos.
- Blender Stack Exchange is a community-driven question and answer site where you can find solutions to specific animation-related questions. You can search for questions related to character animation or ask your own question if you can\'t find the answer.
- Udemy is an online learning platform that offers paid courses on Blender animation. You can find courses specifically focused on character animation and follow along with the instructor to learn the techniques in a structured manner.
Remember to practice regularly and experiment with different techniques to improve your character animation skills in Blender.
READ MORE:
Getting Started with Blender for Character Animation
Embarking on your Blender character animation journey begins with understanding the core fundamentals. This section lays the foundation for creating captivating animations.
- Download and Install Blender: Ensure you have the latest version of Blender installed on your computer for access to all the newest features.
- Familiarize Yourself with the Interface: Spend some time getting to know Blender’s interface. Look for tutorials on navigation, the 3D viewport, and where different tools are located.
- Learn Basic Operations: Before diving into character animation, understand basic operations like scaling, rotating, and moving objects.
- Set Up Your Workspace: Customize your workspace to suit animation work. Blender allows you to adjust layouts and save your setup for future use.
- Explore Blender\"s Rigging Tools: Rigging is essential for character animation. Familiarize yourself with armatures, bones, and the pose mode for manipulating your character.
- Practice with Simple Models: Start with simple models to practice rigging and animation before moving on to more complex characters.
- Utilize Blender’s Animation Tools: Learn about keyframing, the dope sheet, and the graph editor to create smooth animations.
- Join the Blender Community: Engage with the Blender community through forums, social media, and user groups. It\"s a great way to learn from others and get feedback on your work.
By following these steps, you\"ll build a solid foundation in Blender, preparing you for the exciting world of character animation.

Understanding Blender\"s Interface and Basic Tools
Mastering Blender\"s interface and its fundamental tools is crucial for any aspiring animator. This section provides a comprehensive guide to navigating and utilizing Blender\"s capabilities effectively.
- Main Interface Elements:
- 3D Viewport: The primary area where you model, animate, and view your scenes.
- Timeline: Located at the bottom, it\"s essential for animation, allowing you to control the playback of your animation sequences.
- Outliner: A hierarchical list of all objects in your scene, making it easy to select and organize your models.
- Properties Panel: Here, you can adjust the properties of your objects, including materials, modifiers, and physics settings.
- Basic Tools for Animation:
- Move, Rotate, Scale: The fundamental tools for manipulating objects in your scene. Accessible with the shortcuts G (move), R (rotate), and S (scale).
- Extrude: A modeling tool that\"s also useful in character animation for creating more complex geometries.
- Loop Cut: Adds more geometry to your models, which is essential for creating deformations in animation.
- Working with Keyframes:
- Keyframes are the backbone of animation, defining the start and end points of any movement. Insert them by pressing I and choosing the type of keyframe (location, rotation, scale).
- Animation Editors:
- Dope Sheet: Gives an overview of all keyframes in your scene. It\"s ideal for re-timing animations.
- Graph Editor: Allows for more detailed control over the interpolation of keyframes, providing the ability to fine-tune the velocity and timing of animations.
With a solid understanding of Blender\"s interface and basic tools, you\"re well on your way to creating dynamic and compelling character animations.
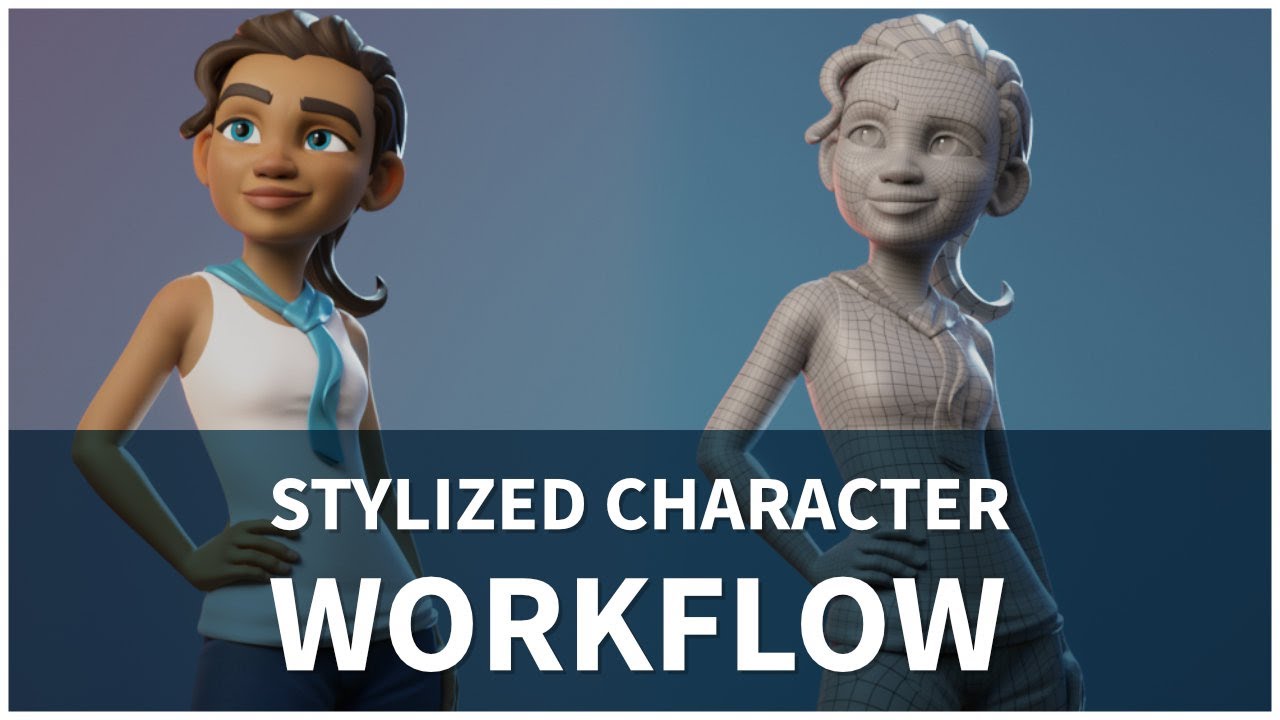
Modeling Your First Character in Blender
Creating your first character in Blender is an exciting journey. This guide will walk you through the process of modeling a character from scratch, ensuring you understand the essentials for bringing your creative visions to life.
- Start with a Plan: Before opening Blender, sketch your character or find reference images. This preparation makes modeling easier and more accurate.
- Set Up Reference Images: In Blender, use the background images feature to load your sketches or reference photos. This will guide your modeling process.
- Begin with Basic Shapes: Use simple shapes like cubes, spheres, and cylinders to block out the basic form of your character. Focus on proportions and the overall silhouette.
- Refine the Model: Start adding details by subdividing the mesh and using the sculpting tools. Pay attention to anatomical details and the character\"s distinctive features.
- Topology and Edge Loops: Ensure your model has good topology, with edge loops that follow the muscle structure and facial features. This is crucial for animation.
- Add Hands and Feet: These can be challenging, so consider using separate objects initially. Merge them with the body once you\"re satisfied with their shape.
- Final Touches: Add the finishing touches to your model, such as hair, clothes, and accessories. Use Blender\"s modifiers to aid in this process.
Modeling a character in Blender requires patience and practice. Don\"t be afraid to experiment and use the community resources available to you. Your first character is a significant step towards mastering Blender\"s powerful modeling tools.

Rigging Your Character for Animation
Rigging is a critical step in character animation, providing a skeleton that allows you to animate your model. This section breaks down the rigging process into manageable steps.
- Create the Armature: Begin by adding an armature object to your scene. This will serve as the skeleton for your character. Position the bones to match the major joints.
- Adjust Bone Placement: In edit mode, refine the placement of your bones to align with your character’s anatomy. Pay special attention to joints like the shoulders, hips, and knees.
- Name Your Bones: Properly naming bones is crucial for organization and easier animation. Use a consistent naming convention that reflects each bone\"s location and function.
- Parent Mesh to Armature: With your armature complete, select your mesh, then the armature, and use Ctrl+P to parent the mesh to the armature. Choose \"With Automatic Weights\" for Blender to calculate the influence of each bone on the mesh.
- Test the Rig: Enter pose mode and test each bone to ensure it deforms the mesh correctly. Look for areas that need weight adjustment and use weight painting to fine-tune the influence of each bone.
- Add Control Bones: For advanced control over your character\"s movements, add non-deforming control bones. These can be used for IK (Inverse Kinematics) setups or to control facial expressions.
- Finalize Your Rig: Once satisfied with the deformation and control, save your work. Your character is now rigged and ready for animation.
Rigging can be complex, but it\"s essential for bringing your character to life with animation. Take your time, and don\"t hesitate to seek out tutorials for specific rigging challenges.

_HOOK_
Creating Basic Animations and Understanding Keyframes
Creating basic animations in Blender involves learning how to use keyframes effectively. This section will guide you through the process of animating your character by manipulating keyframes.
- Understanding Keyframes: Keyframes are the cornerstone of animation in Blender. They mark the start and end points of any animation, defining the position, rotation, and scale of objects at specific frames.
- Inserting Keyframes: To create an animation, move your character or object to the desired starting position. Press \"I\" to insert a keyframe, selecting the properties you wish to animate (such as location, rotation, scale).
- Animating Movement: Move to another frame in the timeline, change the position, rotation, or scale of your object, and insert another keyframe. Blender will automatically interpolate the frames in between, creating smooth movement.
- Playback Your Animation: Use the playback controls in the Timeline window to review your animation. Adjust the start and end frame markers to loop specific sections.
- Editing Keyframes: You can adjust the timing and values of your keyframes in the Dope Sheet or Graph Editor for more precise control over the animation.
- Using the Graph Editor: The Graph Editor allows you to fine-tune the interpolation between keyframes. This is essential for achieving more natural movements and easing in and out of animations.
- Principles of Animation: Apply the 12 principles of animation, such as anticipation, squash and stretch, and timing, to add realism and appeal to your animations.
By understanding and applying these basic concepts of keyframe animation, you\"ll be able to create simple yet compelling animations that bring your Blender characters to life.

Advanced Animation Techniques: Walk Cycles and Facial Expressions
Mastering walk cycles and facial expressions are key to bringing characters to life in Blender. This section delves into advanced techniques to elevate your animation skills.
- Creating Walk Cycles:
- Understand the Cycle: A walk cycle consists of a series of frames that are looped to create continuous motion. Study real-life movements to understand the mechanics of walking.
- Blocking Out Poses: Start by blocking out the key poses: contact, down, passing, and up positions. These are the foundation of your walk cycle.
- Refining Motion: Once key poses are set, add breakdown poses and in-betweens to smooth out the motion. Pay attention to the movement of the arms, legs, and torso.
- Looping the Cycle: Ensure your first and last frames are identical (minus the root movement) to create a seamless loop.
- Animating Facial Expressions:
- Use Shape Keys: Blender\"s shape keys allow for detailed control over facial expressions by morphing the mesh. Create shape keys for common expressions like smiling, frowning, and blinking.
- Combining Shape Keys: Combine different shape keys to create complex facial expressions. Remember, subtle changes can have a significant impact.
- Lip Syncing: For dialogue, break down the speech into phonemes and create corresponding mouth shapes. Animate these shapes in sync with the audio for realistic lip-syncing.
- Adding Personality: Use these techniques to add personality and emotion to your characters. Experiment with different pacing, stride lengths, and expressions to convey character traits and mood.
Advanced animation techniques like walk cycles and facial expressions require practice and patience but are essential for creating engaging and believable characters in Blender.

Character Animation for Impatient People - Blender Tutorial
Are you tired of waiting around? Watch this video to discover how to overcome impatience and achieve a more calm and content mindset in your daily life.
How to Rig and Animate in Blender
Curious about how to bring your creations to life? This video will show you the step-by-step process of rigging and animating your characters, allowing you to add a whole new level of excitement and creativity to your projects.
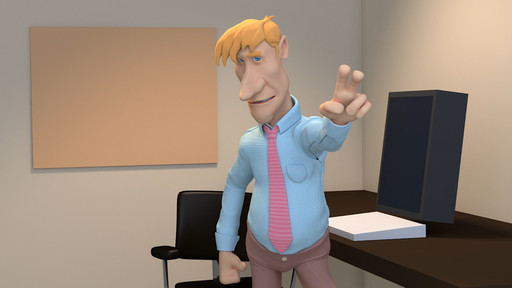
Adding Materials and Textures to Bring Your Character to Life
Materials and textures are essential for adding realism and depth to your Blender character animations. This section explores how to effectively apply these elements to enhance your creations.
- Understanding Materials: Materials define the color, shininess, and transparency of your objects. In Blender, use the Shader Editor to create and apply materials to your character.
- Selecting Textures: Textures are images or patterns applied to materials to give surfaces more detail. Choose textures that match the character’s environment and story.
- UV Mapping: UV mapping is the process of projecting a 2D image onto a 3D model. Unwrap your character model to accurately apply textures to specific areas.
- Applying Textures: Use the Shader Editor to add textures to your materials. Combine different textures for complex effects, such as skin pores, fabric patterns, or wear and tear.
- Adjusting Material Properties: Experiment with material settings like Specular, Roughness, and Bump to achieve the desired look. These adjustments can significantly affect the realism of your character.
- Using Subsurface Scattering: For skin materials, subsurface scattering (SSS) simulates light passing through surfaces. This is crucial for achieving realistic human skin.
- Lighting and Rendering: Proper lighting is vital for showcasing your materials and textures. Experiment with different lighting setups and render your scene to see how materials react under various lighting conditions.
By carefully selecting and applying materials and textures, you can bring your Blender characters to life with stunning detail and realism.
Lighting and Rendering Your Animated Character
Effective lighting and rendering are crucial for showcasing your animated character in the best possible light. This section provides a step-by-step guide to lighting your scene and rendering your animation in Blender.
- Choosing a Lighting Setup: Begin by selecting a lighting setup that complements your character and scene. Three-point lighting is a versatile and commonly used technique that includes key light, fill light, and back light.
- Adjusting Light Properties: Experiment with the properties of each light source, such as intensity, color, and distance. These adjustments can dramatically affect the mood and visual appeal of your scene.
- Using HDRI for Environmental Lighting: HDRI (High Dynamic Range Imaging) can be used for realistic environmental lighting. It simulates lighting from the real world, providing a natural feel to outdoor scenes.
- Setting Up Cameras: Position and angle your cameras to capture the best views of your character. Consider using multiple camera angles for dynamic shots.
- Configuring Render Settings: In Blender\"s Render Settings, choose your render engine (Cycles or Eevee for different quality and speed), set the resolution, and determine the number of samples for rendering.
- Applying Post-Processing Effects: Use Blender’s Compositor to apply post-processing effects like color grading, blur, or glare to enhance the final image or animation.
- Rendering Your Animation: Finally, render your animation. This can be time-consuming, especially for high-quality renders, so consider rendering overnight or using a render farm.
With the right lighting and rendering techniques, you can create visually stunning animations that highlight your character’s details and bring your creative vision to life.
Tips for Realistic Animations: Weight, Timing, and Anticipation
Creating realistic animations requires a deep understanding of weight, timing, and anticipation. These elements are essential for adding believability and life to your animations. Follow these tips to enhance the realism of your Blender animations.
- Conveying Weight:
- Use exaggerated poses and timing to convey the weight of objects and characters. Heavier objects should move slower and have more impact upon interaction. Pay attention to how weight shifts during movement.
- Mastering Timing:
- Timing is crucial for the flow of your animation. Adjust the spacing of your keyframes to speed up or slow down movements. Slow in and out of key poses to create more dynamic and natural motion.
- Incorporating Anticipation:
- Anticipation is the action that precedes the main action, such as winding up before a punch. It prepares the viewer for what’s coming next and adds to the realism of movements.
- Observing Real Life:
- Study real-life movements and interactions. Observing how people and objects move in reality can greatly inform your animation and help you replicate natural motion.
- Using Reference Videos:
- Shoot reference videos for complex actions. Acting out movements yourself or studying videos can provide insights into timing, weight, and anticipation.
- Practicing Squash and Stretch:
- This principle adds flexibility and weight to your animations. Apply squash and stretch to give a sense of fleshiness and elasticity, especially in character movements and expressions.
- Feedback and Iteration:
- Seek feedback from other animators and iterate on your animations. Fresh perspectives can help identify areas for improvement that you might have missed.
By focusing on weight, timing, and anticipation, you can create Blender animations that resonate with viewers and bring your characters to life in a believable way.

_HOOK_
READ MORE:
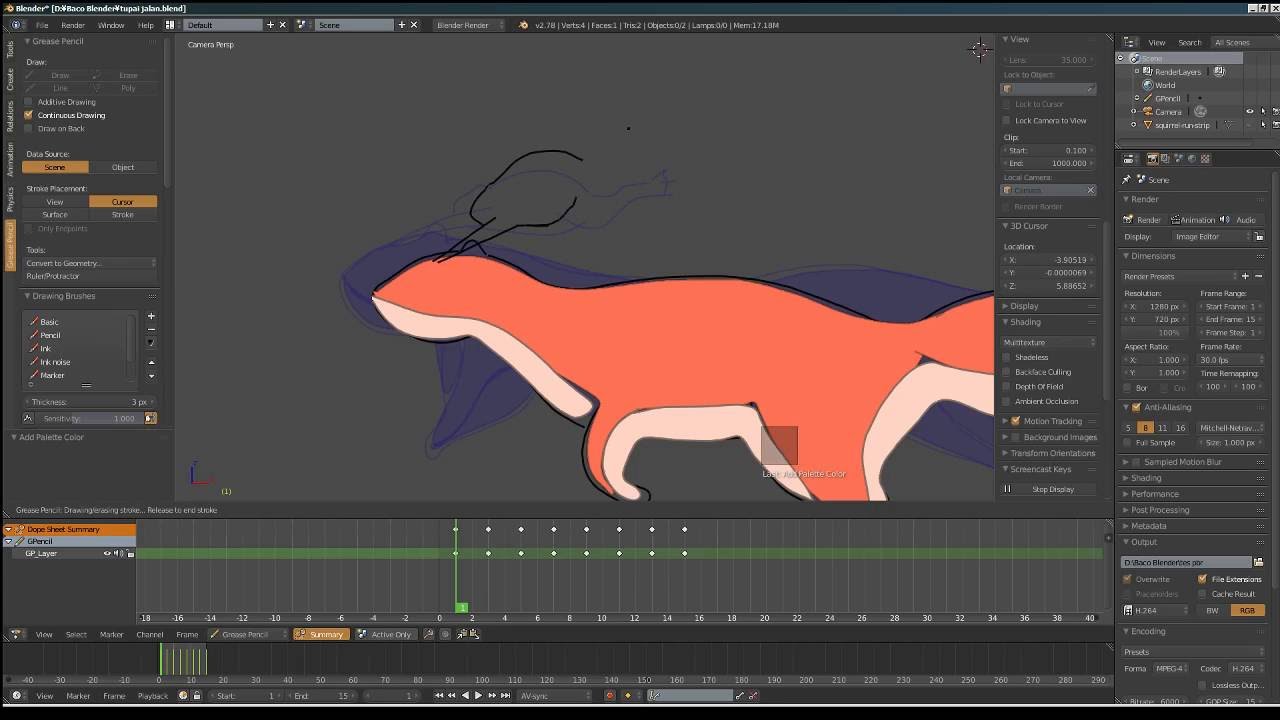
Exporting Your Animation for the World to See
Once you\"ve completed your animation, the final step is to export it for sharing with the world. This section guides you through the process of exporting your Blender animation into a video format that can be easily distributed and viewed.
- Choosing the Right Format:
- Select a video format that balances quality and file size. Popular formats include MP4 (using H.264 codec) for its wide compatibility and balance of quality and compression.
- Setting Output Properties:
- In Blender\"s Output Properties panel, set your desired resolution, frame rate, and aspect ratio. Ensure these settings match your animation project\"s requirements and the intended viewing platform.
- Configuring Encoding Settings:
- Adjust the encoding settings to fine-tune the quality and size of your exported video. Higher bitrates generally result in better quality but larger file sizes.
- Adding Sound:
- If your animation includes sound, ensure the audio codec is set correctly and that the audio file is properly linked within Blender.
- Exporting the Animation:
- With all settings configured, go to Render > Render Animation or press Ctrl+F12 to start the export process. Depending on the length and complexity of your animation, this may take some time.
- Reviewing Your Exported Video:
- After exporting, watch your video in its entirety to ensure there are no errors or issues. Check both visual and audio components for quality and synchronization.
- Sharing Your Work:
- Now that your animation is exported, share it with the world. Consider platforms like YouTube, Vimeo, or social media for showcasing your work. Don\"t forget to engage with your audience and gather feedback!
Exporting is the final step in the animation process, turning your Blender project into a shareable video masterpiece. Follow these steps to ensure your animation reaches your audience in the best possible quality.
Embark on a creative journey with Blender to bring your animated characters to life. Explore, experiment, and share your masterpieces, pushing the boundaries of your imagination and animation skills.