Topic blender animation character tutorial: Embark on a journey to master Blender animation and character creation with our comprehensive tutorial, designed to guide beginners through every step of bringing their imaginative characters to life.
Table of Content
- How to rig a character for animation in Blender?
- Getting Started with Blender for Character Animation
- Understanding Blender\"s Interface and Basic Tools
- Modeling Your First Character in Blender
- Texturing and Materials: Bringing Your Character to Life
- Rigging Your Character for Animation
- YOUTUBE: Become a PRO at Animation in 25 Minutes Blender Tutorial
- Basic Animation Principles in Blender
- Creating a Walk Cycle and Simple Animations
- Advanced Animation Techniques: Facial Expressions and Lip Sync
- Lighting and Rendering Your Animated Character
- Exporting Your Animation for Sharing
- Tips and Tricks for Efficient Animation Workflow
- Resources for Further Learning and Inspiration
How to rig a character for animation in Blender?
To rig a character for animation in Blender, you can follow these steps:
- Create or import the character model into Blender.
- Select the character model and switch to Edit Mode.
- Select the bones you want to create for your character, for example, spine, arms, legs, etc.
- Press Ctrl + P to open the Parenting menu, and select With Automatic Weights.
- Switch to Pose Mode to start working with the rig.
- Adjust the position and orientation of the bones to match your character.
- Add IK (Inverse Kinematics) constraints to the appropriate bones to control the character\'s movements more easily.
- Create and assign weight paint to determine how the character\'s mesh deforms with the rig.
- Refine the rig by adding additional constraints or modifiers if necessary.
- Test the rig by posing and animating the character to ensure it moves as expected.
By following these steps, you can rig a character for animation in Blender and have full control over its movements and poses.
READ MORE:
Getting Started with Blender for Character Animation
Embarking on your Blender character animation journey begins with understanding the basics of Blender. This section will guide you through setting up Blender for the first time, familiarizing you with its interface, and preparing you for character creation.
- Download and Install Blender: Ensure you have the latest version of Blender installed from the official Blender website. It\"s free and open-source.
- Familiarize Yourself with the Interface: Spend some time getting to know Blender\"s interface. Look into the 3D viewport, timeline, outliner, and properties panel.
- Customize Preferences: Access the Preferences menu to customize your settings. This can include input devices, keymaps, and theme colors to suit your workflow.
- Learn Basic Navigation: Practice navigating the 3D viewport using your mouse and keyboard shortcuts. Mastering zoom, pan, and rotate is essential.
- Introduction to Basic Tools: Identify and use basic modeling tools such as extrude, scale, and rotate. These will be crucial for character modeling.
- Understanding Object and Edit Modes: Learn the difference between Object Mode (for selecting and manipulating entire objects) and Edit Mode (for editing the vertices, edges, and faces of a single object).
By completing these initial steps, you\"ll have a solid foundation to start creating your own animated characters in Blender. Remember, practice and experimentation are key to mastering Blender\"s comprehensive toolset.

Understanding Blender\"s Interface and Basic Tools
Navigating Blender\"s interface efficiently is key to a successful character animation project. This section delves into the essential components and tools you need to understand to create animated characters effectively.
- 3D Viewport: The heart of Blender, where you\"ll spend most of your time modeling, texturing, and animating your characters. Learn to rotate, pan, and zoom within this space to view your creations from all angles.
- Timeline: Found at the bottom of the interface, the timeline allows you to control the animation frames, set keyframes, and play back your animations.
- Outliner: This hierarchical view lists all the objects in your scene, helping you organize and select different elements of your animation project.
- Properties Panel: Here, you can adjust object properties, including modifiers, materials, and physics settings, to add complexity and detail to your characters.
- Tools Shelf and Properties Shelf: Accessible by pressing T and N in the 3D viewport, these shelves offer quick access to tools and properties related to the selected object or scene.
Additionally, familiarize yourself with basic tools such as:
- Extrude (E): For extending faces, edges, or vertices.
- Loop Cut (Ctrl+R): Adds more geometry by inserting a loop of edges.
- Scale (S): To resize selected elements.
- Rotate (R): To rotate elements around a pivot point.
- Grab/Move (G): To reposition elements in the 3D space.
Mastering these aspects of Blender\"s interface and basic tools will significantly enhance your efficiency and creativity when designing and animating characters.

Modeling Your First Character in Blender
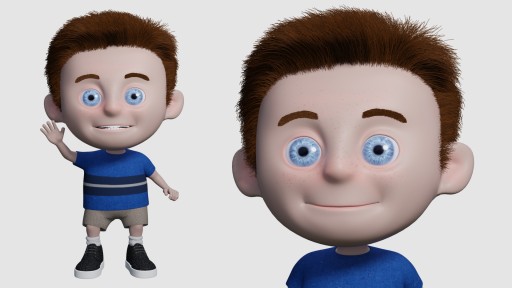
Creating your first character in Blender is an exciting step towards becoming a skilled animator. This section will guide you through the process of modeling a basic character, focusing on essential techniques and strategies.
- Start with a Reference Image: Import reference images of your character from different views to guide your modeling process.
- Create a Base Mesh: Begin with a simple shape, like a cube or sphere, and use it as the foundation for your character. Use the subdivision surface modifier to add complexity.
- Shape the Body: Use the extrude, scale, and grab tools to shape the basic form of your character\"s body, limbs, and head.
- Add Details: Refine your character by adding details such as eyes, mouth, and clothing. Remember to keep topology in mind for animation purposes.
- Subdivision and Sculpting: Apply a subdivision surface modifier to smooth out the mesh. Use Blender\"s sculpting tools for finer details.
- Retopology: For complex characters, consider retopologizing your mesh to ensure a clean, animation-friendly topology.
- Materials and Textures: Once your model is complete, begin applying basic materials to define colors and textures.
Throughout this process, it\"s crucial to periodically review your model\"s proportions and anatomy to ensure accuracy and realism. With patience and practice, you\"ll be able to model engaging and expressive characters in Blender.

Texturing and Materials: Bringing Your Character to Life
Texturing and applying materials are crucial steps in character creation, transforming your model into a vivid, lifelike figure. This section covers the essentials of texturing and material application in Blender, ensuring your character stands out.
- Understanding Materials: Learn how to create and apply materials in Blender. Materials define the color, shininess, and transparency of your character\"s surfaces.
- UV Mapping: Unwrap your character model to create a UV map. This process allows you to apply 2D textures accurately to the 3D surface.
- Selecting Textures: Choose or create textures that match your character\"s look and feel. Consider using image textures for skin, clothing, and details like scars or tattoos.
- Applying Textures: Use the UV map to apply your selected textures to the character. Adjust scale and position to get the perfect fit.
- Shaders and Nodes: Dive into Blender\"s shader editor to create complex materials using nodes. Combining different nodes can simulate a wide range of material properties.
- Bump and Normal Maps: Add depth and detail to your textures with bump and normal maps. These maps simulate the illusion of surface irregularities without adding geometry.
- Subsurface Scattering: For realistic skin textures, utilize subsurface scattering to simulate light passing through translucent materials.
By carefully selecting and applying textures and materials, you can add depth, realism, and personality to your Blender characters. Experiment with different techniques to achieve the desired effect for your project.

_HOOK_
Rigging Your Character for Animation
Rigging is the process of creating a skeleton for your character so that it can be animated. This section explains how to rig a character in Blender, setting the stage for bringing your creations to life through animation.
- Create an Armature: Start by adding an armature to your character. This armature acts as the skeleton that will control the character\"s movements.
- Positioning Bones: Place bones in key parts of the character, such as limbs, spine, and head. Ensure bones are correctly aligned with the character\"s anatomy for realistic movement.
- Parenting Mesh to Armature: Parent your character\"s mesh to the armature using automatic weights to allow the bones to control the mesh during animation.
- Weight Painting: Fine-tune the influence of each bone on the mesh through weight painting. This step is crucial for achieving smooth and natural deformations.
- Adding Constraints: Use constraints to limit the movement of bones and automate complex actions like inverse kinematics (IK), making the rig easier to animate.
- Testing the Rig: Pose your character in various positions to test the rig\"s functionality. Adjust weights and bone positions as needed to correct any issues.
- Organizing the Rig: For complex characters, organize your rig into layers and groups for easier animation control. This can include separating facial bones, IK controls, and FK (forward kinematics) controls.
Successful rigging is key to animating your character effectively. It requires patience and attention to detail, but the reward is a character that moves and behaves realistically in your animated scenes.
Become a PRO at Animation in 25 Minutes Blender Tutorial
Get ready to be mesmerized by the captivating world of animation! This video will take you on a magical ride through stunning visuals, vibrant colors, and enchanting storytelling that will leave you in awe. Don\'t miss out on this opportunity to immerse yourself in the art of animation!
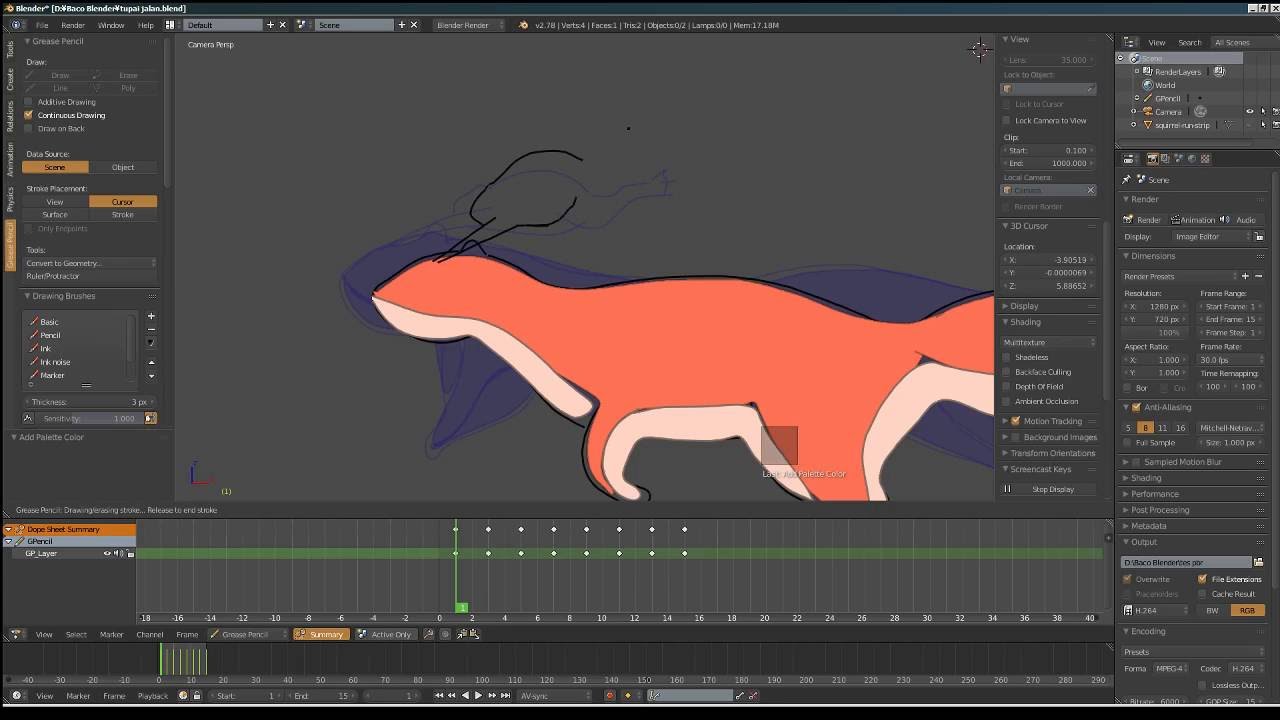
Character Animation Blender 3.2 Beginner Tutorial
Dive into a world filled with captivating characters that will steal your heart! This video introduces you to a lovable and relatable cast that will make you burst out in laughter, shed happy tears, and feel a deep connection. Join these unforgettable characters on their journey of growth, adventure, and friendship. You\'re in for an incredible ride!
Basic Animation Principles in Blender
Understanding the basic principles of animation is essential for creating dynamic and believable character movements in Blender. This section introduces you to these foundational concepts and how to apply them within Blender.
- Squash and Stretch: This principle gives your character a sense of weight and flexibility. In Blender, you can manipulate the scale of objects or bones to achieve this effect.
- Anticipation: Before any significant movement, a small motion in the opposite direction can add realism. Use keyframes to set up these preparatory actions.
- Staging: Use the camera effectively to frame your action, ensuring the viewer\"s focus is on what\"s important. Experiment with camera angles and positions.
- Straight Ahead and Pose-to-Pose Animation: Blender allows for both techniques. Straight ahead animation creates a more fluid, dynamic action, while pose-to-pose is better for dramatic or structured movements.
- Follow Through and Overlapping Action: These principles add realism to movement. Animate secondary elements like hair or clothing to move slightly after the main body part has stopped.
- Slow In and Slow Out: Movement starts slowly, accelerates, and then slows down before stopping. Adjust the spacing of your keyframes in Blender to achieve this effect.
- Arcs: Natural movements tend to follow an arc. Use Blender\"s graph editor to ensure that movements, especially limbs and head turns, follow a curved path.
- Secondary Action: Add smaller actions that complement the main action to add depth to your animation. This could be a facial expression or a hand gesture.
- Timing: The number of frames between actions determines the speed of the movement. Play with timing to convey the mood and physical laws of your animated world.
- Exaggeration: To convey emotion and clarity, sometimes realism needs to be sacrificed for exaggeration. Push poses and facial expressions further for a more engaging animation.
- Solid Drawing: Understanding three-dimensional space is crucial. Blender\"s 3D view helps you to ensure your characters are properly proportioned and positioned within the scene.
- Appeal: Characters should have a personality and be interesting to look at. Use Blender\"s sculpting and texturing tools to add details that make your character stand out.
By applying these principles, you can create animations that are not only technically proficient but also emotionally engaging and entertaining.
Creating a Walk Cycle and Simple Animations
Animating a walk cycle is a fundamental skill in character animation. This section guides you through creating a basic walk cycle and other simple animations in Blender, providing a solid foundation for more complex movements.
- Understanding the Walk Cycle: A walk cycle typically consists of 8 keyframes: the contact positions, down positions, passing positions, and up positions for each foot.
- Setting Up Keyframes: Start by positioning your character in the first contact position and insert a keyframe. Proceed to create keyframes for each of the 8 critical positions of the walk cycle.
- Timing and Spacing: Adjust the timing between keyframes to control the speed of the walk. The spacing of the character’s steps can add personality to the walk.
- Inbetween Frames: Use Blender\"s inbetweening (tweening) tools to smooth out the animation between keyframes, creating fluid movement.
- Refining the Cycle: Review and refine the cycle by adjusting the keyframes and tweening as necessary to ensure a natural motion.
- Looping the Animation: Make your walk cycle loop seamlessly by copying the first keyframe to the end of your animation timeline.
- Adding Upper Body Movement: Once the legs are animated, add movement to the arms, torso, and head to complete the walk cycle.
- Creating Simple Animations: Apply the principles learned in the walk cycle to other basic animations, such as running, jumping, or waving.
- Experimenting with Emotion: Vary the speed, stride length, and posture to convey different emotions or characteristics through the walk cycle.
Mastering a walk cycle and simple animations is a crucial step towards bringing your characters to life. Practice and experimentation are key to developing fluid, realistic animations in Blender.
Advanced Animation Techniques: Facial Expressions and Lip Sync
Creating believable facial expressions and synchronizing lip movements with speech are advanced animation skills that can bring your characters to life. This section delves into techniques for animating facial expressions and achieving accurate lip sync in Blender.
- Understanding Facial Rigging: For facial animation, a detailed rig with bones or shape keys for different facial features is essential. Ensure your rig includes controls for eyebrows, eyes, mouth, and jaw.
- Creating Shape Keys: Shape keys (also known as blend shapes) allow for smooth transitions between different facial expressions. Create a set of key expressions, such as smiling, frowning, and blinking.
- Animating Expressions: Use the created shape keys to animate expressions by transitioning between different states over time.
- Lip Sync Basics: For lip sync, start by breaking down the dialogue into phonemes (distinct units of sound). Create shape keys for these phonemes.
- Synchronizing Dialogue: With the audio track imported into Blender, synchronize the mouth shapes with the spoken words by adjusting the timing of the shape keys.
- Using Addons for Lip Sync: Consider using Blender addons designed to simplify the lip-sync process by automatically matching mouth shapes to audio files.
- Combining Expressions and Lip Sync: For natural-looking animation, combine facial expressions with lip movements. Adjust the intensity of expressions to match the tone of the dialogue.
- Facial Animation with Bones: For more complex rigs, use bones to control facial movements. This allows for more nuanced animations, such as asymmetric smiles or eyebrow raises.
- Practice and Reference: Study real-life facial expressions and mouth movements. Use video references to capture the subtleties of human emotions and speech.
Mastering facial expressions and lip sync requires patience and attention to detail. By applying these advanced techniques, you can add depth and realism to your character animations in Blender.

Lighting and Rendering Your Animated Character
Lighting and rendering are crucial steps in the animation process, transforming your character from a 3D model into a compelling, visually engaging entity. This section covers essential techniques for lighting your scene and rendering your animated character in Blender.
- Understanding Blender\"s Lighting: Familiarize yourself with Blender\"s lighting options, including point, sun, and spot lights. Experiment with their settings to understand how they affect your scene.
- Three-Point Lighting: Utilize the three-point lighting technique to enhance your character\"s appearance. This involves a key light, fill light, and back light to create depth and dimension.
- Soft Shadows: Adjust the size and softness of your lights to create more realistic shadows. Soft shadows can add a level of realism to your character animations.
- Environment Lighting: For outdoor scenes, consider using HDRI images to simulate realistic environmental lighting. This can add a natural ambiance to your scene.
- Material and Texture Lighting: Ensure your character\"s materials and textures are well-lit. Adjust the lighting to highlight the details in your character\"s texture work.
- Rendering Settings: Explore Blender\"s rendering engines, such as Eevee and Cycles. Each offers different advantages for speed and realism.
- Render Samples: Increase the number of render samples for higher quality images, especially when using the Cycles engine for a more realistic outcome.
- Output Settings: Configure your rendering output settings, including resolution, frame rate, and file format, to match your project requirements.
- Post-Processing: Use Blender\"s Compositor for post-processing effects, such as color grading, blur, or glare, to enhance the final image.
- Batch Rendering: For animations, set up batch rendering to automate the rendering process of your frames, saving time and effort.
By carefully considering the lighting and rendering of your animated character, you can significantly improve the visual impact and professionalism of your final project.
_HOOK_
Exporting Your Animation for Sharing
Once you\"ve completed your animation, the final step is to export it for sharing or publishing. This section guides you through the process of exporting your animation from Blender, ensuring it\"s ready for viewing on various platforms.
- Choose the Right Format: Decide on the appropriate file format based on where you plan to share your animation. Common formats include MP4 for web and social media, and MOV for higher quality presentations.
- Setting Up Render Properties: Adjust your render properties, including resolution, frame rate, and aspect ratio, to match your target platform\"s requirements.
- Output Settings: In the Output Properties panel, set your output path and file format. For animations, formats like FFmpeg video allow for a wide range of codecs and settings.
- Compression Settings: Choose your codec and compression rate wisely to balance between quality and file size. H.264 is a widely compatible codec for MP4 files.
- Audio Export: If your animation includes sound, ensure the audio codec is set correctly and that the audio is included in your export settings.
- Batch Rendering: For longer animations, consider using Blender\"s batch rendering feature to automate the rendering process of all frames.
- Testing Before Final Export: Export a short segment of your animation first to test the settings and ensure the output meets your expectations.
- Exporting Your Animation: Once all settings are configured, render your animation. Blender will process each frame, resulting in a final video file.
- Review and Share: Review the exported animation for any issues. Once satisfied, share your creation on your chosen platform, whether it be social media, a website, or directly with others.
Exporting your animation is a crucial step in the animation process, allowing you to share your creative work with the world. Follow these steps to ensure your animation looks its best on any platform.
Tips and Tricks for Efficient Animation Workflow
Maximizing efficiency in your animation workflow can save time and enhance the quality of your projects. Here are practical tips and tricks for streamlining your animation process in Blender.
- Use Keyboard Shortcuts: Learning Blender\"s keyboard shortcuts can significantly speed up your workflow. Familiarize yourself with shortcuts for common actions to reduce reliance on the mouse.
- Organize Your Scene: Use collections and layers to organize your scene. This makes it easier to manage complex projects by hiding or isolating parts of the model or animation.
- Utilize Proxies and Placeholders: For complex scenes, use proxy models or placeholders during the initial stages of animation to improve viewport performance.
- Implement Libraries for Reusable Assets: Create libraries of reusable models, rigs, materials, and animations to speed up production on future projects.
- Batch Operations: Use Blender\"s batch operations for repetitive tasks, such as rendering or applying transformations, to save time.
- Use Add-ons: Blender\"s community and developers offer a wide range of add-ons that can automate tasks or add new functionalities to your workflow.
- Keep Your Rig Simple: A complex rig can slow down animation work. Keep your rigs as simple as possible while maintaining the necessary control for your animations.
- Plan Your Animation: Spend time planning your animation before starting. A clear storyboard or animatic can guide your process and prevent time-consuming revisions.
- Optimize Render Settings: Experiment with render settings to find a balance between quality and rendering time. Consider using Eevee for previews and Cycles for final renders.
- Stay Updated: Blender is continuously being updated with new features and improvements. Stay updated with the latest versions and community tutorials to leverage new tools and workflows.
By incorporating these tips into your Blender animation workflow, you can work more efficiently, allowing more time to focus on creativity and quality.
READ MORE:
Resources for Further Learning and Inspiration
Expanding your skills and finding inspiration is crucial for growth in character animation. Below are resources to deepen your knowledge and spark creativity in your Blender projects.
- Blender Official Tutorials: The Blender Foundation offers extensive tutorials on its website and YouTube channel, covering everything from basics to advanced techniques.
- Online Courses and Workshops: Platforms like Udemy, Coursera, and CG Cookie provide comprehensive courses on Blender animation, catering to various skill levels.
- Blender Community Forums: Participate in forums like Blender Artists and the Blender Community on Reddit to exchange ideas, receive feedback, and connect with other animators.
- Inspirational Artwork: Websites like ArtStation and Behance feature works from talented Blender artists, offering a wealth of inspiration and insight into what\"s possible with the tool.
- Books on Blender: Consider reading books dedicated to Blender, such as \"Blender For Dummies\" or \"Learning Blender: A Hands-On Guide to Creating 3D Animated Characters.\"
- Blender Add-ons: Explore the variety of add-ons available for Blender, which can extend its functionality and streamline specific tasks in animation.
- Animation Challenges and Contests: Participating in online challenges and contests can be a great way to push your limits and gain visibility in the community.
- Follow Blender Artists on Social Media: Many skilled Blender artists share their work and tutorials on social media platforms like Instagram, Twitter, and YouTube.
- Blender Conferences and Meetups: Attending Blender conferences, either virtually or in person, can provide valuable learning opportunities and the chance to network with professionals.
- Practice Projects: Applying what you learn through personal projects or recreating scenes from your favorite animations can be a practical way to improve your skills.
With the right resources at your disposal, you can continuously improve your Blender animation skills, stay motivated, and bring your creative visions to life.
Dive into the world of Blender and unleash your creative potential with character animation. Our comprehensive guide empowers you to bring your unique visions to life, inspiring you to explore, create, and share your animated stories.