Topic how to create a blender animation: Embark on a creative journey to master Blender animation, transforming your ideas into stunning 3D visuals and captivating stories. Start creating today!
Table of Content
- How to create a Blender animation?
- Understanding Blender\"s Interface and Setup
- Choosing the Right Project Settings for Animation
- Modeling Your Characters and Environments
- Texturing and Materials: Bringing Your Animation to Life
- Rigging: Preparing Your Characters for Animation
- Animating Your Characters and Objects
- YOUTUBE: Animation for Beginners - Blender Tutorial
- Using Blender\"s Animation Tools and Features
- Lighting and Camera Setup for Animation
- Rendering Your Animation in Blender
- Post-Production: Editing and Final Touches
How to create a Blender animation?
To create a Blender animation, follow these steps:
- Create a new project in Blender by opening the software.
- Begin by modeling objects or characters that you want to animate. You can use the various tools and techniques available in Blender to create your 3D models.
- Once your models are ready, position them in the desired starting position for your animation.
- Next, set keyframes to define the motion of your objects or characters. Keyframes are used to mark specific points in the animation where you want a change in position, rotation, or any other attribute.
- Move the timeline to a specific frame where you want to make a change in the animation.
- Select the object or character you want to animate and modify its attributes or position.
- After making the desired changes, set another keyframe to capture the new state of the object at that frame.
- Repeat steps 5-7 to add more keyframes and make further changes at different frames to create smooth motion.
- Preview your animation by playing the timeline to ensure it looks as desired.
- Once you are satisfied with your animation, you can render it as a video file or in any other desired format supported by Blender.
READ MORE:
Understanding Blender\"s Interface and Setup
Getting started with Blender animation begins with familiarizing yourself with its interface and setting up your project correctly. Here\"s how:
- Launch Blender: Open Blender. The default screen presents various areas: 3D Viewport, Timeline, Outliner, and Properties.
- 3D Viewport: This is where you\"ll spend most of your time, creating and manipulating objects.
- Timeline: Located at the bottom, it\"s crucial for animation, allowing you to control the playback of your animations.
- Outliner: On the right, this displays all objects in your scene in a hierarchical list, making it easy to select and manage them.
- Properties: Also on the right, this area lets you adjust settings for objects, materials, render settings, and more.
- Adjusting Preferences: Go to Edit > Preferences to customize Blender\"s interface to suit your workflow. Consider enabling addons, setting up keymaps, and adjusting themes.
- Setting Up Your Scene: Before starting, adjust your scene settings in the Properties panel. This includes choosing the render engine (Eevee or Cycles), setting the frame rate, resolution, and other project-specific settings.
- Save Your Project: Regularly save your work by going to File > Save As. Create a naming convention for versions to keep your work organized.
With these steps, you\"re now ready to begin modeling, texturing, and animating within Blender. Familiarity with the interface and a properly set up project are foundational to a successful animation workflow.

Choosing the Right Project Settings for Animation
Setting the right project settings is crucial for creating effective Blender animations. Follow these steps to ensure your animations are set up for success:
- Frame Rate: Determine the frame rate for your project. Standard rates include 24, 30, or 60 frames per second (fps). Choose based on the final look you desire; 24fps for a cinematic feel, 30fps for TV and online videos, and 60fps for high frame rate animations.
- Resolution: Set your project\"s resolution. HD (1920x1080) is commonly used, but you may opt for 4K (3840x2160) for higher quality projects. Consider the final output medium and performance capabilities of your computer.
- Aspect Ratio: Choose an aspect ratio. Common ratios include 16:9 for widescreen displays and 4:3 for standard displays. Your choice should align with where and how your animation will be viewed.
- Output Format: Decide on the output format. Blender supports multiple formats, including AVI, MPEG, and MOV. Consider compatibility with your editing software and the final distribution platform.
- Color Management: Configure color settings to ensure your animation looks consistent across different devices. Utilize Blender\"s color management tools to match your project\"s needs, adjusting for sRGB, Rec. 709, or custom color spaces.
- Sampling: For projects using Cycles renderer, set your sampling rates. Higher samples reduce noise but increase rendering time. Balance quality with rendering efficiency based on your project\"s requirements.
By carefully selecting these settings, you can ensure that your Blender animations are optimized for quality, performance, and compatibility, laying a solid foundation for your creative work.

Modeling Your Characters and Environments
Modeling is the foundation of creating your characters and environments in Blender animation. Follow these detailed steps to model your vision into reality:
- Start with Reference Images: Import reference images for your characters and environments to guide your modeling. Use them as backgrounds in your 3D viewport for accuracy.
- Basic Shapes: Begin by creating basic shapes that outline your character or environment. Use Blender\"s mesh tools like cubes, spheres, and cylinders to block out forms.
- Editing Mode: Switch to Edit Mode to refine your shapes. Use extrude, loop cut, and other editing tools to add detail to your model.
- Modifiers: Utilize modifiers such as Subdivision Surface to smooth out your models and add complexity without manual detail work.
- Sculpting: For characters, switch to Sculpt Mode to add finer details like facial features or muscle definition. Use various brushes to mold your model like clay.
- Retopology: For high-detail models, consider retopology to create a lower-polygon mesh that\"s easier to animate. Use the Shrinkwrap modifier or retopology tools.
- Materials and Textures: Once modeling is complete, begin applying materials and textures to your models. This adds color, realism, and depth to your characters and environments.
- Lighting: Early in the process, start experimenting with lighting to see how your models will appear under different conditions. This can influence your modeling choices.
Modeling in Blender is an iterative process. Continuously refine your models, add details, and adjust proportions as you progress towards your final vision. With practice, you\"ll bring complex characters and environments to life, ready for animation.
Texturing and Materials: Bringing Your Animation to Life
Adding textures and materials is a pivotal step in transforming your Blender models into lifelike animations. Follow this guide to enhance your creations:
- Understand Material Basics: Start by creating a new material in the Material Properties panel. Blender offers a variety of shaders to simulate different physical properties.
- Selecting Textures: Textures can be images or procedurally generated patterns. Use them to add detail to your materials, such as color, bumpiness, or reflectivity.
- UV Mapping: For image textures, UV mapping is crucial. It involves unwrapping your 3D model so that a 2D image can be accurately applied to its surface.
- Shading: Utilize Blender’s node editor to create complex material effects. Combine different shaders, textures, and nodes to achieve the desired look for your material.
- Bump and Normal Maps: These textures simulate surface irregularities without modifying the mesh. Apply them for realistic bumps and dents.
- Emissive Materials: To make objects glow, use emissive materials. This is especially useful for screens, lights, or magical effects in your animations.
- Transparency and Reflection: Control the transparency and reflectivity of materials for effects like glass, water, or shiny surfaces.
- Environmental Textures: Use HDRI images for realistic lighting and reflections on your objects. They provide a global environment light source.
Experimenting with different textures and materials can dramatically change the appearance of your animation. Take your time to test various combinations to achieve the most realistic and visually appealing results.

_HOOK_
Rigging: Preparing Your Characters for Animation
Rigging is the process of creating a bone structure for your character, allowing you to animate them with realistic movements. Follow these steps to rig your characters in Blender:
- Create Armature: Start by adding an armature to your character. Armatures are the bones of your rig. Place bones at key points like joints.
- Edit Bones: In Edit Mode, adjust the size and orientation of your bones to match the anatomy of your character. Make sure each bone is correctly positioned for natural movement.
- Parent Mesh to Armature: With your armature in place, parent your character\"s mesh to the armature. Use automatic weights to allow Blender to calculate the influence of each bone on the mesh, or manually paint weights for finer control.
- IK Constraints: For easier control over limbs, add Inverse Kinematics (IK) constraints to your armature. IK constraints allow you to animate movement by controlling only the end-effector (like a hand or foot) instead of adjusting each joint individually.
- Test Movements: Before moving on, pose your character in various positions to ensure the rig behaves naturally. Adjust weights and bone constraints as needed to fix any deformation issues.
- Custom Controls: Create custom shape controls for your armature to make animation easier. These controls can be anything from simple circles to more complex shapes that represent the function of the control (e.g., a hand icon for hand control).
- Organize Your Rig: Use layers to organize different parts of your armature, such as facial controls, body controls, and IK controls. This keeps your workspace tidy and your rig easy to navigate.
With a properly rigged character, animating becomes a straightforward task of posing your character. Rigging is a critical step in bringing your creations to life with natural and convincing movements.

Animating Your Characters and Objects
Animating in Blender brings your characters and objects to life. This section will guide you through the basic steps to create your first animation:
- Understanding Keyframes: Keyframes are essential in animation, marking the start and end points of any movement. Position your character or object at the start of the movement, select all relevant bones or objects, and press I to insert a keyframe. Choose the type of data you want to keyframe, such as location, rotation, or scale.
- Creating Movement: Move your timeline to another frame, reposition your character or object to where you want them to be at this point in time, and insert another keyframe.
- Playback Animation: Use the timeline\"s play button to review your animation. Adjust the keyframes as needed to smooth out movements or alter timing.
- Using the Graph Editor: For more control over the animation, use the Graph Editor to adjust the interpolation of keyframes. This allows for smoother transitions and more nuanced control of movement.
- Adding More Complexity: As you become more comfortable, start adding more keyframes to create complex sequences. Utilize Blender\"s Dope Sheet to manage and refine these keyframes across your animation.
- Looping Animations: For animations that need to loop, ensure the first and last keyframes are identical. You can copy keyframes in the Dope Sheet to create seamless loops.
- Incorporating Sound: To add audio to your animation, use the Video Sequence Editor (VSE) in Blender. This allows you to sync your animation with sound effects or music.
Animating characters and objects is a creative process that requires practice and experimentation. Start with simple movements to understand the basics and gradually move on to more complex animations as your skills improve.
Animation for Beginners - Blender Tutorial
Discover the incredible power of Blender as you dive into this mind-blowing video showcasing the limitless possibilities of 3D animation. Prepare to be amazed by the stunning visual effects, realistic textures, and seamless character movements created with the help of this groundbreaking software. Get ready for a jaw-dropping experience that will take your visual storytelling skills to new heights!
Using Blender\"s Animation Tools and Features
Blender offers a comprehensive suite of animation tools and features designed to bring your projects to life. Here\"s how to leverage some of Blender\"s most powerful animation capabilities:
- Keyframing: Keyframes are the cornerstone of animation, capturing the position, rotation, and scale of objects at specific points in time. Insert keyframes manually for precise control over your animations.
- Dope Sheet: The Dope Sheet provides an overview of all keyframes and animations in your scene. Use it to adjust timing, duplicate keyframes, or manage animation actions.
- Graph Editor: For fine-tuning animations, the Graph Editor displays keyframe data as curves. Adjust these curves to smooth or modify the acceleration and deceleration of your animations.
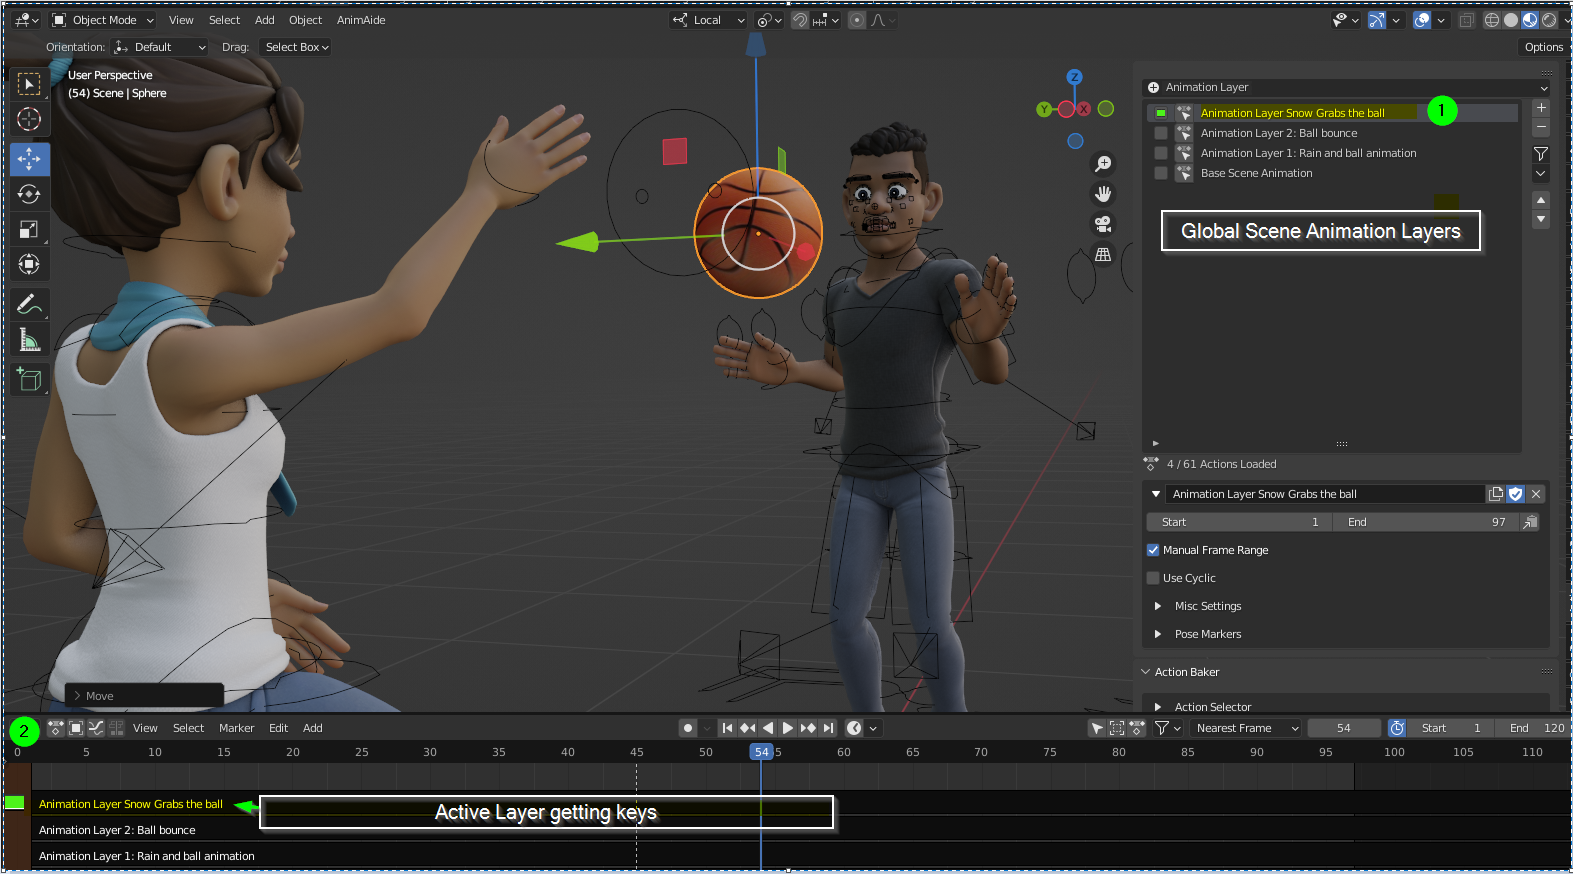
- NLA Editor: The Non-Linear Animation (NLA) Editor allows you to layer and blend different animation sequences. This is particularly useful for complex animations that require the combination of multiple actions.
- Shape Keys: Shape keys are used to deform objects in a smooth transition between different states. They are often used for facial expressions and morphing objects.
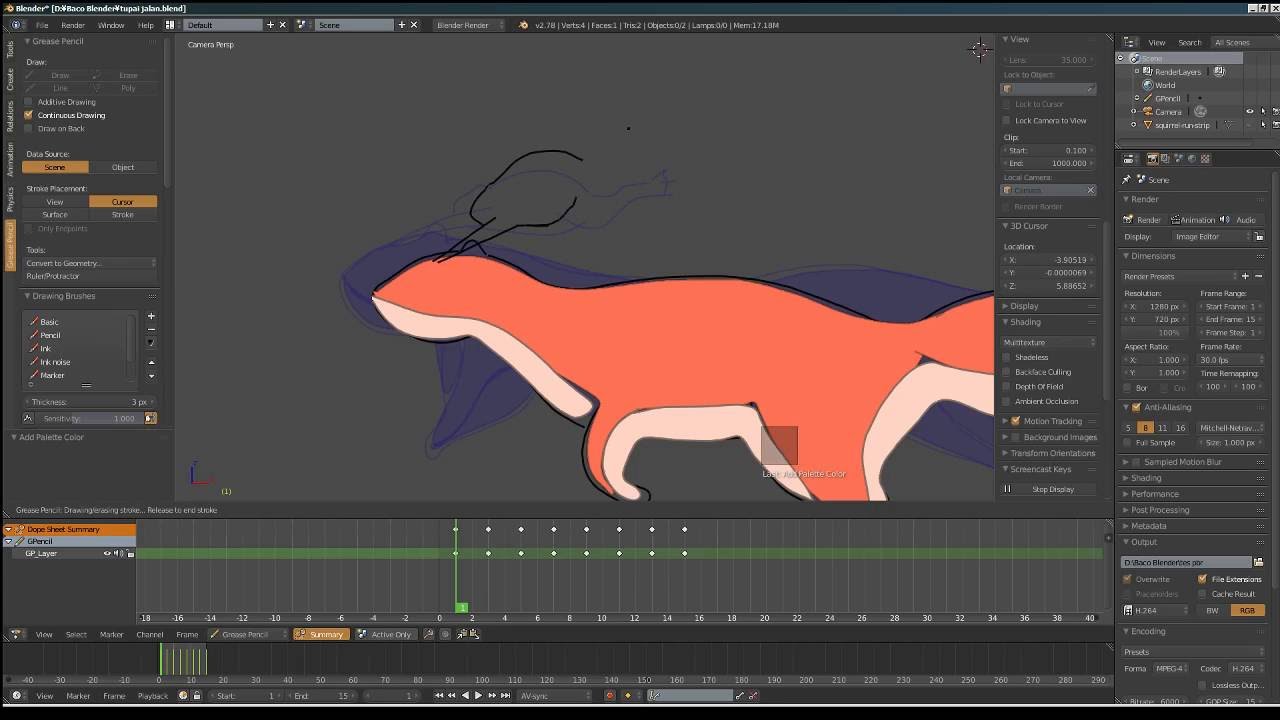
- Grease Pencil: The Grease Pencil tool enables 2D drawing and animation directly in the 3D space. Use it for storyboarding, 2D animation, or as a guide for your 3D models.
- Constraints: Constraints limit the movement of objects based on various conditions. Use them to automate complex movements and interactions between objects.
- Drivers: Drivers are expressions or scripts that control the properties of objects based on other factors. Use drivers to create relationships and automated behaviors within your scene.
By mastering these tools, you can create dynamic and compelling animations that breathe life into your Blender projects. Each tool offers unique advantages, so experiment to find the best combinations for your specific needs.
Lighting and Camera Setup for Animation
Effective lighting and camera setup are critical for bringing your Blender animations to life. This section will guide you through the essentials of creating a visually compelling scene:
- Understanding Blender\"s Lighting: Start by exploring Blender\"s different light types, including point, sun, spot, and area lights. Each light type offers unique characteristics that can enhance your scene\"s mood and depth.
- Three-Point Lighting Setup: For character animations, consider using a three-point lighting setup. This includes a key light, fill light, and back light to fully model your characters and highlight details.
- Adjusting Light Properties: Experiment with the light\"s properties, such as color, intensity, and size, to create the desired effect. Use shadows to add depth and realism to your scene.
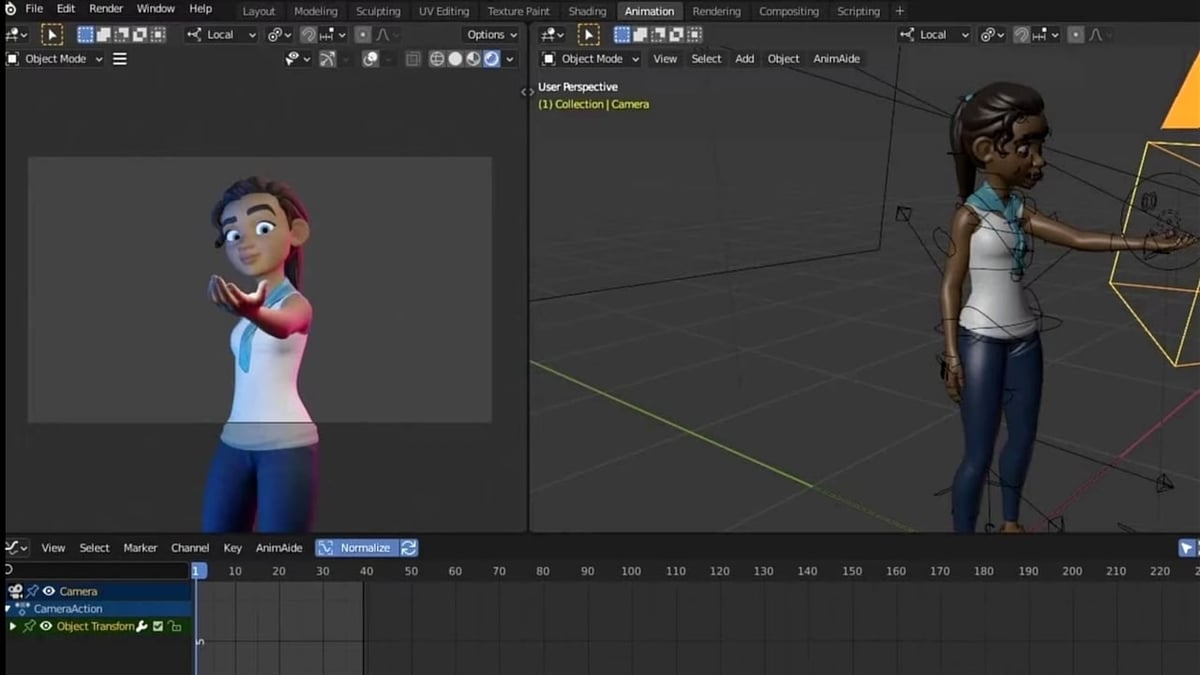
- Camera Placement: Position your camera to best capture the action. Consider the rule of thirds for dynamic compositions and use different camera angles to add interest to your animation.
- Camera Movement: Animate your camera to follow the action or reveal your scene gradually. Keyframe the camera\"s location and rotation for smooth movements.
- Depth of Field: Use depth of field to focus on your subject and blur the background or foreground. This technique adds a cinematic quality to your animations.
- Rendering Settings: Before rendering your animation, adjust your rendering settings for the best quality. Consider the resolution, sampling rates, and output format.
By carefully setting up your lighting and camera, you can dramatically impact the mood, clarity, and visual appeal of your Blender animations. Take the time to experiment with different setups to find what works best for your story.
Rendering Your Animation in Blender
Rendering is the final step in bringing your Blender animation to life. This process transforms your models, animations, and settings into a final video or image sequence. Here\"s a step-by-step guide to rendering your animation:
- Choose Your Render Engine: Blender offers several render engines, including Eevee (real-time engine) and Cycles (ray-traced engine). Select the one that best fits your project\"s needs in the Render Properties panel.
- Set Output Properties: In the Output Properties, specify your output\"s resolution, frame rate, and the directory where your rendered animation will be saved.
- Configure Render Settings: Adjust render settings such as sampling (for Cycles) or shadow and light quality (for Eevee) to balance render quality with time.
- Prepare the Scene: Ensure all materials, textures, and lighting are correctly set up. Perform a final check of your animation in the viewport to catch any issues.
- Animation Settings: Confirm the start and end frames of your animation under the Output Properties. This ensures you render the entire animation sequence.
- Render Animation: Go to Render > Render Animation or press Ctrl+F12 to start rendering. Blender will process each frame, which can take time depending on the complexity of your scene and your computer\"s capabilities.
- Post-Processing: After rendering, you might want to edit your animation in a video editing software to add effects, music, or correct colors.
Rendering can be resource-intensive, so consider rendering a low-resolution preview before committing to a full-quality render. This allows you to identify and correct any issues without waiting for a lengthy render process.

_HOOK_
READ MORE:
Post-Production: Editing and Final Touches
After rendering your animation, post-production is where everything comes together. This phase is crucial for polishing your animation and adding final touches that enhance the overall quality:
- Video Editing: Use Blender\"s Video Sequence Editor (VSE) to compile your rendered scenes, add transitions, and adjust timing. The VSE provides tools for cutting and splicing, layering multiple video tracks, and overlaying text.
- Color Correction: Adjust the colors in your animation to ensure consistency and to enhance the mood. Blender\"s color grading tools in the VSE allow you to tweak brightness, contrast, saturation, and color balance.
- Adding Sound Effects and Music: Sound is critical for bringing your animation to life. Import your audio files into the VSE and synchronize them with your animation. Use sound effects to enhance action scenes and music to set the tone.
- Special Effects: For animations requiring special effects, such as particle systems for fire, smoke, or magic, use Blender’s powerful simulation tools. You can also add effects like lens flares or light leaks in the VSE.
- Titles and Credits: Create opening titles and ending credits using the text tool in the VSE. Customize the font, size, color, and animation to match your project\"s style.
- Exporting Your Final Animation: Once you\"re satisfied with your post-production work, export your animation. Choose the appropriate file format and settings for your distribution platform, whether it\"s online streaming, broadcast, or cinema.
Post-production is your opportunity to refine and enhance your animation, making it ready for audiences to enjoy. With attention to detail and creative use of Blender’s editing tools, you can achieve professional-quality results.
Embark on an exciting journey with Blender to unlock your creative potential. Mastering animation is just the beginning—your stories, characters, and worlds await. Start animating today and bring your visions to life!