Topic blender 3d logo animation tutorial: Embark on a creative journey with our Blender 3D Logo Animation Tutorial, designed to elevate your brand"s digital presence through captivating, professional-quality animations.
Table of Content
- How to create a 3D logo animation using Blender?
- Understanding Blender\"s Interface for Logo Animation
- Setting Up Your Logo for Animation in Blender
- Importing and Preparing Your Logo
- Basic Animation Techniques for Logos
- Advanced Animation Techniques: Using Modifiers and Physics
- Lighting and Texturing Your Logo for a Professional Look
- YOUTUBE: How to Make a 3D Spinning Logo in Blender Blender Basics
- Camera Movement and Angles for Dynamic Animation
- Rendering Your Animated Logo: Best Practices and Settings
- Exporting Your Animation for Web and Broadcast
- Common Issues and How to Solve Them
- Further Learning Resources and Community Support
How to create a 3D logo animation using Blender?
To create a 3D logo animation using Blender, follow these steps:
- Open Blender and create a new project.
- Import or create the 3D model of your logo.
- Position the logo in the desired location and adjust its scale and rotation if needed.
- Set up the camera angle and composition for the animation.
- Open the Animation Workspace in Blender.
- Set keyframes for the logo\'s initial position and rotation.
- Move the timeline to the desired end frame of the animation.
- Adjust the logo\'s position and rotation to create the desired animation effect.
- Set keyframes at the end frame to capture the logo\'s final position and rotation.
- Preview the animation to make sure it looks as expected.
- Adjust the animation curve to smoothen or add variation to the logo\'s movement.
- Add materials and textures to enhance the appearance of the logo.
- Create additional elements or effects, such as lighting, shadows, or particles, to further enhance the animation.
- Render the animation to a video file format of your choice.
By following these steps, you can create a visually appealing 3D logo animation using Blender. With practice and experimentation, you can add more complexity and creativity to your logo animations.
READ MORE:
Understanding Blender\"s Interface for Logo Animation
Blender\"s interface might seem daunting at first, but it\"s designed to streamline your animation workflow. Here\"s a breakdown to get you started on logo animation.
- 3D Viewport: Your main workspace for viewing and editing your logo animation scene.
- Timeline: Located at the bottom, it allows you to manage keyframes and control the animation playback.
- Outliner: A hierarchical list on the right side that displays all elements in your scene, making it easy to select and organize objects.
- Properties Panel: Here, you can adjust object properties, animation settings, camera settings, and render settings specific to your logo animation.
- Shader Editor: For more advanced users, this workspace is where you can create and edit materials and textures to enhance your logo\"s appearance.
Begin by familiarizing yourself with these areas. Experiment by selecting different parts of the interface and seeing what each button and slider does. This hands-on experience is invaluable for mastering Blender for logo animation.

Setting Up Your Logo for Animation in Blender
Before diving into the animation process, it\"s crucial to properly set up your logo in Blender. Follow these steps to ensure your logo is ready for animation.
- Import Your Logo: Start by importing your logo into Blender. If your logo is in vector format (e.g., SVG), Blender can import it directly. Go to File > Import > Scalable Vector Graphics (.svg) to bring your logo into the 3D viewport.
- Convert to Mesh: Once imported, convert your logo from a curve to a mesh by selecting it, then pressing Alt+C and choosing \"Mesh from Curve/Meta/Surf/Text.\"
- Clean Up the Mesh: Depending on the complexity of your logo, you may need to clean up the mesh. Enter Edit Mode (Tab), select vertices, edges, or faces that are not needed, and delete them to simplify the mesh.
- Extrude Your Logo: To give your logo depth, select your logo mesh, enter Edit Mode, select all vertices (A), and then extrude (E). Adjust the extrusion depth to your liking.
- Apply Materials: Switch to the Shader Editor, and create a new material for your logo. Adjust the color, specular, and roughness settings to achieve the desired look for your logo.
- Set Up Lighting: Good lighting is key to making your logo animation look professional. Add a few lights around your logo to highlight its features. Experiment with different types of lights like point, spot, and area lights to see what works best.
- Camera Setup: Position the camera so that your logo is framed well within the viewport. You can adjust the camera settings to change the focal length and depth of field to make your logo stand out.
With these steps, your logo will be fully prepped and ready for animation. Next, you\"ll learn how to bring it to life with keyframes and animation techniques.

Importing and Preparing Your Logo
Getting your logo into Blender and ready for animation involves a few key steps. Follow this guide to start your animation project on the right foot.
- Choose the Right Format: Ensure your logo is in a format compatible with Blender, such as SVG for vector graphics. This format allows for easy scaling and manipulation without loss of quality.
- Importing the Logo: In Blender, go to File > Import and select the appropriate format (e.g., Scalable Vector Graphics (.svg) for SVG files). Navigate to your logo file and import it into Blender.
- Adjusting the Scale: Your logo might not be scaled correctly upon import. Select your logo, press S to scale, and adjust it to the appropriate size for your project.
- Converting to Mesh: To animate your logo, you\"ll need to convert it from a curve to a mesh. With your logo selected, press Alt+C and choose \"Mesh from Curve/Meta/Surf/Text.\" This conversion allows for more complex animations and effects.
- Optimizing the Mesh: After conversion, it\"s a good practice to clean up and optimize the mesh. In Edit Mode (Tab), remove unnecessary vertices, edges, or faces to streamline the animation process.
- Separating Components: If your logo has multiple components that you wish to animate independently, select the vertices of each component in Edit Mode and press P to separate them into individual objects.
- Applying Materials: Add color and texture to your logo by applying materials. In the Properties Panel, go to the Material tab, add a new material, and customize its properties such as color, specular, and roughness to match your logo\"s design.
With your logo properly imported and prepped, you\"re now ready to move on to the exciting part of animating it in Blender.

Basic Animation Techniques for Logos
Animating your logo in Blender can seem complex, but by mastering a few basic techniques, you can create engaging animations that enhance your brand\"s appeal. Let\"s explore the fundamental steps to bring your logo to life.
- Keyframing: Keyframes are the cornerstone of animation in Blender. To animate a property (like position, scale, or rotation), move to the frame where you want the animation to start, change the property to your desired value, press I, and choose the property to keyframe. Move to another frame, change the property again, and insert another keyframe.
- Animating Position: To move your logo across the screen, insert keyframes for its starting and ending positions. This can create a smooth transition from one side of the screen to the other.
- Scaling Animation: Animating the scale of your logo can make it pop. Set a keyframe for the initial scale, then go to another frame and increase or decrease the scale for a dynamic effect.
- Rotation Animation: Adding rotation can draw attention to your logo. Insert a keyframe for the initial rotation, move to a later frame, and adjust the rotation angle before inserting another keyframe.
- Simple Effects with Modifiers: Blender\"s modifiers, such as the Wave or Build modifier, can add interesting effects to your logo animation without complex keyframing. Apply a modifier to your logo object and adjust the settings to see the effect in real-time.
- Using the Graph Editor: For more control over your animation, use the Graph Editor to fine-tune the velocity and timing between keyframes. This can make your logo\"s animation smoother or more dynamic.
By practicing these basic animation techniques, you\"ll be well on your way to creating memorable logo animations that captivate your audience.
_HOOK_
Advanced Animation Techniques: Using Modifiers and Physics
After mastering basic animation techniques, you can elevate your logo animations with advanced methods involving modifiers and physics simulations. These techniques add complexity and realism to your animations.
- Modifiers for Deformation: Use the Simple Deform or Lattice modifier to twist, bend, or stretch your logo. This can be particularly effective for creating eye-catching introductions or transitions.
- Fluid Simulation: Create a dynamic effect by having your logo emerge from or dissolve into a fluid. Set up a fluid simulation with your logo as an obstacle or fluid source for captivating animations.
- Particle Systems: Particle systems can simulate effects like your logo assembling from dust or disintegrating. Add a particle system to your logo and play with the settings to achieve the desired effect. You can also use particles to simulate fire, smoke, or snow surrounding your logo.
- Soft Body and Cloth Simulations: Apply soft body or cloth dynamics to your logo for a flexible or flowing motion. This technique is great for logos that benefit from a softer, more organic appearance.
- Rigid Body Physics: For logos that interact with their environment, use rigid body physics to simulate natural motion and collisions. This can add a level of interactivity and realism to your animation.
- Using the Physics Tab: Blender\"s Physics tab contains all the settings for simulations. Experiment with different physics types to see how they can enhance your logo animation.
- Animating Modifiers: Many modifiers have parameters that can be animated over time. Keyframe these parameters to change the effect throughout your animation, adding depth and interest.
These advanced techniques require practice and experimentation but can significantly enhance the visual appeal of your logo animations. Dive in and explore the possibilities Blender offers for creative expression.
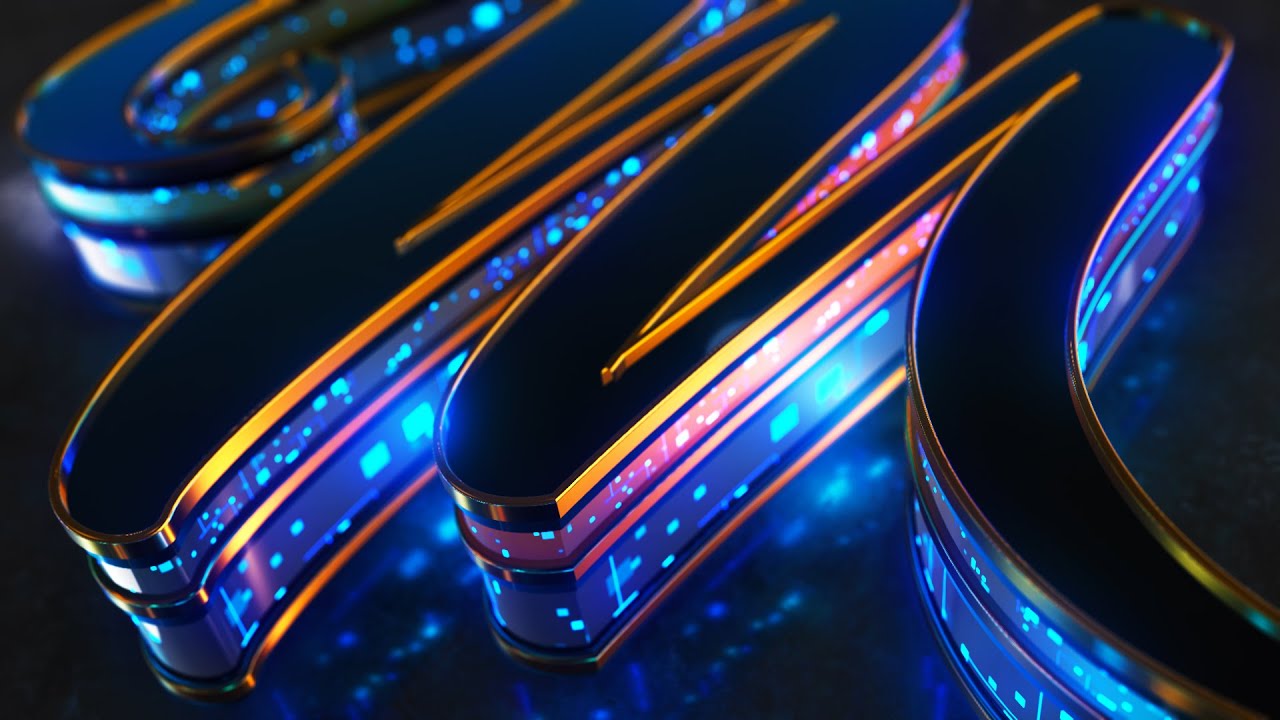
Lighting and Texturing Your Logo for a Professional Look
Lighting and texturing are critical for giving your logo animation a polished and professional appearance. These elements can dramatically affect the mood, tone, and clarity of your animation. Follow these steps to enhance your logo with lighting and texturing techniques.
- Choosing the Right Textures: Start by selecting textures that complement your logo\"s design and the message you want to convey. Blender\"s Shader Editor allows you to create complex materials that can simulate real-world surfaces like metal, glass, or plastic.
- Applying Textures: Use the UV Mapping technique to apply textures accurately to your logo. This involves unwrapping your logo model and applying a texture map, ensuring that the texture fits perfectly on your logo\"s surface.
- Creating Realistic Materials: In the Shader Editor, combine different shaders to create realistic materials. For example, mix a Glossy Shader with a Diffuse Shader to create a material that simulates metallic surfaces with reflections.
- Setting Up the Lighting: Good lighting is essential for showcasing your logo. Use a three-point lighting setup (key light, fill light, and back light) to achieve a balanced and professional look. Adjust the position, color, and intensity of the lights to highlight your logo\"s features and create depth.
- Adding Ambient Occlusion: To enhance the realism of your scene, enable Ambient Occlusion in the World settings. This adds soft shadows in the corners and crevices of your logo, improving spatial definition.
- Experimenting with HDRIs: High Dynamic Range Images (HDRI) can provide realistic environmental lighting. Import an HDRI into the World settings to simulate outdoor or studio lighting conditions, adding realism and depth to your logo animation.
- Rendering Settings: Finally, ensure your render settings are optimized for quality. Enable features like ray tracing and increase the sample rate for smooth, noise-free results. Consider using the denoising feature to clean up any remaining noise without increasing render times significantly.
By carefully lighting and texturing your logo, you can create a visually stunning animation that stands out and effectively communicates your brand\"s identity.
How to Make a 3D Spinning Logo in Blender Blender Basics
\"Discover the incredible world of Blender and unleash your creativity with this mind-blowing software! Dive into the limitless possibilities and create stunning 3D animations that will leave your audience in awe. Don\'t miss out on this video that will take your Blender skills to the next level!\"
Make a Logo Animation in Blender Eevee in under 7 minutes
\"Bring your brand to life with captivating logo animations that will make a lasting impression. This video will guide you through the process of creating stunning logo animations that are sure to grab attention and elevate your brand identity. Get ready to impress with unique and professional logo animations that will set you apart from the competition!\"
Camera Movement and Angles for Dynamic Animation
Camera movement and angles are crucial in creating dynamic and engaging animations in Blender. This section will guide you through the process of setting up and animating the camera to enhance the visual appeal of your logo animation.
- Understanding Camera Basics: Before animating, familiarize yourself with Blender\"s camera settings. You can add a camera by going to Add > Camera. Use the N panel to adjust its position, rotation, and scale.
- Setting the Initial Position: Place your camera in the desired starting position. You can do this by selecting the camera, pressing N to open the sidebar, and adjusting the location and rotation values under the Transform panel.
- Animating the Camera: To animate the camera, move to the frame where you want the animation to start, set the camera\"s position and rotation, and press I to insert a keyframe. Choose \"Location\" and \"Rotation\" from the menu. Move to another frame, change the camera\"s position or rotation, and insert another keyframe.
- Using Camera Paths: For smoother movements, you can attach the camera to a path. Create a curve path and select the camera, then go to the Constraints tab and add a \"Follow Path\" constraint. Select the curve as the target.
- Experimenting with Angles: Experiment with different camera angles to find the most flattering view of your logo. Overhead shots, side views, and close-ups can all add interest to your animation.
- Dynamic Movements: Utilize camera movements such as pans, tilts, zooms, and tracking shots to add dynamism. These movements can emphasize certain aspects of your logo or create a sense of motion.
- Depth of Field: Add depth to your animation by using the camera\"s depth of field settings. This can help focus the viewer\"s attention on the logo while subtly blurring the background or foreground.
- Rendering Camera Movements: Ensure your camera movements render smoothly by adjusting the frame rate and resolution in the Render settings. A higher frame rate can make fast movements appear smoother.
By carefully planning and executing camera movements and angles, you can significantly enhance the impact of your logo animation. Experiment with different techniques to find what best suits your project\"s needs and brings your logo to life in the most dynamic way possible.

Rendering Your Animated Logo: Best Practices and Settings
Rendering is the final step in bringing your animated logo to life. This section will cover the best practices and settings to ensure your logo animation looks professional and is optimized for your intended use.
- Choosing the Right Render Engine: Blender offers several render engines like Eevee, Cycles, and Workbench. Eevee is faster and suitable for real-time rendering, while Cycles, being a ray-trace based engine, is better for photorealistic results but takes longer.
- Resolution and Aspect Ratio: Set your resolution under the Output properties. For most projects, 1920x1080 at 100% scale is suitable. Adjust the aspect ratio based on where your logo will be displayed, keeping in mind platforms like YouTube prefer 16:9.
- Frame Rate: Standard frame rates are 24, 30, or 60 FPS. Choose based on your target medium; for example, 24 FPS is common for film, while 30 or 60 FPS may be more suitable for web and broadcast.
- Sampling: For Cycles, adjust the sampling rate to balance between render quality and time. Higher samples reduce noise but increase render time. Eevee also has settings for samples, affecting shadows and reflections.
- Lighting and Shadows: Ensure your scene is well-lit and shadows are appropriately sharp or soft to enhance the logo\"s appearance. This might involve tweaking light source settings or using environment lighting for more natural effects.
- Output Format: Choose an output format that suits your needs. For animations, a sequence of PNG images can ensure no loss in quality, while MP4 or AVI formats are better for direct playback.
- Compression: When exporting to video formats, adjust the compression settings to balance between quality and file size. A higher bitrate typically means better quality but results in larger files.
- Color Management: Under the Render properties, adjust the color management settings. The standard \"Filmic\" view transform offers a wide dynamic range, making it a good choice for realistic rendering.
- Testing Renders: Before rendering the entire animation, perform test renders of key frames to check lighting, materials, and camera angles. This can save time and resources by identifying and correcting issues early.
By following these best practices and adjusting settings based on the specific requirements of your animated logo project, you can achieve high-quality renders that showcase your logo in the best light. Remember, rendering is a balance between quality and efficiency, so experiment to find the optimal settings for your needs.

Exporting Your Animation for Web and Broadcast
After rendering your animated logo, the next step is to export it for use on the web or in broadcast. This process involves choosing the right file formats, compression settings, and understanding platform-specific requirements to ensure your logo animation looks its best wherever it\"s displayed.
- Choosing the Right File Format: For web use, formats like MP4 (using the H.264 codec) are widely supported and offer a good balance between quality and file size. For broadcast, you may need to consider formats like MOV or uncompressed AVI, depending on the broadcaster\"s specifications.
- Resolution and Frame Rate: Ensure your animation matches the resolution and frame rate requirements of the platform. For example, HD (1920x1080) is common for web and broadcast, but some platforms may support 4K. Standard web frame rates are 30 or 60 FPS, while broadcast standards can vary by country (e.g., 25 FPS for PAL regions).
- Bitrate and Compression: Adjust the bitrate to optimize for quality and file size. Higher bitrates mean better quality but larger files, which can be an issue for web streaming. Use a compression tool or Blender\"s built-in options to find a balance suitable for your distribution channel.
- Aspect Ratio: Maintain the aspect ratio appropriate for your target media. While 16:9 is common, some platforms or broadcasters may require different aspect ratios.
- Audio Settings: If your logo animation includes audio, ensure the audio format and settings are compatible with your distribution channels. AAC is a widely accepted audio codec for web formats.
- Testing Across Devices: Before finalizing your export, test the animation on different devices and browsers to ensure compatibility and performance. Pay attention to load times, playback quality, and audio synchronization.
- Metadata and Tags: When preparing your file for the web, include relevant metadata and tags. This can improve the visibility of your animation on search engines and video platforms.
- Platform-Specific Requirements: Each platform, whether it\"s social media, a website, or a broadcast channel, may have specific requirements for video content. Review these guidelines carefully to ensure your animation meets all necessary criteria.
Exporting your animation properly is crucial for ensuring it reaches your audience in the highest quality possible. By following these steps and adjusting settings as needed for your specific use case, your animated logo will be well-prepared for both web and broadcast platforms.

_HOOK_
Common Issues and How to Solve Them
Working with Blender for logo animation can sometimes lead to challenges. Here, we discuss some common issues and provide solutions to help you navigate through these obstacles smoothly.
- Textures Not Rendering Properly: If your textures appear blurry or are not showing up in the render, ensure that you have unwrapped your model correctly and that the texture files are linked properly in the shader editor. Also, check if the texture resolution is high enough for your needs.
- Animations Not Playing Smoothly: This can be due to a low frame rate or high complexity in your scene. Try simplifying your scene or optimizing your models. Additionally, adjust the frame rate in the output settings to match your target medium.
- Camera Angles Not As Expected: If the camera isn\"t capturing your logo as intended, revisit the camera\"s position and rotation. Use the camera\"s lock-to-view feature for easier framing. You can also animate the camera along a path for smoother movements.
- Lighting Looks Flat: Enhance your scene\"s lighting by adding multiple light sources of varying intensities. Experiment with different types of lighting like point, sun, and area lights. Utilize three-point lighting setups for a more dynamic look.
- Long Render Times: Reduce render times by lowering the sample rate in Cycles or optimizing the scene\"s complexity. Consider using Blender\"s Eevee render engine for faster previews before finalizing your render in Cycles.
- Objects Disappearing from View: If objects are missing from your viewport or render, check their visibility settings in the outliner. Also, ensure they are not on a hidden layer or have been accidentally moved too far from the scene center.
- Unexpected Results with Physics Simulations: Physics simulations can sometimes behave unpredictably. Double-check your physics settings for accuracy and realism. Adjusting the mass, friction, and bounce values of objects can lead to better simulation outcomes.
- Materials Not Looking Realistic: For materials that lack realism, refine their properties in the shader editor. Use Principled BSDF shaders for a more comprehensive control over material properties like roughness, metallic, and subsurface scattering.
Encountering issues is a normal part of the learning process in Blender. With patience and practice, you can overcome these challenges and enhance your skills in logo animation. Remember, the Blender community is a vast resource, and seeking advice from forums and tutorials can provide additional help.

READ MORE:
Further Learning Resources and Community Support
Mastering Blender for logo animation is an ongoing process that benefits greatly from a variety of learning resources and community support. Whether you are a beginner or looking to advance your skills, these resources can help you on your journey.
- Blender Official Tutorials: The Blender Foundation offers comprehensive tutorials and documentation on their official website, covering everything from basic navigation to advanced animation techniques.
- Online Courses and Workshops: Platforms like Udemy, Coursera, and Skillshare feature courses tailored to Blender users of all levels. These courses often include project-based learning that can help solidify your skills.
- YouTube Tutorials: YouTube is a goldmine for Blender tutorials. Channels like Blender Guru, CG Geek, and Ducky 3D specialize in Blender and cover a wide range of topics, from beginner to advanced projects.
- Blender Community Forums: Join forums such as Blender Artists and the Blender subreddit to connect with other users. These communities are great for getting feedback on your work, asking questions, and staying updated on Blender news.
- Books and eBooks: There are several books and eBooks available that delve into Blender\"s capabilities. These can be great resources for those who prefer written instructions and in-depth explanations of concepts.
- Blender Conferences and Meetups: Participating in Blender conferences and local meetups can be a fantastic way to learn from experienced users and professionals. These events often feature workshops, presentations, and networking opportunities.
Utilizing a mix of these resources can dramatically accelerate your learning curve and improve your skills in Blender. Remember, practice and persistence are key. Engage with the community, work on projects that challenge you, and don\"t be afraid to seek help when needed.
Embark on a creative journey with our comprehensive Blender 3D logo animation tutorial, designed to transform beginners into skilled animators. Unlock the full potential of your logos and bring your visions to life in a dynamic, visually captivating way.