Topic blender how to create animation: Embark on a creative journey with Blender to unlock the secrets of 3D animation. This guide will walk you through the essentials, transforming novices into animation artisans ready to bring their visions to life.
Table of Content
- How can I create animations in Blender?
- Understanding Blender\"s Animation Tools
- Getting Started with Your First Animation
- Keyframing and the Timeline
- Animating with Rigging and Bones
- Advanced Techniques: Inverse Kinematics and Shape Keys
- Adding Realism with Textures and Materials
- YOUTUBE: Blender Tutorial: Animation for Beginners
- Lighting Your Scene
- Rendering and Exporting Your Animation
- Looping Animations and Particle Systems
How can I create animations in Blender?
To create animations in Blender, you can follow these steps:
- Create a new Blender project or open an existing one.
- Select or create the objects you want to animate.
- Switch to the \"Animation\" layout if it\'s not already selected.
- Select the object you want to animate.
- Go to the \"Timeline\" editor and set the desired start and end frames for your animation.
- Add keyframes to define the initial and final positions of your object.
- Move to a specific frame in the timeline where you want to modify the object\'s position.
- Make changes to the object\'s location, rotation, or scale.
- Insert another keyframe to store the updated position of the object.
- Repeat steps 7-9 for different frames to create a smooth animation.
- Use the playback controls in the timeline to preview your animation.
- Adjust the timing and interpolation of keyframes to refine your animation.
- Once satisfied with your animation, you can render it as a video or image sequence.
These steps provide a basic overview of how to create animations in Blender. Remember, Blender offers a wide range of animation tools and techniques, so feel free to explore and experiment to achieve the desired results.
READ MORE:
Understanding Blender\"s Animation Tools
Blender offers a comprehensive suite of animation tools for creating dynamic and engaging 3D animations. This section will introduce you to the core features and workflows essential for bringing your animations to life.
- Timeline and Dope Sheet: The foundation of animation in Blender, where you can control keyframes, timing, and overall animation flow.
- Graph Editor: For detailed adjustments, the Graph Editor allows you to fine-tune the interpolation and timing of keyframes.
- Rigging and Armatures: Learn about creating skeletons for characters or objects, enabling them to be animated in a lifelike manner.
- Shape Keys: Perfect for facial expressions and morphing objects without the need for complex rigging.
- Animation Modifiers and Constraints: These tools offer advanced control over animations, allowing for procedural effects and precise movement.
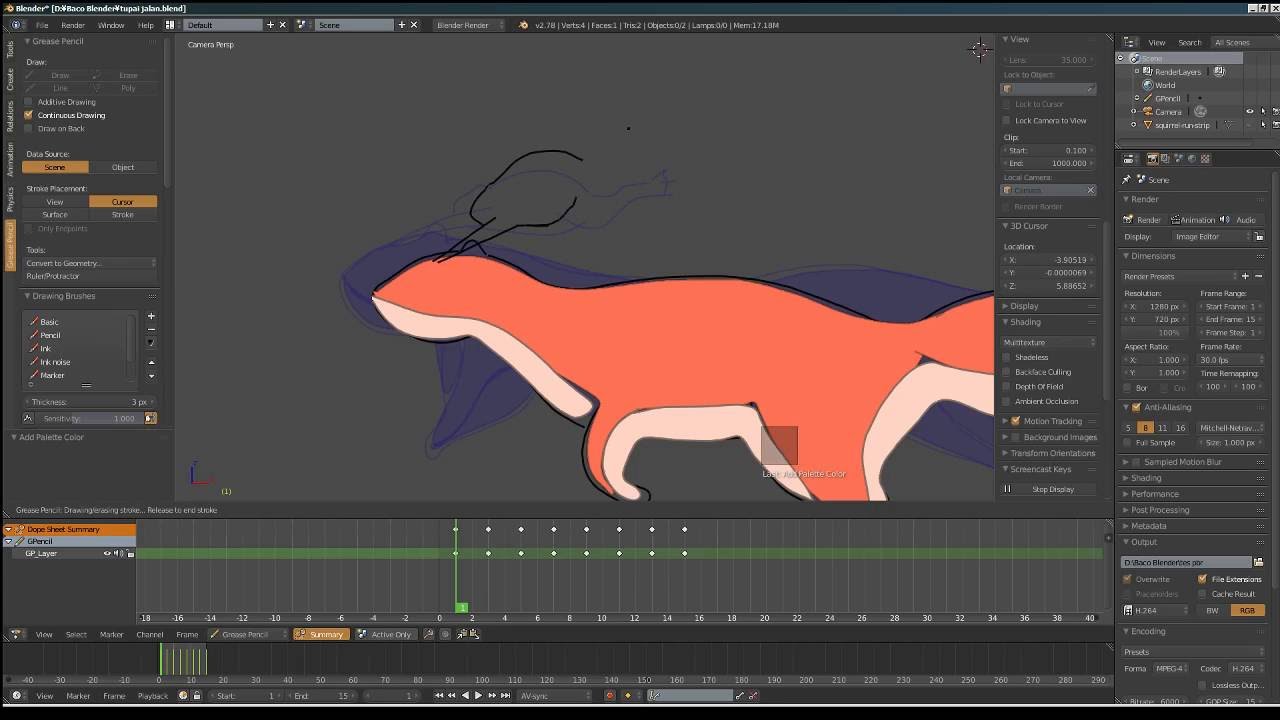
- Grease Pencil: Blender\"s unique feature for 2D animation and storyboarding within the 3D environment.
- Particles and Physics: For adding realism to scenes with simulations like smoke, fire, cloth, or hair dynamics.
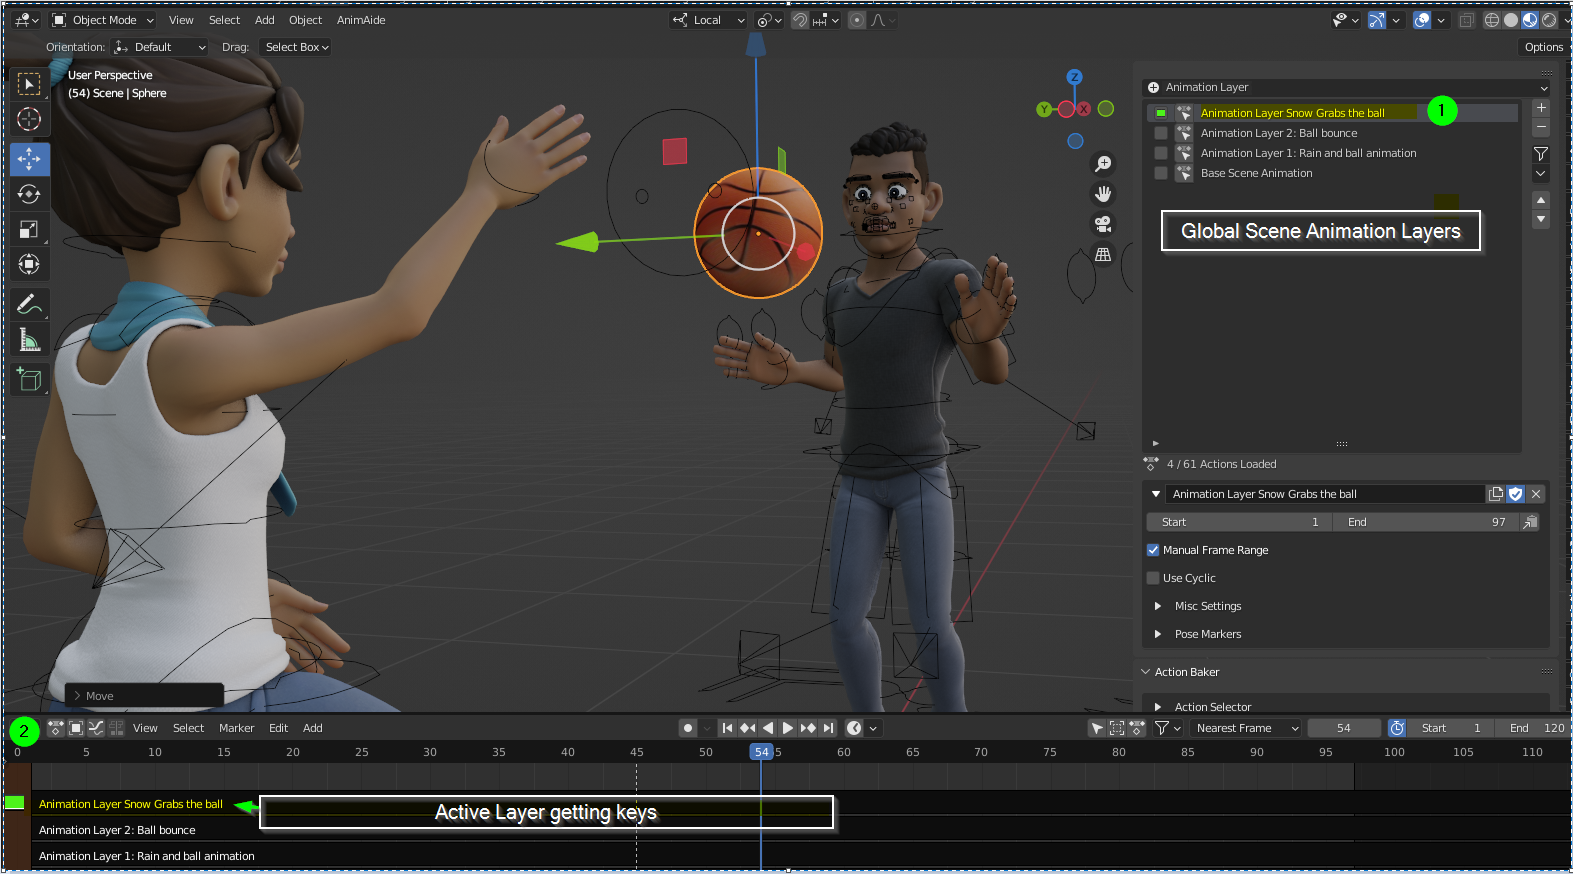
- NLA Editor (Non-Linear Animation): Combine and blend multiple actions and animations, enabling complex sequences with ease.
Each tool in Blender\"s animation suite is designed to work in harmony, offering both novice and experienced animators the flexibility to bring their most imaginative concepts to life. Exploring these tools will provide a solid foundation for your animation projects.

Getting Started with Your First Animation
Creating your first animation in Blender can be a thrilling experience. This guide will walk you through the fundamental steps to animate a simple object, providing a solid foundation for more complex projects in the future.
- Setting Up Your Scene: Open Blender and select a default object, like a cube, to begin. Ensure your scene\"s lighting and camera are correctly positioned for optimal viewing.
- Learning Keyframes: Keyframes are essential in animation. Move to your timeline, select your object, and press I to insert a keyframe. Choose \"Location\" to record its position.
- Animating Movement: Advance the timeline to a new frame, move your object to a new location, and insert another location keyframe. Blender will interpolate the movement between these points.
- Playback Your Animation: Use the playback controls in the timeline to review your animation. Adjust the keyframes as needed to refine the motion.
- Experiment with Properties: Beyond location, experiment with animating other properties like rotation and scale. Insert keyframes for these properties to see how they affect your animation.
- Adding More Complexity: Once comfortable, start adding more objects to your scene, or try rigging a simple character to understand the basics of character animation.
Remember, animation is an art that requires patience and practice. Don\"t hesitate to experiment with different techniques and tools within Blender to discover what works best for your creative vision.

Keyframing and the Timeline
Keyframing and the Timeline are central to animating in Blender, allowing you to define the movement of objects over time. This section breaks down how to effectively use these tools to create dynamic animations.
- Understanding Keyframes: Keyframes are markers that save the state of an object at a particular time point. In Blender, keyframes can store information about location, rotation, scale, and more.
- Inserting Keyframes: To insert a keyframe, select your object, move to the desired frame on the timeline, make your adjustment (e.g., move the object), then press I and choose the property you wish to keyframe (e.g., Location).
- The Timeline: The timeline at the bottom of the Blender interface allows you to scrub through your animation, jump to keyframes, and control playback. Use it to fine-tune the timing of your animation.
- Editing Keyframes: Keyframes can be moved, copied, or deleted directly in the timeline or the Dope Sheet for more complex animations. This allows you to adjust the timing and order of your animation sequences.
- Interpolation: Blender automatically interpolates the frames between keyframes, creating smooth transitions. You can adjust the type of interpolation (e.g., linear, bezier) in the Graph Editor to change how the animation progresses between keyframes.
- Using the Dope Sheet: For more detailed animation control, the Dope Sheet provides an overview of all keyframes and their timing. It\"s essential for managing complex animations with multiple objects or properties.
- Animating with the Graph Editor: The Graph Editor offers a detailed view of the interpolation curves between keyframes, allowing for precise control over the velocity and acceleration of animated properties.
Mastering keyframing and the timeline is crucial for creating compelling animations in Blender. With practice, these tools will enable you to bring any scene to life with rich, dynamic motion.

Animating with Rigging and Bones
Rigging is the process of creating a skeletal structure for your 3D model so that it can be animated in a realistic manner. This section explains how to use Blender\"s powerful rigging and bone tools to prepare your character or object for animation.
- Creating a Rig: Start by adding an armature object to your scene, which serves as the skeleton. Each bone within the armature can be positioned and scaled to match the anatomy of your character.
- Parenting the Mesh to the Armature: Once your armature is set up, you need to bind your 3D mesh to it. This is done through a process called skinning or vertex weighting, where you define how the mesh deforms in response to the bones\" movements.
- Weight Painting: Blender offers a weight painting mode to visually assign how much influence each bone has on different parts of the mesh. Red areas indicate high influence, while blue areas show low influence.
- Adding Constraints: For more advanced control, you can add constraints to bones. Constraints can automate movements, such as making a foot stay planted on the ground or mirroring movements from one side of the character to the other.
- Testing Your Rig: Before animating, it\"s crucial to test your rig. Pose your character in various positions to ensure the mesh deforms naturally and that all constraints work as expected.
- Animating Your Character: With the rig tested, you can now animate your character. Select a bone, insert keyframes for its position, rotation, or scale, and then move through the timeline to create your animation.
Rigging and animating with bones in Blender can be complex, but they are powerful tools that enable you to bring characters and objects to life with realistic movements. As you become more familiar with these processes, you\"ll be able to tackle increasingly sophisticated animation projects.
_HOOK_
Advanced Techniques: Inverse Kinematics and Shape Keys
For those looking to take their Blender animations to the next level, mastering inverse kinematics and shape keys is essential. These advanced techniques offer refined control over movements and expressions, enabling more complex and realistic animations.
- Inverse Kinematics (IK): Unlike forward kinematics where you animate each bone in a chain individually, IK allows you to control the end effector (such as a hand or foot) and the rest of the chain adjusts accordingly. This is ideal for animating limbs that need to reach specific targets.
- Start by adding an IK constraint to the bone at the end of the chain.
- Specify the target bone or object that the end effector should follow.
- Adjust the chain length to determine how many bones in the chain are affected by the IK constraint.
- Shape Keys: Shape keys allow you to deform objects in a non-destructive manner, perfect for facial expressions or morphing objects.
- Create a basis shape key that represents the object’s default state.
- Add additional shape keys to define the target deformations.
- Animate the influence of each shape key over time to transition between states.
By integrating inverse kinematics and shape keys into your animation workflow, you can achieve more dynamic and expressive results. Whether it\"s the subtle nuances of facial expressions or the complex motion of a character reaching for an object, these techniques are invaluable tools for any Blender animator looking to push the boundaries of their creative expression.

Adding Realism with Textures and Materials
Textures and materials are pivotal in adding realism to your animations, transforming bland meshes into lifelike objects. This section will guide you through the process of applying textures and materials in Blender to enhance the visual quality of your animations.
- Understanding Materials: Materials define the base color, reflectivity, transparency, and more. In Blender, start by selecting your object and going to the Material Properties tab to create a new material.
- Applying Textures: Textures are images mapped to the surface of your object to give it detail. You can add textures in the Shader Editor by linking them to the material\"s color input or other properties like displacement for added realism.
- UV Mapping: Properly mapping your textures requires UV unwrapping your model, which projects the 3D surface onto a 2D plane for accurate texture placement. Access this feature in Edit Mode and select UV Unwrap from the mesh menu.
- Using Nodes for Advanced Materials: Blender’s node-based material system allows for complex material setups. Combine different nodes like Image Textures, Mix Shader, and Fresnel to create materials with depth and realism.
- Normal and Displacement Mapping: To add surface detail without increasing geometry, use normal maps. For more significant surface variations, displacement maps can physically alter the mesh based on a texture.
- Environmental Textures: Adding an environment texture to your scene can greatly enhance realism by providing realistic lighting and reflections. This can be done in the World Settings tab.
By carefully applying textures and materials, and understanding how light interacts with these surfaces, you can significantly increase the realism of your Blender animations. Experiment with different combinations to see how they affect the mood and feel of your scene.
Blender Tutorial: Animation for Beginners
Animation: Get ready to be captivated by the magical world of animation! This video will take you on an exhilarating journey through vibrant colors, captivating characters, and jaw-dropping storytelling. Be prepared to be swept away by the artistry and creativity of animation!
Blender Tutorial: Simple Animation for Beginners (2.8)
Blender: Unleash your inner creativity with the powerful and versatile Blender software! In this video, you\'ll discover the endless possibilities of 3D modeling, animation, and visual effects. Whether you\'re a beginner or a seasoned pro, join us on this exciting adventure and become a master of Blender!
Lighting Your Scene
Effective lighting is crucial in animation, as it sets the mood, highlights details, and adds depth to your scenes. This section guides you through the process of lighting your scene in Blender, ensuring your animations are visually compelling.
- Understanding Blender\"s Light Types: Blender offers several types of lights, including Point, Sun, Spot, and Area. Each has unique characteristics that affect shadows, intensity, and the area covered.
- Setting Up Key Lights: Your main light source, or key light, should be placed to highlight the form of the objects in your scene. Position it to create depth by casting shadows that define shapes and textures.
- Adding Fill Lights: Fill lights reduce shadows caused by the key light. They should be softer and less intense, positioned opposite the key light to balance the scene\"s overall illumination.
- Using Backlights for Depth: A backlight, or rim light, is placed behind the subject to separate it from the background, enhancing the three-dimensional feel of the scene.
- Experimenting with Color Temperature: Lights can have warm or cool color temperatures, affecting the mood of the scene. Warm lights can create a cozy atmosphere, while cool lights might suggest a night or overcast day.
- Utilizing Environmental Lighting: Environmental textures can provide global illumination, simulating the complex light interactions found in real-world scenes. This is great for outdoor scenes or adding realism to interiors.
- Adjusting Shadows and Reflections: Play with shadow softness, angle, and color to add realism. Reflections can also be tweaked to ensure they contribute to the scene\"s believability.
Lighting is both an art and a science. By carefully planning and adjusting your lights, you can evoke emotions, direct the viewer\"s attention, and make your animations truly stand out.

Rendering and Exporting Your Animation
Rendering transforms your Blender animations into video files or images, while exporting makes your creations compatible with other platforms. This final step is critical in sharing your work with the world. Follow these guidelines to ensure a smooth rendering and exporting process.
- Choosing the Right Render Engine: Blender offers several render engines like Eevee (real-time) and Cycles (ray-traced). Select the one that best suits your project\"s needs for quality and speed.
- Setting Up Render Properties: In the Render Properties panel, adjust settings such as resolution, frame rate, and output format. Higher resolutions and frame rates offer better quality but require more processing time.
- Applying Render Samples: For Cycles, increasing the number of samples improves image quality at the cost of longer render times. Find a balance that offers the quality you need without excessive wait times.
- Previewing Your Animation: Use the Render Preview mode to check how lighting, materials, and textures look under final render conditions. Make adjustments as needed before the final render.
- Rendering Your Animation: Once satisfied with your setup, render your animation by going to Render > Render Animation. Ensure you have enough storage space for the rendered files.
- Exporting for Other Platforms: To share your animation on platforms that require specific formats, use Blender’s File > Export options. Choose the format that matches your target platform, such as FBX for game engines.
Rendering and exporting are the final steps in the Blender animation process, turning your hard work into shareable, high-quality video or compatible formats for various platforms. Patience and attention to detail during these steps ensure your animation reaches its audience in the best possible light.

READ MORE:
Looping Animations and Particle Systems
Creating looping animations and effective particle systems in Blender can add incredible dynamism and realism to your projects. This section will guide you through the process of making seamless loops and utilizing Blender\"s particle systems for animations that endlessly captivate.
- Designing Loop-Friendly Animations: When planning your animation, consider movements that can naturally return to their starting point. This makes it easier to create a seamless loop.
- Adjusting Keyframes for Loops: For a smooth loop, ensure the first and last keyframes of your animation are identical. You might also need to adjust the interpolation between keyframes to ensure a seamless transition.
- Utilizing the Graph Editor: The Graph Editor is a powerful tool for refining loops. Use it to ensure your animation curves smoothly start and end at the same values, eliminating noticeable jumps.
- Implementing Particle Systems: Blender\"s particle system can add complexity to your animations, from flowing water to drifting smoke. For looping particle animations, key settings include start and end frames, lifetime of particles, and emission rate.
- Making Particle Systems Loop: To loop a particle system, ensure the particle lifetime is not longer than the loop duration. Adjust the emission rate and timing to avoid visible starts and stops.
- Exporting Looping Animations: When rendering a looping animation, double-check the loop settings and preview the animation to ensure the loop is seamless before final rendering.
Looping animations and effective particle system use in Blender can greatly enhance the visual appeal and engagement of your projects. With careful planning and attention to detail, you can create mesmerizing animations that loop flawlessly.
Embarking on your Blender animation journey opens a world of creative possibilities. With dedication and practice, the tools and techniques discussed can transform your ideas into captivating animations that inspire and delight audiences worldwide.
_HOOK_