Topic blender animation tips: Embark on a journey to mastery with our Blender Animation Tips, where expert advice meets practical strategies, empowering you to bring your most ambitious animations to life with clarity, efficiency, and creativity.
Table of Content
- What are some tips for blender animation?
- Understanding Keyframe Animation Basics
- Utilizing Blender\"s Graph Editor for Precise Control
- Mastering Rigging and Inverse Kinematics for Realistic Movement
- Creating Engaging Character Expressions and Body Language
- Implementing Effective Lighting and Camera Techniques
- YOUTUBE: Top 10 Blender Animation Tips to Help You Animate Faster!
- Optimizing Workflow with Blender\"s Modifiers and Simulation Tools
- Exploring Advanced Techniques: Fluid, Soft Body, and Cloth Dynamics
- Learning from Case Studies: Real-world Animation Projects
- Avoiding Common Pitfalls in Animation Projects
- Gathering Insights from Expert Interviews and Community Tips
- Expanding Skills with Additional Resources and Tutorials
What are some tips for blender animation?
Here are some tips for animation in Blender:
- Master the fundamentals: Before diving into complex animations, make sure you have a good understanding of the basic principles of animation. This includes concepts like timing, spacing, squash and stretch, anticipation, and follow-through.
- Use reference videos: If you\'re animating a specific action or movement, it can be helpful to study reference videos to understand how the motion works in real life. You can use these references as a guide to make your animation more believable.
- Plan your animation: Before starting your animation, create a storyboard or animatic to plan out the sequence and timing of your shots. This will help you visualize the final result and make any necessary adjustments before investing time in the detailed animation process.
- Utilize the Graph Editor: The Graph Editor in Blender is a powerful tool for refining animation curves and creating fluid motion. Be sure to take advantage of it to add more polish and control to your animations.
- Experiment with different techniques: Blender offers various animation techniques like keyframing, shape keys, and rigging. Don\'t be afraid to explore and try different methods to find what works best for your specific animation project.
- Keep your scene organized: As your animation becomes more complex, it\'s crucial to keep your scene organized. Use naming conventions, layers, and groups to easily manage and edit different elements of your animation.
- Render in stages: Instead of rendering the entire animation sequence at once, consider breaking it down into smaller segments or shots. This allows you to preview and iterate on specific sections, saving time and resources.
- Seek feedback: Don\'t hesitate to share your work with others and ask for feedback. Constructive criticism can help you identify areas for improvement and enhance the overall quality of your animation.
By following these tips and continuously practicing, you can improve your Blender animation skills and create captivating and professional-looking animations.
READ MORE:
Understanding Keyframe Animation Basics
Keyframe animation is a fundamental concept in Blender that allows animators to define specific moments in time where changes in an animation occur. This technique involves setting \"keyframes\" at specific frames in the timeline for the properties you wish to animate, such as position, rotation, scale, etc. Blender interpolates the values between these keyframes, creating smooth transitions and movements.
- Start by selecting the object you wish to animate in your scene.
- Move the timeline cursor to the frame where you want the animation to start.
- With the object selected, press the \"I\" key to insert a keyframe. A menu will appear, letting you choose which properties to keyframe (e.g., Location, Rotation, Scale).
- Move the timeline cursor to another frame where you want the next change in the animation to occur.
- Modify the object\"s properties as desired (move, rotate, scale, etc.).
- Press \"I\" again to insert another keyframe for the changed properties.
Blender will automatically create the animation between these keyframes, smoothly transitioning the object\"s properties from the values defined at the first keyframe to those at the second. By repeating this process, you can create complex animations.
Understanding the Graph Editor can further refine your animations. This tool provides a visual representation of the keyframe values over time, allowing for precise control over the interpolation and easing of animations. Experimenting with different types of keyframes and interpolation modes, such as Linear, Bezier, or Constant, will help you achieve the desired motion and timing for your animations.

Utilizing Blender\"s Graph Editor for Precise Control
The Graph Editor in Blender is an indispensable tool for animators seeking precise control over their animations. This powerful feature allows you to edit the interpolation of keyframes, providing fine-tuned adjustments to the velocity and timing of your animations. Here\"s how to leverage the Graph Editor for maximum effect:
- Accessing the Graph Editor: Switch to the Graph Editor by changing your layout view or selecting it from the editor type menu.
- Selecting Keyframes: In the Graph Editor, keyframes appear as points on 2D curves. You can select individual keyframes or box select multiple keyframes to edit.
- Adjusting Keyframe Interpolation: Right-click on a keyframe and choose \"Interpolation Mode\" to change how Blender transitions between keyframes. Options include Linear, Bezier, and Constant, among others.
- Editing Handles: For Bezier interpolation, you can adjust the handles of each keyframe to fine-tune the easing in and out of keyframes. This allows for more dynamic and fluid motions.
- Using the F-Curve Modifiers: Blender\"s Graph Editor offers F-Curve modifiers like noise, cycles, and limits. These can be applied to keyframe channels to create complex movements without manually keyframing each step.
- Locking and Muting Channels: To focus on editing specific properties, you can lock or mute channels. This is useful for isolating movements or simplifying the animation process.
Understanding and utilizing the Graph Editor can dramatically enhance the precision and fluidity of your animations. By mastering keyframe interpolation and the use of F-Curve modifiers, you can create more refined and expressive animations in Blender.

Mastering Rigging and Inverse Kinematics for Realistic Movement
Rigging and inverse kinematics (IK) are essential for creating realistic character movements in Blender. Rigging involves creating a skeleton (armature) for your model, while IK simplifies the animation process by allowing you to manipulate the end effector (like a hand or foot) to control the entire limb\"s movement. Follow these steps to master these techniques:
- Creating the Armature: Begin by adding bones to your character, ensuring each bone\"s pivot points align with the character\"s joints. Parent the mesh to the armature with automatic weights for initial skinning.
- Adjusting Weight Paint: Fine-tune the influence of each bone on the mesh by adjusting the weight paint. This ensures the mesh deforms naturally with the bones\" movement.
- Setting up Inverse Kinematics: Add an IK constraint to a bone at the end of a limb. Specify the chain length to determine how many bones up the chain the IK effect should apply.
- Using Pole Targets: Control the knee or elbow direction using a pole target. This is a separate bone that the IK system uses as a reference point to orient the limb.
- Testing and Refining: Animate your character using the IK controls and adjust as necessary. Pay special attention to joint rotations and ensure they mimic real-world movements accurately.
Rigging and IK are powerful tools for bringing characters to life. By understanding and applying these concepts, you can create complex animations with realistic movements, greatly enhancing the quality of your Blender projects.

Creating Engaging Character Expressions and Body Language
Creating engaging character expressions and body language is pivotal in breathing life into your 3D models. These elements not only convey emotions but also enhance the storytelling aspect of your animations. Here’s how to craft expressive characters in Blender:
- Understand Facial Anatomy: A solid grasp of facial anatomy is crucial. Study how different muscles move during various expressions to replicate these in your characters.
- Use Shape Keys for Facial Expressions: Shape keys allow you to modify a mesh\"s shape, perfect for creating detailed facial expressions. Start with neutral expressions and then create shape keys for emotions like happiness, sadness, anger, and surprise.
- Incorporate Body Language: Body language can communicate a character’s emotions as strongly as facial expressions. Use armatures to pose your character in ways that reflect their mood or intentions.
- Employ Rigging for Flexibility: Rigging characters with a comprehensive bone structure allows for more nuanced movements and expressions. Consider using additional bones for facial features to achieve more dynamic expressions.
- Animating Eye Movements: Eyes are the windows to the soul. Animate the eyes to look around, blink, and express emotions. This adds a layer of realism and relatability to your characters.
- Practice Subtlety: Sometimes, less is more. Subtle movements or changes in expression can have a powerful impact. Pay attention to the timing and ease of these changes for a natural look.
By combining these techniques, you can create characters that convey a wide range of emotions and tell compelling stories through their expressions and body language. Remember, the key to successful character animation lies in observation, experimentation, and refinement.

_HOOK_
Implementing Effective Lighting and Camera Techniques
Effective lighting and camera techniques are crucial for bringing your Blender animations to life. They not only enhance the visual appeal of your scenes but also contribute significantly to storytelling and mood setting. Here\"s how to implement these techniques for maximum impact:
- Understanding Lighting Basics: Start by familiarizing yourself with the different types of lights available in Blender, such as point, sun, area, and spotlights. Each type offers unique characteristics and uses, from simulating sunlight to highlighting specific areas of your scene.
- Three-Point Lighting: A classic setup that involves a key light, fill light, and backlight. This technique provides depth, reduces shadows, and highlights the form of objects or characters in your scene.
- Using HDRIs for Environmental Lighting: High Dynamic Range Images (HDRIs) can be used to create realistic environmental lighting. They simulate the light from a real-world environment, providing a quick and effective way to light your scenes.
- Camera Composition and Framing: Pay attention to how you frame your scenes. Use the rule of thirds, leading lines, and other compositional techniques to guide the viewer\"s eye and make your animations more engaging.
- Depth of Field: Utilize Blender’s camera settings to adjust the depth of field. This effect blurs the background or foreground, focusing attention on the main subject and adding a cinematic quality to your shots.
- Animating Camera Movements: Smooth camera movements can greatly enhance the storytelling aspect of your animations. Use keyframes to animate camera pans, zooms, and tilts to reveal or follow action within your scene.
- Color Grading and Post-Processing: After rendering, use Blender’s compositor or external software to adjust colors, contrast, and brightness to set the mood or time of day. Color grading can significantly affect the emotional impact of your animation.
By mastering these lighting and camera techniques, you can create visually stunning and emotionally resonant animations that captivate your audience. Remember, experimentation and practice are key to developing a keen eye for effective lighting and cinematography in Blender.
Top 10 Blender Animation Tips to Help You Animate Faster!
\"Discover the secret to achieving faster results in just minutes! Watch our video and learn the proven techniques that will save you time and supercharge your productivity.\"
Optimizing Workflow with Blender\"s Modifiers and Simulation Tools
Blender\"s robust set of modifiers and simulation tools can significantly streamline your 3D modeling and animation workflow. These tools offer a non-destructive way to create complex shapes, add detail, and simulate physics without manually editing geometry. Here\"s how to optimize your workflow with these powerful features:
- Leverage Modifiers for Efficiency: Use modifiers such as Subdivision Surface for smoothing geometry, Boolean for creating complex shapes through intersections or differences, and Array to duplicate objects along a path. Modifiers can be stacked and adjusted anytime, offering flexibility and speed.
- Automate Repetitive Tasks: For tasks like creating patterns or complex structures, utilize the Array and Mirror modifiers. This not only saves time but also ensures consistency and precision across your models.
- Use Simulation Tools for Realism: Blender\"s simulation tools, such as Cloth, Fluid, and Soft Body dynamics, add realism to your scenes. Use these tools to simulate natural movements and interactions without keyframe animation.
- Optimize Meshes with Decimate Modifier: Reduce the complexity of high-poly models using the Decimate modifier. This is particularly useful for performance optimization in animation and game assets.
- Employ Rigging Modifiers: The Armature modifier allows for skeletal rigging of models. Combine this with Inverse Kinematics (IK) for more realistic and complex character animations.
- Experiment with Physics Modifiers: Use physics-based modifiers like Smoke, Fire, and Particles to create dynamic effects. These tools simulate real-world physics, adding depth and immersion to your scenes.
- Utilize Custom Modifiers for Unique Effects: Explore custom modifiers and third-party add-ons for unique effects and workflow enhancements. Blender’s community offers a plethora of tools that can cater to niche requirements.
By integrating these modifiers and simulation tools into your workflow, you can achieve complex results more efficiently, leaving more time for creativity and experimentation. Remember, the key to optimizing your workflow is understanding the capabilities of each tool and applying them effectively to suit your project\"s needs.

5 Blender Tips That Have Saved Me 100+ Hours
\"Are you tired of wasting hours on mundane tasks? Our video reveals the game-changing strategies to maximize your efficiency and reclaim your precious hours. Don\'t miss out!\"
Exploring Advanced Techniques: Fluid, Soft Body, and Cloth Dynamics
Blender\"s advanced simulation tools, including fluid, soft body, and cloth dynamics, enable the creation of highly realistic animations. These tools simulate the physics of liquids, flexible materials, and fabrics, adding a layer of realism to your projects. Here\"s how to effectively utilize these dynamics:
- Fluid Simulations: Start by setting up a domain to define the boundaries of your fluid simulation. Adjust the fluid resolution for higher quality but consider the increased computational requirements. Use obstacles and inflow/outflow objects to interact with the fluid.
- Soft Body Dynamics: Ideal for simulating flexible materials, soft body dynamics can be applied to objects that need to deform or bounce. Adjust the soft body settings like mass, stiffness, and damping to achieve the desired behavior. Collision objects can be added to interact with the soft body.
- Cloth Simulations: To simulate fabrics, apply the Cloth modifier to your mesh. Configure properties such as stiffness, damping, and friction to control how the cloth behaves. Wind and other forces can be used to animate the cloth realistically.
- Combining Simulations: For complex scenes, you may need to combine different types of simulations. For instance, a character wearing a flowing dress (cloth dynamics) walking through water (fluid dynamics). Blender allows for the interaction between different simulation types for cohesive scene integration.
- Optimizing Simulations: High-quality simulations can be computationally intensive. Use Blender\"s cache system to save and replay simulations, adjusting settings as needed before final rendering. Consider simplifying your simulations where possible to maintain performance.
- Post-Processing Effects: After simulating, use Blender\"s compositing tools to refine the visual appearance of your simulations. This can include color correction, adding motion blur, or integrating the simulation seamlessly with the rest of your scene.
Mastering these advanced techniques can significantly enhance the realism and immersion of your animations. By carefully setting up and adjusting the parameters of your simulations, you can create stunning, lifelike scenes in Blender.

Learning from Case Studies: Real-world Animation Projects
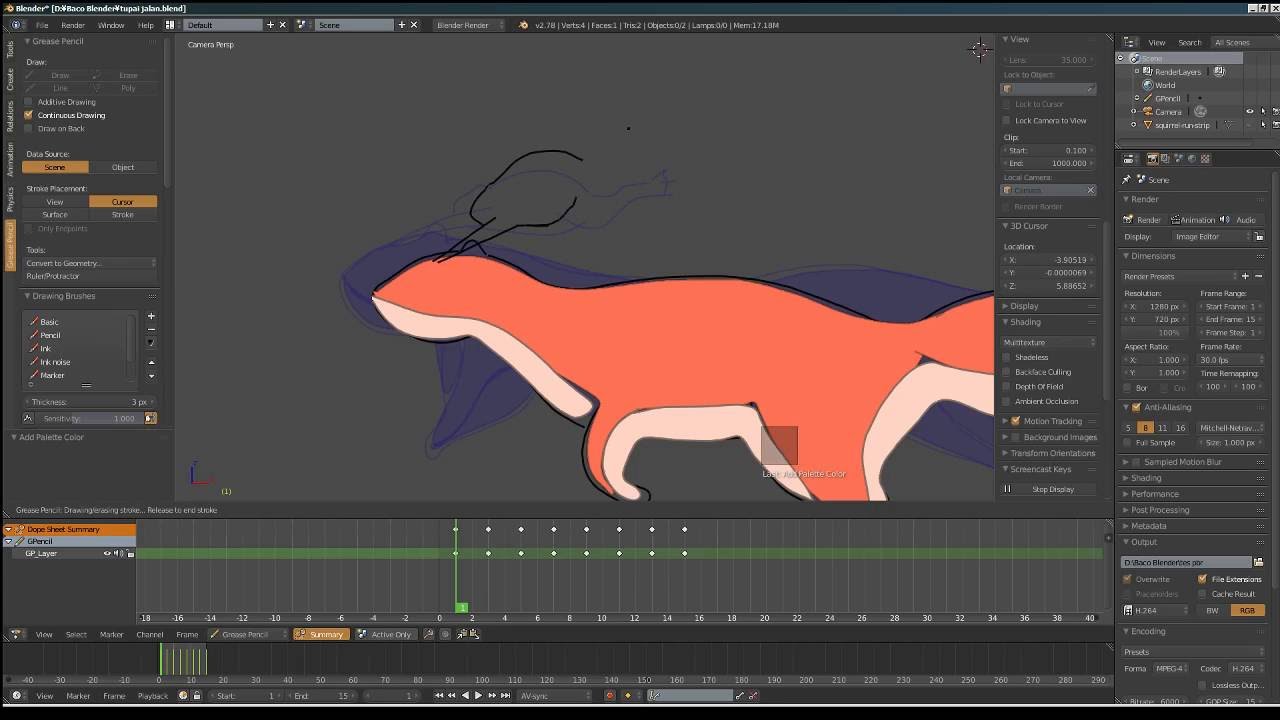
Studying real-world animation projects in Blender provides invaluable insights into the practical application of animation principles, workflow optimization, and creative problem-solving. Case studies like the production of \"Sprite Fright,\" Blender\"s own open movie project, reveal the depth of planning and iteration required to bring animated stories to life.
- Planning and Pre-production: Successful animations begin with thorough planning. Sketching important moments and gathering reference material, such as filming a specific walk or action, can significantly ease the blocking phase, allowing animators to flesh out beats before animation begins.
- Feedback and Iteration: Sharing work early with supervisors or peers for feedback can streamline the animation process, guiding early directions and changes for easier iteration. This approach emphasizes the importance of moving from rough to detailed animations, avoiding unnecessary work early on.
- Creative Approach: The motto \"Animate drunk, polish sober\" highlights the creative freedom in the initial stages of animation, focusing on getting the story beats and essential movements right without worrying about fine details. Simplifying motion to its essence allows for clearer communication of actions and emotions.
- Technical Setup: Properly setting up shots before animating, especially for technical scenes involving constraints or camera movements, saves time and avoids potential rework. Planning the use of IK (Inverse Kinematics) and FK (Forward Kinematics), as well as when to switch parenting, ensures a smoother animation process.
- Training and Analysis: Developing an analytical eye for animation is crucial. Understanding what makes animation appealing or identifying areas of improvement relies on a deep knowledge of animation principles and the ability to analyze animations frame by frame.
These insights from real-world projects underscore the iterative nature of animation, the importance of foundational planning, and the value of a creative and analytical approach. Through case studies, animators learn to refine their craft, making animations more believable, engaging, and technically sound.
Avoiding Common Pitfalls in Animation Projects
Creating animations can be a complex process filled with potential pitfalls. Understanding and avoiding these common mistakes can significantly enhance the quality and efficiency of your animation projects.
- Overlooking Planning and Pre-Production: Before diving into animation, it\"s crucial to spend adequate time in planning and pre-production. Thumbnailing, sketching important moments, and gathering reference material can make the blocking phase smoother and more efficient.
- Ignoring Feedback: Feedback is essential at all stages of animation. Share your work with supervisors, directors, or peers early on to receive constructive criticism that can save time and improve the final product.
- Avoiding Simplification: The principle of \"animate drunk, polish sober\" emphasizes the importance of simplifying animations in the initial stages. Focus on the essential movements and story beats before diving into the details.
- Underestimating Technical Setup: Properly setting up your shot before animating is critical, especially for more technical shots. Planning constraints, parent-switching, and camera movements can prevent the need for significant adjustments later.
- Lack of Analysis: Developing an analytical eye for animation is vital. Understanding what makes an animation appealing or identifying flaws requires a deep knowledge of animation principles and a keen eye for detail.
- Poor Resource Management: As projects grow in complexity, they can strain computer resources, leading to slow playback and lag. Utilizing features like Blender\"s \"Simplify\" can help optimize your scene and improve performance.
- Not Saving Workspaces: Personalized workspaces can increase productivity and creativity. Saving your workspace settings can ensure a consistent environment, regardless of the project you\"re working on.
By understanding and avoiding these common pitfalls, animators can streamline their workflow, enhance the quality of their animations, and avoid unnecessary work. Remember, animation is an iterative process that benefits greatly from planning, feedback, and continuous learning.
_HOOK_
Gathering Insights from Expert Interviews and Community Tips
The Blender animation community is rich with insights from experts and enthusiasts alike. Drawing from interviews with seasoned animators and community-shared tips can significantly enhance your animation skills. Here are some key takeaways gathered from expert interviews and community contributions:
- Embrace Modular Animation: Create actions as modular sequences. This approach not only keeps your project organized but also allows for easy modification and reuse of animation segments across different scenes or projects.
- Shortcut Mastery: Learn and utilize Blender\"s keyboard shortcuts, such as CTRL + TAB for quick switching between Object Mode and Pose Mode. This can save you a considerable amount of time, especially when working on complex animations.
- Precision with the 3D Cursor: Use the 3D cursor for precise object placement. This tool is indispensable for aligning objects accurately within your scene, enhancing the realism and detail of your animations.
- Individual Origins for Smooth Rotations: Utilize the \"Individual Origins\" option for rotating multiple objects. This feature is crucial for maintaining the uniqueness of each object\"s movement, contributing to more dynamic and realistic animations.
- Exploring the 2D Cursor in Graph Editor: The 2D cursor in the Graph Editor can be a powerful ally in refining the movement and timing of your animations. Use it as a reference for scaling and rotating keyframes to achieve precise control over animation curves.
- Mastering the Breakdowner Tool: The Breakdowner tool is essential for creating smooth transitions between keyframes. It allows for blending poses with precision, offering a seamless way to refine animations.
- Scene Optimization with Simplify: To manage complex scenes without overloading your system, utilize the \"Simplify\" feature. This helps in reducing the polygon count of your objects, ensuring smoother playback and faster rendering times.
- Permanently Saving Workspaces: Customize and save your workspace to streamline your workflow. Having a personalized and organized workspace can significantly boost your productivity and creativity.
By applying these expert tips and community insights, you can elevate your Blender animations to new heights. Remember, the key to mastery is continuous learning and experimentation. Engage with the Blender community, participate in forums, and practice regularly to refine your skills and develop your unique animation style.

READ MORE:
Expanding Skills with Additional Resources and Tutorials
To truly master Blender animation, continuously expanding your skill set through additional resources and tutorials is essential. Here are ways to deepen your knowledge and refine your techniques:
- Beginner Tutorials: Start with tutorials aimed at beginners to solidify your understanding of Blender\"s fundamental tools and features. Focus on keyframe animation, the timeline, and the dope sheet for managing animations.
- Walk Cycles: Practice creating walk cycles, a foundational skill for character animation. Break down the process into key frames and refine through repetition.
- Physics and Simulations: Explore tutorials on physics-based animations for objects and environments. Learn to animate with realism by applying physics simulations.
- Character Rigging: Dive into rigging tutorials to understand the mechanics of moving characters. Mastering rigging and inverse kinematics is crucial for realistic character movement.
- Advanced Techniques: Challenge yourself with tutorials on advanced techniques like fluid simulations, soft body dynamics, and cloth simulations to bring complexity and realism to your animations.
- Project-Based Learning: Engage in tutorials that take you through the complete process of modeling, texturing, lighting, and animating a project. This holistic approach helps in understanding workflow and project management.
Remember, the key to mastery is practice and continuous learning. Utilize the vast array of online tutorials, participate in Blender community forums, and don’t hesitate to experiment with your projects.
Unlock the full potential of your Blender animations with our comprehensive guide. From keyframe basics to advanced simulations, these tips will empower artists at all levels to create stunning visuals and bring their creative visions to life.