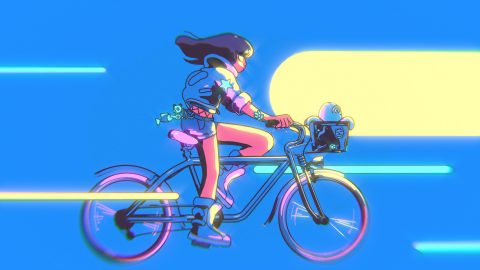
Topic blender grease pencil animation tutorial: Unlock the power of Blender"s Grease Pencil with our comprehensive animation tutorial, designed to guide you through mastering the art of 2D animation and bringing your creative visions to life.
Table of Content
- Can you provide a blender grease pencil animation tutorial?
- Getting Started with Blender Grease Pencil
- Understanding Grease Pencil Basics
- Navigating the Interface for 2D Animation
- Drawing and Editing with Grease Pencil
- Frame-by-Frame Animation Techniques
- Using Layers and Colors in Grease Pencil
- YOUTUBE: Blender 2D Animation Tutorial for Beginners - Grease Pencil
- Animating with Onion Skinning
- Adding Effects and Modifiers
- Storyboarding with Grease Pencil
- Exporting Your Grease Pencil Projects
- Tips and Tricks for Efficient Animation Workflow
- Advanced Techniques and Creative Uses
- Resources for Further Learning
Can you provide a blender grease pencil animation tutorial?
Yes, I can provide a Blender Grease Pencil animation tutorial. Here is a step-by-step guide:
- Open Blender and select the Grease Pencil workspace.
- Create a new 2D animation file by clicking on \"File\" and then \"New\".
- In the Grease Pencil tab, click on the \"Draw\" button to activate the drawing tool.
- Choose a brush type and size from the options on the left-hand side panel.
- Start drawing on the canvas by left-clicking and dragging.
- To create a keyframe, press \"D\" on your keyboard while drawing. This will automatically insert a new frame with your drawing.
- To animate your drawing, move to the next frame by using the arrow keys on your keyboard or by clicking on the timeline at the bottom of the window.
- Make changes to your drawing on the new frame.
- Continue creating keyframes and making changes to animate your drawing.
- To play your animation, press the play button at the bottom of the window.
- Adjust the timing of keyframes and the animation sequence as needed.
- Once you are satisfied with your animation, you can render it by clicking on the \"Render\" button and choosing the desired output format.
This is a basic overview of creating an animation using Blender\'s Grease Pencil. There are many more advanced features and techniques you can explore to enhance your animations. I encourage you to refer to the official Blender documentation and online tutorials for more in-depth guidance.
READ MORE:
Getting Started with Blender Grease Pencil
To begin creating with Blender\"s Grease Pencil, you\"ll need to get familiar with its unique toolset designed for 2D animation and drawing directly in a 3D space. Follow these steps to start your journey:
- Download and Install Blender: Ensure you have the latest version of Blender installed to access the most up-to-date Grease Pencil features.
- Open Blender and Create a New File: Select \"2D Animation\" from the template menu to setup your workspace for Grease Pencil drawing.
- Familiarize with the Interface: Explore the layout, which includes the 3D viewport, timeline, and drawing tools specific to Grease Pencil.
- Learn Basic Drawing Techniques: Use the Grease Pencil to start drawing. Practice using different brushes and strokes to get comfortable with the tool.
- Experiment with Layers: Layers allow you to separate elements of your animation for easier editing and organization.
- Understand Keyframes and Animation: Learn how to add keyframes in the timeline to create movement in your drawings.
- Play with Colors and Materials: Customize your creations by adding colors and materials to your Grease Pencil objects.
- Save Your Project: Don\"t forget to regularly save your work to prevent any loss of progress.
By following these steps, you\"ll be well on your way to creating dynamic and engaging animations using Blender\"s Grease Pencil. Remember, practice is key to mastering any new tool, so don\"t hesitate to experiment and explore all the possibilities that this powerful feature offers.
Understanding Grease Pencil Basics
The Grease Pencil in Blender is a powerful tool that allows artists to draw in 3D space, offering a seamless blend of 2D drawing and 3D animation. Grasping its fundamentals is key to leveraging its full potential:
- Grease Pencil Object: It\"s a unique Blender object that stores strokes, which are essentially lines or shapes drawn by the artist.
- Strokes and Points: Strokes are made up of points, similar to vertices in a mesh, which can be manipulated for precise control over your drawings.
- Drawing Modes: There are several modes available, including Draw, Edit, Sculpt, and Weight, each providing tools for specific tasks like creating, modifying, or animating strokes.
- Layers: Just like in traditional digital art software, layers in Grease Pencil allow you to separate different elements of your drawing for better organization and editing flexibility.
- Materials: You can assign materials to your strokes for coloring and texturing, enhancing the visual quality of your animations.
- Animation Techniques: Grease Pencil integrates with Blender\"s animation tools, allowing you to keyframe your drawings for movement and use features like onion skinning for smooth transitions.
Understanding these basics will provide a solid foundation for creating your first Grease Pencil project. Remember, experimenting with each feature will help you discover the best ways to bring your artistic visions to life.
Navigating the Interface for 2D Animation
Blender\"s interface can be daunting for beginners, especially when focusing on 2D animation with the Grease Pencil. Here’s how to navigate the Blender interface to make the most of your 2D animation projects:
- Workspace Selection: Start by choosing the \"2D Animation\" workspace from the top menu to automatically configure Blender for 2D drawing and animation.
- Tool Shelf and Properties: On the left, the Tool Shelf provides drawing, editing, and sculpting tools, while the Properties panel on the right offers settings for your Grease Pencil objects, materials, and layers.
- 3D Viewport: The central area is the 3D Viewport, where you\"ll spend most of your time drawing and animating. It can display 3D and 2D views, which you can switch between as needed.
- Timeline and Dope Sheet: At the bottom, the Timeline allows you to scrub through your animation, while the Dope Sheet provides detailed control over keyframes and timing.
- Layers Panel: Use the Layers panel to manage the visibility, locking, and ordering of your drawing layers.
- Materials and Colors: The Materials tab lets you create and assign different colors and textures to your strokes, enriching the visual appeal of your animations.
- Rendering Settings: The Render tab contains settings for exporting your animation, including output format, resolution, and frame rate.
This overview of the Blender interface for 2D animation should help you find your way around more confidently. Remember, practice and exploration are key to becoming proficient with Blender\"s tools.
Drawing and Editing with Grease Pencil
The Grease Pencil tool is at the heart of Blender\"s 2D animation capabilities. It allows for intuitive drawing and editing directly in the 3D space. Mastering these techniques is essential for creating compelling animations:
- Choosing the Right Brush: Begin by selecting a brush from the tool shelf. Blender offers a variety of brushes for different effects, such as drawing, filling, and erasing.
- Drawing Strokes: With the draw tool selected, click and drag in the viewport to create strokes. Adjust the brush size and strength to suit your needs.
- Using Layers: Organize your artwork by drawing on different layers. This allows for easy editing and manipulation of individual elements without affecting the rest of your drawing.
- Editing Strokes: Use the edit mode to select, move, bend, or delete specific points or entire strokes. This is crucial for refining your drawings and animations.
- Working with Colors: Assign materials to your strokes in the material properties panel to color your drawings. You can also use the fill tool to apply colors to closed areas.
- Animating Your Drawings: Switch to the animation workspace to keyframe your drawings for movement. Use the dope sheet and graph editor for precise control over timing and easing.
- Using Modifiers: Explore Grease Pencil modifiers to add effects like blur, noise, or lattice deformations to your animations, enhancing their visual impact.
By following these steps, you\"ll be able to create dynamic and visually appealing animations with the Grease Pencil tool in Blender. Practice each technique to develop your skills further.

_HOOK_
Frame-by-Frame Animation Techniques
Frame-by-frame animation is a traditional and highly control-centric technique that involves drawing each frame of an animation by hand. When applied using Blender\"s Grease Pencil, it allows for rich, expressive animations. Here\"s how to master this method:
- Set Your Frame Rate: Decide on the frame rate for your project in the render settings. A standard frame rate is 24 fps, but choosing a higher or lower rate can affect the animation\"s fluidity and style.
- Start with Key Drawings: Begin your animation with key frames, drawing the most important positions of your animation sequence to outline the motion.
- Fill In-Between Frames: Once your key frames are established, draw the in-between frames. These frames transition smoothly between key positions, adding fluidity to the movement.
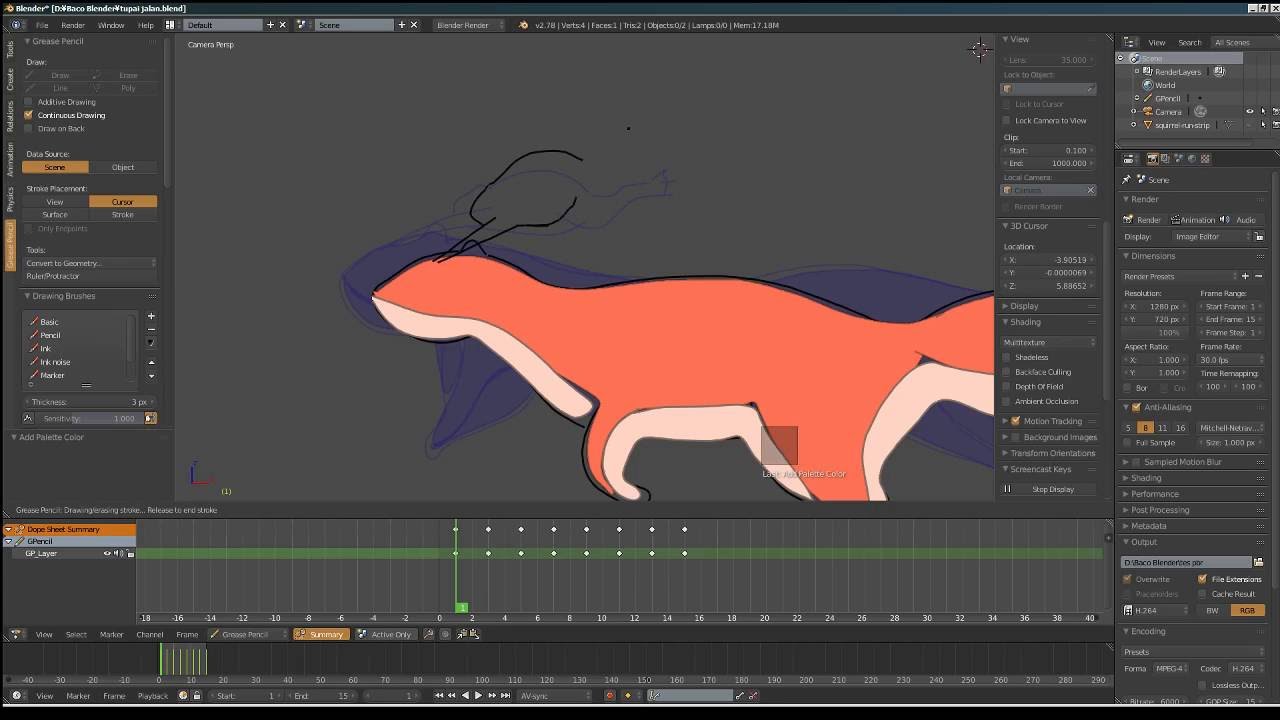
- Onion Skinning: Enable onion skinning in the viewport overlays to see a translucent overlay of previous and upcoming frames. This guide helps in creating smoother transitions between frames.
- Adjust Timing and Spacing: Use the timeline and dope sheet to adjust the timing of your frames. Spacing the frames closer together will speed up the motion, while spacing them further apart will slow it down.
- Refine Your Animation: Play back your animation frequently to review its flow and timing. Make adjustments as needed to ensure smooth movement.
- Add Details and Secondary Actions: Once your primary motion is animated, add details and secondary actions to enhance realism and interest.
- Finalize and Export: After completing your animation, finalize it by cleaning up any rough drawings and exporting it using Blender\"s render settings.
This frame-by-frame approach with the Grease Pencil tool allows for detailed and expressive animations, giving life to your 2D creations in Blender.
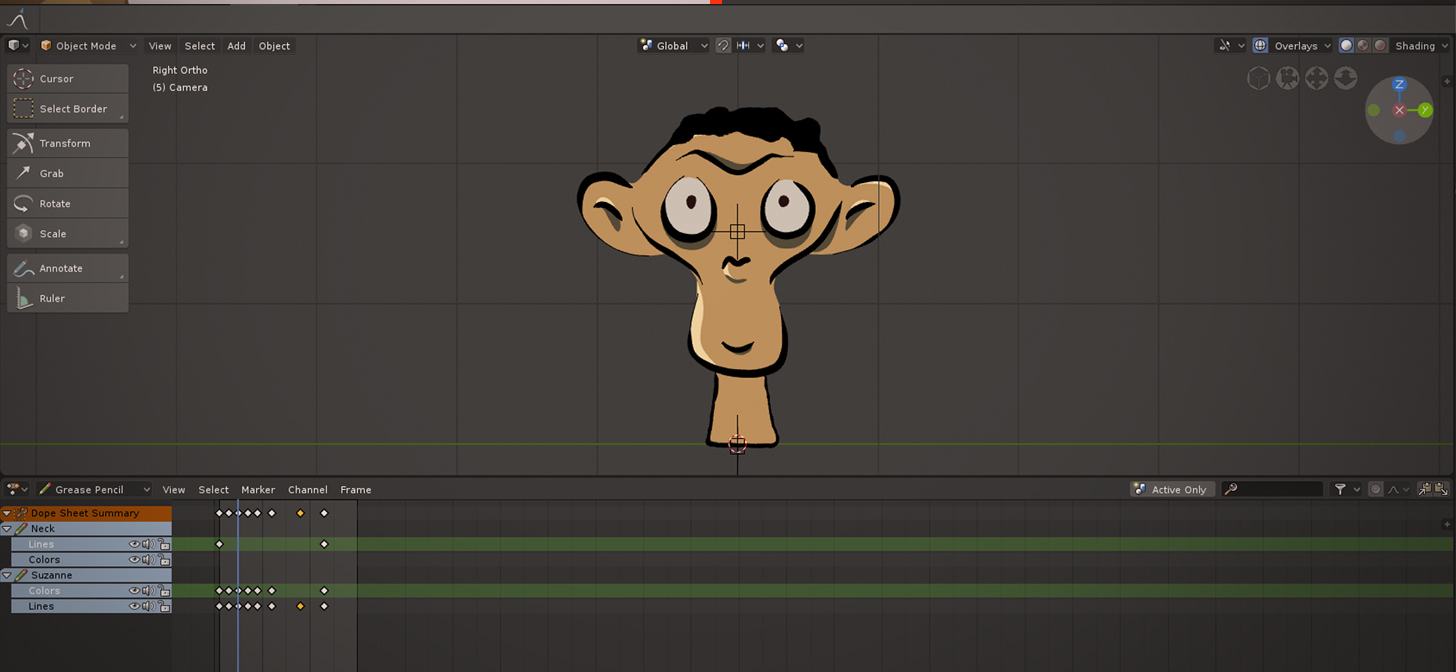
Using Layers and Colors in Grease Pencil
Layers and colors are crucial elements in creating complex and visually appealing animations in Blender\"s Grease Pencil. They provide organization and depth to your artwork, allowing for intricate compositions and easy edits. Here\"s how to effectively use them:
- Organizing with Layers: Use layers to separate different elements of your animation, such as background, characters, and foreground elements. This allows for individual editing without affecting other parts of your drawing.
- Adding and Managing Layers: In the Grease Pencil panel, you can add new layers, duplicate existing ones, or merge them. Use the visibility toggle to focus on specific layers while working.
- Naming Layers: Clearly name each layer according to its content or function. This will help you stay organized, especially in complex projects.
- Using Blend Modes: Experiment with layer blend modes to achieve various effects, such as shadows, highlights, or transparency.
- Applying Colors: Assign materials to your Grease Pencil strokes to add color. You can create custom materials in the Material Properties tab for specific hues, shades, and textures.
- Color Palettes: Organize your colors into palettes for consistency across your animation. This is especially useful for characters or recurring elements.
- Editing Strokes with Colors: Use the fill tool or stroke painting to modify the color of existing strokes. This can be useful for adjustments or stylistic changes.
- Locking and Muting Layers: Lock layers to prevent accidental edits or mute them to focus on specific aspects of your animation.
Mastering the use of layers and colors in Grease Pencil will elevate your animations, making them more dynamic, colorful, and well-organized.

Blender 2D Animation Tutorial for Beginners - Grease Pencil
Get ready to be mesmerized by the captivating world of animation! This video showcases stunning visuals and storytelling that will leave you in awe. Don\'t miss out on this delightful journey into the realm of imagination and creativity.
Blender Tutorial: An Intro To Grease Pencil - Super Secret Tips
Have you ever wanted to learn something new and exciting? Look no further! This tutorial video is the perfect guide to help you master a new skill. Easy-to-follow instructions and expert tips will make you a pro in no time. So grab a notebook and get ready to unlock your potential with this amazing tutorial.
Animating with Onion Skinning
Onion skinning is an essential technique in traditional and digital animation that allows animators to see several frames at once, providing a reference for movement and positioning. In Blender\"s Grease Pencil, it\"s a powerful feature for creating smooth animations. Here\"s how to use it effectively:
- Enabling Onion Skinning: Find the onion skinning option in the Grease Pencil object\"s properties. Turn it on to activate the feature in your workspace.
- Adjusting the Range: You can adjust the range of frames visible before and after the current frame. This helps in planning out the motion by providing a clearer view of the animation\"s path.
- Customizing Colors: Blender allows you to customize the colors of the onion skins. Differentiating past and future frames by color can help you navigate your animation more intuitively.
- Using Onion Skinning with Layers: Onion skinning can be applied to specific layers. This is useful when working on complex scenes where you want to focus on animating one element at a time.
- Animating Frame by Frame: With onion skinning enabled, draw your next frame using the ghost images as a guide for consistent motion. This is particularly helpful for detailed or nuanced movements.
- Refining Motion: Use onion skinning to refine the motion between frames. It allows you to easily identify where adjustments are needed to smooth out actions or poses.
- Toggle Visibility: You can quickly toggle the visibility of onion skins on and off. This allows you to check the actual progress of your animation without the overlay.
- Optimizing Performance: If you experience lag while using onion skinning, reduce the number of frames visible or temporarily disable the feature to improve Blender\"s performance.
Mastering onion skinning in Blender\"s Grease Pencil will significantly enhance your ability to create fluid, lifelike animations by providing a frame-by-frame reference that guides your drawing process.

Adding Effects and Modifiers
Blender\"s Grease Pencil offers a range of effects and modifiers that can enhance your animations, adding complexity and visual appeal with minimal effort. Here\"s how to incorporate these powerful tools into your projects:
- Accessing Modifiers: In the properties panel, switch to the modifiers tab to view and add new modifiers to your Grease Pencil object.
- Wave Modifier: Use the wave modifier to add a dynamic, wavy motion to your drawings, ideal for simulating water, flags, or cloth.
- Build Modifier: The build modifier allows your drawings to appear on the screen over time, which is perfect for creating reveal effects or transitions.
- Array Modifier: Duplicate your artwork in a pattern or sequence with the array modifier. This can be used for creating complex patterns or multiple instances of characters.
- Color Effects: Enhance your animations with color effects. Adjust brightness, contrast, hue, and saturation directly within Blender to match your artistic vision.
- Tint Modifier: Apply the tint modifier to change the color of specific strokes or layers, allowing for dynamic color shifts in your animation.
- Blur Effect: Add a blur effect to soften edges or create a sense of motion. This effect can be adjusted for strength and direction to fit the scene.
- Layering Modifiers: Modifiers can be stacked and combined to create unique effects. Experiment with different combinations to discover new possibilities.
- Animating Modifiers: Many modifier properties can be animated over time, allowing for dynamic changes in your effects throughout the animation.
Incorporating effects and modifiers into your Grease Pencil animations can significantly enhance the visual quality and creativity of your work. Experiment with these tools to find new ways to bring your animations to life.

Storyboarding with Grease Pencil
Storyboarding is a crucial phase in animation, allowing you to visualize the narrative flow of your project. Blender\"s Grease Pencil tool is perfectly suited for creating detailed storyboards. Here\"s how to utilize it for your storytelling:
- Setting Up Your Canvas: Start by setting up a new Blender file with a 2D Animation workspace. This provides a clean slate for drawing your storyboard panels.
- Sketching the Panels: Use the Grease Pencil to sketch out each panel of your storyboard. Think of each panel as a frame in your final animation, capturing key moments and transitions.
- Adding Text Annotations: Use the text tool in Blender to add annotations or dialogue under each panel. This helps convey additional information about the scene, such as actions, emotions, or camera movements.
- Organizing Layers: Create separate layers for different elements within each panel, such as characters, backgrounds, and text. This makes it easier to edit individual components without affecting the whole panel.
- Using Color Coding: Apply different colors to highlight important aspects of your storyboard, such as character movements, sound effects, or camera angles. This visual coding can simplify the reading and understanding of the storyboard.
- Revising and Editing: The flexibility of the Grease Pencil allows you to easily revise your panels. Take advantage of this by refining your storyboard as your project evolves.
- Exporting Your Storyboard: Once your storyboard is complete, you can export it as a series of images or a PDF to share with your team or use as a reference throughout the production process.
Storyboarding with Blender\"s Grease Pencil offers a dynamic way to plan and visualize your animation projects, ensuring that your creative vision is clearly defined from the start.

_HOOK_
Exporting Your Grease Pencil Projects
Once you\"ve completed your animation with Blender\"s Grease Pencil, the next step is to export it for sharing or further production. Here\"s a step-by-step guide to efficiently export your projects:
- Choose the Output Format: Decide on the format for your export. Blender supports a variety of formats, including PNG, JPEG for images, and MOV, AVI, or MPEG for videos.
- Set the Output Properties: In the Output Properties panel, specify your desired resolution, frame rate, and the file path where your project will be saved.
- Configure Render Settings: Adjust render settings to match the needs of your project. This includes options for anti-aliasing, shading, and color management to ensure the best quality.
- Select the Frame Range: Specify the start and end frames of your animation if you\"re not exporting the entire sequence. This allows you to export specific segments of your project.
- Apply Post-Processing Effects: If necessary, apply any final post-processing effects before exporting. Blender\"s Compositor offers a range of options for color correction, blurring, or adding other visual effects.
- Exporting Images: For still images or storyboards, select the frame you wish to export and use the \"Render Image\" option. Save each frame as needed.
- Exporting Animation: For full animations, use the \"Render Animation\" button. Blender will process each frame sequentially and compile them into the chosen video format.
- Checking the Export: Once the export is complete, review the exported files to ensure everything looks as expected. If necessary, make adjustments and re-export.
Following these steps will help you successfully export your Grease Pencil projects from Blender, ready for sharing, presentation, or further post-production.
Tips and Tricks for Efficient Animation Workflow
Creating animations with Blender\"s Grease Pencil can be a rewarding experience. To make your animation workflow as efficient as possible, here are some tips and tricks:
- Use Shortcuts: Familiarize yourself with Blender\"s keyboard shortcuts. This can significantly speed up your workflow and make navigation easier.
- Customize Your Workspace: Blender allows you to customize and save workspaces. Set up a workspace that suits your animation process, with easy access to tools you use frequently.
- Keep Your Files Organized: Use a consistent naming convention for your files and keep your project assets organized in folders. This makes it easier to find and manage your resources.
- Reuse Elements: Take advantage of Blender\"s library system to reuse assets like characters, backgrounds, or props across multiple projects or scenes.
- Onion Skinning for Smooth Transitions: Make extensive use of onion skinning to ensure smooth transitions and movements in your animations.
- Layer Management: Use layers judiciously to separate different elements of your animation. This allows for easier editing and adjustments.
- Pre-plan Your Animation: Spend time storyboarding and planning your animation before diving into the creation process. A clear plan can save time and ensure a cohesive final product.
- Regularly Save Your Work: Blender\"s auto-save feature is helpful, but make it a habit to manually save your progress frequently to avoid losing work.
- Experiment with Modifiers and Effects: Don\"t be afraid to experiment with different modifiers and effects to achieve unique results. Blender\"s non-destructive workflow means you can always undo or adjust as needed.
- Stay Updated: Blender is regularly updated with new features and improvements. Stay current with updates to take advantage of the latest tools and enhancements for animation.
By incorporating these tips into your workflow, you can create more efficiently and effectively, allowing you more time to focus on the creative aspects of your animations.
Advanced Techniques and Creative Uses
Blender\"s Grease Pencil not only excels in traditional 2D animation but also opens the door to innovative techniques and creative applications. Here are some advanced ways to push the boundaries of what you can achieve:
- 3D Integration: Mix 2D Grease Pencil drawings with 3D models to create unique compositions that blend flat animation with spatial depth.
- Custom Brushes: Create and customize your own brushes in Blender for unique textures and effects in your Grease Pencil artwork.
- Morphing Animations: Use the interpolation tools to morph between shapes or characters, creating smooth transitions and transformations within your animations.
- Frame-by-Frame Sculpting: Apply Blender\"s sculpting tools to Grease Pencil frames for dynamic adjustments and to add volume or texture to your drawings.
- Camera Movements: Utilize Blender\"s camera to add pans, zooms, and rotation effects, bringing a cinematic quality to your 2D animations.
- Grease Pencil as Masks: Use Grease Pencil strokes as masks in the compositor to create interesting effects or reveal elements in your scenes.
- Animating Effects and Modifiers: Keyframe the properties of effects and modifiers for dynamic changes in your artwork over time.
- Multiplane Scenes: Create multiplane scenes by arranging Grease Pencil layers at different depths. This technique adds a sense of parallax and depth to your animations.
- Rigging for 2D Characters: Rig 2D characters drawn with Grease Pencil for more complex animations. This approach combines the principles of 3D rigging with 2D art.
- Interactive Prototypes: Use Grease Pencil in conjunction with Blender\"s game engine to prototype interactive content or simple games featuring your 2D animations.
Exploring these advanced techniques can significantly enhance your creative output, allowing you to explore new artistic directions and innovate within the realm of 2D and 3D animation with Blender\"s Grease Pencil.
READ MORE:
Resources for Further Learning
Expanding your skills with Blender\"s Grease Pencil requires practice and the right resources. Here are some invaluable resources for further learning and inspiration:
- Blender Official Tutorials: Start with the source. Blender\"s official website and YouTube channel offer tutorials specifically for Grease Pencil, covering basics to advanced techniques.
- Online Courses and Workshops: Platforms like Udemy, Coursera, and Skillshare feature comprehensive courses on Blender, including dedicated sections for Grease Pencil animation.
- Blender Community Forums: Join the Blender community forums and the Blender Artists online community. These platforms allow you to ask questions, share your work, and get feedback from fellow artists.
- Books and E-books: There are several books available that focus on Blender, including guides to mastering Grease Pencil for animation and illustration.
- Video Tutorials: YouTube and Vimeo host countless tutorials from Blender enthusiasts and professionals alike. These can be great for visual learners and cover a wide range of topics.
- Blender Conferences: Watch presentations from Blender Conference attendees. These talks often explore creative uses of Grease Pencil and share insights into the animation process.
- Project Files and Templates: Experiment with project files and templates from other creators. Analyzing and manipulating these can be a great way to learn.
- Blender Add-ons: Explore add-ons created for Blender that can enhance your Grease Pencil work, from custom brushes to animation tools.
- Practice Projects: Finally, the best way to learn is by doing. Set yourself small projects to apply what you\"ve learned and push your boundaries.
Utilizing these resources will deepen your understanding of Blender\"s Grease Pencil, improve your skills, and inspire you to create more ambitious and creative animations.
Embark on a creative journey with Blender\"s Grease Pencil, where your animation dreams can take flight. With the right guidance, practice, and exploration, you\"ll unlock endless possibilities in the world of 2D and 3D art.