Topic blender how to animate a character: Discover the magic of character animation in Blender, where creativity meets functionality. This guide will walk you through each step to bring your characters to life, making animation accessible and enjoyable for artists of all levels.
Table of Content
- How to animate a character in Blender?
- Understanding the Blender Interface
- Getting Started with Character Modeling
- Rigging Your Character for Animation
- Introduction to Keyframe Animation
- Using Inverse Kinematics for Natural Movements
- Animating Facial Expressions and Lip Sync
- YOUTUBE: Animating 3D Characters in 1 Minute
- Applying Motion Capture Data to Your Character
- Working with Nonlinear Animation (NLA) Editor
- Adding Sound and Synchronizing Animations
- Rendering Your Animation
- Tips for Realistic Animation
- Resources for Further Learning
How to animate a character in Blender?
Animating a character in Blender involves a series of steps. Here is a step-by-step guide on how to animate a character in Blender:
- Create a Character Model:
- Create or import a character model with a proper rigging setup. The rigging should include bones that define the character\'s skeletal structure and control its movement.
- Ensure the rigging is correctly aligned with the character\'s mesh, allowing for smooth deformation during animation.
- Set Up the Animation Workspace:
- Open Blender and switch to the Animation workspace.
- Ensure the Timeline panel is open, displaying the keyframes.
- Position the 3D viewport to best view your character and its rigging.
- Keyframing the Pose:
- Select the rig\'s root bone and set your current frame to the desired starting point of the animation.
- Enter Pose Mode by selecting the armature and pressing the Tab key or by choosing it from the mode dropdown in the 3D viewport.
- Manipulate the bones to create the desired pose for the character at the current frame.
- With the bones posed, press the \"I\" key and choose the type of keyframe you want to create (e.g., LocRotScale for full character animation).
- Repeat the previous two steps for each major pose of your animation, setting keyframes at the corresponding frames.
- Refine the Animation:
- Using the Dope Sheet or Graph Editor, adjust the timing of the animation by moving and scaling the keyframes.
- Add additional keyframes to refine the character\'s movements, ensuring smooth transitions between poses.
- Pay attention to timing, spacing, and anticipation to make the animation more appealing.
- Render and Playback:
- Configure the render settings, such as resolution and output format.
- Preview the animation in the viewport or using the \"Play\" button in the Timeline panel.
- Render the final animation using the designated render button or shortcut.
READ MORE:
Understanding the Blender Interface
Before diving into character animation, familiarizing yourself with Blender\"s comprehensive interface is crucial. This section guides you through the primary areas and tools, setting a solid foundation for your animation journey.
- 3D Viewport - The heart of Blender, where you\"ll spend most of your time modeling, rigging, and animating characters. Navigate using mouse or shortcut keys to rotate, pan, and zoom.
- Timeline - Located at the bottom, it allows you to control the animation frame by frame. Use it to set keyframes and play animations.
- Outliner - A hierarchical list on the right that displays all objects in the scene, making it easy to select and manage your character components.
- Properties Panel - Adjacent to the Outliner, it offers various settings for the active object, including materials, modifiers, and physics properties.
- Tool Shelf and Properties Shelf - Accessible by pressing T and N in the 3D Viewport. These shelves provide quick access to tools and object properties.
Begin by customizing the interface to your preference, enabling the workspace that best suits your workflow. Exploring these areas will enhance your efficiency and comfort as you start animating characters in Blender.

Getting Started with Character Modeling
Character modeling is a vital step in animation, requiring attention to detail and understanding of anatomy. This section covers the basics to kickstart your modeling process in Blender, ensuring a solid foundation for animation.
- Concept and Reference Images - Begin by gathering or creating concept art and reference images. Use these as a guide to ensure accuracy and consistency in your model.
- Setting Up Background Images - Import your reference images into Blender to serve as a backdrop, aiding in the modeling process.
- Basic Mesh Modeling - Start with a simple shape, such as a cube or sphere, and use Blender\"s modeling tools to extrude, scale, and modify it to match your character\"s basic form.
- Adding Detail - Gradually add more detail to your character by subdividing the mesh and sculpting features. Focus on key areas like the face, hands, and feet.
- Topology and Edge Loops - Pay attention to the topology of your model. Use edge loops to maintain a clean, animatable mesh, particularly around joints for smooth deformations.
- Materials and Textures - Once your model is complete, apply materials and textures to bring your character to life. This can include colors, bump maps, and specular highlights.
Character modeling in Blender is both an art and a science. Taking the time to refine your model will pay off in the animation stage, leading to more believable and dynamic characters.
Rigging Your Character for Animation
Rigging is the process of creating a skeleton for your character so it can move in a lifelike manner. This section will guide you through the essential steps to rig your character in Blender, ensuring it\"s ready for animation.
- Understanding Armatures - Armatures are the bones of your character. Learn how to add and position bones to match your character\"s anatomy.
- Parenting Mesh to Armature - Once your armature is in place, you need to parent the character\"s mesh to the armature, which allows the bones to control the mesh during animation.
- Weight Painting - This process defines how much influence each bone has on the surrounding mesh. Use weight painting to fine-tune the deformation of your character\"s mesh when it moves.
- Creating Control Rigs - For complex movements, additional control rigs (IK handles, custom shapes for controllers) can be added to simplify the animation process.
- Testing the Rig - Before moving on to animation, it\"s crucial to test your rig thoroughly. Pose your character in various positions to ensure the mesh deforms naturally and all controls work as intended.
Successful rigging is a critical step in character animation, providing the foundation for bringing your character to life. With Blender\"s powerful rigging tools, you can create rigs that are both flexible and intuitive to animate.

Introduction to Keyframe Animation
Keyframe animation is a fundamental technique in Blender that allows animators to define specific poses for characters at certain points in time. This section breaks down the basics of keyframe animation to get you started.
- Understanding Keyframes - Keyframes are markers that save the position, rotation, and scale of objects at a particular frame in your animation timeline.
- Setting Your First Keyframe - To create an animation, move your character to the desired starting pose, select the bones or objects you wish to animate, and press \"I\" to insert a keyframe. Choose the attributes you want to keyframe, such as location, rotation, or scale.
- Creating Movement - Move ahead in the timeline, adjust your character to the next pose, and insert another keyframe. Blender will automatically interpolate the frames between keyframes, creating smooth motion.
- Interpolation and Easing - Blender offers different interpolation types, such as linear or bezier, to control how animation transitions between keyframes. Adjust these settings in the Graph Editor for more nuanced animations.
- Animating Properties - Beyond physical movement, you can animate almost any property in Blender, including material color, light intensity, or camera angle. This is done in the same way, by setting keyframes for the desired properties at specific frames.
- Playback and Editing - Use the timeline controls to play back your animation, review the movement, and make adjustments as needed. Keyframes can be moved or deleted to refine the animation.
Keyframe animation is a powerful tool in Blender, allowing for precise control over the movement and behavior of characters and objects. With practice, you can create complex and lifelike animations that bring your creations to life.

_HOOK_
Using Inverse Kinematics for Natural Movements
Inverse Kinematics (IK) is a technique in Blender that simplifies the animation process, especially for limbs and complex movements. It allows for more intuitive posing of characters by manipulating the end effector (like a hand or foot) to control the movement of connected chain bones.
- Understanding Inverse Kinematics - IK reverses the traditional bone chain movement logic. Instead of rotating each bone individually, you move the last bone in the chain, and the preceding bones adjust automatically to create natural motion.
- Adding an IK Constraint - Select the bone where you want the IK effect to end, and add an IK constraint. Specify the target bone or object and the chain length to define how many bones are affected.
- Adjusting IK Properties - Fine-tune the IK constraint settings, such as influence and pole target, to control how the bone chain behaves. This can help avoid unnatural bending and twisting.
- Animating with IK - With IK constraints applied, animate your character by moving the target bones. This method is particularly useful for walking cycles, hand movements, and any action where limbs need to reach specific points.
- Combining FK and IK - For maximum flexibility, blend Forward Kinematics (FK) and IK. Use FK for the main body movements and IK for limbs. This combination can yield more dynamic and varied animations.
- Practical Tips for IK Animation - Practice with simple actions first, like lifting an arm or taking a step. Pay attention to how the IK chain affects movement and adjust your rig accordingly for the best results.
By incorporating IK into your Blender projects, you can achieve more natural and realistic animations with less effort. It\"s an essential technique for any character animator looking to elevate their work.

Animating Facial Expressions and Lip Sync
Animating facial expressions and lip sync in Blender adds life and emotion to characters, making them more relatable and engaging. This section explains how to animate faces and synchronize dialogue effectively.
- Creating Shape Keys - Shape keys, also known as blend shapes, are used to deform the mesh into different facial expressions. Create a base shape key for the neutral expression, then additional keys for emotions like happiness, sadness, anger, and phonemes for speech.
- Animating Shape Keys - Animate the intensity of each shape key over time to transition between expressions. This can be done by inserting keyframes on the shape key\"s value slider for precise control over the facial animation.
- Setting Up a Lip Sync - For lip sync, focus on the phonemes that correspond to the spoken dialogue. Animate the shape keys to match the timing of the speech, ensuring the mouth movements are synchronized with the audio.
- Using Drivers for Automated Movements - Drivers can automate facial animations based on the movement of other objects or bones. For example, a driver could make a character blink when the eyelid bone moves.
- Combining Manual and Automated Techniques - While shape keys and drivers offer a great start, manually adjusting keyframes can add nuances that make your character\"s emotions and lip sync feel more natural and realistic.
- Practical Tips for Facial Animation - Study real facial expressions and mouth movements for authenticity. Keep animations subtle to avoid over-exaggeration, unless the style of your project calls for it.
Animating facial expressions and lip sync requires patience and attention to detail, but the payoff is a character that truly connects with the audience. Blender\"s tools make these intricate animations accessible, allowing for deep emotional storytelling.

Animating 3D Characters in 1 Minute
Animating: Discover the enchanting world of animating as we take you on a journey through the principles and techniques that bring characters to life. Get ready to unleash your creativity and learn the secrets behind mesmerizing animations in our captivating video tutorial!
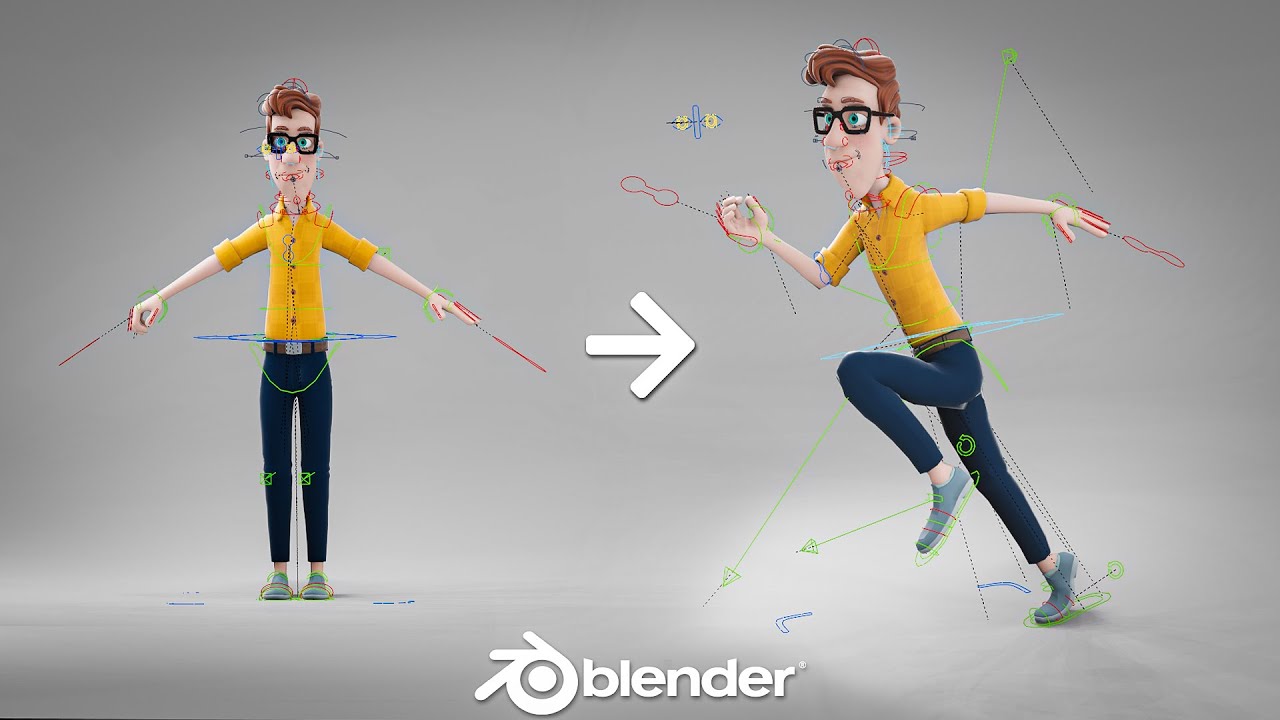
Rigging and Animating in Blender
Rigging: Dive into the fascinating art of rigging and unlock the potential to create seamless movements for your characters. Our insightful video tutorial will teach you step-by-step how to set up rigs, control deformations, and enhance the overall realism of your animations. Join us on this exciting journey and become a rigging expert today!
Applying Motion Capture Data to Your Character
Utilizing motion capture data can dramatically speed up the animation process and add realism to your character\"s movements. Blender allows for easy integration of motion capture data, transforming your animation workflow.
- Finding Motion Capture Data - Start by sourcing motion capture files compatible with Blender. Many online repositories offer free or purchasable motion data in formats like BVH or FBX.
- Importing Motion Capture Data - Use Blender\"s import function to load the motion capture file into your scene. Ensure the imported data includes an armature that can be mapped to your character.
- Retargeting Motion to Your Character - The key step is to retarget the motion data from the imported armature to your character\"s rig. This may involve adjusting bone names and orientations to match.
- Refining the Animation - After retargeting, you\"ll likely need to refine the animation. Use the graph editor and dope sheet to adjust keyframes and ensure the movements look natural on your character.
- Applying Additional Animations - Combine motion capture with keyframe animation for facial expressions, finger movements, or any specific actions not captured in the motion data.
- Testing and Exporting - Thoroughly test the animation within your scene, making adjustments as needed. Once satisfied, your character is ready for rendering or export.
By applying motion capture data, you can achieve high-quality animations that would be time-consuming to create manually. This technology brings a new level of realism and dynamism to character animation in Blender.
Working with Nonlinear Animation (NLA) Editor
The Nonlinear Animation (NLA) Editor in Blender is a powerful tool that allows animators to blend and layer different actions together. It\"s ideal for creating complex animations by reusing and mixing existing animations. This section explains how to utilize the NLA Editor effectively.
- Understanding NLA Concepts - The NLA Editor works with actions, which are individual animations that can be layered and blended. Each action becomes a strip in the NLA Editor, allowing for non-linear editing.
- Adding Actions to the NLA Editor - Start by creating actions in the Action Editor. Once an action is completed, push it down to the NLA Editor to convert it into an NLA strip.
- Layering and Blending Actions - In the NLA Editor, you can stack multiple actions on top of each other. Use blending modes and tweak the strip properties to control how actions mix together.
- Adjusting Action Strips - Move, scale, and trim action strips to fit your animation timeline. This allows for precise control over when and how each action plays.
- Using Tweaks and Transitions - For finer control, use tweak mode to make adjustments to action strips without altering the original action. Add transitions between strips for smooth changes in animation.
- Animating Properties with the NLA - Beyond character movements, the NLA Editor can animate properties like material colors, light settings, or camera movements by layering these as actions.
The NLA Editor is a versatile tool that enhances the animation process in Blender, enabling animators to create more complex and varied sequences efficiently. Mastering the NLA Editor opens up a world of possibilities for character animation and beyond.

Adding Sound and Synchronizing Animations
Adding sound to your Blender animations can significantly enhance the overall impact and realism of your scene. Synchronizing these sounds with your animations is key to creating an immersive experience. Here\"s how you can achieve this:
- Importing Sound Files:
- First, switch to the Video Sequencer Editor. Go to \"Add\" > \"Sound\" and select the audio file you want to use. Supported formats include WAV and MP3. Once imported, you can see the waveform in the timeline, which helps in synchronizing audio with animations.
- Synchronizing Sound with Animation:
- Play the animation in the timeline to identify key points where specific sound cues should occur. Use the frame number as a reference to align the sound accurately with actions or movements in your animation.
- Adjusting Sound Properties:
- In the Properties panel, you can adjust various sound properties such as volume, pitch, and distance. Use these settings to match the sound\"s intensity and tone with the scene\"s dynamics.
- Animating Sounds:
- To animate sounds (e.g., fading in or out), keyframe the volume or other properties. Place the playhead at the desired frame, change the property value, and press \"I\" over the value field to insert a keyframe.
- Adding Sound Effects for Realism:
- Consider adding environmental sounds, such as wind or footsteps, to enhance realism. Layering different sounds can add depth to your scene. Ensure each sound effect is synchronized with the corresponding animation for maximum impact.
- Lip Syncing:
- For character dialogue, use the VSE to sync the audio dialogue with the character\"s mouth movements. This might require adjusting the timing of the mouth\"s keyframes to match the spoken words accurately.
- Exporting Your Animated Movie:
- Once your animation and sound are perfectly synchronized, go to \"Render\" > \"Render Animation\" to export your project. Ensure you have selected an output format that supports audio, such as AVI or MPEG.
Remember, the key to successful sound synchronization is patience and attention to detail. Regularly preview your animation with sound to ensure timing and effects are precisely aligned. With practice, you\"ll be able to create rich and immersive animated scenes that captivate your audience.
_HOOK_
Rendering Your Animation
Rendering is the final step in bringing your Blender animation to life, transforming your models and animations into high-quality images or videos. Follow these steps to render your animation effectively:
- Choose the Right Render Engine:
- Blender offers several render engines, including Eevee and Cycles. Eevee is faster and suitable for real-time rendering, while Cycles produces more photorealistic results but takes longer. Select the engine that best fits your project needs from the Render Properties tab.
- Set Up Camera and Lighting:
- Ensure your scene is well-lit and the camera is positioned correctly to capture the desired angles of your animation. Good lighting and camera placement are crucial for achieving the best rendering outcome.
- Configure Render Settings:
- In the Render Properties, adjust the resolution, frame rate, and other settings to match your project requirements. Higher resolutions and frame rates will produce better quality but will take longer to render.
- Choose Output Format:
- Decide whether you want your animation rendered as a sequence of images or a video file. Image sequences are more reliable and give you more control in post-production, while video files are more convenient for quick previews or sharing.
- Specify Output Location:
- In the Output Properties, set the destination folder for your rendered animation. Ensure you have enough disk space available, as high-quality renders can consume a significant amount of storage.
- Start Rendering:
- Go to Render > Render Animation or press Ctrl + F12 to begin the rendering process. Rendering can take a significant amount of time, depending on the complexity of your scene and the quality settings chosen.
- Review and Post-Process:
- Once rendering is complete, review your animation for any issues. You may need to render certain sections again or make adjustments. Use Blender\"s Compositor or external video editing software for post-processing and to add final touches.
Rendering is a resource-intensive process, so consider using a powerful computer or render farm to speed up the process. Patience and experimentation with different settings are key to achieving the best results. With practice, you\"ll find the optimal workflow for rendering your Blender animations.

Tips for Realistic Animation
Creating realistic animations in Blender requires a blend of art, science, and attention to detail. Here are some tips to help you achieve lifelike results:
- Study Real-Life Movements:
- Observing how people and objects move in the real world is foundational. Use reference videos or act out movements yourself to understand the dynamics and subtleties of motion.
- Follow the 12 Principles of Animation:
- Familiarize yourself with the 12 principles of animation developed by Disney\"s Ollie Johnston and Frank Thomas. Principles like anticipation, squash and stretch, and secondary action are essential for adding realism and appeal to your animations.
- Use Inverse Kinematics (IK):
- IK simplifies the animation of complex movements, particularly in limbs, by allowing for more natural motion with fewer keyframes. It\"s especially useful for walking cycles and arm movements.
- Implement Weight and Balance:
- Conveying the weight of characters and objects enhances realism. Characters should shift their weight believably when moving, and objects should interact with the environment in a realistic manner.
- Pay Attention to Timing and Spacing:
- The timing of movements and the spacing between frames are critical for conveying speed and weight. Adjusting these elements can dramatically improve the realism of your animation.
- Focus on Facial Expressions and Lip Sync:
- Detailed facial expressions and accurate lip-syncing are vital for character animation. They convey emotions and dialogue, connecting the audience to the characters.
- Add Secondary Actions:
- Secondary actions, such as a character playing with their hair while talking, add depth and believability to animations. These actions should complement the primary action without distracting from it.
- Use Motion Capture for Complex Animations:
- For highly realistic movements, consider using motion capture data. While it requires additional equipment, motion capture can save time and provide an authentic basis for your animations.
- Experiment with Particle Systems for Natural Phenomena:
- Blender\"s particle systems can simulate complex natural phenomena like rain, smoke, or fire, adding a layer of realism to your scenes.
- Continuously Refine and Iterate:
- Realistic animation is achieved through iteration. Review your work critically and make adjustments as needed. Feedback from others can also provide valuable insights for improvement.
Realistic animation is an art that takes time to master. By applying these tips and continuously practicing, you can create compelling, lifelike animations that resonate with viewers.
READ MORE:
Resources for Further Learning
Advancing your skills in character animation with Blender is an ongoing journey. Here are some resources that can help you continue learning and improving:
- Blender Official Tutorials: The Blender Foundation offers comprehensive tutorials on their website and YouTube channel, covering everything from basic to advanced techniques.
- Online Courses and Workshops: Platforms like Udemy, Coursera, and CG Cookie offer structured courses on Blender, including specialized topics in character animation.
- Books: Consider reading books like \"Blender 3D Cookbook\" by Enrico Valenza or \"Learning Blender: A Hands-On Guide to Creating 3D Animated Characters\" by Oliver Villar for in-depth knowledge and practical exercises.
- Blender Community and Forums: Engaging with the Blender community through forums and social media groups is a great way to get feedback, ask questions, and stay updated on the latest features and techniques.
- Blender Conferences and Meetups: Attending Blender conferences or local meetups can provide valuable networking opportunities and insights from experienced professionals in the field.
- YouTube Channels: There are numerous YouTube channels dedicated to Blender tutorials that cater to all skill levels, such as Blender Guru, CG Geek, and Darrin Lile.
- Practice Projects: Applying what you learn through small projects is crucial. Participate in challenges or recreate scenes from your favorite animations to practice and showcase your skills.
Remember, the key to mastering Blender and character animation is persistence and continuous learning. Make use of these resources, stay curious, and don\"t be afraid to experiment with new ideas and techniques.
Embark on your Blender character animation journey with confidence, equipped with our comprehensive guide. Whether you\"re a beginner or looking to refine your skills, these insights will empower you to bring your creative visions to life.