Topic blender 3d uv mapping tutorial: Unlock the full potential of your 3D models with our Blender 3D UV Mapping Tutorial, guiding you through every step to achieve professional-looking textures.
Table of Content
- What are the basic steps for UV mapping in Blender 3D?
- Understanding the Basics of UV Mapping in Blender
- Setting Up Your Blender Workspace for UV Mapping
- Step-by-Step Guide to UV Unwrapping in Blender
- Advanced Techniques for Efficient UV Mapping
- YOUTUBE: UV Unwrapping Explained for Beginners | Blender Tutorial
- Using Blender\"s UV Editing Tools to Optimize Your Workflow
- Common UV Mapping Problems and How to Solve Them
- Applying Textures to UV Maps for Realistic Rendering
- Tips and Tricks for UV Mapping Complex Models
- Exporting UV Maps and Textures from Blender
- Best Practices for UV Mapping in Blender
What are the basic steps for UV mapping in Blender 3D?
The basic steps for UV mapping in Blender 3D are as follows:
- Create or import a 3D model in Blender.
- Select the object you want to apply UV mapping to.
- Switch to Edit Mode by clicking on the \"Edit Mode\" button at the top of the Blender window.
- Select the faces of the object that you want to map the texture onto.
- Unwrap the selected faces by clicking on the \"UVs\" tab in the Properties panel and selecting \"Unwrap\" from the dropdown menu.\"
- Adjust the UV map by scaling, rotating, and moving the UV vertices to match the desired texture placement.
- Create or import a 2D texture image that you want to apply to the object.
- In the UV/Image Editor view, click on \"Image\" in the menu bar and select \"Open\" to load the texture image.
- Switch back to the 3D view by clicking on \"View\" and selecting \"UV Editing\" in the dropdown menu.
- In the Image Texture node, select the loaded texture image from the dropdown menu.
- Connect the Image Texture node to the Material Output node.
- Preview the UV mapping by switching to Texture Paint mode.
- Adjust the texture mapping and make any necessary corrections to achieve the desired result.
- Once satisfied, export the UV map and the texture image if needed.
READ MORE:
Understanding the Basics of UV Mapping in Blender
UV Mapping is a critical technique in 3D modeling, allowing artists to project 2D images onto the surface of 3D models. This foundational step in texturing helps in creating detailed, realistic, and engaging visuals. Blender, with its comprehensive set of UV mapping tools, offers a flexible platform for artists to unwrap their models, arrange UV layouts, and apply textures efficiently.
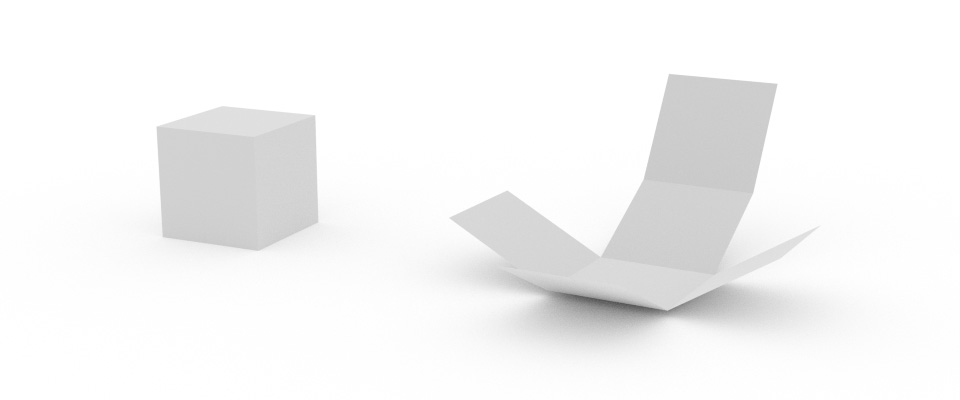
- What is UV Mapping? - UV mapping involves translating the 3D surface of a model into a 2D representation. This process enables the application of textures to models with precision and control.
- Understanding UV Coordinates: - UV coordinates (U for horizontal and V for vertical) define how textures wrap around a 3D object. These coordinates are crucial for aligning textures correctly.
- Why UV Mapping is Essential: - It allows for the detailed texturing of 3D models, which is vital for adding realism, depth, and character to your creations.
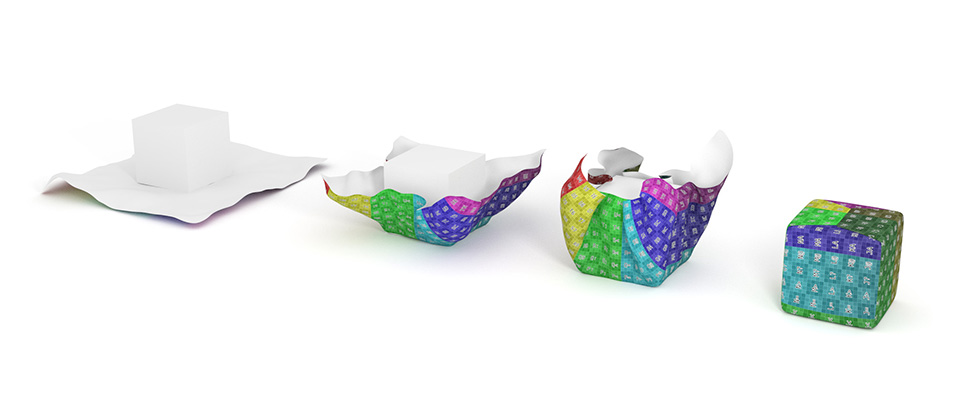
Blender\"s UV mapping process starts with unwrapping a model, where you manually or automatically \"unfold\" the 3D object into a 2D UV map. This step is critical for visualizing how the 2D texture will overlay on the 3D model. Blender provides tools like \"Smart UV Project\" and \"Unwrap\" for this purpose, offering control over seam placement and stretching to minimize texture distortion.
- Marking Seams: Identifying and marking seams on your model guides Blender in unwrapping the mesh. Seams are edges where the mesh is \"cut\" to lay flat.
- Unwrapping Models: After marking seams, the unwrap operation is performed, converting the 3D model into a 2D UV map.
- Adjusting UV Layouts: Once unwrapped, the UV layout can be adjusted in Blender\"s UV Editor, allowing for precise texture placement.
Understanding these basics of UV mapping in Blender sets a solid foundation for further exploration into texturing and detailing your 3D models. This knowledge is key to creating visually stunning and realistic models in Blender.

Setting Up Your Blender Workspace for UV Mapping
Preparing your Blender workspace for UV mapping is essential for an efficient and effective texturing workflow. This setup will help you manage your 3D models and textures with ease, allowing for precise UV mapping and texture application.
- Open Blender and Select Your Model: Start by opening Blender and selecting the model you wish to UV map. Ensure it\"s properly imported or created within Blender.
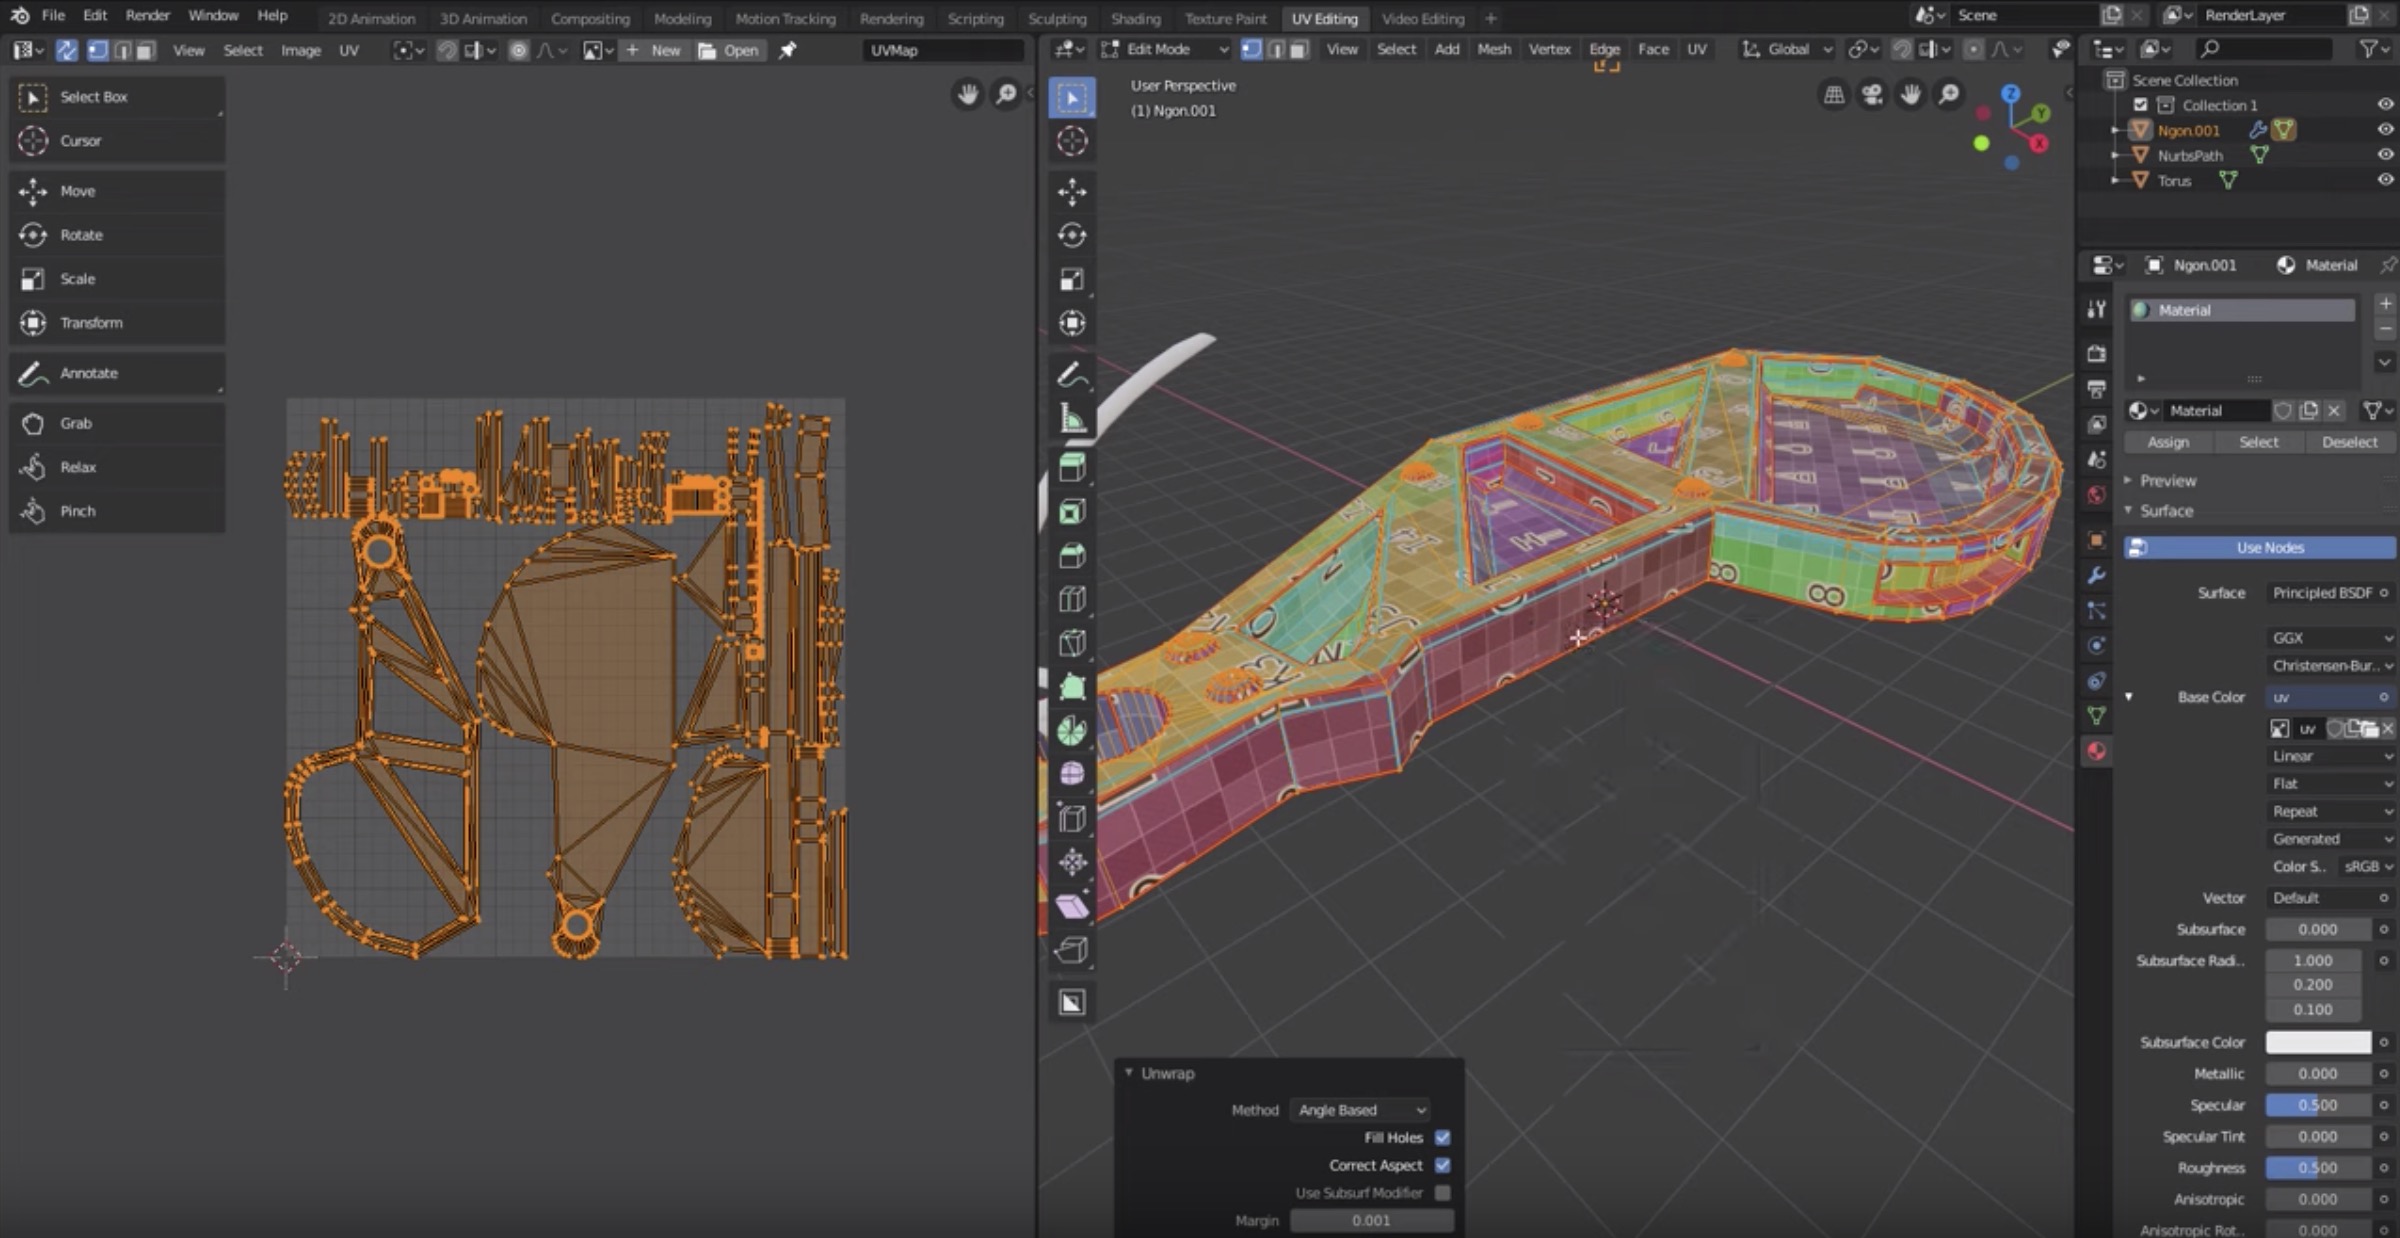
- Switch to UV Editing Workspace: Blender offers a dedicated UV Editing layout which splits your screen between the 3D viewport and the UV Editor. You can switch to this workspace by selecting \"UV Editing\" from the top menu.
- Configure the 3D Viewport: In the 3D Viewport, ensure you\"re in Edit Mode (Tab key) to see and select vertices, edges, and faces. This mode is crucial for marking seams and unwrapping your model.
- Adjust the UV Editor: The UV Editor is where you\"ll see your unwrapped mesh and arrange the UV layout. Familiarize yourself with tools like \"Move\", \"Rotate\", and \"Scale\" to manipulate UV islands.
- Utilize the Shading/Texture View: Switching the viewport shading to \"Material Preview\" or \"Rendered\" mode helps visualize how textures apply to your model in real-time.
- Set Up Texture Nodes: If working with material textures, open the Shader Editor in a new window to create and connect texture nodes. This step is vital for applying textures to UV maps.
By setting up your Blender workspace for UV mapping, you create an environment that supports detailed texture work. This preparation is key to achieving high-quality results in your 3D projects.
Step-by-Step Guide to UV Unwrapping in Blender
UV Unwrapping is a pivotal process in texturing that maps a 3D model\"s surface onto a 2D plane for texture application. This guide will walk you through the UV unwrapping process in Blender, ensuring you can efficiently map your models.
- Select Your Model and Enter Edit Mode: Begin by selecting your model in Blender. Press the \"Tab\" key to switch to Edit Mode, where you can edit the mesh.
- Mark Seams: Identify edges that act as \"cuts\" in your 3D model to lay it out flat. In Edge Select mode (Ctrl + Tab), select edges where you want seams. Right-click and choose \"Mark Seam\" from the context menu. Seams are typically placed in less noticeable areas or where natural seams exist in the object.
- Unwrap the Model: With seams marked, select all mesh parts (A key) you wish to unwrap. Then, press U and choose \"Unwrap\". Blender will unwrap the selected mesh based on the seams, creating a UV map in the UV Editor.
- Adjusting the UV Map: In the UV Editor, you can move, rotate, and scale the UV islands (the unwrapped parts of your mesh) to better fit the UV space. This adjustment is crucial for efficient texture usage and minimizing distortion.
- Use Project From View for Flat Surfaces: For more straightforward or flat surfaces, the \"Project from View\" option can quickly unwrap these areas based on your current view in the 3D viewport.
- Pin UVs for Complex Unwraps: In cases where you need to make adjustments or re-unwrap parts of your mesh, you can pin vertices in the UV Editor (P key) to maintain their position.
Following this step-by-step process will help you achieve clean and efficient UV unwraps in Blender, laying the foundation for detailed and realistic texturing.
Advanced Techniques for Efficient UV Mapping
To elevate your UV mapping skills in Blender, mastering advanced techniques is key. These strategies will help you tackle complex models, reduce texture distortion, and optimize your workflow for professional results.
- Live Unwrap: Blender\"s Live Unwrap feature allows for real-time adjustments to your UV map as you mark or clear seams. Enable this by selecting some UVs, pinning them (P), and then unwrapping (U) while \"Live Unwrap\" is activated.
- Minimize Stretching: Use the \"Minimize Stretch\" option in the UV Editor to reduce texture distortion. This tool iteratively adjusts UVs to make the texture distribution as uniform as possible.
- UV Sculpting: For fine-tuning UV maps, Blender includes a UV Sculpt mode, which lets you push and pull UV vertices, much like sculpting a 3D model. This is particularly useful for eliminating overlaps and ensuring even texture distribution.
- Seamless Textures: When working with tiled or repetitive textures, ensure your UV islands are aligned precisely to avoid visible seams. Blender\"s \"Snap to Pixels\" feature can help achieve seamless transitions.
- Custom UV Layouts for Animation: If your project involves animation, consider creating custom UV layouts that accommodate movement without causing texture slipping or stretching.
- Exporting UV Layouts: For complex texturing work or collaboration with other artists, you might need to export your UV layout. Blender allows exporting UV layouts as images, which can be used as guides in texture painting software.
By incorporating these advanced UV mapping techniques into your Blender workflow, you can significantly enhance the quality and realism of your textured models, paving the way for high-end visual content creation.

_HOOK_
UV Unwrapping Explained for Beginners | Blender Tutorial
UV Unwrapping: Discover the magic of UV unwrapping in this mesmerizing video! Watch as intricate 3D models come to life effortlessly, allowing you to create stunning textures and realism in your digital creations. Don\'t miss out on this essential skill for every aspiring 3D artist!
Using Blender\"s UV Editing Tools to Optimize Your Workflow
Blender\"s UV editing tools are designed to streamline the UV mapping process, making it more efficient and less time-consuming. Understanding and utilizing these tools effectively can greatly enhance your texturing workflow.
- UV Sync Selection: This feature synchronizes the selection between the 3D viewport and the UV editor. It allows for easy identification and editing of UVs corresponding to the selected faces in your model.
- UV Squares: For geometric shapes or models requiring grid-like textures, the UV Squares tool straightens UVs into perfect squares. This is especially useful for architectural models or objects with man-made geometry.
- Pin and Unpin UVs: Pinning UV vertices ensures they stay in place while other parts of the UV map are being adjusted. This is crucial for maintaining parts of your unwrap that are already properly placed.
- Average Islands Scale: To achieve a consistent texture scale across different parts of the model, use the \"Average Islands Scale\" function. This ensures that all UV islands are scaled proportionally to one another.
- Pack Islands: The \"Pack Islands\" tool efficiently arranges UV islands within the UV space, maximizing texture usage and minimizing wasted space. It\"s essential for complex models with numerous UV islands.
- Seams from Islands: This function automatically marks seams around selected UV islands, making it easier to modify or re-unwrap specific parts of your model without starting from scratch.
Mastering these UV editing tools in Blender not only optimizes your texturing process but also empowers you to achieve more detailed and high-quality results in your 3D projects.

Blender Texturing Tutorial | Blender Texture Mapping Simplified
Blender Texturing: Delve into the world of Blender texturing with this captivating video! Witness the transformation of plain 3D objects into visually enticing masterpieces, as textures add depth, realism, and personality to your digital designs. Gain valuable insights and techniques that will elevate your Blender workflow to new heights.
Common UV Mapping Problems and How to Solve Them
Even experienced 3D artists encounter challenges during UV mapping. Recognizing these common issues and knowing how to address them can significantly improve your texturing process.
- Texture Stretching: Texture stretching occurs when UV islands are not proportionally scaled to the model. Solve this by utilizing the \"Minimize Stretch\" option in the UV Editor or manually adjusting the UV islands to more accurately fit the texture.
- Seams Visibility: Visible seams can disrupt the visual flow of a texture. To minimize seam visibility, place seams in less noticeable areas or use the \"Blend\" option in texture painting to smooth out the transitions.
- Overlapping UVs: Overlapping UVs can cause textures to display incorrectly. Use the \"Pack Islands\" feature to automatically arrange UV islands efficiently, or manually adjust them to ensure no overlap.
- Distorted Textures: Distorted textures often result from improper UV unwrapping. To correct this, ensure that your UV map accurately reflects the 3D geometry of the model. Tools like \"Live Unwrap\" and \"UV Sculpting\" can help fine-tune the unwrap.
Addressing these common UV mapping problems effectively requires a combination of strategic planning and the skilled use of Blender\"s UV editing tools. With practice, solving these issues becomes a straightforward part of the UV mapping workflow, leading to better texturing outcomes.

Applying Textures to UV Maps for Realistic Rendering
Applying textures to UV maps is a crucial step in the 3D modeling process, turning a flat, lifeless model into a vibrant and realistic object. This section guides you through the process of texturing your models in Blender for a more lifelike render.
- Prepare Your Texture Files: Ensure that your texture images are ready and accessible. High-resolution images work best for detailed textures.
- Select Your Model and Open the Shader Editor: With your model selected, switch to the \"Shading\" workspace to access the Shader Editor. This area allows you to create and connect nodes for texturing.
- Create a New Material: In the Shader Editor, create a new material for your model. This material will serve as the base for your texture application.
- Add an Image Texture Node: Press \"Shift + A\" to add a node, select \"Texture\", and then choose \"Image Texture\". Connect this node to the \"Base Color\" input of the \"Principled BSDF\" shader.
- Load Your Texture Image: In the Image Texture node, click \"Open\" and navigate to your texture file. Once loaded, the texture will apply to your model based on the UV map.
- Adjust the Mapping and Texture Settings: If necessary, add a \"Mapping\" node between the \"Texture Coordinate\" and \"Image Texture\" nodes to adjust the position, rotation, and scale of your texture on the model.
- Use UV Editing to Fine-Tune: Switch back to the UV Editing layout to make any necessary adjustments to the UV map, ensuring the texture aligns correctly on your model.
- Preview and Render: Regularly switch to \"Material Preview\" or \"Rendered\" view mode to check the appearance of your textures. Adjust as needed until you achieve the desired result.
By following these steps and applying textures to your UV maps, you can significantly enhance the realism of your 3D renders, creating engaging and lifelike visuals in Blender.

Tips and Tricks for UV Mapping Complex Models
UV Mapping complex models can be challenging, but with the right approach, you can simplify the process and achieve excellent results. These tips and tricks are designed to help you tackle the intricacies of UV mapping detailed and multifaceted 3D models in Blender.
- Break Down the Model: Divide complex models into smaller, manageable parts. This makes it easier to focus on one section at a time, reducing the overall complexity of the UV mapping process.
- Use the Project From View Method: For surfaces facing the camera, the \"Project from View\" unwrapping method can save time and ensure accurate mapping. It\"s especially useful for flat surfaces or those with minimal distortion.
- Employ the Pinning Feature: Pinning allows you to lock certain vertices in place in the UV/Image Editor. This is incredibly useful when making adjustments or when you need to keep specific areas of your unwrap unchanged.
- Take Advantage of Seams: Placing seams thoughtfully is crucial for complex models. Identify natural breaks or hidden areas on your model to place seams, facilitating easier unwrapping and less visible texture seams.
- Utilize the Live Unwrap Function: Blender\"s Live Unwrap feature automatically adjusts the UV map as you mark or clear seams, offering a dynamic way to see how changes affect the UV layout.
- Optimize Texture Space: Use the \"Pack Islands\" function to efficiently fill the UV space, ensuring no wasted texture space and that all parts of the model are proportionally represented.
- Check for Stretching: Regularly use the \"Stretching\" overlay in the UV Editor to identify and correct areas of the UV map that may cause texture distortion.
- Keep Texture Resolution in Mind: For complex models, higher resolution textures may be necessary to maintain detail. Consider the final use of the model to balance texture resolution with performance.
By applying these tips and tricks to your workflow, you can enhance your efficiency and effectiveness in UV mapping complex models within Blender, leading to better textured and more realistic 3D creations.

Exporting UV Maps and Textures from Blender
Exporting UV maps and textures is a crucial step for integrating your Blender models into other projects or applications. This process allows you to share your work with others, use your models in different software, or prepare them for gaming engines. Follow these steps to successfully export your UV maps and textures.
- Prepare the UV Map for Export: Ensure your UV map is correctly unwrapped and optimized. Check for any overlapping or stretching that might affect the final texture application.
- Exporting the UV Layout: Go to the UV Editor, and under the \"UV\" menu, find \"Export UV Layout\". Choose your preferred file format (PNG, SVG, etc.), specify the destination, and adjust the export settings such as fill opacity or line thickness.
- Prepare Textures for Export: If you have created or modified textures directly in Blender (for example, using the Texture Paint mode), ensure they are saved. Open the Image Editor, select your texture, and use \"Image\" > \"Save As\" to export your texture files.
- Exporting Models with Textures: When exporting your model (e.g., as an FBX or OBJ file), ensure that the \"Include UVs\" option is checked in the export settings. This ensures that the UV map is preserved in the model file.
- Review Exported Files: After exporting, review your UV maps and textures in the target software or engine to ensure they appear as expected. Adjustments may be necessary depending on the destination\"s requirements.
- Consider File Formats: Different applications may require specific file formats for textures and models. Ensure compatibility by selecting the appropriate format during export.
Exporting UV maps and textures from Blender can seem complex, but by following these steps, you can streamline the process. This ensures that your 3D models and their textures are ready for use in any external project or application.

_HOOK_
READ MORE:
Best Practices for UV Mapping in Blender
UV Mapping is an essential skill in 3D modeling, crucial for applying textures accurately to your models. Following best practices in Blender not only streamlines the UV mapping process but also ensures the highest quality results. Here are some guidelines to enhance your UV mapping workflow.
- Plan Your Seams: Strategically place seams in areas that are less visible or along natural lines and creases of the model. This helps in creating more natural-looking textures and reduces the visibility of texture seams.
- Keep UV Islands Proportional: Use the \"Average Islands Scale\" function to ensure all UV islands are correctly scaled in relation to each other. This prevents texture distortion and ensures a uniform texture appearance across the model.
- Minimize Texture Stretching: Regularly check for stretching using the \"UV Stretching\" overlay in the UV Editor. This helps in identifying and correcting areas where textures may not apply correctly.
- Optimize Your UV Layout: Utilize the \"Pack Islands\" feature to efficiently arrange UV islands within the UV space, maximizing texture resolution and minimizing wasted space.
- Utilize Texture Space Efficiently: For models that will be viewed from a distance, consider scaling down the UV islands for less detailed parts. This allows you to allocate more texture space to prominent features.
- Test Textures Early: Apply a checkerboard or grid texture to your model early in the UV mapping process. This can reveal issues with stretching or distortion that might not be visible with the model\"s final textures.
- Stay Organized: For complex models with multiple materials or texture sets, keep your UV maps organized by naming them appropriately. This simplifies the texture application process and makes it easier to manage your project.
Adhering to these best practices in Blender can significantly improve the quality and efficiency of your UV mapping process, leading to more realistic and visually appealing 3D models.
Mastering UV mapping in Blender empowers you to bring your 3D creations to life with stunning realism. Dive into these tutorials to transform your texturing skills and unleash your creative potential today!