Topic blender 3d texture tutorial: Dive into the world of 3D art with our Blender 3D Texture Tutorial, guiding you from basic textures to advanced techniques, unlocking endless creative possibilities.
Table of Content
- How to create realistic textures in Blender 3D?
- Understanding Blender\"s Interface for Texturing
- Getting Started with Materials and Textures
- Step-by-Step Guide to UV Mapping
- Introduction to Shader Nodes and Their Applications
- Techniques for Realistic Texturing
- YOUTUBE: Blender Tutorial: PBR Texturing in 3 Minutes for Beginners
- Exploring Procedural Textures in Blender
- Advanced Texturing Methods: Bump and Displacement Mapping
- Creating and Applying Custom Textures
- Optimizing Textures for Rendering and Animation
- Resources for Free Textures and Materials
How to create realistic textures in Blender 3D?
To create realistic textures in Blender 3D, follow these steps:
- Create a new material by selecting an object and going to the Material Properties tab in the Properties panel.
- Rename the material by double-clicking on \"Material\" and typing a more descriptive name, such as \"wood\" or \"brick\".
- Click on the plus (+) button next to the Base Color slot to add a texture to the material.
- In the Texture Properties tab, click on the drop-down menu under Type and select the desired type of texture.
- Adjust the settings of the texture to achieve the desired appearance. This may include adjusting parameters such as scale, intensity, and color.
- To add more realism, consider using procedural textures or image textures. Procedural textures can be generated within Blender, while image textures can be imported from external sources.
- To apply the texture to the object, go back to the Material Properties tab and make sure the material is assigned to the desired object.
- You can further enhance the realism by adding other texture maps, such as normal maps, roughness maps, and displacement maps, to simulate different surface properties.
- Experiment with different settings and combinations of textures to achieve the desired realistic effect.
 |
 |
By following these steps, you can create realistic textures in Blender 3D and bring your 3D models to life.
READ MORE:
Understanding Blender\"s Interface for Texturing
Blender\"s interface offers a comprehensive environment for creating detailed textures on 3D models. To start, familiarize yourself with the key areas:
- 3D Viewport: This is where you visually interact with your models. Use it to select, rotate, and scale your objects.
- Properties Panel: Here, you\"ll find the Material tab, where you can add new materials and textures to your selected object.
- Shader Editor: For more advanced texturing, open the Shader Editor. It allows you to create complex materials using nodes.
- UV/Image Editor: This space is essential for UV mapping, allowing you to unwrap your model and apply textures accurately.
- Texture Paint: A mode in the 3D Viewport that lets you paint textures directly onto your model in a very intuitive way.
Begin by adding a material to your object in the Properties Panel. Then, move to the Shader Editor to fine-tune your texture with nodes. UV mapping is crucial for applying textures correctly, so take your time to learn the UV/Image Editor. Finally, experiment with Texture Paint to add personal touches to your model.
Understanding these areas will make your texturing process in Blender more efficient and enjoyable, unlocking your potential to create stunning 3D art.
Getting Started with Materials and Textures
Materials and textures are fundamental in bringing your Blender 3D models to life. This section will guide you through the process of applying and customizing them:
- Create a New Material: Select your object, go to the Properties panel, and navigate to the Material tab. Click the \"New\" button to add a material.
- Assign a Texture: With the material created, switch to the Texture tab in the Properties panel. Press \"New\" to add a texture. Choose the type of texture you want to apply, such as Image or Movie for bitmap textures or Clouds for procedural.
- Edit Texture Settings: Customize your texture\"s properties, including scaling, mapping, and influence, to achieve the desired effect on your material.
- UV Mapping: To accurately apply your texture to the model, switch to Edit Mode and unwrap your object (U key) in the UV/Image Editor. This step is crucial for textures to appear correctly.
- Shader Editor: For advanced control over your materials and textures, use the Shader Editor. Here, you can create complex materials by connecting nodes that control everything from color and brightness to reflectivity and texture mapping.
Experimenting with different materials and textures, and understanding how they interact with light and the 3D environment, is key to achieving realism or any desired aesthetic in your Blender projects. Start with simple materials, and gradually explore more complex texturing techniques to enhance your skills.

Step-by-Step Guide to UV Mapping
UV Mapping is a crucial process in texturing that involves unwrapping your 3D model into a 2D image layout. This guide will walk you through the basics:
- Select Your Model: In Object Mode, select the model you want to UV map.
- Enter Edit Mode: Press Tab to switch to Edit Mode, where you can edit the vertices, edges, and faces of your model.
- Marking Seams: Select edges where you want your model to be \"cut\" and unwrapped. Right-click and choose \"Mark Seam\". Seams are essential for creating a logical unwrap that minimizes distortion.
- Unwrapping: With seams marked, select all faces of your model (A key) and press U. Choose \"Unwrap\" from the menu. Blender will unfold your model based on the seams you\"ve marked.
- Adjusting in UV Editor: Open the UV/Image Editor view. You\"ll see your model\"s unwrapped 2D layout. Here, you can move, scale, and rotate the UV islands to better fit the texture space.
- Applying Textures: With your UV map adjusted, you can now apply textures in a way that they map accurately to your 3D model. Assign a texture via the Material tab, and it will follow the UV layout.
This basic workflow for UV mapping in Blender will help ensure your textures are accurately projected onto your models, enhancing the realism and detail of your 3D projects.

Introduction to Shader Nodes and Their Applications
Shader nodes in Blender are a powerful feature for creating complex materials and textures through a visual programming interface. Here\"s how to get started:
- Accessing the Shader Editor: With your object selected, switch to the Shader Editor from the bottom menu in the interface. This workspace allows you to build materials using a node-based system.
- Understanding Basic Nodes:
- Diffuse BSDF: Simulates the way light scatters on a rough surface.
- Glossy BSDF: Creates a shiny, reflective surface.
- Image Texture: Allows you to apply bitmap images as textures.
- Mix Shader: Combines two shaders to create complex surface properties.
- Creating Your First Material: Start by adding a Diffuse BSDF node and connect it to the Material Output. This is your basic material. Enhance it by mixing it with a Glossy BSDF node to add reflectivity.
- Applying Textures with Nodes: Use an Image Texture node to bring your texture into Blender. Connect it to the Diffuse BSDF to apply it to your material. Use mapping nodes to control the texture\"s placement and scale.
- Experimenting with Node Combinations: The true power of shader nodes lies in experimentation. Combine different nodes like Fresnel, Noise Texture, and Bump to discover unique material effects.
Shader nodes can dramatically increase the realism and complexity of your materials in Blender. Spend time experimenting with different combinations to see how they affect the appearance of your objects.

_HOOK_
Techniques for Realistic Texturing
Creating realistic textures in Blender involves a blend of art and technique. Here are some key methods to elevate your texturing skills:
- Use High-Quality Reference Images: Start with high-resolution images for your textures. They provide a detailed base and make your textures look more realistic.
- Incorporate PBR Materials: Physically Based Rendering (PBR) materials reflect light in a realistic manner. Utilize PBR textures for diffuse, roughness, metallic, and normal maps to add realism to your models.
- Layer Multiple Textures: Combine different textures to create depth and complexity. For example, layer a dirt texture over a base material to add wear and tear.
- Utilize Normal and Bump Maps: These maps add surface detail without increasing the polygon count. Use them to simulate bumps, cracks, and other textures.
- Add Variation with Procedural Textures: Blender\"s procedural textures allow for infinite variation. Combine them with image textures to avoid repetitive patterns and add uniqueness to your models.
- Pay Attention to Scale: Ensure the texture scale is appropriate for your model. Incorrect scale can break the illusion of realism.
- Use UV Mapping for Accuracy: Proper UV mapping ensures your textures align correctly with your 3D model. Take the time to unwrap your model effectively.
Realistic texturing is a critical skill in 3D modeling that brings your creations to life. By focusing on quality, detail, and the right techniques, you can achieve stunning, lifelike results in Blender.

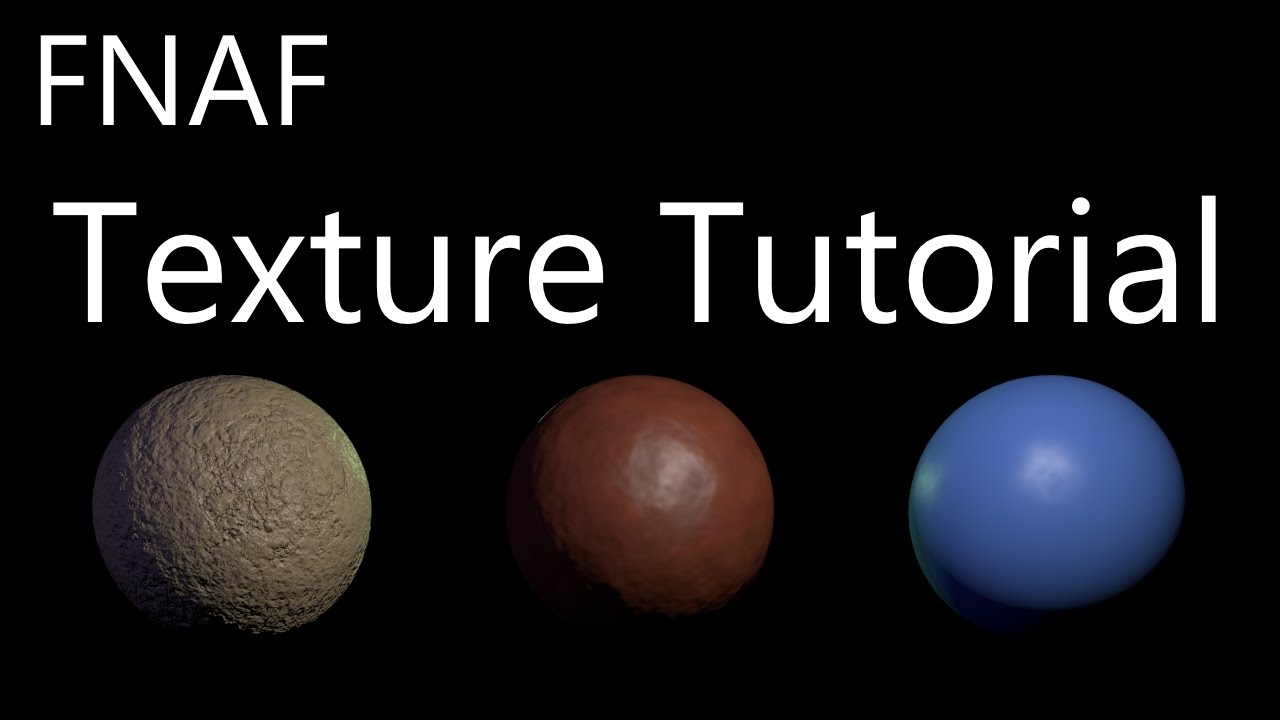
Blender Tutorial: PBR Texturing in 3 Minutes for Beginners
Are you a beginner looking to dive into a new hobby? This video is perfect for you! Discover the secrets to getting started and watch as your skills grow with each step. Don\'t miss out on this amazing opportunity to learn something new!
Exploring Procedural Textures in Blender
Procedural textures in Blender offer endless possibilities for creating complex materials without relying on image textures. Here\"s how to start experimenting with them:
- Understanding Procedural Textures: Procedural textures are generated mathematically by Blender. They can create patterns and textures that are infinitely adjustable without losing quality.
- Access Procedural Textures: In the Shader Editor, add a texture node (Shift+A, Texture) and select a procedural texture type like Noise, Voronoi, or Musgrave.
- Adjust Settings: Each procedural texture comes with its own set of parameters. Play with these settings to understand how they affect the texture’s appearance. Parameters can include scale, detail, distortion, and more.
- Combine Textures: For more complex materials, combine multiple procedural textures using Mix RGB or ColorRamp nodes. This technique allows for the creation of unique surfaces.
- Use Procedural Textures for Displacement: Beyond simple surface textures, procedural textures can drive displacement, adding real geometric detail to your models.
- Experiment with Nodes: Incorporate procedural textures with other shader nodes like Bump, Displacement, and Vector Math to create dynamic and complex materials.
Procedural textures are a powerful tool in Blender for creating dynamic, scalable, and highly customizable materials. By mastering these textures, you can add incredible detail and realism to your 3D models without the need for high-resolution image textures.

Blender Secrets - Easy PBR Textures
Unlock the secrets to success with this mind-blowing video! Whether it\'s in your personal or professional life, these secrets will revolutionize the way you think and act. Get ready for a transformative experience that will leave you motivated and inspired. Don\'t miss out on this opportunity to unlock your true potential!
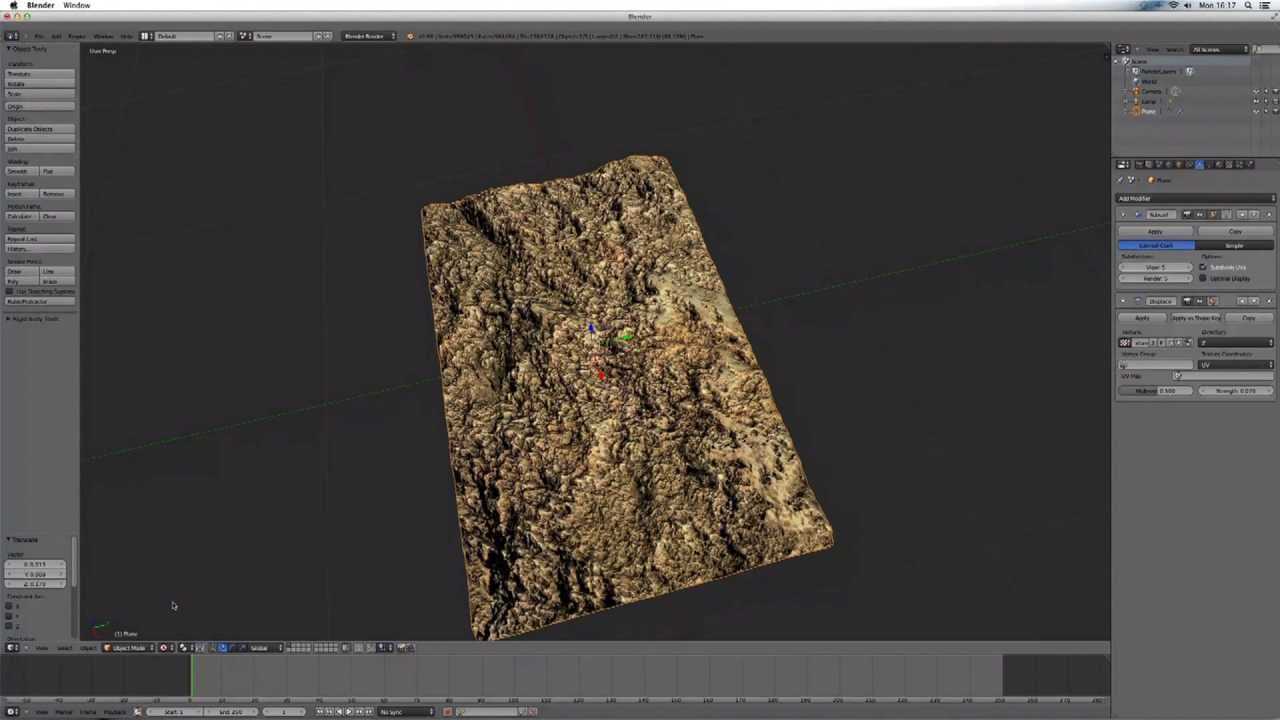
Advanced Texturing Methods: Bump and Displacement Mapping
Bump and displacement mapping are advanced techniques that add realism to 3D models by simulating surface irregularities. Here\"s how to apply these methods in Blender:
- Bump Mapping:
- Utilizes grayscale images to simulate texture depth without altering the model\"s geometry.
- In the Shader Editor, add a Bump node and connect your texture to the Height input. Adjust the Strength to control the intensity of the bump effect.
- Displacement Mapping:
- Physically alters the geometry of the mesh based on a texture, creating real depth and detail.
- To use displacement, your model needs a high enough subdivision level. Add a Displacement node in the Shader Editor, and connect your texture to the Height input.
- In the Material settings, under Settings > Surface, set Displacement to \"Displacement Only\" or \"Displacement and Bump\" for combined effects.
- Texture Preparation: For both methods, high-quality textures are crucial. You can create or download grayscale images for bump mapping or use detailed height maps for displacement.
- Experiment with Settings: Adjust the scale, strength, and mid-level of your displacement and bump maps to achieve the desired effect. Fine-tuning these settings is key to realistic results.
Both bump and displacement mapping can dramatically increase the realism of your textures in Blender. While bump mapping adds surface detail visually, displacement mapping modifies the mesh for a more authentic look. Experimenting with these methods will enhance your textures and bring your 3D models to life.
Creating and Applying Custom Textures
Custom textures can significantly enhance the uniqueness and quality of your 3D models in Blender. Follow these steps to create and apply your own textures:
- Designing Your Texture: Use image editing software to create your texture. Consider the scale, pattern, and color scheme that match your project\"s needs. High-resolution images ensure better quality and detail.
- Importing into Blender: In Blender, select your object and go to the Material Properties tab. Create a new material, then go to the Shader Editor and add an Image Texture node. Load your custom texture by clicking \"Open\" and navigating to your image file.
- Applying UV Mapping: For the texture to correctly map to your model, use UV mapping. Enter Edit Mode (Tab), select all faces (A), and unwrap your model (U key). Adjust the UV map in the UV/Image Editor to align your texture properly.
- Adjusting Texture Settings: In the Shader Editor, you can adjust the texture’s properties such as scale, rotation, and position using the Mapping node connected between the Image Texture node and the Shader node.
- Testing and Tweaking: Render your scene to see how the texture looks on your model. Adjust the lighting and camera angle to best showcase the texture. Tweaking the texture\"s settings in Blender or editing the original image file may be necessary to achieve the desired result.
Creating and applying custom textures is a rewarding process that allows for endless creativity in your 3D projects. With practice, you\"ll be able to produce detailed and realistic textures that bring your models to life.
Optimizing Textures for Rendering and Animation
Optimizing your textures is crucial for efficient rendering and smooth animation in Blender. Here are steps to ensure your textures not only look great but also perform well:
- Reduce Texture Size: Large textures can slow down rendering times. Use image editing software to scale down images without significantly compromising quality, especially for background objects.
- Compress Textures: Use texture compression to reduce file sizes. Blender supports various compression formats that can significantly lower memory usage while maintaining visual fidelity.
- Limit Number of Textures: Each unique texture adds to the processing load. Where possible, reuse textures or create atlases that combine multiple textures into a single image to reduce the number of texture files needed.
- Utilize Procedural Textures: Procedural textures are generated in real-time and can be more memory-efficient than bitmap textures, especially for complex patterns or noise effects.
- Opt for Lower Resolution Where Possible: Not all textures require high resolution. For distant objects or those with less focus, lower-resolution textures can be used without noticeable quality loss.
- Manage Texture Nodes Efficiently: In the Shader Editor, ensure that texture nodes are used efficiently. Unnecessary nodes can increase render times.
- Use Bump Maps for Minor Details: Instead of high-polygon models, use bump maps or normal maps to simulate small details on surfaces, reducing the computational load.
By following these optimization techniques, you can create visually stunning scenes in Blender that render more quickly and run smoother during animation playback, making your 3D projects more efficient and manageable.

_HOOK_
READ MORE:
Resources for Free Textures and Materials
Finding high-quality, free textures and materials can greatly enhance your Blender projects. Below are some valuable resources to help you find just what you need:
- CC0 Textures: Offers a wide range of high-quality, royalty-free textures and materials that you can use freely in any project.
- Texture Haven: Provides 100% free textures, all under CC0 license, specializing in realistic, high-resolution textures.
- HDRI Haven: The perfect place for finding high dynamic range imaging for lighting your scenes realistically, also available under a CC0 license.
- BlenderKit: Integrated directly within Blender, it offers thousands of materials, textures, and models created by the community for the community.
- Polliigon: Although not all resources are free, Poliigon offers free textures monthly and features a wide variety of high-quality materials and textures.
- Textures.com: Provides a vast library of textures with a free daily download limit, offering everything from simple materials to complex patterns.
Utilizing these resources, you can access a vast library of textures and materials to bring your Blender projects to the next level. Remember to check the license of each resource to ensure it fits your project\"s needs.
Embark on your Blender 3D texturing journey with confidence! With these tutorials, you\"ll master the art of creating lifelike textures, bringing your visions to life in stunning detail and realism.


