Topic blender 3d video editing tutorial: Discover the art of video editing with our Blender 3D Video Editing Tutorial, designed to guide beginners and experts alike through the intricacies of creating stunning visual content using this powerful, free software.
Table of Content
- How can I learn video editing with Blender 3D?
- Getting Started with Blender for Video Editing
- Understanding Blender\"s Interface for Video Editing
- Importing and Organizing Media in Blender
- Basic Video Editing Techniques: Cutting, Splicing, and Trimming
- Advanced Editing: Color Grading, Effects, and Transitions
- Working with Audio: Syncing, Mixing, and Volume Control
- YOUTUBE: Blender 3D Beginner Video Editing Tutorial - FREE Video Editor
- Animating Text and Using Meta Strips for Enhanced Visuals
- Speed Control: Slowing Down and Speeding Up Footage
- Utilizing Blender\"s Compositing Tools for VFX
- Rendering and Exporting Your Edited Video
- Additional Resources and Tutorials for Further Learning
How can I learn video editing with Blender 3D?
Learning video editing with Blender 3D can be an exciting and rewarding experience. Here is a step-by-step guide to get started:
- Start by downloading and installing Blender from the official website (https://www.blender.org/).
- Launch Blender and familiarize yourself with the user interface.
- Import your video footage into Blender by clicking on \"File\" > \"Import\" > \"Video\" and selecting the desired file.
- Drag and drop the imported video clip into the Video Sequencer Editor (VSE) workspace.
- Trim the video clip by placing the playhead at the desired starting point and pressing \"I\" on your keyboard to set the start frame. Similarly, set the end frame by placing the playhead and pressing \"O\".
- To add transitions between video clips, select the first clip, press \"Shift+A\" and choose the desired transition effect from the menu. Adjust the duration and position of the transition as needed.
- To add effects such as color correction or filters, select the desired clip, go to the \"Effects\" tab, and choose from the available options.
- For more advanced editing, you can add text overlays, images, or audio tracks by using the available tools in the VSE workspace.
- Once you are satisfied with your video, click on \"Render\" > \"Render Animation\" to export the final result.
Remember to save your project regularly to avoid losing any progress. Blender\'s video editing capabilities may seem overwhelming at first, but with practice and experimentation, you\'ll be able to create professional-looking videos.
READ MORE:
Getting Started with Blender for Video Editing
Embarking on your video editing journey with Blender opens up a world of creative possibilities. This section is designed to guide you through the initial steps of using Blender for video editing, ensuring a smooth start to your creative projects.
- Download and Install Blender: Begin by visiting the official Blender website to download the latest version. Ensure your system meets the software requirements for a seamless experience.
- Familiarize Yourself with the Interface: Upon launching Blender, take some time to explore the interface. Locate the Video Sequence Editor (VSE), which is your central workspace for video editing tasks.
- Importing Media: Learn how to import video clips, images, and audio files into the VSE. Use the \"Add\" menu to select the type of media you wish to import and navigate to its location on your computer.
- Basic Editing Techniques: Experiment with basic editing functions such as cutting, moving, and arranging clips on the timeline. Understand how to use the strip editor for precise editing controls.
- Adding Effects and Transitions: Explore the effects available in Blender, including transitions, color grading, and filters. Apply these to enhance the visual appeal of your project.
- Working with Audio: Blender allows you to sync audio with video effortlessly. Learn to adjust volume levels, add sound effects, and mix audio tracks to complement your visual content.
- Rendering Your Project: Finally, understand the rendering process. This converts your project into a video file format. Adjust the render settings according to your project needs and output the final video.
Remember, practice is key to mastering Blender\"s video editing capabilities. Experiment with different features and tools to discover your unique editing style.

Understanding Blender\"s Interface for Video Editing
Blender\"s interface might seem daunting at first, but it\"s efficiently designed for a seamless video editing process. This section will help you navigate and utilize the interface effectively for your video editing projects.
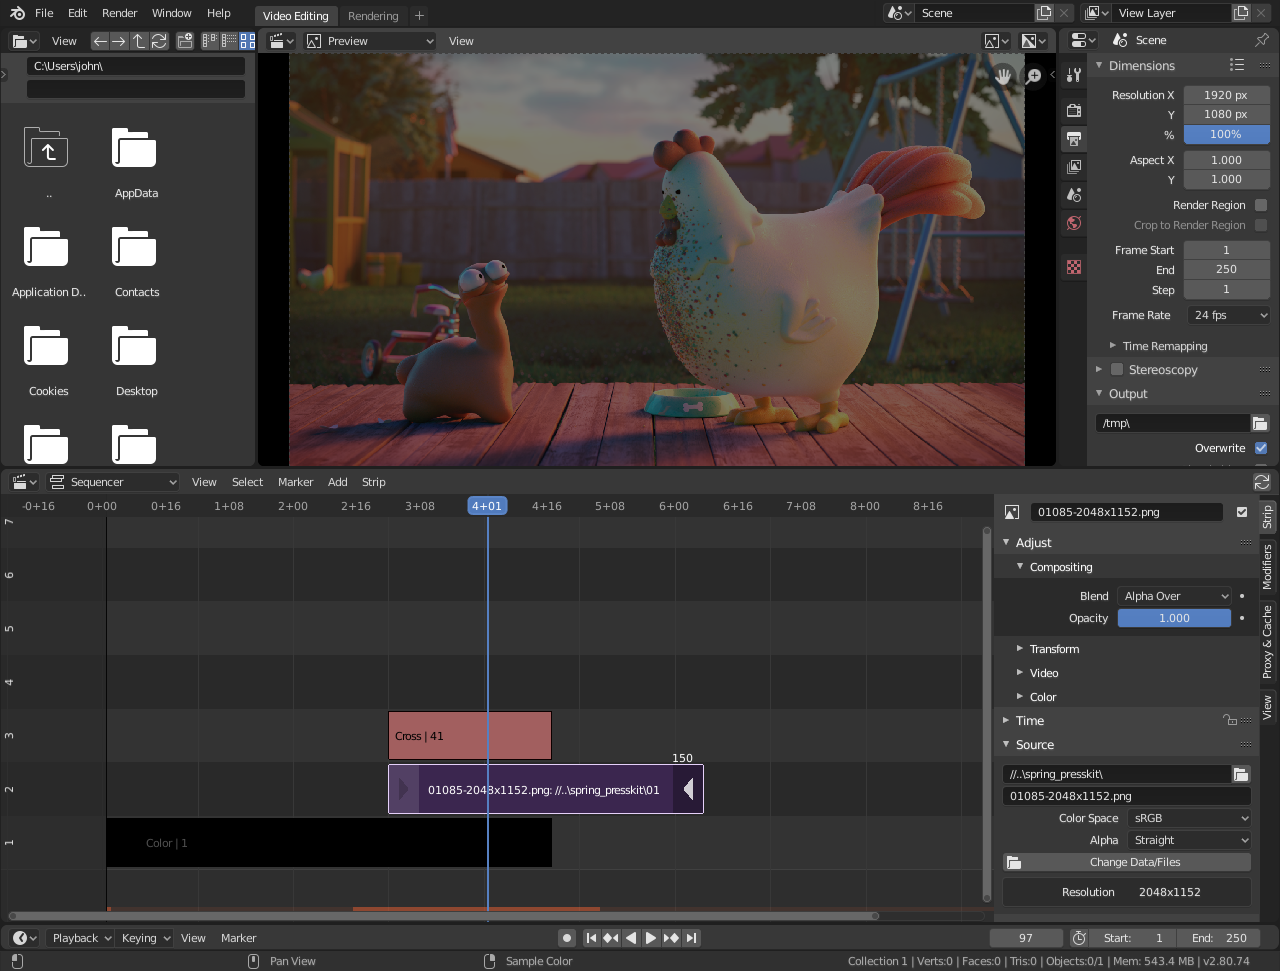
- Layout: The default layout can be customized, but for video editing, you\"ll primarily use the Video Sequencing Editor (VSE) workspace. It provides a timeline view, preview area, and a list of video channels.
- Timeline: The timeline is where you\"ll arrange your video clips, audio files, and effects. It\"s intuitive and allows for easy dragging and dropping of elements.
- Preview Window: This is where you can watch your project come to life. The preview window updates in real-time as you make edits, allowing for immediate feedback on your work.
- Properties Panel: Here, you can adjust settings for your project, including rendering options, output formats, and encoding settings. It\"s also where you\"ll find effect properties for any selected video or audio clip.
- Tools and Effects: Blender offers a range of tools and effects for enhancing your video. These can be accessed from the toolbar or through menus. Familiarize yourself with the basics, like cuts and transitions, before moving on to more complex effects.
- Audio Mixer: For projects with audio, Blender includes an audio mixer in the VSE. This allows for adjusting volume levels, syncing audio clips, and adding sound effects.
Take the time to explore Blender\"s interface and practice using different features. As you become more comfortable, you\"ll find that Blender is a powerful tool for video editing, offering extensive functionality that rivals even commercial software.
Importing and Organizing Media in Blender
Effectively managing your media is crucial for a smooth video editing workflow in Blender. This guide will walk you through the steps to import and organize your video clips, images, and audio files, setting the stage for efficient editing.
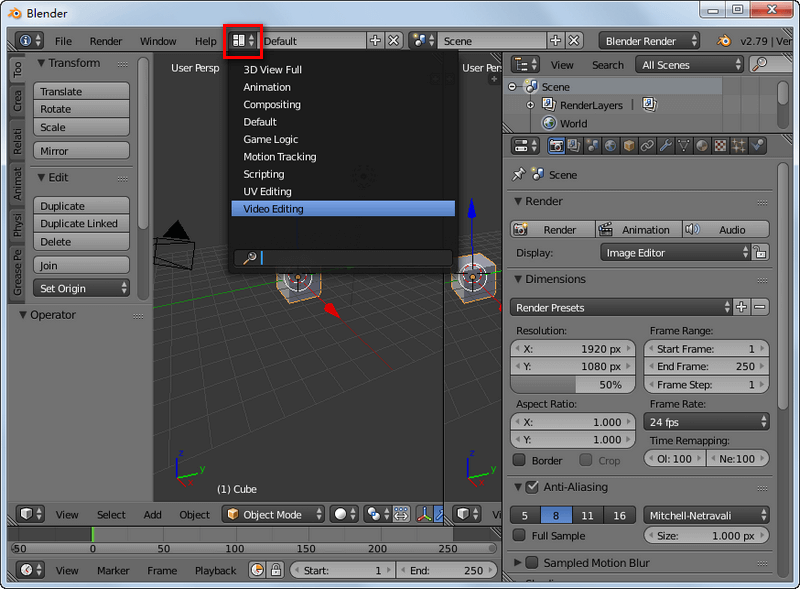
- Opening the Video Editing Workspace: Start Blender and switch to the Video Editing workspace from the top menu to access the Video Sequence Editor (VSE).
- Importing Media: To import media, go to the \"Add\" menu in the VSE and select the type of media you want to import (e.g., Movie, Sound, Image, etc.). Navigate to your files and select them to add them to your project.
- Organizing Tracks: Blender allows you to place each piece of media on separate tracks. Use this feature to categorize your media by type (video, audio, effects) for better organization.
- Adjusting Media Properties: Once imported, you can adjust various properties of your media clips, such as duration, start frame, and display options, directly in the VSE.
- Using Meta Strips: For complex projects, group related clips into meta strips. This simplifies your timeline and makes it easier to apply effects or transformations to multiple clips simultaneously.
- Preview and Adjustment: Utilize the preview window to review your imported media. You can trim, cut, or extend clips right in the timeline for precise editing.
By following these steps, you\"ll ensure that your media is well-organized and ready for editing. Remember, taking the time to properly import and arrange your media can significantly streamline your video editing process in Blender.

Basic Video Editing Techniques: Cutting, Splicing, and Trimming
Mastering basic video editing techniques in Blender sets the foundation for more advanced projects. This section focuses on cutting, splicing, and trimming—essential skills for any video editor.
- Cutting Clips: Use the \"Cut\" tool (shortcut: K) to slice a clip into two parts. Position the playhead where you want the cut, then press K to slice the clip. This is useful for removing unwanted parts of a clip or for reorganizing your timeline.
- Splicing Clips: Splicing involves merging two clips together. In Blender, you can splice clips by aligning them on the timeline without any gap. If necessary, use the snapping feature to ensure precise alignment.
- Trimming Clips: Trimming adjusts the start or end point of a clip without cutting it. Select a clip and drag its ends to shorten or lengthen it. This technique is perfect for fine-tuning the length of your clips to match your project\"s timing.
- Soft Cut: For non-destructive editing, use the \"Soft Cut\" feature (shortcut: Shift+K), which allows you to make a cut that doesn\"t immediately separate the clip. This can be useful for experimenting with different edit points without committing to them.
- Ripple Edit: While not a native feature in Blender\"s VSE, you can simulate a ripple edit by moving all subsequent clips simultaneously after making a cut or adjustment. This is useful for maintaining sync across your entire project.
By practicing these basic techniques, you\"ll be able to efficiently edit your video projects in Blender, laying the groundwork for more complex editing tasks and effects.

_HOOK_
Advanced Editing: Color Grading, Effects, and Transitions
Once you\"re comfortable with basic editing in Blender, advancing to color grading, effects, and transitions can significantly elevate the quality of your video projects. This section will guide you through these advanced techniques.
- Color Grading: Access Blender\"s color grading tools through the Color Management section in the Properties panel. Use the \"Look\" dropdown to apply different color profiles or manually adjust the RGB curves to fine-tune the mood and tone of your video.
- Applying Effects: Blender offers a variety of effects, such as Gaussian blur, glow, or color correction. Add effects by selecting your clip and choosing \"Add Effect Strip\" from the Add menu. Experiment with different effects to achieve your desired visual style.
- Creating Transitions: To add transitions between clips, simply overlap them on the timeline. Blender automatically creates a crossfade. For more control, use the \"Wipe\" or \"Gamma Cross\" effect from the Effect Strip menu to customize your transitions.
- Utilizing Keyframes: For dynamic effects and transitions, use keyframes to animate properties over time. Right-click on a property (e.g., opacity, color balance) and select \"Insert Keyframe\" to start animating.
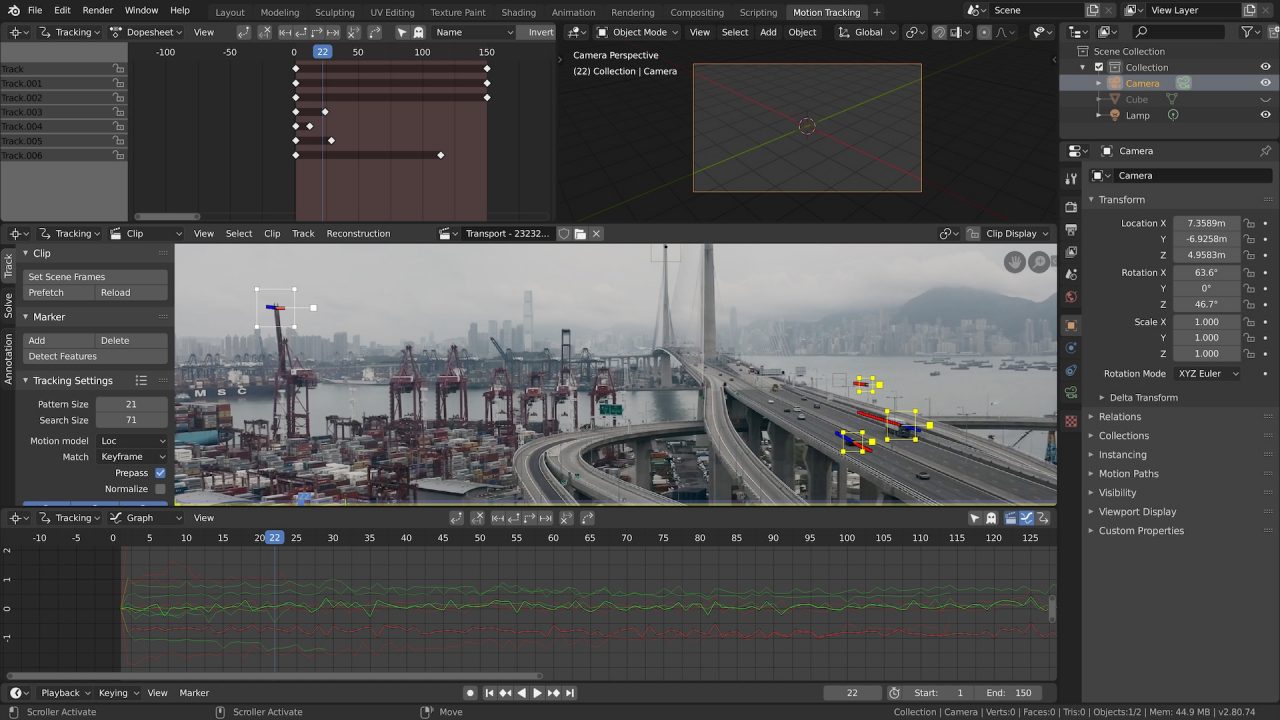
- Advanced Compositing: For more complex effects and color work, switch to the Compositor workspace. Here, you can use nodes to create sophisticated visual effects, composite different layers, and adjust the overall look of your video.
By mastering these advanced techniques, you can enhance the visual appeal of your Blender projects, making them more engaging and professional-looking. Practice applying these skills to different projects to become proficient in advanced video editing with Blender.

Working with Audio: Syncing, Mixing, and Volume Control
Audio is a critical component of video production, and Blender provides comprehensive tools for syncing, mixing, and controlling volume. This section will guide you through effectively managing audio in your video projects.
- Importing Audio: To add audio to your project, use the \"Add\" menu in the Video Sequence Editor and select \"Sound.\" Navigate to your audio file and import it into the timeline.
- Syncing Audio with Video: To sync audio with video, align the audio strip with the corresponding video strip on the timeline. Use waveform displays for precise alignment. Blender\"s scrubbing feature allows you to play back audio as you move the playhead, aiding in accurate syncing.
- Mixing Audio Tracks: Blender allows for multiple audio tracks to be mixed together. Adjust the volume of each track in the properties panel to balance your mix. Keyframing volume levels can create dynamic audio effects, such as fading in or out.
- Volume Control: Control the overall volume of your project or individual clips by selecting the audio strip and adjusting the volume slider in the strip\"s properties. For more advanced control, use the VSE\"s built-in effects like the Compressor or Limiter.
- Audio Effects: Beyond basic mixing and volume control, Blender supports various audio effects that can be applied via the Sequencer\"s Effects Strip. Explore options like reverb or delay to enhance your audio\"s impact.
Effective audio management can transform a good video into a great one. With practice, these tools will help you achieve professional-sounding audio in your Blender projects.
Blender 3D Beginner Video Editing Tutorial - FREE Video Editor
Tutorial: This tutorial video is an absolute must-watch for anyone looking to master a new skill or enhance their knowledge. The step-by-step instructions and clear explanations make it easy to follow along and achieve amazing results in no time!
Blender 3.0 Video Editing Tutorial - Ep.1 - Interface, Output, Timeline, Import, Render
Interface: Get ready to be blown away by the sleek and user-friendly interface showcased in this video. Discover how to navigate through the various features effortlessly, streamlining your workflow and maximizing your productivity. Don\'t miss out on this visual feast!
Animating Text and Using Meta Strips for Enhanced Visuals
Animating text and utilizing meta strips in Blender can significantly enhance the visual appeal of your video projects. This section will guide you through the process of creating dynamic text animations and using meta strips to manage complex sequences efficiently.
Animating Text in Blender
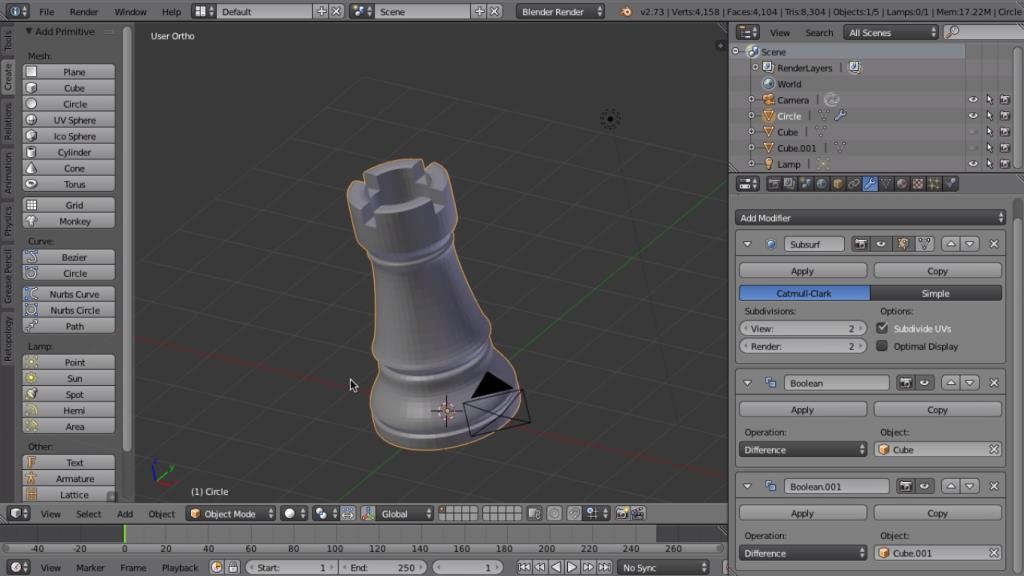
- Create Text Object: Start by adding a text object to your scene. Go to the 3D View, press Shift+A, and select Text. Enter Edit mode (Tab) to type your desired text.
- Convert Text to Mesh: For more complex animations, convert the text to a mesh with Alt+C. This allows for more detailed manipulation and effects.
- Apply Transformations: Use the Object Properties panel to animate the position, rotation, and scale of your text. Insert keyframes by hovering over the property and pressing I.
- Add Effects: Enhance your text animation with effects such as extrusion, bevel, and materials. These can be adjusted in the Text Data properties panel.
Using Meta Strips for Enhanced Visuals
Meta strips in Blender are a powerful feature for video editing, allowing you to group multiple strips into one. This simplifies your timeline and makes it easier to apply effects and transformations to multiple clips at once.
- Grouping Strips: Select the strips you wish to group, then press Ctrl+G to create a meta strip. This strip can be treated as a single unit in your video sequence editor.
- Editing Within Meta Strips: To edit individual elements within a meta strip, select it and press Tab to enter Meta Strip Edit mode. Press Tab again to exit.
- Applying Effects: With meta strips, you can apply effects and transitions to the entire group instead of individual clips, saving time and ensuring consistency.
- Animating Meta Strips: Just like with individual strips, you can animate the properties of a meta strip over time by inserting keyframes for position, scale, and rotation.
Tips for Effective Text Animation and Meta Strip Use
- Experiment with different fonts and effects to make your text stand out.
- Use meta strips to manage complex scenes or sequences with many elements, keeping your timeline organized.
- Remember to render your animations to see the final effect and adjust as necessary.
By mastering text animation and meta strips, you can create visually engaging content that captures your audience\"s attention. Practice these techniques to discover the full potential of Blender\"s video editing capabilities.

Speed Control: Slowing Down and Speeding Up Footage
Adjusting the speed of your footage in Blender allows for creative flexibility in your video editing projects. Whether you\"re looking to create dramatic slow-motion effects or increase the pace of a scene, Blender\"s speed control features are robust and user-friendly. This section will guide you through the process of slowing down and speeding up your video clips.
Adding a Speed Control Effect Strip
- Select Your Clip: In the Video Sequence Editor, select the video clip you wish to adjust the speed of.
- Add Speed Control: With the clip selected, go to Add > Effect Strip > Speed Control. This adds a speed control effect strip linked to your video clip.
- Adjust Speed Settings: Select the speed control strip, and in the Effect Strip Properties panel, adjust the speed factor to control the playback speed of the clip. A value less than 1 will slow down the clip, while a value greater than 1 will speed it up.
Advanced Speed Control Techniques
- Frame Number Mapping: Instead of using a speed factor, you can directly manipulate the frame number mapping to achieve more precise control over specific sections of your footage.
- Use Speed Control for Audio: If your clip has audio, remember to adjust the speed of the audio track separately to match your video\"s new pace. This may require external software for pitch correction.
- Creating Smooth Slow Motion: For smooth slow-motion effects, ensure your footage was recorded at a high frame rate. This provides more frames to work with, resulting in smoother playback when slowed down.
Tips for Effective Speed Adjustments
- Experiment with different speed settings to find the perfect pace for your scene.
- Consider the rhythm and flow of your overall project when adjusting speed to maintain consistency.
- Use keyframes with the speed control strip to dynamically change the speed of a clip over time, creating engaging speed ramps.
By mastering the speed control features in Blender, you can add dynamic and impactful elements to your video projects. Whether for artistic effect or narrative pacing, the ability to manipulate the speed of your footage is an invaluable tool in your video editing arsenal.
Utilizing Blender\"s Compositing Tools for VFX
Blender\"s compositing tools offer a powerful suite for creating visual effects (VFX) that can enhance your video projects with dynamic, visually striking elements. This section will explore how to leverage these tools to integrate VFX into your work, from basic compositing techniques to more advanced effects.
Introduction to Node-Based Compositing
Blender uses a node-based system for compositing, allowing you to create complex effects by connecting different nodes in a graph-like structure. This system provides flexibility and control over the compositing process.
Getting Started with Compositing in Blender
- Access the Compositor: Switch to the Compositing workspace from the top menu to access the node editor.
- Use Nodes: Ensure the Use Nodes option is enabled. This will display the default nodes, including a Render Layers node and a Composite node.
- Adding Nodes: Add new nodes by pressing Shift+A and selecting the type of node you need from the menu. Common nodes for VFX include Color Correction, Blur, and Keying nodes.
Creating Simple Effects
- Background Replacement: Use the Keying node to remove a green screen and replace it with a new background, seamlessly integrating your subjects into different environments.
- Adding Blurs and Glows: Enhance your footage with visual effects like blurs and glows to create depth or highlight certain elements.
Advanced Compositing Techniques
- Color Grading: Utilize the Color Balance and Curves nodes to adjust the color grading of your footage, enhancing the mood and tone.
- Combining CGI with Live Action: Blend CGI elements with live-action footage by using nodes to match the lighting and color for a cohesive scene.
- Creating Custom Effects: Experiment with different nodes and their parameters to create unique visual effects tailored to your project\"s needs.
Tips for Effective Compositing
- Always start with a clear vision of the final effect you want to achieve to guide your compositing workflow.
- Use Blender’s Viewer node to preview the results of your compositing in real-time as you work.
- Keep your node setup organized by labeling nodes and using Frame nodes to group related elements together.
Blender\"s compositing tools open up a world of possibilities for adding VFX to your videos. Whether you\"re working on a small project or a full-scale production, these tools can help you achieve professional-level effects and enhance your storytelling.
_HOOK_
Rendering and Exporting Your Edited Video
Once you have completed editing your video in Blender, the next step is to render and export it into a format that can be easily shared and viewed. This section will guide you through the process of rendering your project and exporting the final video, ensuring your hard work is showcased in the best possible quality.
Setting Up Your Render Options
- Choose the Output Format: In the Properties panel, navigate to the Output tab. Here, you can select your desired video format, such as MPEG, AVI, or H.264, and specify the file destination.
- Resolution and Frame Rate: Still in the Output tab, set your video’s resolution and frame rate. Ensure these settings match your project’s intended display standards to maintain quality.
- Audio Codec: If your video includes audio, don’t forget to specify an audio codec under the Encoding section to ensure your audio is included in the final render.
Rendering Your Video
- Perform a Test Render: Before rendering the entire video, perform a test render of a short segment to check for any issues in the video or audio quality.
- Render Settings: Adjust the render settings according to your project\"s needs. You can find these settings in the Render tab, where you can choose between rendering just one frame or the entire sequence.
- Start Rendering: Once you\"re satisfied with the settings, click on Render > Render Animation to begin rendering your project. This process can take some time, depending on the length and complexity of your video.
Exporting the Final Video
- After rendering, Blender will automatically save your video to the location you specified in the output settings.
- Check the final video for any rendering errors or issues with the audio synchronization.
- If necessary, you can go back and adjust your edit or render settings and re-render the project.
Tips for Efficient Rendering
- Use Blender’s built-in presets for common resolutions and frame rates to save time.
- Consider rendering your project in segments if it’s particularly long or complex, then combining those segments in the final step.
- Close other applications while rendering to allocate more resources to Blender and speed up the process.
Rendering and exporting is the final step in the video editing process in Blender. By following these guidelines, you can ensure your video is rendered smoothly and ready to share with your audience. Remember, patience is key during the rendering process, as this step is crucial in bringing your creative vision to life.
READ MORE:
Additional Resources and Tutorials for Further Learning
Enhancing your skills in Blender for video editing and VFX requires continuous learning and practice. There are numerous resources available online that can help you expand your knowledge and refine your techniques. Below is a curated list of additional resources and tutorials that are invaluable for both beginners and advanced users looking to dive deeper into the world of Blender.
Official Blender Tutorials
- Blender Foundation: The official Blender website offers a comprehensive set of tutorials covering all aspects of Blender, including video editing, modeling, animation, and more.
- Blender Cloud: Subscription-based platform providing access to training, assets, and films made by the creators of Blender.
Online Learning Platforms
- Udemy: Features a variety of Blender courses for all levels, focusing on specific areas such as video editing, 3D modeling, and animation.
- CG Cookie: Offers in-depth Blender training courses, from basics to advanced techniques, with a focus on practical projects and workflows.
YouTube Channels
- Blender Guru: Well-known for high-quality tutorials that range from beginner to advanced levels, covering various aspects of Blender.
- CG Geek: Offers tutorials and projects that explore creative uses of Blender for video editing, animation, and visual effects.
Forums and Community Platforms
- Blender Artists Community: A forum where users can ask questions, share work, and discuss all things Blender.
- Reddit Blender Community: A subreddit dedicated to Blender, where users share tutorials, tips, and their creations.
Books and E-books
- There are several comprehensive guides and manuals available in both physical and digital formats that delve into Blender\"s capabilities, ideal for those who prefer self-paced learning.
By exploring these resources, you can continue to grow your skills and stay updated on the latest Blender techniques and features. Remember, the key to mastering Blender is practice and experimentation, so don\"t hesitate to apply what you learn in your own projects.
Embark on your Blender 3D video editing journey with confidence, leveraging this guide to unlock your creative potential. From basic edits to advanced VFX, these tutorials will equip you with the skills needed to bring your visions to life.