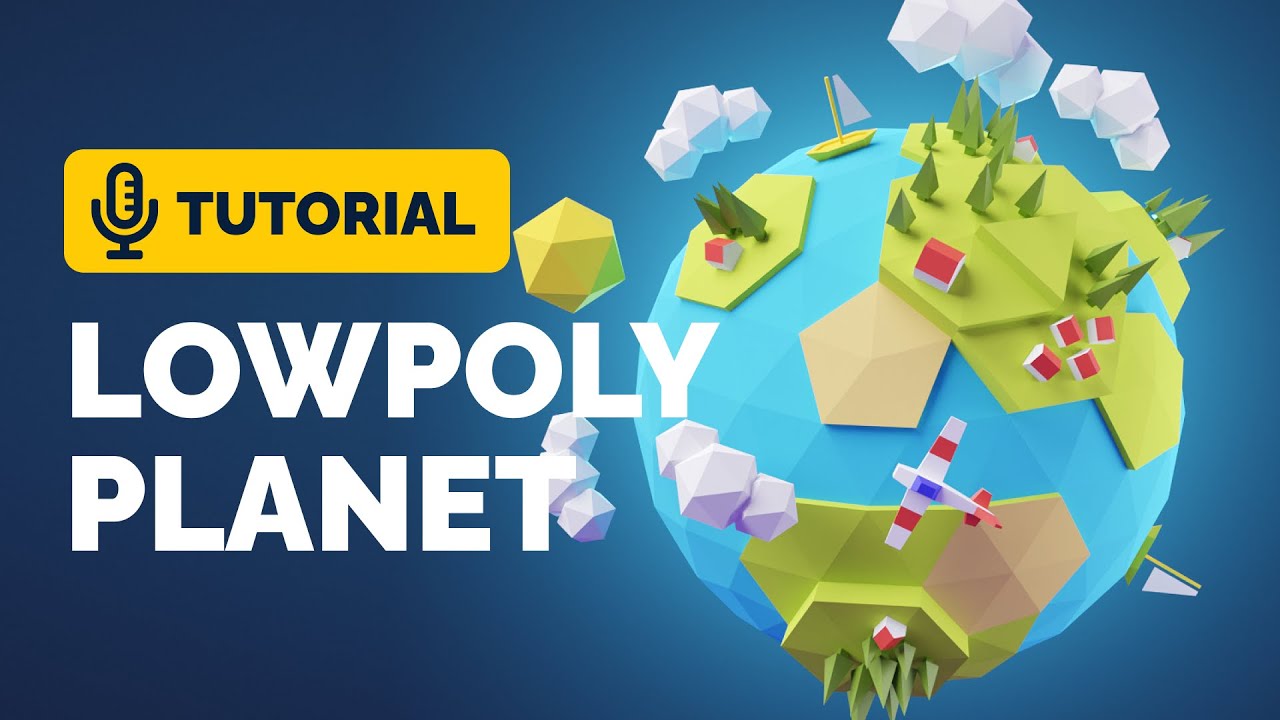
Topic blender 3d low poly tutorial: Dive into the world of Blender 3D with our comprehensive low poly tutorial, designed to guide beginners through mastering the basics of low poly modeling, texturing, and rendering to bring your creative visions to life.
Table of Content
- What are some recommended techniques for creating low poly 3D models in Blender?
- Getting Started with Blender for Low Poly Modeling
- Understanding Low Poly and Its Applications
- Basic Tools and Techniques for Low Poly Modeling in Blender
- Creating Your First Low Poly Model in Blender
- Texturing and Coloring Low Poly Models
- Lighting and Rendering Low Poly Scenes
- YOUTUBE: Low Poly House Modeling Tutorial in Blender 3.4
- Advanced Tips and Tricks for Low Poly Modeling
- Creating Low Poly Characters for Games
- Optimizing Low Poly Models for Performance
- Inspirational Low Poly Project Ideas
- Resources for Learning More About Low Poly Modeling
What are some recommended techniques for creating low poly 3D models in Blender?
Creating low poly 3D models in Blender involves several techniques that can help achieve a stylized, geometric look. Here are some recommended techniques:
- Start by planning your model: Before jumping into Blender, it\'s essential to have a clear idea of what you want to create. Sketching or gathering reference images can help in visualizing the final result.
- Keep the polygon count low: Low poly models are characterized by their simplicity and a reduced number of polygons. To achieve this, focus on creating basic shapes and avoid unnecessary detail.
- Use the \"Decimate\" modifier: Blender\'s \"Decimate\" modifier is a powerful tool for reducing polygon count while preserving the overall shape. Experiment with different settings to find the right balance between simplifying the model and maintaining its visual appeal.
- Utilize flat shading: Instead of applying smooth shading to your low poly models, consider using flat shading. This technique emphasizes the angular geometry and enhances the stylized look.
- Take advantage of beveling: Beveling the edges of your low poly models can add a subtle level of detail and make them visually more interesting. Be mindful not to overuse this technique, as it should complement the overall simplicity of the model.
- Efficient texture mapping: Low poly models often make use of simple, flat textures. Consider unwrapping the UVs of your model efficiently to optimize texture space and minimize distortion.
- Experiment with color palettes: Choosing a unique and cohesive color palette can enhance the visual impact of your low poly models. Play around with different color combinations and consider using limited color ranges for a more stylized effect.
By applying these techniques and experimenting with different approaches, you can create visually appealing low poly 3D models in Blender.
READ MORE:
Getting Started with Blender for Low Poly Modeling
Embarking on your low poly modeling journey in Blender begins with understanding the basics of the Blender interface and the principles behind low poly design. This section will guide you through setting up Blender for your first low poly project, introducing the essential tools, and offering best practices to streamline your workflow.
- Download and Install Blender: Ensure you have the latest version of Blender installed from the official website to access all the latest features and improvements.
- Familiarize Yourself with the Interface: Spend some time navigating Blender\"s user interface, focusing on the 3D viewport, object mode, edit mode, and the properties panel.
- Learn the Basic Tools: Master the key tools for low poly modeling, such as the move, rotate, scale, extrude, and loop cut.
- Setting Up Your Workspace: Customize your workspace by adjusting the layout and shortcuts to suit your low poly modeling needs. Enable the necessary add-ons for an optimized workflow.
- Starting Your First Project: Begin with a simple project, like modeling a low poly tree or house, to apply the basic techniques of low poly modeling.
- Modeling Techniques: Explore different modeling techniques, focusing on creating distinct shapes with a minimal number of polygons.
- Texturing and Shading: Learn how to apply basic textures and colors to your models to bring them to life with a stylized look.
By following these steps, you\"ll lay a solid foundation for your low poly modeling projects in Blender, paving the way for more complex creations.
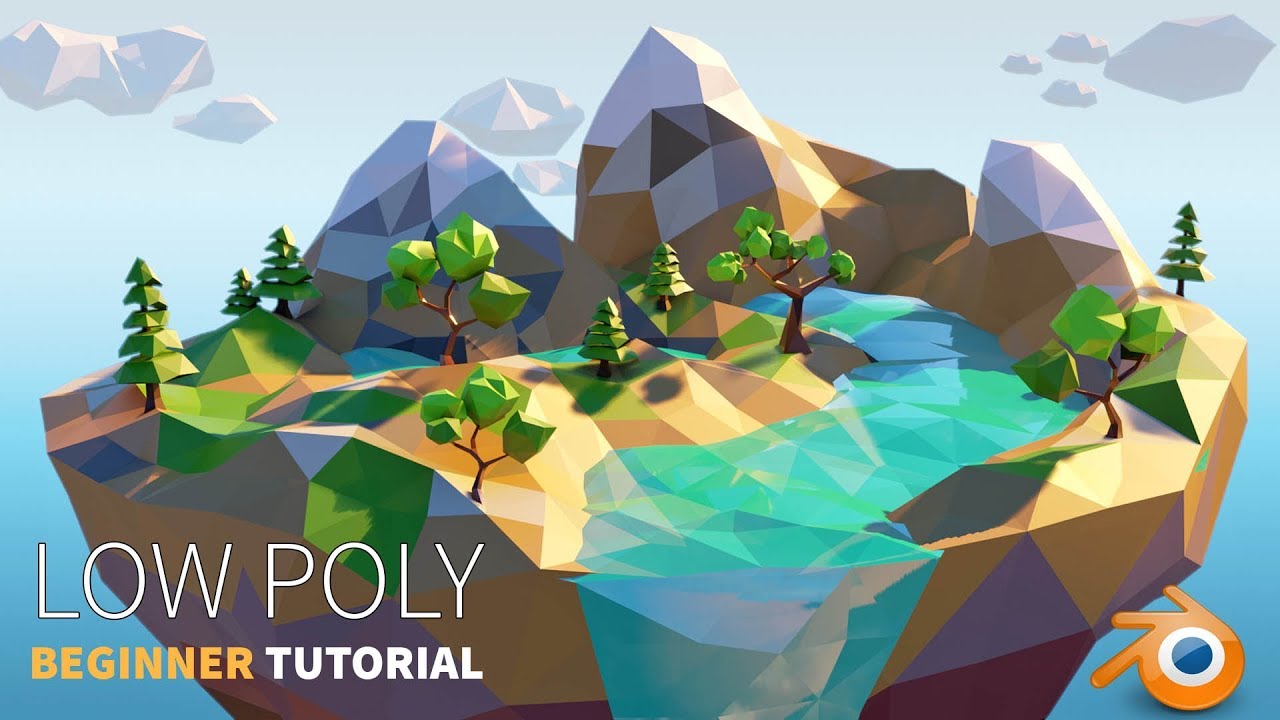
Understanding Low Poly and Its Applications
Low poly, a digital art form characterized by its minimalistic approach, utilizes a reduced number of polygons to create stylized 3D models. This technique not only speeds up the rendering process but also evokes a unique aesthetic appeal. Understanding its foundation and applications can significantly enhance your modeling skills in Blender.
- Foundational Concept: Low poly art simplifies complex shapes into basic geometric forms, reducing the computational load while maintaining visual integrity.
- Video Games: One of the most common applications, low poly models are essential for creating vast, explorable worlds without overburdening the game engine.
- Virtual Reality (VR): Low poly models are ideal for VR environments due to their efficiency, allowing for smoother performance in immersive experiences.
- Animation and Film: Low poly models are used in animations and films for stylistic choices or as placeholders during the pre-visualization process.
- 3D Printing: In 3D printing, low poly models are favored for their straightforward design and ease of printing, reducing errors and material usage.
- Educational Tools: They serve as excellent educational tools, helping students grasp the basics of 3D modeling and computational geometry with an accessible entry point.
- Graphic Design: Low poly models are increasingly popular in graphic design, offering a distinctive style for illustrations, logos, and background imagery.
Embracing the low poly technique in Blender opens up a world of creative possibilities across various industries, highlighting its versatility and efficiency in digital content creation.
Basic Tools and Techniques for Low Poly Modeling in Blender
Mastering low poly modeling in Blender involves a blend of tools and techniques designed to create visually appealing models with a minimal polygon count. This section introduces the fundamental tools and methods to start crafting your own low poly art efficiently.
- Edit Mode: Essential for manipulating vertices, edges, and faces to shape your models.
- Extrude: Use the Extrude tool to extend faces and create new geometry, a cornerstone technique for building complex shapes from simple ones.
- Loop Cut and Slide: This tool allows you to add more geometry by inserting a loop of edges, crucial for adding details to your models.
- Merge Vertices: Simplify your geometry by merging vertices together, reducing the polygon count without compromising the model\"s integrity.
- Modifiers:
- Decimate: Reduce the number of polygons in your model efficiently, crucial for achieving the low poly look.
- Subdivision Surface: Use sparingly to smooth your model, then apply decimation to simplify the mesh.
- Shading: Explore Flat vs. Smooth shading to achieve the desired aesthetic; flat shading accentuates the low poly style.
- UV Unwrapping: Essential for texturing your models, UV unwrapping allows you to map 2D textures onto your 3D objects.
Combining these tools and techniques in Blender enables you to create detailed low poly models that are both performance-friendly and visually striking. Practice each method to discover how they can be applied to your projects, enhancing your low poly modeling skills.
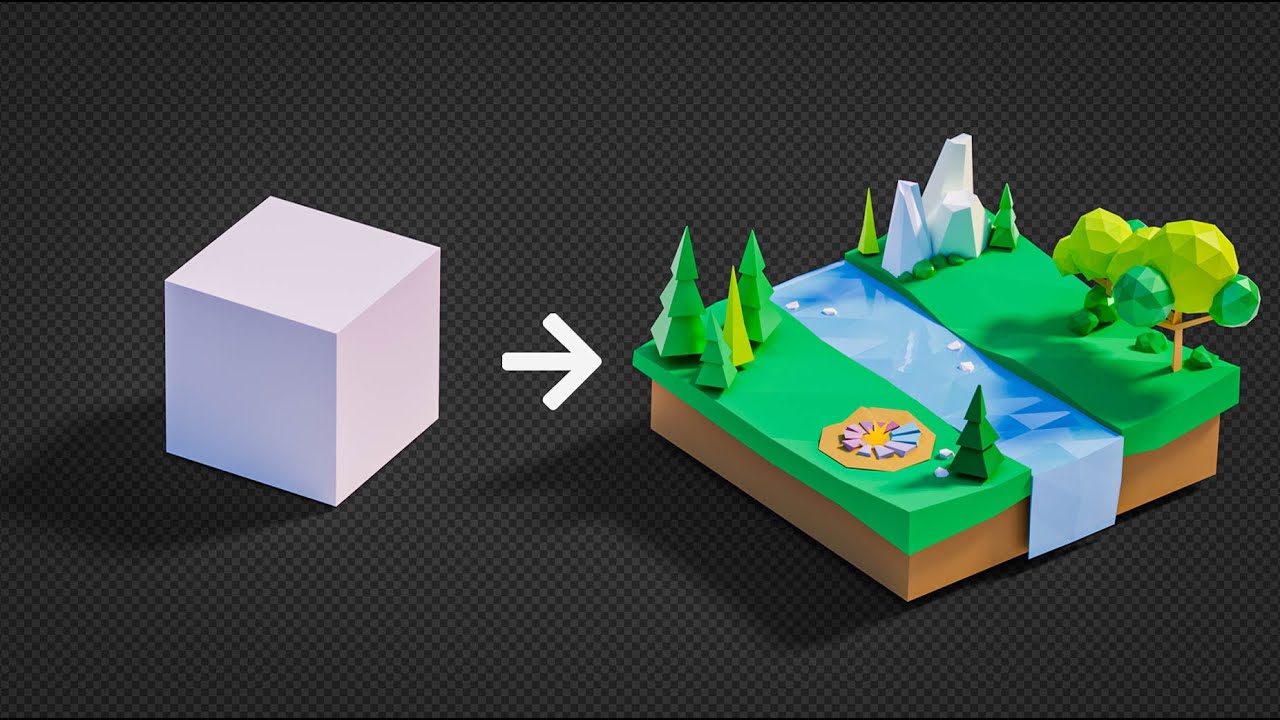
Creating Your First Low Poly Model in Blender
Creating your first low poly model in Blender is an exciting journey into 3D art. This section will guide you through the process step by step, ensuring you grasp the basics of low poly modeling and can complete a simple project from start to finish.
- Choose a Simple Object: Start with something manageable, like a tree, house, or basic character. This will help you learn without becoming overwhelmed.
- Set Up Your Scene: Open Blender and create a new project. Adjust your workspace to have the 3D viewport, properties editor, and outliner easily accessible.
- Modeling Basics: Use the Add menu (Shift+A) to insert a plane, cube, or other primitive shapes as the starting point for your model.
- Modify the Shape: Enter Edit Mode (Tab) to move, scale, and rotate vertices, edges, and faces. Use Extrude (E) to add volume and Loop Cut (Ctrl+R) to add detail.
- Refine Your Model: Apply the techniques from the previous section to refine your model. Keep the polygon count low by merging vertices (Alt+M) and simplifying shapes.
- Apply Materials: Switch to the Shading workspace to create and apply basic materials to your model. Use vibrant colors to give your low poly model a lively appearance.
- Lighting: Add a light source to your scene to highlight the model\"s form and texture. Experiment with different lighting setups to find one that suits your scene.
- Rendering: Finally, render your scene (F12) to produce the final image. Adjust the render settings in the properties panel to achieve the desired quality and resolution.
By following these steps, you\"ll complete your first low poly model in Blender, gaining valuable skills and confidence to tackle more complex projects in the future.

_HOOK_
Texturing and Coloring Low Poly Models
Texturing and coloring are crucial steps in bringing your low poly models to life in Blender. This guide will walk you through the process of applying textures and colors to your models, enhancing their visual appeal and making them ready for rendering or game engines.
- Understanding Materials and Textures: Begin by exploring Blender\"s material and texture settings. Learn how to create new materials and assign them to your model.
- Applying Base Colors: Use the color picker to apply base colors to your materials. For low poly models, vibrant colors can help accentuate the simplistic design.
- UV Unwrapping Your Model: UV unwrap your model to apply textures correctly. This process maps the 3D surface of your model onto a 2D plane for texturing.
- Creating Textures: You can create textures within Blender or import them from external sources. For low poly art, simple textures often work best.
- Applying Textures: Apply your textures to the model by linking them to the material. Adjust the mapping coordinates to align the texture properly.
- Shading: Choose between flat and smooth shading to complement your low poly model. Flat shading can enhance the low poly look by emphasizing each face.
- Lighting: Proper lighting is essential to showcase your textures and colors. Experiment with different light sources to highlight the best features of your model.
By mastering these texturing and coloring techniques in Blender, you can create distinctive low poly models that stand out in any digital environment.
Lighting and Rendering Low Poly Scenes
Proper lighting and rendering are key to showcasing your low poly models and scenes in Blender. This guide will help you understand the basics of lighting setups and rendering options to make your low poly creations look their best.
- Understanding Lighting: Start by exploring different types of lights in Blender, such as point, sun, and area lights. Each has its own effect on the scene, offering unique shadows and highlights.
- Three-Point Lighting: For a balanced and dynamic look, use the three-point lighting setup. This includes a key light, fill light, and back light to properly illuminate your model from all angles.
- Ambient Occlusion: Enable ambient occlusion in the world settings to add soft shadows in corners and crevices, enhancing the low poly look.
- Color and Intensity: Adjust the color and intensity of your lights to create the desired mood. Cooler lights can suggest a nighttime or cold environment, while warmer lights can evoke daylight or warmth.
- Camera Setup: Position your camera to best capture the essence of your scene. Experiment with different angles and distances to find the most appealing composition.
- Rendering Settings: In the render settings, choose your render engine (Eevee for faster results, Cycles for more realism), set the resolution, and adjust samples for quality.
- Post-Processing: Use Blender’s Compositor to enhance your rendered image. You can adjust contrast, saturation, and add effects like bloom to highlight your low poly aesthetics.
With these steps, you can light and render your low poly scenes in Blender, bringing out the best in your models and creating stunning visuals for your portfolio or projects.

Low Poly House Modeling Tutorial in Blender 3.4
Get ready to be captivated by the world of modeling! Discover the secrets to strutting your stuff on the runway, mastering the perfect poses, and becoming a confident and successful model in this exciting video. Don\'t miss out on this opportunity to learn from the best!
Learn Low Poly Character Modeling in Blender 3.5 - Full Course - Model, Rig, Animate, Clone, Export
Step into a captivating realm filled with fascinating characters! From heroes to villains, get ready to dive into the art of character development. Unleash your creativity and learn how to bring your characters to life with this mesmerizing video. Join us on this imaginative journey and let your characters steal the show.
Advanced Tips and Tricks for Low Poly Modeling
Enhance your low poly modeling skills in Blender with these advanced tips and tricks. By refining your approach and incorporating these techniques, you can create more complex and visually appealing models while maintaining the essence of low poly design.
- Use Modifiers Wisely: Experiment with modifiers like Boolean for complex shapes, Mirror for symmetrical models, and Solidify to give thin objects thickness.
- Optimize Topology: Pay attention to your model\"s topology to ensure it\"s efficient and animation-friendly. Use loop cuts to add detail only where necessary.
- Sharp Edges and Creases: Use the Edge Split modifier or mark edges as sharp to keep hard edges crisp in your low poly models, especially when using smooth shading.
- Low Poly Sculpting: For organic shapes, start with a high poly mesh in Sculpt Mode, then use the Decimate modifier to reduce the polygon count while retaining the form.
- Texture Painting: Create unique textures directly in Blender with texture painting. This is particularly useful for adding details without increasing the poly count.
- Baking High to Low Poly: Create a high poly model with detailed textures, then bake these details onto a low poly model to maintain performance while achieving visual complexity.
- Efficient UV Unwrapping: For complex models, take the time to manually unwrap UVs. This ensures better texture placement and reduces visual artifacts.
By incorporating these advanced techniques into your workflow, you can push the boundaries of low poly modeling in Blender, creating intricate models that are both beautiful and performance-efficient.
Creating Low Poly Characters for Games
Creating low poly characters for games is a rewarding process that combines artistic creativity with technical skills. This section will guide you through the essential steps to design, model, and prepare a low poly character for use in game engines using Blender.
- Concept and Design: Start with a clear concept of your character. Sketch your character from multiple angles to serve as a reference.
- Blocking Out the Shape: Use basic shapes (cubes, spheres) in Blender to block out your character\"s form. Focus on proportion and silhouette at this stage.
- Refining the Model: Begin refining the shapes, adding details while keeping the polygon count low. Use extruding and loop cuts to define limbs, facial features, and other details.
- Optimizing the Mesh: Ensure your character\"s mesh is clean and optimized for animation. Use techniques like retopology if necessary to create an efficient, animatable topology.
- UV Unwrapping: Unwrap your character\"s mesh for texturing. Keep the UV layout organized to facilitate easier texturing.
- Texturing: Apply textures to give your character color and detail. Consider using stylized textures to complement the low poly aesthetic.
- Rigging: Rig your character with a skeleton to prepare it for animation. Pay attention to joint placement for realistic movement.
- Animation Basics: Create basic animations to bring your character to life. Start with simple actions like walking or jumping.
- Exporting for Game Engines: Once your character is modeled, textured, rigged, and animated, export it to a format compatible with your game engine (e.g., FBX for Unity or Unreal Engine).
By following these steps, you can create engaging and visually appealing low poly characters for your game projects, ready to be integrated into game engines and brought to life through animation.

Optimizing Low Poly Models for Performance
Optimizing low poly models for performance is crucial in game development and real-time applications. This section provides insights on how to make your Blender models efficient without sacrificing visual quality.
- Reduce Polygon Count: Strive to use the least number of polygons necessary to maintain the shape and details of your model. Tools like the Decimate modifier can help reduce complexity without major visual impact.
- Efficient Texturing: Use textures to add detail instead of geometry. UV maps should be well organized to maximize texture space and reduce the number of textures used.
- Combine Meshes: Where possible, combine multiple objects into a single mesh to reduce draw calls in the game engine.
- Use LODs (Level of Detail): Create multiple versions of your model with varying levels of detail. Use lower detail models when the object is far from the camera to save on performance.
- Optimize Materials: Minimize the number of materials and shaders used. Each material can increase the time it takes to render a scene.
- Clean Up Your Mesh: Remove any unnecessary vertices, edges, or faces. Ensure there are no hidden faces inside your model that could increase the polygon count needlessly.
- Bake Lighting and Shadows: For static objects, consider baking lighting and shadows into the textures. This technique can drastically reduce the need for complex lighting calculations in real-time.
By applying these optimization techniques, you can ensure your low poly models are not only visually appealing but also perform well in various digital environments.

_HOOK_
Inspirational Low Poly Project Ideas
Low poly projects offer a unique blend of simplicity and creativity, making them perfect for both beginners and experienced artists looking to explore this distinctive style. Here are some project ideas to inspire your next Blender creation.
- Stylized Landscapes: Create serene landscapes with rolling hills, tranquil lakes, and sparse vegetation. Focus on using bold colors and simple shapes to evoke mood and atmosphere.
- Character Design: Design low poly characters ranging from humans to fantastical creatures. Experiment with proportions and simple textures to bring personality and life to your creations.
- Architectural Models: Construct stylized versions of real-world buildings or dream up your own architectural wonders. These models can be used for games, visualizations, or artistic compositions.
- Vehicle Models: From vintage cars to futuristic spacecraft, vehicles are a great way to practice modeling clean lines and functional designs in a low poly format.
- Abstract Art: Use low poly techniques to create abstract compositions that play with form, color, and light. This can be a great way to experiment with Blender’s rendering capabilities.
- Animated Scenes: Bring your low poly scenes to life with simple animations. Experiment with moving vehicles, flowing water, or dynamic lighting to add depth to your projects.
- Game Assets: Design assets for video games, including environmental objects, power-ups, and props. Low poly models are ideal for mobile games and indie projects where performance is key.
Each of these projects can help you refine your low poly modeling skills while pushing the boundaries of your creativity. Whether you\"re making art for fun or developing assets for a game, low poly projects offer endless possibilities for exploration and expression in Blender.

READ MORE:
Resources for Learning More About Low Poly Modeling
Expanding your knowledge and skills in low poly modeling in Blender is a continuous process. Here are some invaluable resources to help you advance your low poly modeling techniques, from beginner to advanced levels.
- Blender Official Documentation: Start with Blender’s own documentation for an in-depth understanding of all tools and features available for low poly modeling.
- Online Tutorials and Courses: Websites like YouTube, Udemy, and Coursera offer a wide range of tutorials and courses tailored to all skill levels, from basic introductions to advanced techniques.
- Blender Communities: Join Blender communities on Reddit, Blender Artists, or the Blender Network to share your work, get feedback, and learn from other artists’ experiences.
- Books and E-books: There are numerous books and e-books dedicated to Blender and low poly modeling, providing step-by-step guides and project-based learning.
- Practice Projects: Websites like BlenderNation or CGTrader offer challenges and project ideas that can provide practical experience and inspiration.
- Workshops and Webinars: Keep an eye out for workshops and webinars hosted by experienced Blender artists. These can offer real-time insights and tips not found in pre-recorded tutorials.
- Blender Add-ons: Explore add-ons specifically designed to enhance low poly modeling, such as decimation tools and texture baking utilities, to streamline your workflow.
Utilizing these resources can significantly enhance your ability to create stunning low poly models in Blender, pushing your creative boundaries and opening up new possibilities in your 3D projects.
Embark on your journey into the captivating world of low poly modeling with Blender, where creativity meets simplicity. Let these tutorials inspire you to create, explore, and transform your visions into stunning digital art.