Topic 3d modeling in blender tutorial: Dive into the world of 3D modeling with our Blender tutorial, designed to guide beginners and enthusiasts through the fundamentals of creating stunning 3D art and animations effortlessly.
Table of Content
- What are the basic steps for 3D modeling in Blender tutorial?
- Getting Started with Blender: Interface Overview
- Essential Blender Shortcuts and Navigation Tips
- Basic Modeling Techniques: Understanding Meshes, Edges, and Vertices
- Modeling Simple Objects: A Step-by-Step Guide
- YOUTUBE: Beginner 3D Modeling Tutorial with Blender 2.8
- Advanced Modeling Tools and Techniques
- Sculpting in Blender: An Introduction
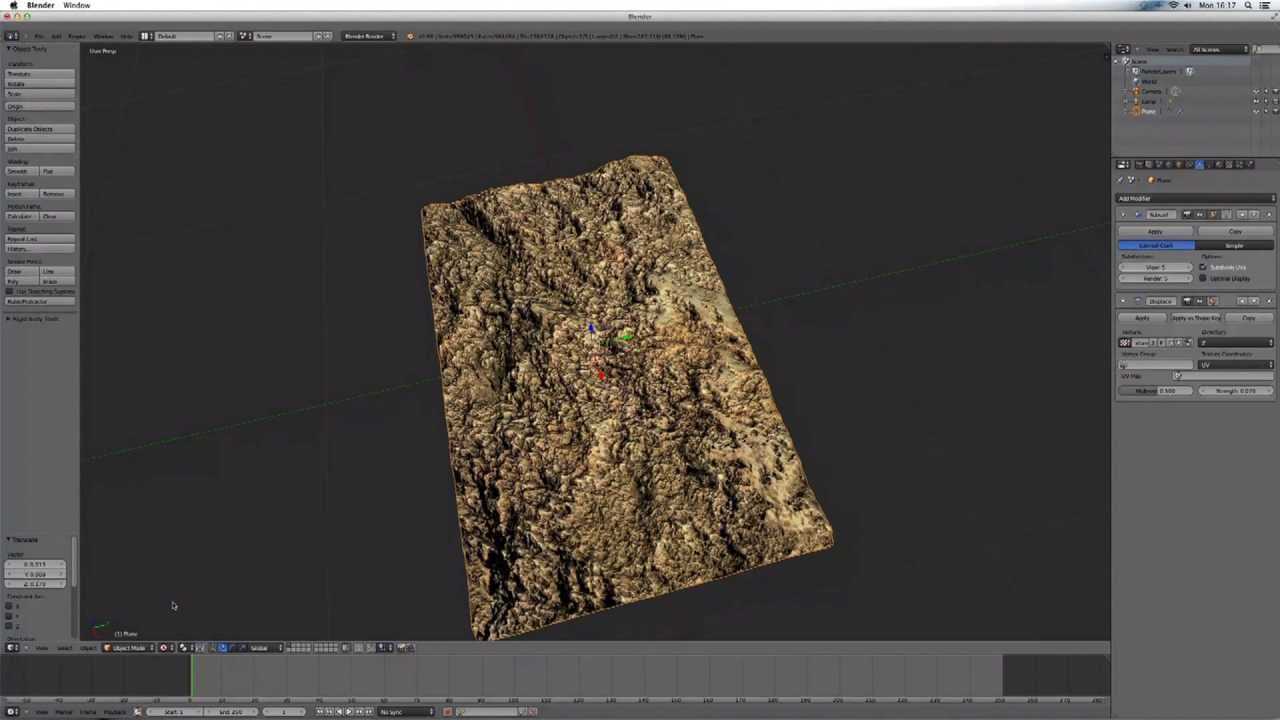
- Texturing and Materials: Bringing Your Models to Life
- Lighting and Rendering: Basics for Realism
- Animation Basics with Blender
- Exporting and Sharing Your 3D Models
- Common Problems and How to Solve Them
- Resources for Further Learning and Inspiration
What are the basic steps for 3D modeling in Blender tutorial?
The basic steps for 3D modeling in Blender tutorial are as follows:
- Launch Blender and create a new project.
- Set up the workspace by adjusting the layout and viewports to suit your preference.
- Import any reference images or sketches that you may have for your model.
- Select the appropriate modeling method from the available options, such as polygon modeling, sculpting, or using modifiers.
- Begin blocking out the general shape of your model using basic geometric primitives or starting from a mesh template. This is also known as the \"blocking stage\".
- Refine the shape of your model by adding more detail and using various modeling tools like extrusions, bevels, and loops to create the desired forms.
- Pay attention to proportions, edge flow, and topology to ensure a clean and optimized mesh.
- If needed, use subdivision surfaces or other modifiers to smooth the model and add more detail.
- Add additional elements and details to your model, such as textures, materials, and UV unwrapping.
- Once you are satisfied with the model, you can proceed to rendering and/or animating it within Blender.
- Save your project and export the model in a compatible format for use in other software or platforms, if needed.
READ MORE:
Getting Started with Blender: Interface Overview
Embarking on your 3D modeling journey in Blender begins with understanding its comprehensive interface, designed for efficiency and creativity. Let\"s explore the key components to kickstart your projects:
- 3D Viewport: The heart of Blender, where your 3D scene is displayed. Navigate using mouse controls or shortcuts to rotate, pan, and zoom.
- Timeline: Located at the bottom, it controls animation playback and keyframe management, crucial for bringing your models to life.
- Outliner: A hierarchical view on the right that lists all objects in your scene, making it easy to select and manage components.
- Properties Panel: Adjacent to the Outliner, it houses settings for the active object, world settings, rendering, and more.
- Toolshelf and Properties Shelf: Toggle these shelves with T and N in the 3D Viewport for quick access to tools and object properties.
- Editor Types: Blender\"s interface is highly customizable. Switch between different editors like the Node Editor, UV/Image Editor, or Text Editor from the dropdown menu at each window\"s corner to suit your task.
Begin by customizing your workspace layout to fit your workflow. Blender offers pre-defined layouts for animation, modeling, compositing, and more, accessible from the top of the interface. Familiarizing yourself with these areas will streamline your 3D modeling process, making Blender a powerful tool in your creative arsenal.

Essential Blender Shortcuts and Navigation Tips
Embarking on your 3D modeling journey in Blender begins with understanding its comprehensive interface, designed for efficiency and creativity. Let\"s explore the key components to kickstart your projects:
- 3D Viewport: The heart of Blender, where your 3D scene is displayed. Navigate using mouse controls or shortcuts to rotate, pan, and zoom.
- Timeline: Located at the bottom, it controls animation playback and keyframe management, crucial for bringing your models to life.
- Outliner: A hierarchical view on the right that lists all objects in your scene, making it easy to select and manage components.
- Properties Panel: Adjacent to the Outliner, it houses settings for the active object, world settings, rendering, and more.
- Toolshelf and Properties Shelf: Toggle these shelves with T and N in the 3D Viewport for quick access to tools and object properties.
- Editor Types: Blender\"s interface is highly customizable. Switch between different editors like the Node Editor, UV/Image Editor, or Text Editor from the dropdown menu at each window\"s corner to suit your task.
Begin by customizing your workspace layout to fit your workflow. Blender offers pre-defined layouts for animation, modeling, compositing, and more, accessible from the top of the interface. Familiarizing yourself with these areas will streamline your 3D modeling process, making Blender a powerful tool in your creative arsenal.

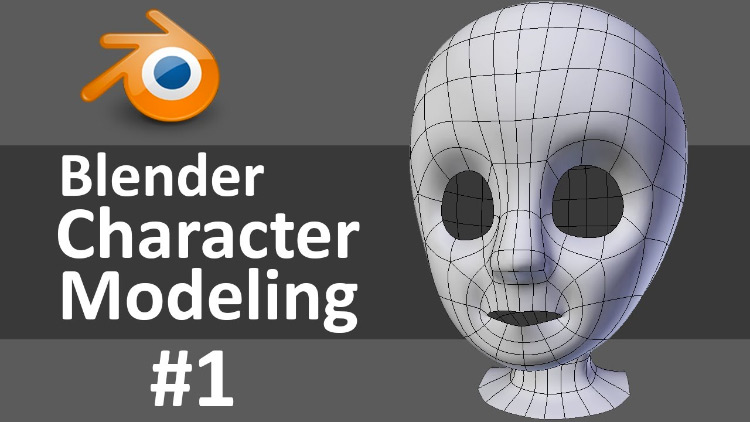
Basic Modeling Techniques: Understanding Meshes, Edges, and Vertices
Mastering the basics of modeling in Blender starts with a solid understanding of meshes, edges, and vertices. These fundamental components form the building blocks of any 3D model and knowing how to manipulate them is key to creating detailed and efficient models. Let’s dive into each of these elements and explore some basic techniques to get you started.
What are Meshes, Edges, and Vertices?
- Meshes: A mesh is a collection of vertices, edges, and faces that defines the shape of a 3D object in Blender. Meshes can be as simple as a single plane or as complex as a detailed character model.
- Edges: An edge is a line that connects two vertices in a mesh. Edges define the structure of the mesh and are key to shaping and refining your model.
- Vertices: A vertex is a point in 3D space where two or more edges meet. Vertices are the most basic element of a mesh and can be moved, added, or deleted to change the form of your model.
Basic Modeling Techniques
- Selection Tools: Understanding how to select vertices, edges, and faces is crucial. You can select elements by right-clicking (or left-clicking, depending on your settings) and use Shift to select multiple elements.
- Transformations: Use the G (grab), R (rotate), and S (scale) keys to manipulate your selections. These transformations are the foundation of modeling in Blender.
- Extrusion: Extruding is a fundamental technique where you create new geometry from a selected vertex, edge, or face by pressing E. Extrusion is widely used for adding volume and detail to your model.
- Loop Cuts: Adding loop cuts (Ctrl+R) allows you to add more geometry along a loop of faces, which is essential for creating more detailed models and for adding topology for animation.
- Subdivision: Subdivision Surface Modifier can smooth and subdivide your mesh, adding more vertices, edges, and faces automatically. This is great for creating organic shapes.
Modeling Practice: A Simple Object
Let’s put these techniques into practice by modeling a simple object:
- Start with a cube. In Object Mode, press Shift+A and select Mesh > Cube.
- Enter Edit Mode (Tab) and use the loop cut tool (Ctrl+R) to add a horizontal loop. Scroll the mouse wheel to increase the number of cuts.
- Select the top face and use extrusion (E) to pull it upwards, forming a simple house shape.
- Experiment with moving (G), rotating (R), and scaling (S) different parts of your mesh to refine your model.
- Apply a Subdivision Surface Modifier from the Modifiers tab to smooth the edges and add complexity.
Understanding and applying these basic modeling techniques will set a strong foundation for your journey into 3D modeling with Blender. Practice with different shapes and modifiers to become more familiar with the process and unlock your creative potential.

Modeling Simple Objects: A Step-by-Step Guide
Creating simple objects in Blender is an excellent way for beginners to get comfortable with 3D modeling. This step-by-step guide will take you through the process of modeling a basic mug, which introduces techniques like extrusion and loop cuts that are essential for all 3D modeling projects.
Step 1: Setting Up Your Scene
- Open Blender and create a new project.
- Select the default cube by right-clicking on it, then delete it by pressing X and selecting Delete.
Step 2: Adding a Cylinder
- Press Shift+A to open the Add menu, then select Mesh > Cylinder.
- In the Add Cylinder options (left bottom corner), set the Vertices to 32 for a smoother circular base.
- Adjust the Radius and Depth to resemble the proportions of a mug (e.g., Radius: 1, Depth: 2).
Step 3: Shaping the Mug
- With the cylinder selected, enter Edit Mode by pressing Tab.
- Select the top edge loop by alt+right-clicking (or alt+left-clicking, depending on your settings) on the top edge.
- Press E to extrude, then immediately press S to scale the extrusion inwards slightly, creating the inner lip of the mug.
- Extrude again upwards to form the thickness of the mug’s wall.
Step 4: Creating the Handle
- In Edit Mode, select a vertical edge on the side of the mug where you want the handle.
- Press E to extrude this edge outwards slightly, then Z to constrain the movement to the Z-axis.
- Rotate and scale the extruded edge to shape the handle. Use loop cuts (Ctrl+R) to add more geometry for better control over the shape.
- Finally, connect the vertices to form the handle’s loop using the F key to create faces between them.
Step 5: Adding Details and Finishing Touches
- To smooth the mug, add a Subdivision Surface Modifier from the Modifiers panel.
- Adjust the Viewport and Render levels to 2 for a smoother appearance.
- Optionally, add a Solidify Modifier to give the mug walls thickness.
- Enter Object Mode and apply a material to your mug from the Material Properties tab.
By following these steps, you’ve now created a simple 3D model of a mug in Blender. This process introduces you to fundamental modeling techniques like extrusion, scaling, and the use of modifiers, which are applicable to a wide range of 3D modeling projects. Continue practicing with different shapes and objects to further develop your skills.

_HOOK_
Beginner 3D Modeling Tutorial with Blender 2.8
\"Looking to create stunning 3D animations? Learn how to master Blender, the ultimate software for all your creative endeavors. Unlock your artistic potential and dive into the world of endless possibilities with this must-watch video!\"
Introduction to Blender Modeling: Creating 3D Objects
\"Ready to bring your imagination to life? Discover the fascinating realm of 3D modeling and learn how to design intricate and visually impressive digital landscapes. This captivating video will guide you through the process, helping you unleash your creativity like never before.\"
Advanced Modeling Tools and Techniques
As you progress in your Blender journey, mastering advanced modeling tools and techniques will enable you to tackle more complex projects with efficiency and creativity. This guide explores some of the powerful tools at your disposal and provides insights into techniques that can elevate your 3D modeling skills.
Non-Destructive Modeling with Modifiers
- Boolean: Use the Boolean modifier to combine or subtract mesh objects, creating complex shapes that would be difficult to model manually. Perfect for creating intricate designs and mechanical parts.
- Array: The Array modifier creates multiple copies of your object in an array. It’s ideal for objects that require repetition, like fences or building facades, allowing for adjustments without the need to manually duplicate and place each object.
- Curve: With the Curve modifier, you can bend your mesh along a curve object. This is especially useful for creating objects like cables, pipes, and anything that requires a smooth, flowing shape.
Retopology for Cleaner Meshes
Retopology is the process of recreating an existing mesh with more optimal geometry. It’s crucial for animation and game asset creation, ensuring models are lightweight and deform naturally.
- Use the Shrinkwrap modifier to project new geometry onto the surface of your high-poly model.
- Employ the Poly Build tool to manually create faces, adhering to the underlying form of your model.
- Blender’s Grease Pencil and BSurfaces addon can be used to generate geometry from strokes, offering a fast and intuitive way to retopologize organic shapes.
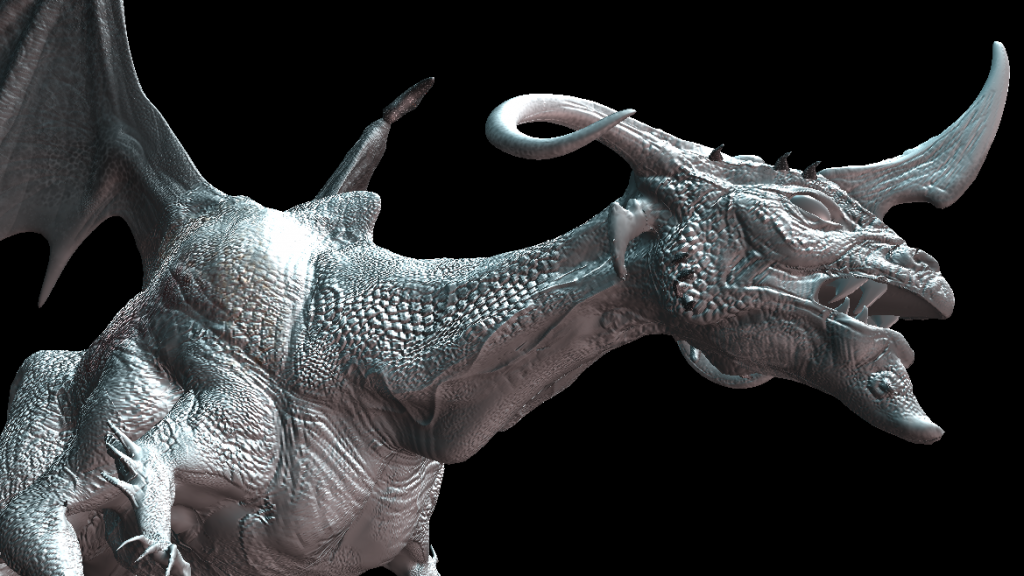
Sculpting for Detailed Models
Sculpting in Blender allows for the intuitive shaping of models, adding fine details that are difficult to achieve through traditional modeling methods.
- Dynotopo: Dynamically adds geometry where needed as you sculpt, allowing for high levels of detail without the need for a densely subdivided mesh.
- Brushes: Utilize various brushes for different effects, such as the Clay Strips for adding volume or the Crease brush for sharp indents.
- Remesh: The Remesh modifier can be used to create a uniform topology for sculpting, essential for achieving smooth, detailed surfaces.
Simulation for Realistic Effects
Blender’s physics simulations offer ways to create realistic animations and effects, including cloth, fluid, and smoke.
- Cloth: Simulate fabric and clothing, adjusting parameters to get the desired drape and movement.
- Fluid: Create realistic liquid behaviors, from flowing water to splashing effects.
- Smoke: Generate smoke and fire simulations for dynamic and engaging visual effects.
By integrating these advanced tools and techniques into your workflow, you can push the boundaries of what is possible in Blender. Whether it’s through the creation of detailed character models, engaging environments, or dynamic simulations, these skills will enhance the quality and realism of your projects.
Sculpting in Blender: An Introduction
Sculpting in Blender offers a powerful and intuitive way to create detailed 3D models, mimicking the process of sculpting in clay. This introduction to sculpting in Blender will guide you through the basics, from setting up your workspace to utilizing essential tools and techniques to bring your creations to life.
Setting Up Your Sculpting Workspace
- Open Blender and select the Sculpting tab at the top to switch to the sculpting workspace.
- Choose a base mesh to start sculpting. You can use basic shapes like spheres or cubes, or import a model. A high-poly mesh is recommended for capturing details.
Understanding Sculpting Tools
Blender\"s sculpting mode offers a variety of brushes and tools designed for different effects:
- Brush: The primary tool for adding and subtracting material. Adjust its strength, size, and shape to suit your sculpting needs.
- Smooth: Smoothens out bumps and rough areas, refining the surface of your model.
- Crease: Creates sharp creases and folds, perfect for defining tight spaces and edges.
- Inflate: Increases the volume of your mesh, useful for creating puffed-up areas.
- Grab: Allows you to pull, push, and move large sections of your mesh, ideal for shaping and positioning.
Basic Sculpting Techniques
- Begin with a general shape: Use the Grab tool to adjust the overall form of your mesh, focusing on the major shapes and proportions.
- Add details gradually: Start with a larger brush to block out forms and features, then switch to smaller brushes for finer details.
- Use the Smooth brush sparingly to refine surfaces without over-smoothing and losing detail.
- Experiment with different brushes to achieve various textures and effects, enhancing the realism and complexity of your sculpt.
Dynotopo for Dynamic Topology
Dynotopo (Dynamic Topology) is a sculpting feature that dynamically subdivides the mesh as you sculpt, allowing for detailed sculpting without the need for a highly subdivided base mesh. It’s especially useful for adding intricate details to specific areas of your model.
- To enable Dynotopo, in the Sculpt mode, go to the Active Tool settings and toggle on Dynotopo.
- Adjust the Detail Size to control the level of detail. Smaller values result in finer detail.
Tips for Effective Sculpting
- Work in stages: Start with broad forms and gradually move to finer details.
- Regularly rotate your view to sculpt from multiple angles, ensuring a well-rounded model.
- Utilize reference images for accuracy and inspiration, especially when sculpting complex or organic shapes.
- Practice consistently to develop your skills and discover your unique sculpting style.
Sculpting in Blender is a rewarding process that blends artistic expression with digital craftsmanship. By mastering these basics, you\"ll be well on your way to creating stunning, detailed models that bring your visions to life.
Texturing and Materials: Bringing Your Models to Life
Applying textures and materials is a crucial step in 3D modeling that breathes life into your creations, making them appear realistic or stylized, depending on your project\"s needs. This section covers the basics of texturing and material application in Blender, guiding you through the process of enhancing the visual appeal of your models.
Understanding Materials and Textures
In Blender, materials define the color, transparency, and shininess of your objects, while textures are images or procedural patterns that add detail to these materials. Together, they simulate the appearance of different surfaces, from rough concrete to smooth metal, and everything in between.
Adding a Material
- Select your object in Object Mode.
- Go to the Properties panel and click on the Material tab.
- Click the \"New\" button to create a new material. Adjust the material\"s properties such as Base Color, Specularity, and Roughness to achieve the desired look.
Applying Textures
- With the material selected, switch to the Shader Editor view from the top menu.
- Add a new Texture node by pressing Shift+A, selecting Texture, and then choosing the type of texture you want (Image Texture for bitmap images or a procedural texture like Noise).
- Connect the texture node\"s Color output to the Base Color input of the Principled BSDF shader node to apply your texture to the material.
- Adjust the texture settings and mapping coordinates to fit your model correctly.
UV Unwrapping for Accurate Texturing
UV Unwrapping is the process of projecting a 3D model\"s surface onto a 2D plane for accurate texture mapping. This ensures that textures align correctly with your model\"s geometry.
- In Edit Mode, select all faces of your object.
- Press U to open the UV Mapping menu and select a projection method (Smart UV Project for automatic unwrapping works well for complex objects).
- Adjust the UV map in the UV/Image Editor to match the texture to your model\"s surface.
Tips for Realistic Texturing
- Use high-quality textures for the best results. Numerous free and paid resources offer textures suitable for various projects.
- Layer multiple textures using nodes in the Shader Editor for more complex surfaces. For example, combine a base color texture with a bump map to add surface detail.
- Experiment with different material settings and textures to achieve the desired effect. Reflection, transparency, and emission properties can add depth and realism to your models.
Texturing and applying materials in Blender transforms your models from simple shapes into vivid, detailed objects. By mastering these techniques, you can create compelling and visually rich 3D scenes and characters that stand out.

Lighting and Rendering: Basics for Realism
Lighting and rendering are pivotal in transforming your 3D models into realistic scenes or visually stunning artworks. This guide introduces the basics of lighting and rendering in Blender, providing you with the foundational knowledge to enhance the realism and appeal of your projects.
Understanding Lighting
Lighting is essential in 3D modeling and animation. It not only reveals your model\"s forms and textures but also sets the mood of your scene. Blender offers several types of lights, each with its unique properties and uses:
- Point Light: Emits light in all directions from a single point, similar to a light bulb.
- Sun Light: Simulates sunlight, emitting parallel rays that cast shadows with consistent direction and intensity.
- Spot Light: Emits light in a cone shape, allowing for focused lighting with controllable size and falloff.
- Area Light: Provides soft, diffused lighting from a rectangular or square shape, great for simulating light from windows or softboxes.
Basic Lighting Setup
- Start with a three-point lighting setup to achieve a balanced and professional look. This includes a key light, fill light, and back light.
- Place the key light to one side of your model, slightly above, to highlight the form and create shadows.
- Add a fill light on the opposite side, at a lower intensity, to soften the shadows created by the key light.
- Use a back light behind your model to separate it from the background and add depth to your scene.
Rendering Basics
Rendering is the process of converting your 3D scene into a 2D image or animation. Blender\"s Cycles and Eevee are two powerful rendering engines, each with its strengths:
- Cycles: A ray-tracing renderer that simulates realistic lighting and shadows, ideal for photorealistic renders. It\"s computationally intensive but produces high-quality results.
- Eevee: A real-time render engine that provides fast previews and final renders. While not as physically accurate as Cycles, it\"s highly efficient for animations and stylized scenes.
Rendering Your Scene
- Choose your rendering engine in the Render Properties panel.
- Adjust settings like resolution, samples (for Cycles), and ambient occlusion (for Eevee) to optimize quality and rendering time.
- Use the Camera view (Numpad 0) to frame your scene and adjust the camera\"s position and settings for the desired composition.
- Press F12 to render your image or Ctrl+F12 to render an animation.
Tips for Realistic Renders
- Experiment with different lighting setups to find what best suits your scene and enhances its mood.
- For photorealism, pay attention to materials and textures, ensuring they accurately reflect how objects interact with light.
- Use depth of field, motion blur, and other camera effects to add realism and focus to your renders.
By understanding and applying these principles of lighting and rendering, you can significantly elevate the quality of your 3D projects in Blender, achieving stunning visuals that captivate your audience.
Animation Basics with Blender
Blender is not only a powerful tool for 3D modeling but also for creating animations. Whether you\"re animating characters, creating dynamic simulations, or setting up motion graphics, understanding the basics of animation in Blender is essential. This guide will introduce you to the fundamental concepts and steps to get started with animation in Blender.
Keyframes: The Foundation of Animation
Keyframes are the core of animation, marking the start and end points of any movement. By setting keyframes for an object\"s properties at different times, Blender interpolates the frames in between, creating smooth transitions.
- Select your object and decide which property you want to animate (e.g., location, rotation, scale).
- Move to the frame where you want the animation to start and adjust your object\"s property as desired.
- Press I and choose the property to insert a keyframe.
- Move to another frame, change the property, and insert another keyframe.
- Play back the animation using the play controls in the Timeline editor.
Animating with the Graph Editor
The Graph Editor allows you to fine-tune the animation curves, which represent the change in properties over time. This is crucial for creating realistic motions and adjusting the pacing of your animations.
- Open the Graph Editor from the editor type menu.
- Select a keyframe curve to view its interpolation graph.
- Use handles on the keyframe points to adjust the curve, changing the speed and timing of the animation.
Using the Dope Sheet for Overview
The Dope Sheet provides an overview of all keyframes and animations in your scene, making it easier to manage and synchronize animations across multiple objects.
- Access the Dope Sheet from the editor type menu.
- Here, you can move, duplicate, or delete keyframes for all animated properties.
Rigging for Character Animation
Rigging is the process of creating a skeleton (armature) for a character, which can then be animated. This allows for more complex movements and is essential for character animation.
- Create an armature that matches your character’s structure.
- Place the armature inside your character model in Edit Mode.
- Select the mesh, then the armature, and use Ctrl+P to parent the mesh to the armature with automatic weights.
- In Pose Mode, you can now animate the armature, and the mesh will follow.
Tips for Successful Animation
- Start with simple animations to understand keyframing and interpolation.
- Watch real-life references to capture realistic movements and timings.
- Use the Graph Editor to smooth out or exaggerate motions for more dynamic animations.
- Practice rigging with simpler models before moving on to complex characters.
Animation in Blender opens up a world of creative possibilities. By mastering these basics, you\"ll be well-equipped to bring your models to life and create compelling animated sequences.

_HOOK_
Exporting and Sharing Your 3D Models
After investing time and effort into creating a 3D model in Blender, the next step is to share your work with the world or use it in other projects or applications. Blender supports various formats for exporting models, catering to different uses like 3D printing, game development, and more. This guide will walk you through the process of exporting and sharing your 3D models effectively.
Choosing the Right Format
Before exporting, decide on the best format based on your needs:
- FBX: Widely used in game development, supports models, textures, and animations.
- OBJ: Compatible with most 3D software, ideal for static models without animations.
- STL: Commonly used for 3D printing, focuses on the geometry of the model.
- GLTF/GLB: A versatile format for web-based applications, supports PBR materials and animations.
Exporting Your Model
- Ensure your model is ready for export. This includes applying any modifiers and ensuring the mesh is clean.
- Select the object or objects you want to export.
- Go to File > Export and choose the desired format.
- In the export window, adjust the settings based on your needs. Common settings include applying transformations, selecting objects, and choosing what data to include (e.g., materials, textures).
- Choose the export location, name your file, and click Export.
Sharing Your Models
There are several platforms where you can share your 3D models:
- Online 3D galleries: Websites like Sketchfab allow you to upload and display your models in a 3D viewer.
- Marketplaces: If you’re looking to sell your models, platforms like TurboSquid or CGTrader provide a space for artists to list their work.
- Social media: Sharing images or videos of your models on platforms like Instagram, Twitter, or specialized forums can attract attention and build your portfolio.
Tips for Successful Export and Sharing
- Check your model for any issues before exporting, such as non-manifold edges or flipped normals, to ensure compatibility and quality.
- Include textures and materials when necessary by packing them into your file (if supported by the format).
- Consider copyright and licensing when sharing your models, especially if you plan to sell them or use copyrighted materials.
Exporting and sharing your 3D models is a rewarding phase where your creations can be appreciated by others, used in various applications, or contribute to your professional portfolio. By following these steps and tips, you can ensure your models make the transition smoothly from Blender to the broader world.
Common Problems and How to Solve Them
Even the most experienced Blender users encounter problems during their 3D modeling projects. Recognizing these issues and knowing how to solve them can save you time and frustration. Here are some common problems faced by Blender users, along with solutions to overcome them.
Problem 1: Inverted Normals
Inverted normals can cause parts of your model to appear inside out or not render correctly.
- Select the affected mesh and enter Edit Mode.
- Select all faces by pressing A.
- Press Shift+N to recalculate normals outside. For inverted internal faces, select them individually and press Alt+N > Flip Normals.
Problem 2: Non-Manifold Geometry
Non-manifold geometry occurs when edges or vertices don\"t form a well-defined solid, causing issues with modifiers and rendering.
- In Edit Mode, go to Select > Select All by Trait > Non-Manifold.
- Identify and correct the issue: remove extra edges, fill in gaps, or separate disconnected parts into new objects.
Problem 3: Texture Stretching
Texture stretching happens when the UV map does not match the model\"s geometry correctly.
- Ensure your model is properly UV unwrapped. In Edit Mode, select all faces and press U to unwrap again if necessary.
- Adjust the UV map in the UV/Image Editor to minimize stretching.
- Use tools like \"Minimize Stretch\" in the UV Editor to automatically adjust the UVs.
Problem 4: Slow Performance
Blender may run slowly on complex scenes due to high polygon counts or intense computations.
- Reduce the viewport shading quality or switch to Bounding Box or Wireframe mode.
- Use modifiers like Decimate to reduce polygon count without significantly affecting visual quality.
- Hide or move objects to different layers or collections that are not currently being worked on.
Problem 5: Artifacts in Renders
Rendering artifacts, like strange shadows or noise, often occur due to lighting or material settings.
- Check for overlapping faces or objects and remove any duplicates.
- Adjust shadow and light settings, increasing samples for smoother results.
- Ensure materials are set up correctly, particularly with regard to transparency and reflectivity settings.
Encountering problems is a natural part of the learning process in Blender. By familiarizing yourself with common issues and their solutions, you can navigate challenges more efficiently and focus on bringing your creative visions to life.
READ MORE:
Resources for Further Learning and Inspiration
The journey into 3D modeling with Blender is an ongoing process of learning and discovery. Whether you are a beginner looking to grasp the basics or an experienced user aiming to master advanced techniques, a wealth of resources is available to support your growth. Below are some valuable resources for further learning and inspiration.
Online Tutorials and Courses
- Blender Guru: Known for the \"Donut\" tutorial, Blender Guru offers in-depth videos on a range of topics from beginner to advanced levels.
- CG Cookie: This platform provides a variety of courses and tutorials focused on Blender, covering modeling, texturing, and animation.
- CG Geek: Offers tutorials and project-based learning to help users create detailed scenes and characters in Blender.
Books and E-books
- \"Blender For Dummies\": An excellent starting point for beginners, providing a comprehensive overview of Blender\"s tools and features.
- \"The Complete Guide to Blender Graphics\": This book covers more advanced topics, helping users to enhance their modeling, texturing, and rendering skills.
Community and Support
- Blender Artists Community: A forum where users can share their work, ask questions, and connect with other Blender enthusiasts.
- Blender Stack Exchange: A Q&A site for Blender users to seek help with specific issues or challenges.
Inspiration and Showcases
- ArtStation: Many artists share their Blender projects here, offering a great source of inspiration across different styles and disciplines.
- BlenderNation: Features news, articles, and showcases from the Blender community, highlighting exceptional work and developments.
Official Blender Resources
- Blender.org: The official Blender website provides downloads, documentation, and the Blender Foundation’s official tutorials.
- Blender Cloud: Subscription-based service offering project files, tutorials, and assets created by Blender Foundation.
Engaging with these resources can significantly accelerate your learning curve, provide solutions to common problems, and inspire you to push the boundaries of what you can create with Blender. Remember, the key to mastering Blender is practice, patience, and continuous learning.
Embark on your Blender journey with our comprehensive guide, from basic modeling to advanced techniques and animation. Unleash your creativity, refine your skills, and join a vibrant community of artists. Transform your ideas into stunning 3D art today!