Topic blender 3d modeling tutorial: Welcome to the ultimate Blender 3D modeling tutorial, where we guide you through the journey of mastering 3D creation, from basic principles to advanced techniques, ensuring a solid foundation in the world of digital art.
Table of Content
- What is the process for creating a stylized character using Blender for 3D modeling?
- Getting Started with Blender
- Understanding the Blender Interface
- Basic 3D Modeling Concepts
- Modeling Tools and Techniques
- Working with Modifiers
- YOUTUBE: Beginner 3D Modeling Tutorial with Blender 2.8
- Texturing and Materials
- Lighting and Rendering
- Animation Basics
- Creating Realistic Environments
- Tips and Tricks for Efficient Modeling
- Advanced Modeling Techniques
- Resources for Further Learning
What is the process for creating a stylized character using Blender for 3D modeling?
To create a stylized character using Blender for 3D modeling, you can follow the following process:
- Start by adjusting Blender\'s settings to optimize the modeling tools for your needs.
- Shape a basic object as the foundation for your character.
- Refine the shape and proportions of the object to match the desired stylized look.
- Divide the object into different parts such as head, torso, limbs, etc.
- Use Blender\'s sculpting tools to add details and define the character\'s features.
- Create the facial features, such as eyes, nose, and mouth, using Blender\'s modeling tools.
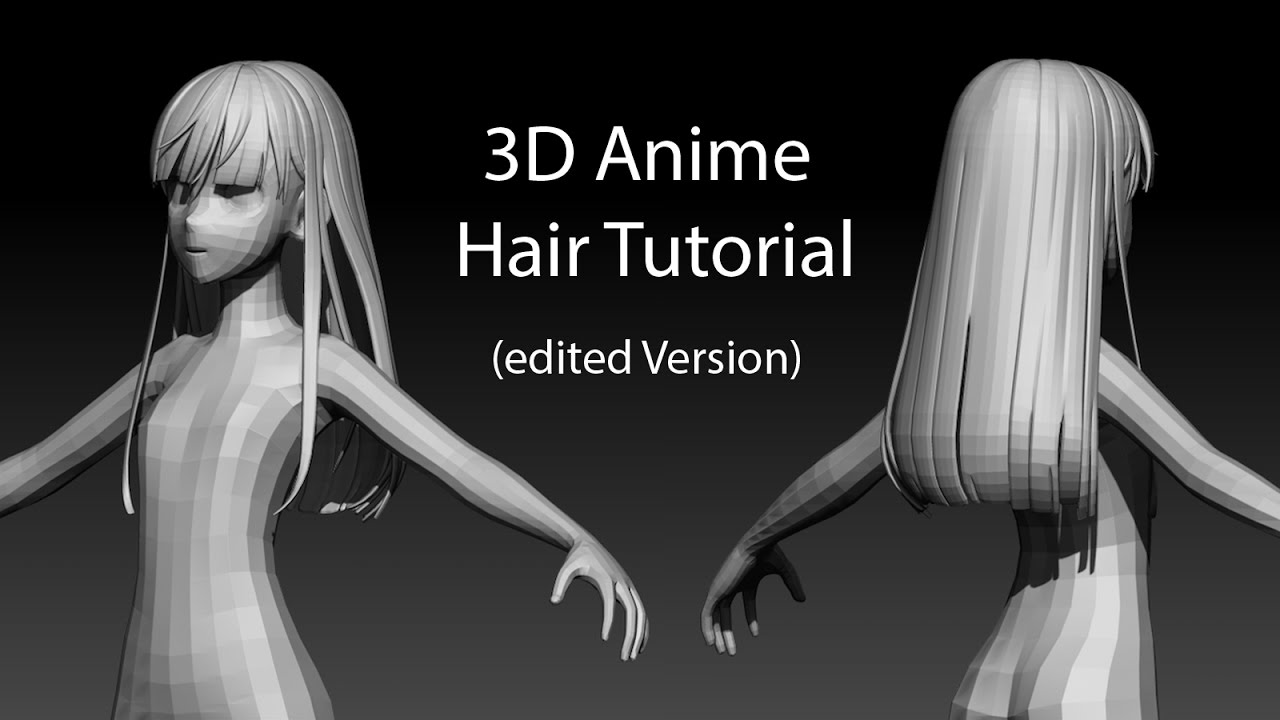
- Add hair, if applicable, using Blender\'s particle system.
- Create or import textures for the character\'s skin, clothes, and accessories.
- Apply the textures to the respective parts of the character using Blender\'s UV mapping tools.
- Refine the character\'s pose and adjust the materials and lighting to enhance the stylized look.
- Once you are satisfied with the character, you can render the final image or animation using Blender\'s rendering engine.
- Optionally, you can further enhance the final output by post-processing it using image editing software.
READ MORE:
Getting Started with Blender
Blender is an incredibly powerful, free, and open-source 3D modeling software used by beginners and professionals alike. Whether you\"re interested in creating animations, visual effects, or 3D models, Blender has the tools you need. Here\"s how to get started:
- Download and Install Blender: Visit the official Blender website to download the latest version. Installation is straightforward, just follow the prompts.
- Familiarize Yourself with the Interface: Blender\"s interface might seem daunting at first, but it\"s designed for efficiency. Spend some time navigating the layout, understanding the 3D viewport, object mode vs. edit mode, and where to find essential tools.
- Learn Basic Navigation: Mastering navigation within the 3D viewport is crucial. Practice zooming, panning, and rotating your view. Use the middle mouse button to rotate, scroll wheel to zoom, and shift + middle mouse button to pan.
- Start with Basic Shapes: Begin your modeling journey by adding and modifying basic shapes. Learn how to insert meshes like cubes and spheres from the add menu and modify them using scale, rotate, and move tools.
- Explore Modeling Tools: Blender offers a vast array of modeling tools. Start experimenting with extrude, loop cut, and subdivision surface to modify and refine your shapes.
- Practice with Simple Projects: Apply what you\"ve learned by following along with simple project tutorials. This hands-on approach helps solidify your understanding of Blender\"s tools and workflows.
- Join the Blender Community: Blender has a vast and supportive community. Forums, social media groups, and the Blender Stack Exchange are great resources for tips, tutorials, and troubleshooting.
Remember, learning Blender is a journey. Be patient, practice regularly, and don\"t be afraid to experiment. With time, you\"ll gain proficiency and start bringing your 3D visions to life.

Understanding the Blender Interface
The Blender interface is designed to offer a comprehensive suite of tools for 3D modeling, animation, rendering, and more, all within a single workspace. Understanding this interface is key to navigating and utilizing Blender efficiently. Here\"s a breakdown of the main components:
- 3D Viewport: The heart of Blender, where your 3D scene is displayed. It allows for viewing and interacting with models. You can rotate, zoom, and pan the view using mouse controls.
- Timeline: Located at the bottom, it\"s essential for animation, allowing you to manage keyframes and control the playback of your animations.
- Outliner: A hierarchical view of all objects in the scene, including cameras, lights, and meshes. It\"s useful for selecting, organizing, and understanding the structure of your scene.
- Properties Panel: This panel offers detailed control over the properties of the selected object, including materials, modifiers, physics, and render settings.
- Tool Shelf and Modes: The tool shelf, on the left side, contains tools for editing your objects. Blender\"s modes (such as Object Mode and Edit Mode) can be toggled here, each offering different functionalities for interacting with your scene.
- Shading/UVs Editor: This area allows for detailed texturing and shading work, including UV unwrapping and texture painting.
- Node Editor: For more advanced users, this editor is used for creating complex material shaders and textures using a node-based interface.
Each area of the Blender interface is designed to work seamlessly with others, providing a cohesive and flexible environment for your 3D projects. Beginners should take time to explore each part of the interface, customizing it as needed to fit their workflow. As you become more familiar with these elements, you\"ll find navigating Blender becomes second nature, allowing you to focus on bringing your creative visions to life.

Basic 3D Modeling Concepts
Understanding the foundational concepts of 3D modeling is essential for anyone looking to master Blender. These principles form the basis of creating and manipulating digital objects in a three-dimensional space. Let’s dive into the core concepts:
- Vertices, Edges, and Faces: The basic building blocks of any 3D model. Vertices are points in 3D space, edges connect two vertices, and faces are flat surfaces enclosed by edges. Together, they define the shape of an object.
- Meshes: A collection of vertices, edges, and faces that create a 3D object. Meshes can represent anything from simple shapes like cubes and spheres to complex models like characters and environments.
- Extrusion: A fundamental technique used to extend shapes in 3D space. By extruding, you can create new faces connected to existing ones, adding volume and complexity to your models.
- Modifiers: Non-destructive tools that automatically affect a model’s geometry in various ways. Modifiers can smooth, deform, or add complexity to a mesh without permanently changing its base structure.
- Topology: Refers to how vertices, edges, and faces are arranged on a model. Good topology is crucial for models that will be animated, as it affects how the mesh deforms.
- UV Mapping: The process of projecting a 2D image onto a 3D model’s surface for texturing. UV maps are essential for adding details and realism to your models.
- Shading and Materials: Techniques used to define the surface properties of a model, including its color, texture, and reflectiveness. Blender offers a powerful node-based system for creating complex materials.
These concepts are just the start of your 3D modeling journey in Blender. By understanding and applying these basics, you\"ll be well on your way to creating detailed and dynamic 3D models. Remember, practice is key to mastering these concepts, so don’t hesitate to experiment and explore the vast capabilities of Blender.

Modeling Tools and Techniques
Blender offers a wide range of tools and techniques for 3D modeling, enabling artists to create detailed and complex models with efficiency. Understanding these tools and how to apply them is crucial for any 3D artist. Here’s an overview of some of the most important tools and techniques in Blender:
- Loop Cut and Slide: This tool allows you to add more geometry by inserting a loop of edges into your mesh, which is essential for adding detail and controlling topology.
- Knife Tool: The Knife tool lets you make precise cuts across your models, allowing for custom shapes and adding complexity to existing geometry.
- Extrude: One of the most frequently used tools, extrusion allows you to extend faces, edges, or vertices to add volume and shape to your models.
- Inset Faces: Used to create additional geometry inside a face, useful for adding detail or preparing a surface for extrusion.
- Bevel: This tool is used to soften edges and corners by adding extra geometry, which can enhance the realism of your models.
- Subdivision Surface Modifier: A powerful modifier that smooths your model by subdividing the mesh, adding more geometry and creating a smoother appearance.
- Proportional Editing: Allows for smoother modifications to your mesh by affecting a range of vertices at once, based on a falloff radius, which is great for organic modeling.
- Sculpting: Blender’s sculpting mode turns your model into virtual clay, allowing for intuitive shaping with various brushes.
- Shading and UV Unwrapping: Once your model is complete, these techniques are used to apply textures and materials, bringing your model to life with realistic details.
Mastering these tools and techniques will significantly enhance your 3D modeling capabilities in Blender. Remember, practice is essential, and experimenting with different tools will help you discover the best ways to achieve your desired results. As you grow more comfortable with these tools, you’ll find your workflow becoming faster and more efficient, allowing for the creation of increasingly complex and detailed models.

_HOOK_
Working with Modifiers
Modifiers in Blender are powerful tools that non-destructively alter your mesh\"s geometry, providing endless possibilities for modeling, animation, and simulation. They can simplify complex modeling tasks, add detail to your models, or create dynamic animations. Understanding how to effectively use modifiers will greatly enhance your 3D modeling workflow. Here are some key modifiers and tips on how to use them:
- Subdivision Surface: Increases the number of polygons, smoothing your model. Ideal for creating organic shapes with smooth surfaces.
- Array: Creates copies of your model in an array, allowing for complex, repetitive structures without manually duplicating the geometry.
- Boolean: Combines two meshes in various ways (union, difference, intersection), enabling complex shapes that would be difficult to model manually.
- Mirror: Mirrors your model across a specified axis, useful for symmetrical designs and reducing half the workload.
- Solidify: Adds thickness to thin objects, perfect for creating shells or hollowing out previously solid models.
- Bevel: Softens edges and corners by adding extra geometry, enhancing realism, especially in mechanical models.
- Displace: Uses a texture map to deform your model, great for creating intricate surface details like waves or bumps.
- Armature: Used for rigging, allowing you to attach a mesh to a skeleton for animation.
To use a modifier, simply add it to your mesh from the Modifiers tab in the Properties panel. Each modifier has its own set of parameters that can be adjusted to achieve the desired effect. Stack multiple modifiers to compound their effects and create complex results. Experimenting with different modifiers and their settings is key to mastering their use. Remember, modifiers are non-destructive, meaning you can adjust or remove them at any time without permanently altering your mesh.
Learning to work with modifiers will not only speed up your modeling process but also open up new creative possibilities. Whether you’re creating detailed characters, intricate architectural designs, or dynamic animations, modifiers are indispensable tools in your Blender toolkit.

Beginner 3D Modeling Tutorial with Blender 2.8
\"Unlock your creativity and learn the art of 3D modeling with this comprehensive Blender tutorial. From basic shapes to intricate designs, this video will guide you step-by-step, helping you transform your imagination into stunning visuals.\"
Texturing and Materials
Texturing and applying materials are crucial steps in bringing your Blender models to life, adding realism, depth, and emotion to your scenes. These processes involve mapping images or textures onto your 3D objects and defining their surface properties like color, reflectivity, and transparency. Here’s how to get started with texturing and materials in Blender:
- Understanding Materials: Materials define the color and texture of your object. In Blender, you can create complex materials using the Shader Editor, which allows for node-based material creation.
- Applying Textures: Textures are images that are mapped onto the surface of your models. They can be used for various effects, including color (diffuse), bump mapping (for simulating surface detail), specular (for shininess), and more.
- UV Mapping: Before applying textures, you must unwrap your model, which involves projecting your 3D model onto a 2D plane for texture mapping. Blender offers several unwrapping methods, including smart UV project and manual seam marking.
- Shader Editor: Use the Shader Editor to create and edit materials. You can combine different shaders, textures, and nodes to create a wide range of material effects.
- Using Nodes: Nodes are the building blocks of materials in Blender. You can mix and match different nodes to create custom textures, control transparency, add displacement, and more.
- Material Libraries: Blender includes a variety of preset materials that can be applied to your models. These can be a great starting point for beginners.
- Texture Painting: For more control over your textures, Blender offers texture painting tools, allowing you to paint directly onto your 3D model.
Texturing and materials are a vast and complex area, but mastering them will significantly impact the quality of your renders. Start with simple materials, and gradually experiment with more complex textures and node setups. Remember, practice and experimentation are key to understanding and applying these concepts effectively.

Blender 3D Modeling and Lighting Tutorial by Polygon Runway
\"Illuminate your world with this illuminating lighting tutorial! Whether you\'re a beginner or a seasoned pro, this video will teach you the tricks and techniques to make your scenes come alive. Get ready to master the art of lighting and create captivating visuals.\"
Lighting and Rendering
Lighting and rendering are the final steps in the 3D modeling process, transforming your models into stunning visuals. Effective lighting can make a scene feel real, set the mood, and highlight the details of your models. Rendering turns your 3D scene into a 2D image or animation, showcasing your work in its best light. Here\"s how to approach lighting and rendering in Blender:
- Understanding Lighting Basics: Blender offers various light types, including point, sun, spot, and area lights. Each has its own characteristics and uses, from simulating sunlight to creating focused beams.
- Three-Point Lighting: A classic technique that uses three lights (key, fill, and back) to achieve a well-lit scene. This setup can highlight your model and add depth to your scene.
- Using HDRI for Environment Lighting: HDRI images can provide realistic environmental lighting by simulating light from the real world. Blender allows you to add HDRI images in the World settings for natural-looking illumination.
- Material and Light Interaction: Understand how your materials respond to light. Adjusting material properties like roughness and specularity can significantly impact the look of your scene under different lighting conditions.
- Rendering Engines: Blender includes several rendering engines, such as Eevee (real-time renderer) and Cycles (ray-traced renderer). Choose the one that best suits your project\"s needs based on speed and realism.
- Rendering Settings: Explore the rendering settings to optimize your final output. Settings like resolution, sampling, and denoising can affect the quality and render time of your project.
- Post-Processing: After rendering, use Blender\"s Compositor to enhance your image. You can adjust colors, add effects, or combine different render passes for a polished final product.
Mastering lighting and rendering is essential for presenting your 3D models compellingly. Start with basic setups and progressively experiment with more advanced techniques and settings to find what works best for your scenes. With practice, you\"ll be able to create breathtaking renders that bring your digital creations to life.
Animation Basics
Animation in Blender opens up a world of dynamic storytelling and creative expression. It allows you to bring characters and objects to life through movement. Starting with animation can seem daunting, but with an understanding of the basics, you\"ll be animating in no time. Here are the foundational steps for animating in Blender:
- Understanding Keyframes: Keyframes are the cornerstone of animation, marking the start and end points of any movement. In Blender, you can insert keyframes for almost any property, including position, rotation, and scale.
- The Timeline and Dope Sheet: The timeline provides a simplified view of your animation, allowing you to play back and scrub through your scene. The Dope Sheet offers a more detailed view, letting you manage keyframes across different objects and properties.
- Interpolation and Easing: Blender automatically creates smooth transitions between keyframes, a process known as interpolation. You can adjust the easing of these transitions to make the movement more natural or dynamic.
- Animating with Armatures: For character animation, armatures (skeletons) are used to rig your model. By attaching bones to the mesh, you can create complex animations with more control over movement.
- Shape Keys: Useful for facial expressions and morphing objects, shape keys allow you to transition between different shapes of the same mesh.
- Using the Graph Editor: For fine-tuning animations, the Graph Editor visualizes keyframes as curves, representing the change in properties over time. Adjusting these curves gives you precise control over the pacing and timing of your animations.
- Physics and Simulations: Blender also offers physics-based animation tools, including cloth, fluid, soft body, and rigid body dynamics. These can add realism to your animations by simulating natural movements and interactions.
Starting with simple animations and gradually incorporating more complex techniques is a great way to learn. Experimenting with different types of animations and tools within Blender will not only improve your skills but also inspire creativity. Remember, animation is an art form that takes time to master, so be patient and enjoy the process of bringing your creations to life.

Creating Realistic Environments
Creating realistic environments in Blender is a process that combines modeling, texturing, lighting, and atmospheric effects to bring scenes to life. Whether you\"re aiming for photorealistic landscapes or stylized backdrops, understanding the principles of environmental creation is key. Here’s how to craft compelling, realistic environments:
- Landscape Modeling: Start with Blender’s landscape generator or sculpting tools to create the basic shape of your terrain. Pay attention to natural formations and variations to add realism.
- Material and Texture: Apply materials and textures to your landscape to simulate natural surfaces. Use high-resolution images for ground, rocks, water, and vegetation to enhance detail and realism.
- Vegetation: Populate your scene with trees, bushes, and grass. You can use particle systems for scattering vegetation realistically or add individual models for specific placements.
- Water Effects: For scenes with water, use the fluid simulation tools in Blender to create realistic water surfaces, or apply animated textures for simpler effects.
- Atmospheric Effects: Fog, mist, and volumetric lighting can add depth and mood to your environment. Experiment with Blender’s volumetric shaders to achieve these effects.
- Lighting: Proper lighting is crucial for realism. Use a combination of sun lamps, environmental lighting (HDRI), and localized light sources to mimic natural lighting conditions.
- Detailing with Props and Decals: Add props like rocks, logs, buildings, and other details to fill your scene. Decals can be used to add wear, tear, and other fine details without needing complex geometry.
- Rendering Techniques: Use Blender’s Cycles render engine for photorealistic output. Adjust render settings like sampling, resolution, and denoising to get the best quality within your hardware capabilities.
Creating realistic environments requires patience and attention to detail. Start with broad strokes to block out the main elements, then gradually add details and adjust elements as you go. Remember, reference images and real-world observation are invaluable for capturing the essence of natural environments. With practice, you’ll be able to create immersive, realistic scenes that captivate the viewer’s imagination.
_HOOK_
Tips and Tricks for Efficient Modeling
Efficiency in 3D modeling is crucial for streamlining your workflow and enhancing productivity. Whether you\"re a beginner or an experienced Blender user, incorporating certain tips and tricks can significantly improve your modeling process. Here are some strategies to model more efficiently in Blender:
- Use Shortcuts: Learning and using Blender\"s keyboard shortcuts can drastically reduce your modeling time. Shortcuts for common actions like extruding (E), merging (Alt+M), and switching between modes (Tab) are invaluable.
- Customize Your Interface: Tailor Blender’s interface to suit your workflow. You can create custom toolbars and menus to access your most-used tools quickly.
- Utilize Modifiers: Modifiers can automate repetitive tasks and add complexity without manual work. Familiarize yourself with modifiers like Mirror, Subdivision Surface, and Boolean for faster modeling.
- Keep Your Mesh Clean: A clean topology not only makes your model easier to edit but also behaves better under animation and texturing. Use tools like Loop Cut and Slide (Ctrl+R) to maintain quads and avoid n-gons.
- Use Linked Duplicates: For repeated elements, use linked duplicates (Alt+D) instead of regular duplicates (Shift+D). This way, editing one instance automatically updates all linked duplicates.
- Block Out Shapes First: Start with simple shapes to block out your model\"s basic form before adding details. This approach helps in maintaining proportions and simplifies the modeling process.
- Apply Smoothing Wisely: Use the Smooth and Flat shading options judiciously to give your model the right appearance. Adding a Subdivision Surface modifier can smooth your model, but use it sparingly to avoid unnecessary geometry.
- Use Collections and Layers: Organize your scene using collections and layers. This not only helps in managing complex scenes but also improves Blender\"s performance by allowing you to hide elements not currently being worked on.
By adopting these tips and tricks, you can enhance your modeling efficiency in Blender, giving you more time to focus on creativity and detail. Remember, the key to efficiency is often found in preparation and organization, coupled with a deep understanding of your tools.
Advanced Modeling Techniques
As you progress beyond the basics in Blender, you\"ll discover a myriad of advanced modeling techniques that can elevate your work from good to great. These methods allow for more complex and detailed creations, pushing the boundaries of digital art. Here are some advanced techniques to enhance your Blender modeling skills:
- Topology Refinement: Understanding and refining your mesh topology is crucial for models that deform, such as characters. Good topology ensures smooth deformations and easier rigging.
- Hard Surface Modeling: This technique is essential for creating mechanical or man-made objects. It involves precise control over edges and surfaces to achieve a clean, manufactured look. Utilize modifiers like Bevel and Boolean for added precision.
- Sculpting for Detail: Blender’s sculpting tools enable you to add intricate details to your models. This is particularly useful for organic models, where you can sculpt textures and features directly onto your mesh.
- Retopology Tools: For high-poly models or sculpted details, retopology is the process of creating a new, optimized mesh that captures the detail with fewer polygons. Blender offers tools like the Shrinkwrap modifier and the Poly Build tool for retopology.
- Procedural Textures: Beyond image-based texturing, procedural textures offer infinite variability and resolution independence. Mastering Blender’s node editor allows you to create complex materials that react dynamically to the environment.
- Simulation for Modeling: Use Blender’s physics simulations, like cloth, fluid, and soft body dynamics, as modeling tools. Simulations can produce realistic folds, splashes, and deformations that would be challenging to model by hand.
- Non-Destructive Workflow: Embrace a non-destructive modeling workflow using modifiers and shape keys. This approach allows for greater flexibility, as you can make significant changes without permanently altering the base geometry.
These advanced techniques require time and practice to master but offer a significant payoff in the quality and complexity of your models. As you incorporate these methods into your workflow, you\"ll find yourself able to tackle more challenging projects and bring even the most ambitious visions to life.
READ MORE:
Resources for Further Learning
Expanding your Blender skills requires access to a variety of learning resources. From tutorials to community forums, there’s a wealth of information available to help you advance your knowledge and techniques. Here are some essential resources for further learning in Blender:
- Blender.org Tutorials: The official Blender website hosts a range of tutorials for all skill levels, from beginners to advanced users.
- Blender Artists Community: Engage with other Blender users, share your work, and get feedback. It’s a great place to learn from experienced artists.
- YouTube Channels: There are numerous YouTube channels dedicated to Blender tutorials. Channels like Blender Guru, CG Geek, and Ducky 3D offer tutorials on a wide range of topics.
- Online Courses: Websites like Udemy, Coursera, and CGCookie offer structured courses that cover everything from the basics to advanced modeling techniques.
- Books and E-books: For those who prefer written material, there are many books and e-books available that cover Blender in detail. \"Blender For Dummies\" and \"The Complete Guide to Blender Graphics\" are good starting points.
- BlenderNation: A website that curates Blender news, articles, tutorials, and daily tips. It’s a great resource for staying updated on the latest Blender developments.
- Blender Stack Exchange: A question and answer site for people who use Blender to create 3D graphics, animations, or games. It’s useful for troubleshooting specific issues.
Utilizing these resources can significantly enhance your Blender skills and understanding. Remember, the key to mastering Blender—or any complex software—is consistent practice and continuous learning. Explore, experiment, and don’t be afraid to tackle challenging projects as you grow.
Embarking on your Blender 3D modeling journey opens a world of creative possibilities. With practice, exploration, and the right resources, you\"ll unlock the full potential of your imagination and bring your most ambitious projects to life.