Topic blender 3d tutorial for beginners: Embark on your 3D modeling journey with our Blender 3D tutorial for beginners, designed to equip you with the essential skills and confidence to create stunning 3D artwork and animations.
Table of Content
- How to get started with Blender 3D as a beginner?
- Understanding Blender\"s Interface and Navigation
- Basic Modeling Techniques
- Introduction to Texturing and Materials
- Lighting in Blender
- Rendering Your First Scene
- Animation Basics
- YOUTUBE: Blender Tutorial for Complete Beginners Part 1
- Using Blender for 3D Printing
- Creating Your First Game Asset
- Advanced Modeling Techniques
- Introduction to Sculpting
- Node-Based Materials and Texturing
- Compositing and Post-Processing
- Animation Principles and Rigging
- Simulations and Effects
- Workflow Tips and Tricks
- Resources for Further Learning
How to get started with Blender 3D as a beginner?
To get started with Blender 3D as a beginner, follow these steps:
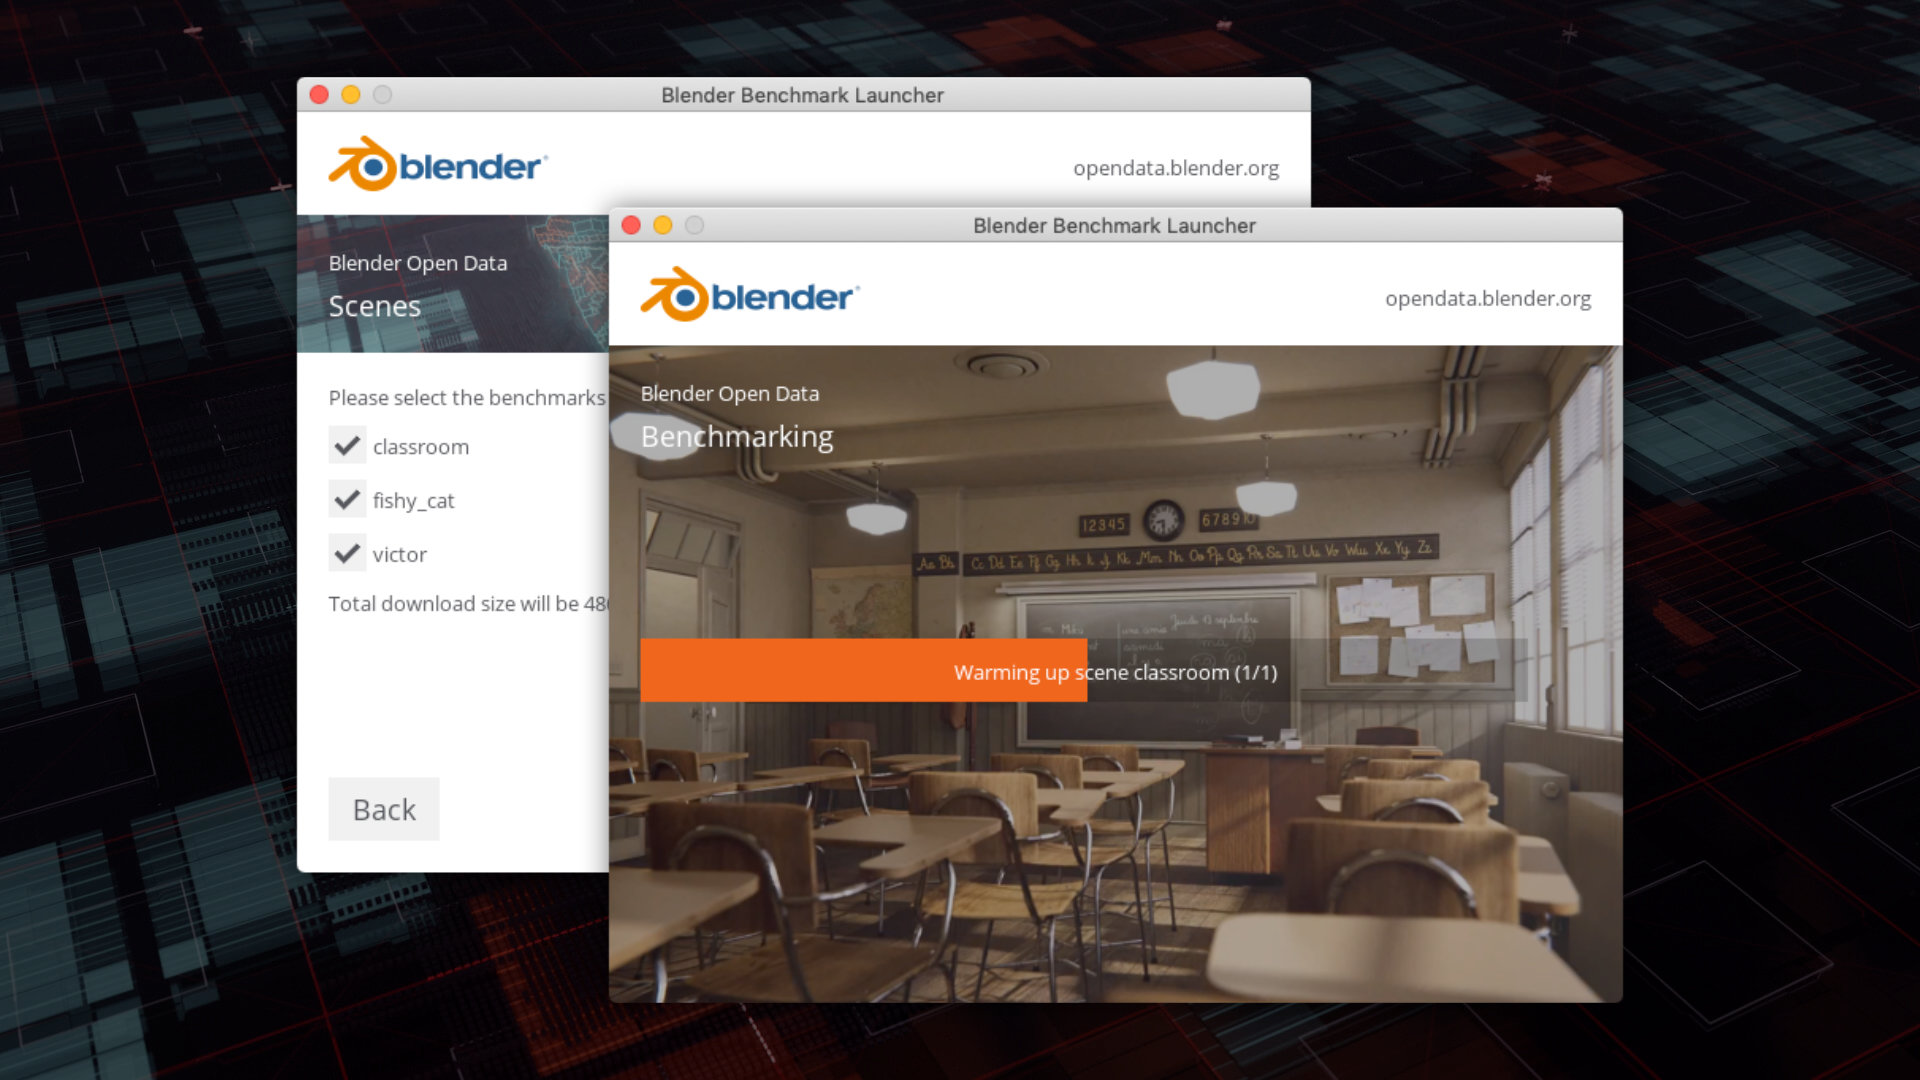
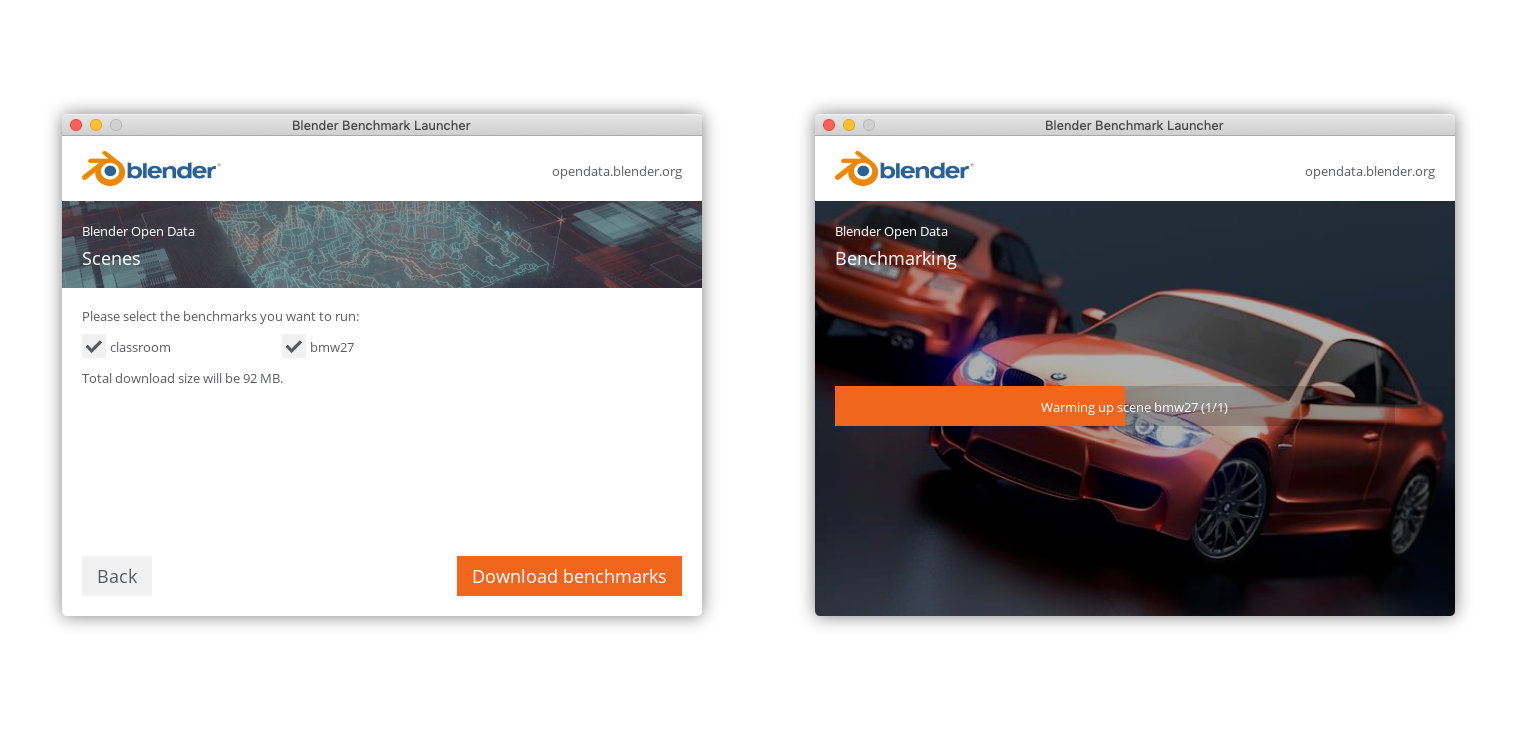
- Download and Install Blender: Go to the official Blender website and download the latest version of Blender for your operating system. Install it on your computer.
- Explore the Interface: Open Blender and familiarize yourself with the interface. Take some time to understand the different areas, menus, and panels.
- Learn the Basics: Start by understanding the basic concepts of 3D modeling and animation. Familiarize yourself with common terms like vertices, edges, and faces.
- Watch Tutorials: Look for beginner tutorials on websites like YouTube or Blender Guru. These tutorials will guide you step by step on how to create simple 3D objects, apply materials, and perform basic animations.
- Practice: Start creating your own simple projects in Blender. Experiment with different tools and techniques to gain hands-on experience.
- Expand your Knowledge: As you get comfortable with the basics, explore more advanced features in Blender like sculpting, texturing, rigging, and rendering. There are many resources available online, including advanced tutorials, forums, and documentation.
- Join the Blender Community: Engage with other Blender users by joining online communities, forums, and social media groups. This will allow you to connect with like-minded individuals, seek help, and learn from experienced artists.
READ MORE:
Understanding Blender\"s Interface and Navigation
Welcome to the first step in mastering Blender 3D. This section will guide you through Blender\"s comprehensive interface and efficient navigation tools, laying the foundation for your 3D modeling journey.
- Opening Blender: Upon launching Blender, you\"re greeted with the default screen, which includes the 3D viewport, timeline, outliner, and properties panel.
- 3D Viewport: The 3D viewport is where you\"ll spend most of your time. Here, you can view and interact with your scene. Use the middle mouse button to orbit, scroll wheel to zoom, and shift + middle mouse button to pan around your scene.
- Properties Panel: Located to the right, this panel offers various settings for the active object, rendering, world settings, and more.
- Outliner: The outliner, found on the top right, displays a hierarchical list of all objects in your scene. It\"s essential for organizing and selecting different elements.
- Timeline: At the bottom, the timeline allows you to control animation playback, set keyframes, and change the current frame.
- Editor Types: Blender\"s interface is highly customizable. You can change any panel to display different types of editors like the Node Editor, UV/Image Editor, or the Text Editor by clicking on the editor type selector in each panel\"s header.
- Customizing Layout: You can drag the corners of any panel to resize it or split it into multiple panels. Right-click on the edge between panels to split or join them, tailoring the workspace to your needs.
- Hotkeys: Learning Blender\"s hotkeys can significantly speed up your workflow. Commonly used shortcuts include \"G\" to grab (move), \"R\" to rotate, and \"S\" to scale objects within the 3D Viewport.
By familiarizing yourself with these fundamental aspects of Blender\"s interface and navigation, you\"ll be better prepared to tackle more complex 3D modeling tasks with confidence and efficiency.

Basic Modeling Techniques
Embarking on the world of 3D modeling with Blender opens up a universe of creative possibilities. This section will introduce you to the basic modeling techniques essential for creating simple to complex models in Blender.
- Understanding Mesh Objects: Most models in Blender are created using mesh objects. A mesh is a collection of vertices, edges, and faces. You can create and manipulate these components to form your desired shape.
- Starting with Primitives: Blender provides a variety of primitive shapes (like cubes, spheres, cylinders, etc.) that can be used as the starting point for your models. You can add a primitive to your scene by pressing Shift+A and selecting the shape you need from the Mesh menu.
- Entering Edit Mode: With a mesh object selected, press Tab to switch between Object Mode and Edit Mode. Edit Mode allows you to manipulate the vertices, edges, and faces of the object.
- Selecting Mesh Elements: In Edit Mode, you can select vertices, edges, or faces by clicking on them while in the respective selection mode. Use Shift+Click to select multiple elements.
- Transforming Mesh Elements: Once selected, you can move (G), rotate (R), and scale (S) your mesh elements. These transformations are fundamental to shaping your model.
- Extruding and Loop Cuts: Extruding (E) allows you to create new geometry from the selected elements, essential for adding volume and details. Loop Cuts (Ctrl+R) introduce new edge loops, enabling you to add definition and control the flow of your mesh.
- Subdivision and Smoothing: Subdivision Surface Modifier can be applied to your object to create a smoother appearance by increasing the number of polygons. Use the Shade Smooth option to smooth out the appearance of faces in your model.
- Using Modifiers: Modifiers like Mirror, Solidify, and Bevel can automate and enhance your modeling process, adding complexity and detail to your models without permanently altering the mesh until you apply them.
Mastering these basic modeling techniques will provide you with the tools to start creating your own 3D models in Blender. Practice is key, so experiment with these techniques to understand their potential fully.

Introduction to Texturing and Materials
Texturing and applying materials are critical steps in bringing your 3D models to life in Blender. This section will guide you through the basics of creating and applying textures and materials to your models, enhancing their realism and visual appeal.
- Understanding Materials: Materials define the color, transparency, and reflective properties of your object. In Blender, you can create a new material by selecting your object, going to the Material Properties panel, and clicking the \"New\" button.
- Diffuse and Specular: Adjust the diffuse color to change the base color of your material. Specular settings control the reflectivity and the shininess of the material, affecting how it interacts with light.
- Adding Textures: Textures can be applied to materials to add detail such as bumps, scratches, or patterns. Go to the Texture tab, select \"New\", and choose the type of texture you want to add. You can use both procedural textures (generated within Blender) and image textures (external images).
- UV Unwrapping: To accurately apply an image texture to a model, you need to unwrap your mesh in UV Editor. This process maps the 3D surface of your model to a 2D space, allowing you to align your texture properly.
- Applying Textures: With your UV map prepared, you can assign an image texture to it. In the Shader Editor, connect an Image Texture node to the Base Color input of the Principled BSDF shader, and select your image.
- Using Nodes: Blender\"s powerful node-based system allows for complex material creation. You can mix textures, adjust mappings, and manipulate values to create realistic or stylized materials for your objects.
- Previewing and Adjusting: Use the Material Preview mode in the viewport to see how your materials and textures look under different lighting conditions. Adjust the settings as needed to achieve your desired effect.
By understanding the basics of texturing and materials, you can significantly enhance the visual quality of your 3D models in Blender. Experiment with different textures and material settings to discover the vast possibilities for creativity.

Lighting in Blender
Lighting is a crucial component in 3D visualization, adding depth, mood, and realism to your scenes. This section delves into the basics of lighting in Blender, guiding you through the process of illuminating your models effectively.
- Types of Lights: Blender offers several types of lights, including Point, Sun, Spot, and Area lights. Each has its unique properties and uses. Point lights emit light in all directions, Sun lights simulate sunlight with parallel rays, Spot lights create a cone of light, and Area lights emit light from a specific shape.
- Adding a Light: To add a light to your scene, press Shift+A and navigate to Light. Choose the type of light you need and place it in your scene.
- Adjusting Light Properties: With a light selected, you can adjust its properties in the Light tab. Modify the color, intensity (strength), and falloff of the light to achieve the desired effect.
- Using Three-Point Lighting: A common lighting technique is three-point lighting, which uses three lights (key light, fill light, and back light) to fully illuminate your subject. This setup helps to highlight the form of the object and reduce harsh shadows.
- Shadows: Control the appearance of shadows cast by lights under the Shadow section in the Light tab. You can adjust the softness, distance, and strength of shadows to add depth to your scene.
- Environmental Lighting: For more global illumination, you can use an Environment Texture in the World settings. This allows you to light your entire scene with an HDRI image, providing realistic lighting and reflections.
- Lighting Effects: Explore additional effects like volumetric lighting for fog or light rays by enabling Volumetrics in the Render settings. Use nodes in the Shader Editor to customize these effects.
Mastering the art of lighting in Blender can transform your scenes, enhancing the realism and emotional impact of your renders. Experiment with different lighting setups and properties to discover the best approach for your projects.
_HOOK_
Rendering Your First Scene
Rendering is the process of generating a photorealistic or non-photorealistic image from a 3D model. This section will walk you through the steps to render your first scene in Blender, turning your 3D models into stunning visuals.
- Setting Up Your Scene: Before rendering, ensure your scene is fully prepared. This includes positioning your camera, setting up the lighting, and applying materials and textures to your objects.
- Choosing a Render Engine: Blender offers several render engines, including Eevee (real-time engine) and Cycles (ray-tracing engine). Select the engine that best fits your project needs in the Render Properties panel.
- Camera Settings: Position your camera to frame your scene correctly. You can adjust the camera\"s location, rotation, and focal length in the Camera Properties panel.
- Lighting and Materials: Double-check your lighting setup and materials to ensure they are as you intend. Good lighting and texturing can significantly impact the quality of your render.
- Render Settings: In the Render Properties panel, adjust settings like resolution, samples (for Cycles), and performance settings to optimize your render quality and time.
- Output Settings: Specify your desired output format (image or video), file format (e.g., PNG, JPEG, AVI), and the directory to save your render in the Output Properties panel.
- Rendering the Image: With everything set up, click on the Render menu and select \"Render Image\" for a still image or \"Render Animation\" for a sequence. You can also press F12 to start rendering an image directly.
- Post-Processing: After rendering, you may want to make some adjustments or add effects. Use the Compositor in Blender for post-processing your render to enhance its appearance further.
Rendering your first scene is a rewarding experience, showcasing the culmination of your hard work. Experiment with different settings and techniques to continually improve the quality of your renders.

Animation Basics
Animation in Blender is a powerful tool, allowing you to bring your creations to life. This section introduces you to the fundamental concepts and steps involved in animating objects within Blender.
- Understanding Keyframes: Keyframes are the cornerstone of animation, marking the start and end points of any movement. You can insert a keyframe by selecting an object, moving to the desired frame in the timeline, and pressing \"I\" to choose the property to animate (like location, rotation, scale).
- Timeline and Dope Sheet: The Timeline provides a simplified overview of your animation, while the Dope Sheet offers more detailed control, displaying all keyframes and allowing for easy adjustments.
- Interpolation: Blender automatically interpolates the frames between keyframes, creating smooth transitions. You can adjust the type of interpolation in the Graph Editor to change how the animation progresses between keyframes.
- Animating Materials and Lights: Animation isn\"t limited to object movement; you can also animate properties of materials and lights. This can include changes in color, intensity, or even texture maps over time.
- Using the Graph Editor: For more precise control over your animations, the Graph Editor displays the interpolation curves for each animated property. Here, you can fine-tune the speed and timing of your animations.
- Principles of Animation: Familiarize yourself with basic animation principles such as anticipation, timing, squash and stretch, and secondary action. Applying these principles will make your animations more dynamic and believable.
- Simple Character Animation: Start with simple rigs or armatures to practice animating basic movements. Rigging involves creating a skeleton that can be animated, and Blender provides tools for both automatic and manual rigging.
- Previewing and Rendering Animations: Use the play button in the Timeline to preview your animation. When satisfied, render your animation through the Render menu, selecting \"Render Animation\" or pressing Ctrl+F12.
Animation is a vast field, and mastering it requires practice and patience. Begin with simple projects to understand the basics, and gradually move on to more complex scenes as you gain confidence.
Blender Tutorial for Complete Beginners Part 1
Calling all aspiring visual artists and animators! Get ready to unleash your creativity with Blender. This video is jam-packed with insider tips and tricks to help you master Blender\'s powerful features, showing you how to create jaw-dropping 3D models, animations, and visual effects. Don\'t miss out on the opportunity to take your skills to the next level!
Using Blender for 3D Printing
Blender is not just for creating stunning 3D animations and models; it\"s also a powerful tool for preparing models for 3D printing. This section will guide you through the basics of using Blender to create printable 3D models, ensuring they are ready for your 3D printer. From checking model integrity to exporting in the correct format, we\"ll cover all the essential steps.
- Understanding the Basics of 3D Printing: Before diving into Blender, familiarize yourself with 3D printing fundamentals, such as types of 3D printers, materials used, and the importance of model solidity and print orientation.
- Setting Up Blender for 3D Printing: Adjust Blender\"s settings for 3D printing by enabling the \"3D Print Toolbox\", which provides tools for analyzing and preparing models for printing.
- Model Preparation: Ensure your model is suitable for 3D printing. This involves checking for and fixing any non-manifold edges, making sure the model is solid, and optimizing its geometry for printing.
- Checking for Printability: Use the 3D Print Toolbox to analyze your model for common print issues, such as thin walls, overhangs, and non-manifold edges. Correct these issues to ensure a successful print.
- Exporting Your Model: Once your model is prepared and checked for printability, export it in a format compatible with your 3D printer, typically STL or OBJ. Ensure the scale and dimensions are correctly set to match your printing requirements.
Remember, the key to successful 3D printing with Blender is in the preparation. By following these steps, you can create models that are not only visually appealing but also fully optimized for 3D printing. Whether you\"re creating prototypes, functional parts, or artistic sculptures, Blender can help bring your ideas to life in the physical world.
- Make use of Blender\"s extensive modeling tools to create detailed and complex designs that are ready for printing.
- Regularly consult the 3D Print Toolbox throughout your modeling process to catch and fix issues early on.
- Experiment with different materials and printing techniques to find the best results for your specific project.
With practice and patience, Blender can become an invaluable part of your 3D printing workflow, allowing you to seamlessly transition from digital models to tangible objects.
Creating Your First Game Asset
Creating game assets is a fundamental skill for any aspiring game developer or designer. Blender, with its comprehensive set of tools for 3D modeling, texturing, and animation, is an excellent choice for this task. This section will guide you through the process of creating your first game asset in Blender, from concept to export.
- Conceptualizing Your Asset: Begin by deciding what asset you want to create. It could be anything from a simple prop like a barrel or crate to a more complex character or vehicle. Sketching your idea or creating a mood board can help solidify your concept.
- Setting Up Blender: Open Blender and set up your workspace for modeling. You may want to enable specific add-ons that are beneficial for game asset creation, such as the \"LoopTools\" add-on.
- Modeling Your Asset: Start by blocking out the basic shape of your asset using Blender\"s modeling tools. Focus on getting the proportions right before moving on to add details. Use modifiers like \"Subdivision Surface\" to smooth out your model and \"Mirror\" for symmetrical objects.
- UV Unwrapping: Once your model is complete, you need to unwrap it. UV unwrapping is the process of projecting your 3D model onto a 2D plane to apply textures. Blender\"s UV editing tools make this step efficient and straightforward.
- Texturing: After unwrapping your model, it\"s time to add textures. You can either create your textures in Blender using its painting tools or import them from external sources. For game assets, consider the importance of PBR (Physically Based Rendering) textures for a more realistic appearance.
- Exporting Your Asset: With your asset now modeled and textured, it\"s time to export it for use in a game engine. The most common format for game assets is FBX, but you might also use OBJ depending on your engine\"s requirements. Make sure to export your textures as well if they are not embedded in the file.
Creating game assets in Blender is a skill that improves with practice. Start with simple projects to familiarize yourself with Blender\"s tools and gradually move on to more complex assets. Remember, every game asset you create brings you one step closer to bringing your game world to life.
- Pay close attention to the poly count of your asset to ensure it is optimized for game performance.
- Experiment with Blender\"s sculpting tools for organic shapes and characters to add intricate details to your assets.
- Utilize Blender\"s animation tools to bring your assets to life if your game requires animated models.
By following these steps and tips, you\"ll be well on your way to creating your first game asset in Blender. The skills you develop will serve as a solid foundation for all your future game development projects.
Advanced Modeling Techniques
Mastering advanced modeling techniques in Blender is crucial for creating highly detailed and complex 3D models. This section will guide you through some sophisticated methods that will elevate your 3D modeling skills.
Subdivision Surface Modeling
Subdivision surface modeling is a technique used to create smooth and high-resolution models from a low-polygon base. Start by creating a basic shape and then apply the Subdivision Surface modifier to smooth out the geometry. It\"s essential to control edge flow for maintaining the shape and optimizing the model\"s topology.
Boolean Operations
Boolean operations are powerful tools for creating complex shapes by combining or subtracting basic ones. Use the Boolean modifier to perform operations like union, difference, and intersection, which are invaluable for hard surface modeling, such as creating mechanical parts or architectural elements.
Retopology
Retopology is the process of converting high-resolution models into a mesh with a lower, more manageable polygon count while preserving details. This technique is crucial for animation and game asset creation. Blender\"s retopology tools, such as the Shrinkwrap modifier and snapping options, facilitate this process.
Sculpting for Detailing
Combining sculpting with traditional modeling techniques can add intricate details to your models. Use Blender\"s sculpting mode to add fine details, textures, and organic shapes. Dynamic topology (Dyntopo) allows for flexible sculpting without worrying about the mesh\"s initial topology.
Edge Creasing and Hard Edges
For hard surface models, controlling the sharpness of edges is crucial. Use edge creasing and the Mark Sharp feature along with the Edge Split modifier to achieve sharp or smooth transitions between surfaces, which is particularly useful in mechanical or man-made objects.
Modeling with Modifiers
Blender\"s modifier stack offers a non-destructive way to model complex scenes. Utilize modifiers like Array, Mirror, and Solidify to create repetitive structures, symmetrical models, and add thickness to surfaces, respectively. Combining these can significantly speed up the modeling process.
UV Mapping and Texturing
While not strictly a modeling technique, proper UV mapping is essential for adding textures and materials to your model. Unwrap your model efficiently to apply detailed textures that will bring your model to life. Use Blender\"s UV editing tools to layout the UVs optimally.
Custom Brushes and Add-ons
Expand Blender\"s functionality with custom brushes for sculpting and texturing, and add-ons designed to streamline complex modeling tasks. These tools can enhance your productivity and allow for unique effects and workflows.
By mastering these advanced modeling techniques, you\"ll be well-equipped to tackle any 3D modeling project in Blender, from detailed character models to intricate mechanical designs. Remember, practice and experimentation are key to becoming proficient in these skills.
_HOOK_
Introduction to Sculpting
Sculpting in Blender is a powerful technique that allows artists to create detailed models with an intuitive, hands-on approach. This section provides a step-by-step guide to get you started with sculpting, turning your 3D models into works of art.
Setting Up Your Sculpting Workspace
Begin by selecting the Sculpting workspace in Blender. This workspace provides all the tools and panels you need for sculpting. Ensure you have a model ready for sculpting; you can start with a basic shape like a sphere for practice.
Understanding Sculpting Brushes
Blender offers a variety of sculpting brushes, each with its own purpose:
- Draw Brush: Adds volume to your mesh.
- Clay Strips Brush: Simulates adding strips of clay to build up forms.
- Smooth Brush: Smoothens out the bumps and rough edges.
- Grab Brush: Allows you to pull, push, and move the mesh.
- Crease Brush: Creates sharp indentations, perfect for wrinkles or folds.
DynTopo (Dynamic Topology)
Enable Dynamic Topology (DynTopo) to add more geometry to your model as you sculpt, allowing for finer details without the need for a highly subdivided mesh from the start. This can be activated in the Sculpt mode under the DynTopo tab.
Symmetry
Most models are symmetrical, especially characters. Activate the symmetry option to mirror your sculpting strokes across an axis, saving time and ensuring consistency.
Sculpting Techniques
Begin with broad strokes to define the basic shapes and volumes. Gradually move to smaller brushes to add details such as muscles, facial features, or textures. Remember, sculpting is an iterative process; start rough and refine over time.
Using Masks
Masks allow you to protect certain areas of your model from being affected by sculpting brushes. Use masks to isolate parts of your model that you want to detail individually.
Adding Fine Details
For adding fine details like skin pores or cloth textures, consider using texture brushes or stencils. These can impart complex patterns onto your model with a single stroke.
Finishing Touches
After sculpting, you may want to retopologize your model for animation or game development, reducing the polygon count while retaining details. Additionally, proper material and texture application will bring your sculpted model to life.
This introduction to sculpting in Blender should get you started on the path to creating detailed and expressive 3D models. Practice is key, so experiment with different brushes and techniques to develop your unique sculpting style.
Node-Based Materials and Texturing
Blender\"s node-based material and texturing system is a powerful feature that allows for the creation of complex and dynamic materials. This section will introduce you to the basics of working with nodes and how to apply textures to your models to enhance realism and detail.
Understanding the Shader Editor
The Shader Editor is where you\"ll spend most of your time creating and editing materials. Open it by changing one of your workspace areas to the Shader Editor. This area displays nodes that can be connected to create materials. Each node performs a specific function, such as generating textures, adjusting colors, or affecting material properties like glossiness or transparency.
Creating Your First Material
To create a new material:
- Select your object in the 3D Viewport.
- Go to the Material Properties tab and click \"New\" to create a new material.
- In the Shader Editor, you\"ll see the default material nodes: the Principled BSDF (a versatile shader node for creating a wide range of materials) connected to the Material Output node.
Adding Textures
Textures can add realism to your materials. To add a texture:
- In the Shader Editor, press Shift+A to add a new node. Select Texture and then choose an image texture or a procedural texture.
- Connect the texture node\"s color output to the Base Color input of the Principled BSDF node.
- If using an image texture, you\"ll need to open an image file. Procedural textures, on the other hand, generate patterns without needing an external image file.
Manipulating Textures with Nodes
You can further manipulate textures by adding nodes that adjust their properties. For instance, use the Mapping node to change the texture\"s position, scale, and rotation, and the Texture Coordinate node to define how the texture is mapped onto the object.
Combining Multiple Textures
For more complex materials, you may want to combine multiple textures. Use nodes like MixRGB or ColorRamp to blend textures together. The Factor input controls the blend between them, allowing for intricate material designs.
Utilizing PBR Workflows
Physically Based Rendering (PBR) workflows are widely used in the industry for their realistic results. The Principled BSDF shader is designed for PBR and allows you to create materials that respond realistically to lighting. Experiment with its various inputs, such as Roughness, Metallic, and Normal, to achieve lifelike textures.
Final Tips
- Node-based materials can be as simple or complex as needed. Start simple and gradually add complexity.
- Use the Node Wrangler addon (enabled in Blender\"s preferences) for enhanced functionality and shortcuts in the Shader Editor.
- Practice by recreating materials from the real world to understand how different nodes affect the final appearance.
By mastering Blender\"s node-based materials and texturing system, you\"ll be able to create stunning, realistic materials that can bring your 3D models to life.
Compositing and Post-Processing
Compositing and post-processing in Blender are powerful techniques used to enhance the final output of your 3D projects. This section will guide you through the basics of using Blender\"s Compositor to add finishing touches that elevate the quality of your renders.
Introduction to the Compositor
The Compositor in Blender is a node-based system, similar to material nodes, but it is used for post-processing and compositing operations after rendering. To access it, switch to the Compositing workspace. Ensure you enable \"Use Nodes\" in the Compositor to start.
Basic Compositing Operations
Your first compositing node setup will typically involve the Render Layers node connected to the Composite node. This basic flow allows you to apply post-processing effects to your rendered image. Here are some foundational operations you can perform:
- Adding a Background: Use the Alpha Over node to combine your rendered scene with a background image or color.
- Adjusting Colors: The Color Balance or RGB Curves nodes are perfect for tweaking the colors in your render to achieve a specific mood or correct the overall color balance.
- Adding Glow or Bloom: The Glare node can be used to add a bloom effect to bright areas in your render, giving the impression of intense light or glow.
Layering and Masking
For more advanced compositing, you may want to render your scene in layers or passes. This allows for greater control in post-processing, enabling you to adjust, for example, only the shadows, highlights, or specific objects in your scene independently.
Adding Effects
Blender\"s Compositor offers a variety of nodes to add effects:
- Blur: Add a Blur node to soften parts of your image or create a depth of field effect.
- Lens Distortion: Simulate camera lens effects with the Lens Distortion node.
- Vector Blur: Use Vector Blur for motion blur effects, making fast-moving objects appear more realistic.
Using the Compositor for Final Touches
Finally, use the Compositor to add the finishing touches to your render. This could include sharpening the image, adjusting the contrast, or applying a vignette. Experiment with different nodes and their settings to see how they affect your final image.
Remember, compositing and post-processing are about enhancing your render to achieve the desired final look. It\"s an art as much as it is a technical process, so feel free to experiment and be creative with the tools Blender provides.
Animation Principles and Rigging
Understanding the principles of animation and mastering the art of rigging are essential for bringing your Blender models to life. This section covers the basics of animation and introduces you to rigging, enabling you to create dynamic and realistic animations.
Fundamentals of Animation
Animation in Blender is based on keyframes, which are points in time that specify the start and end positions of any movement. To animate an object, you essentially define its position, rotation, or scale at specific keyframes, and Blender interpolates the frames in between.
- Inserting Keyframes: Select your object, move to the desired frame in the timeline, make your transformation, and press I to insert a keyframe. You can choose from location, rotation, scale, or a combination thereof.
- The Graph Editor: Use the Graph Editor to fine-tune your animations. It displays the interpolation of keyframes as curves, allowing for precise control over the speed and timing of animations.
- Principles of Animation: Familiarize yourself with foundational animation principles such as squash and stretch, anticipation, and follow through. These principles help create more natural and appealing motions.
Introduction to Rigging
Rigging is the process of creating a skeleton (armature) for a model so that it can be animated. This involves setting up bones that define how parts of your model move in relation to each other.
- Creating an Armature: Start by adding an armature object to your scene. Place bones strategically to match the major joints and parts of your model that you wish to animate.
- Parenting the Mesh to the Armature: With both your model and armature selected, parent the mesh to the armature using automatic weights. This process binds the mesh to the bones, so moving a bone will move the corresponding part of the mesh.
- Weight Painting: Fine-tune the influence of each bone on the mesh through weight painting. This allows for smoother and more controlled deformations during animation.
Animating with Armatures
Once your rig is set up, animate it by selecting the armature, entering Pose Mode, and manipulating the bones. Keyframe the positions of these bones to create movements such as walking, jumping, or any action your project requires.
Advanced Rigging Techniques
As you become more comfortable with basic rigging, explore advanced techniques such as inverse kinematics (IK), constraints, and custom bone shapes for enhanced control and efficiency in animating characters and objects.
Through understanding and applying these animation and rigging principles, you\"ll be well on your way to producing captivating animations in Blender. Remember, practice and experimentation are key to mastering these skills.
Simulations and Effects
Blender offers a wide range of tools for creating realistic simulations and effects, from fluid dynamics to cloth and particle systems. This section will introduce you to the basics of setting up and running simulations in Blender, allowing you to add impressive dynamics to your scenes.
Fluid Simulation
To create a fluid simulation, you\"ll need to define at least one object as a fluid domain (where the simulation takes place) and another as a fluid source. Follow these steps:
- Set up the domain by selecting your container object and applying the Fluid modifier, specifying it as the Domain type.
- Add a fluid source by selecting an object that will emit fluid, applying the Fluid modifier, and specifying it as the Flow type.
- Adjust the fluid properties, such as viscosity and inflow velocity, according to the effect you\"re aiming for.
- Bake the simulation to calculate the fluid dynamics. This process may take some time depending on the complexity and resolution of your simulation.
Smoke and Fire
Creating smoke and fire effects in Blender follows a similar process to fluid simulation but uses the Smoke modifier. Set up a domain to contain the simulation and an emitter for the smoke or fire. Adjust settings like smoke density, flame rate, and color to achieve realistic effects. Don\"t forget to bake the simulation to see the results.
Particle Systems
Particle systems in Blender can create effects ranging from rain and snow to hair and fur. To add a particle system:
- Select your emitter object and go to the Particle Properties tab to add a new particle system.
- Configure the particle settings, including emission rate, lifetime, and physics properties like gravity and wind influence.
- For more complex effects, explore force fields to affect particle motion or use keyed particles to animate particles moving along a path.
Cloth and Soft Body Simulation
To simulate cloth or soft bodies, apply the Cloth or Soft Body modifier to your object. Define the material properties, such as stiffness and damping, and any external forces like wind. Pinning allows you to fix parts of the cloth while the rest simulates naturally. Again, simulation needs to be baked for the final effect.
Dynamic Paint
Dynamic Paint is a versatile tool that lets objects interact in a way that one can \"paint\" or affect the other dynamically through movement. Set up a canvas and a brush object to create effects like footprints in snow or ripples in water.
Each of these simulation types offers a wealth of parameters to tweak, allowing for a high degree of control and realism in your scenes. Experimenting with different settings and combining simulations can lead to stunning results. Remember to consider the computational demands of simulations; higher resolutions and more complex interactions require more processing power and time to bake.
_HOOK_
Workflow Tips and Tricks
Enhancing your workflow in Blender can significantly improve your efficiency and the quality of your projects. This section shares essential tips and tricks that will help streamline your 3D modeling, animation, and rendering processes.
Customizing the Interface
Blender\"s interface is highly customizable, allowing you to tailor the workspace to fit your needs. You can:
- Drag and drop panels to rearrange the layout.
- Create multiple views for simultaneous editing and previewing.
- Save custom layouts for different tasks like modeling, animating, or UV mapping.
Keyboard Shortcuts
Learning and using keyboard shortcuts can drastically speed up your workflow. Some essential shortcuts include:
- G to move, R to rotate, and S to scale objects.
- Tab to toggle between Object Mode and Edit Mode.
- Ctrl + Z to undo and Shift + Ctrl + Z to redo actions.
Efficient Modeling Practices
When modeling, keep your geometry as simple as possible. Use modifiers like Subdivision Surface to add complexity non-destructively. This approach makes it easier to make changes without redoing your work.
Using Libraries for Assets and Materials
Create and maintain libraries of reusable assets and materials. Blender allows you to link or append objects from other files, enabling you to quickly add pre-made elements to new projects.
Batch Rendering
For projects that require rendering multiple scenes or animations, use Blender\"s command line interface for batch rendering. This method can save a lot of time by automating the rendering process, allowing you to render scenes overnight or while working on other tasks.
Node Groups for Reusable Materials
In the Shader Editor, create node groups for materials you use frequently. Node groups can be saved and reused in other projects, saving time when creating new materials.
Animation Layers
Use Blender\"s Non-Linear Animation (NLA) Editor to work with animation layers. This allows you to blend different animations together or make adjustments without affecting the original keyframes.
Useful Add-ons
Explore Blender\"s vast selection of add-ons for additional functionality. Many add-ons can automate repetitive tasks, add new features, or streamline specific aspects of your workflow. Some must-try add-ons include Node Wrangler for material creation, BoolTool for boolean operations, and Auto-Rig Pro for character rigging.
Implementing these workflow tips and tricks can significantly enhance your productivity and creativity in Blender. Remember, the key to a smooth workflow is finding practices and tools that best suit your project needs and personal preferences.
READ MORE:
Resources for Further Learning
Continuing your education in Blender is crucial for developing your skills and staying up to date with new features. Below is a curated list of resources for further learning, ranging from online tutorials to communities where you can share your work and get feedback.
Official Blender Tutorials
The Blender Foundation offers a variety of tutorials on its official website and YouTube channel. These resources cover everything from the basics to advanced features, directly from the developers of Blender.
Online Course Platforms
Platforms like Udemy, Coursera, and CG Cookie offer comprehensive Blender courses that cater to both beginners and advanced users. These courses often include hands-on projects and community support.
YouTube Channels
Many experienced Blender artists share their knowledge on YouTube. Channels like Blender Guru, CG Geek, and Darrin Lile offer tutorials on a wide range of topics, from modeling and texturing to animation and VFX.
Books and eBooks
For those who prefer written material, books like \"Blender For Dummies\" and \"Learning Blender: A Hands-On Guide to Creating 3D Animated Characters\" provide step-by-step instructions and project-based learning.
Forums and Online Communities
Joining Blender forums and online communities can be incredibly beneficial. Sites like Blender Artists and the Blender Network are great places to ask questions, share your work, and connect with other Blender users.
Blender Add-ons and Plugins
Exploring add-ons and plugins can significantly expand Blender\"s capabilities. The Blender Market and Gumroad host a variety of tools developed by the community that can streamline your workflow or add new functionality to your projects.
Practice Projects
Applying what you learn through projects is one of the best ways to improve. Challenge yourself with personal projects or participate in online challenges and competitions hosted by Blender communities.
With dedication and the right resources, you can continually grow your skills in Blender. Remember, the learning process is ongoing, and the Blender community is always here to support you along the way.
Embark on your Blender journey with our comprehensive tutorials designed for beginners. Unlock your creative potential and transform your ideas into stunning 3D art. Start exploring the infinite possibilities with Blender today!