Topic blender 3d software tutorial: Embark on a creative journey with our Blender 3D Software Tutorial, designed to guide you through mastering the essentials of 3D modeling, animation, and rendering to bring your visions to life.
Table of Content
- Can you suggest any beginner tutorials for learning Blender 3D software?
- Getting Started with Blender
- Understanding Blender\"s Interface
- Basic Modeling Techniques
- Texturing and Materials
- Lighting in Blender
- Animation Fundamentals
- YOUTUBE: Learn Blender 3D in 20 Minutes! Blender Tutorial for Absolute Beginners
- Rendering and Exporting
- Advanced Modeling Tips and Tricks
- Sculpting with Blender
- Simulation and Effects
- Compositing and Post-Processing
- Resources and Continuing Your Learning
Can you suggest any beginner tutorials for learning Blender 3D software?
Here are some beginner tutorials for learning Blender 3D software:
- Blender Guru\'s Beginner Tutorial Series: This comprehensive series on YouTube covers the basics of Blender, including navigation, modeling, texturing, lighting, and rendering. It\'s a great starting point for beginners. You can find it on the Blender Guru YouTube channel.
- Blender Basics Tutorial: This step-by-step tutorial on the Blender website walks you through the process of creating a simple scene in Blender. It covers modeling, materials, lighting, and rendering.
- Blender Beginner Tutorial: This tutorial on the CG Geek YouTube channel focuses on modeling a simple character in Blender. It also covers basic rigging and animation.
These tutorials provide a solid foundation for beginners and will help you understand the basics of Blender 3D software. Make sure to practice and experiment on your own to further enhance your skills.
READ MORE:
Getting Started with Blender
Welcome to the exciting world of Blender, the powerful open-source software for 3D modeling, animation, and rendering. This section will guide you through the initial steps to get Blender installed on your computer and introduce you to its interface, ensuring a smooth start to your 3D creation journey.
- Download and Install Blender: Visit the official Blender website to download the latest version of Blender. Ensure your system meets the requirements, then follow the installation instructions for your operating system.
- Explore the Interface: Upon launching Blender, you\"ll be greeted with its default screen, which includes the 3D viewport, timeline, outliner, and properties panel. Take a moment to familiarize yourself with these areas.
- Basic Navigation: Learn the basic navigation controls:
- Rotate View: Hold the middle mouse button and move the mouse.
- Pan View: Hold Shift + middle mouse button and move the mouse.
- Zoom: Scroll the middle mouse wheel or Ctrl + middle mouse button and move the mouse.
- Adding Objects: Learn how to add objects to your scene by pressing Shift + A and selecting from the menu (Mesh, Curve, Light, etc.).
- Selecting and Transforming Objects: Select objects by clicking on them with the right mouse button. Transform objects using the G (grab/move), R (rotate), and S (scale) keys followed by the mouse movement. Press Enter to confirm the transformation.
- Basic Modeling: Start with basic modeling techniques such as extruding (E), loop cut (Ctrl + R), and adding modifiers from the properties panel to understand how to modify and enhance your objects.
- Save Your Project: Don’t forget to frequently save your work by going to File > Save As to avoid losing your progress.
By following these steps, you\"ll be well on your way to creating your first 3D project in Blender. Remember, practice is key to mastering Blender, so experiment with different features and tools to become more comfortable with the software.

Understanding Blender\"s Interface
Blender\"s comprehensive interface might seem daunting at first, but it\"s designed to offer powerful functionality while maximizing your creative workflow. This section will help you become familiar with the key components of Blender\"s interface, making your 3D modeling, animation, and rendering tasks more intuitive and efficient.
- Main Areas of the Interface:
- 3D Viewport: The heart of Blender, where you\"ll spend most of your time modeling, animating, and viewing your scenes.
- Timeline: Located at the bottom, it\"s essential for animation, allowing you to control the timing of movements and transformations.
- Outliner: A hierarchical view of all objects in the scene, making it easy to select and organize your elements.
- Properties Panel: Offers access to all the settings for your objects, including materials, modifiers, and physics properties.
- Customizing the Layout: Blender\"s interface is highly customizable. You can drag and split views to create a workspace that matches your workflow. Right-click on the corner of any panel and select \"split area\" or \"join area\" to modify your layout.
- Hotkeys and Shortcuts: Blender is known for its efficient use of hotkeys and shortcuts. Familiarize yourself with the most common ones, like G for grab/move, R for rotate, and S for scale, to speed up your workflow.
- Editor Types: Blender includes various editors for different tasks, such as the Node Editor for material and compositing work, the UV/Image Editor for texturing, and the Graph Editor for animation. You can switch between these editors in any window by clicking on the editor type menu in the corner.
- Workspaces: At the top of the Blender window, you\"ll find tabs for different workspaces, each optimized for tasks like modeling, sculpting, UV editing, and animation. These preset layouts can be customized and saved to suit your needs.
- Search Function: Press F3 to open the search menu, which allows you to quickly find and execute any Blender function without navigating through menus.
Understanding Blender\"s interface is the first step towards unleashing your creative potential. Take your time to explore and customize your workspace, and remember that practice is key to becoming proficient with Blender\"s powerful tools.

Basic Modeling Techniques
Modeling is a fundamental aspect of creating in Blender, allowing you to build everything from simple shapes to complex structures. This section covers essential modeling techniques to start shaping your 3D world.
- Starting with Basic Shapes: Begin by adding primitive shapes (cube, sphere, cylinder, etc.) to your scene. Use Shift + A and select the shape you need from the Mesh menu.
- Editing Meshes: Enter Edit Mode by pressing Tab. Here, you can select vertices, edges, or faces to modify your object. Use the G (move), R (rotate), and S (scale) keys to manipulate selected elements.
- Extruding: Extruding is crucial for adding volume and complexity. Select a face or edge and press E to extrude. Move your mouse to adjust the extrusion distance and click to confirm.
- Loop Cuts: Add more geometry to your meshes with loop cuts. Press Ctrl + R, then move your mouse over an edge to see where the cut will be applied. Scroll to increase the number of cuts, click to confirm, and then adjust the position.
- Subdivision Surface Modifier: To smooth your models, use the Subdivision Surface modifier. This adds geometry and rounds your object. Go to the Modifiers tab in the Properties panel, add a Subdivision Surface modifier, and adjust the levels of subdivision for both the viewport and render.
- Proportional Editing: For organic modeling, proportional editing is invaluable. Press O to toggle it on. When you move, scale, or rotate a selection, nearby vertices will also be affected, with the influence area adjustable with the mouse wheel.
- Knife Tool: Use the Knife tool (K) to make precise cuts in your meshes. Click to start the cut, move your mouse to define the path, and click again to confirm. Press Enter to complete the operation.
- Inset Faces: Use the inset tool (I) to create a new face inside a selected face, useful for creating details like windows or frames.
- Bevel: Bevel edges to create smooth transitions. Select an edge and press Ctrl + B, then move your mouse to adjust the bevel width and scroll to add more segments.
By mastering these basic modeling techniques, you\"ll be well-equipped to start bringing your ideas to life in Blender. Practice each technique to become comfortable with the vast array of tools at your disposal.

Texturing and Materials
Texturing and applying materials are essential steps in bringing your Blender models to life, adding realism, depth, and emotion to your creations. This section will guide you through the basics of creating and applying textures and materials in Blender.
- Understanding Materials: Materials define the color, shininess, transparency, and texture of your object. In the Properties panel, switch to the Material tab to add a new material to your selected object.
- Adding Textures: Textures are images or procedural patterns that give your materials detail. Add a texture by going to the Texture tab in the Properties panel, selecting your material, and then clicking \"New\" to add a texture.
- UV Mapping: UV mapping is the process of projecting a 2D image onto your 3D model. Enter Edit Mode (Tab), select all faces (A), and then unwrap your model (U) to open the UV/Image Editor and adjust your model\"s UV layout.
- Shaders: Use shaders to control how your material interacts with light. The Principled BSDF shader is a versatile shader in Blender that can handle most materials types, from metallic surfaces to transparent glass.
- Using Nodes: Blender\"s node-based material system allows for complex material creation. Open the Shader Editor, and you can drag nodes like Texture Coordinate, Image Texture, and Principled BSDF into your workspace to create your material.
- Applying Textures: In the Shader Editor, connect your Image Texture node to the Base Color input of the Principled BSDF shader. Adjust settings like Roughness and Metallic to achieve the desired material appearance.
- Bump and Normal Maps: To add surface detail without increasing geometry, use bump or normal maps. Connect these maps to the Normal input of the Principled BSDF shader through a Normal Map node for realistic textures.
- Environmental Textures: Add realism to scenes with environmental textures. Use an Environment Texture node connected to the World\"s shader node to add background images or HDRIs for realistic lighting and reflections.
By understanding and applying these texturing and material techniques, you can dramatically improve the visual quality of your models and scenes in Blender, making them more engaging and lifelike.
_HOOK_
Lighting in Blender
Lighting is a critical component in 3D visualization, affecting mood, depth, and the overall realism of your scene. This section explores the fundamentals of lighting in Blender, helping you illuminate your projects effectively.
- Types of Lights: Blender offers several types of lights, including Point, Sun, Spot, and Area lights. Each has its unique characteristics and uses, from simulating sunlight to creating focused beams.
- Adding Lights: Add lights to your scene by pressing Shift + A and navigating to Light. Choose the type of light you need, and position it in your scene to achieve the desired effect.
- Adjusting Light Properties: Select a light to adjust its properties in the Light tab of the Properties panel. Here, you can modify the light\"s color, strength, and other settings specific to the light type.
- Using the Eevee Renderer: Eevee is Blender\"s real-time renderer, offering fast feedback on lighting and materials. It\"s particularly useful for setting up lights and viewing their effects in real-time.
- Shadow Settings: Control the quality and softness of shadows directly from the light\"s properties. Soft shadows can be achieved by increasing the size of the light source, while hard shadows result from smaller light sources.
- Three-Point Lighting: A classic technique in photography and film, three-point lighting uses key, fill, and back lights to fully illuminate your subject. This setup can help achieve a professional look in your renders.
- HDRI Lighting: For realistic environmental lighting, use HDRI images. These images provide comprehensive lighting and reflection data from real-world scenes. Add an HDRI in the World settings by using an Environment Texture node.
- Lighting for Mood: Experiment with light colors and intensities to create specific moods. Cooler lights can suggest night or cold, while warmer lights can simulate sunlight or cozy interiors.
- Using Light Probes: In Eevee, use light probes to improve the accuracy of reflections and indirect lighting. They are especially useful in enclosed environments or scenes with reflective materials.
Effective lighting is key to presenting your work in its best light. Experiment with different types and settings to discover the vast potential of lighting in Blender.
Animation Fundamentals
Animation breathes life into your 3D models, allowing them to move, interact, and convey stories. This section introduces the basic principles of animation in Blender, guiding you through creating your first animations.
- Understanding Keyframes: Keyframes are the cornerstone of animation, marking the start and end points of any movement. In Blender, you can insert a keyframe by selecting an object, moving to a specific frame, making a change (like moving the object), and then pressing \"I\" to insert a keyframe for the property you\"ve changed (like location).
- Timeline and Dope Sheet: The Timeline offers a simplified overview of your animation, while the Dope Sheet provides a more detailed view, allowing you to adjust the timing and sequence of keyframes easily.
- Interpolation and Easing: Blender automatically interpolates the frames between your keyframes, creating smooth transitions. You can adjust the type of interpolation and easing in the Graph Editor to refine your animation\"s flow.
- Animating Properties: Beyond location, you can animate nearly any property in Blender, including rotation, scale, material properties, and even the strength of lights. Use this to create dynamic and complex animations.
- Armature and Rigging: For character animation, you\"ll need to create an armature (a skeleton) and rig your model. Rigging involves defining how the mesh of your model deforms in response to the movements of the armature.
- Weight Painting: Weight painting controls how different parts of your mesh are influenced by the bones of the armature. It\"s essential for creating realistic deformations in character animation.
- Action Editor: Use the Action Editor to organize and manage different animations (actions) for your characters or objects. This allows you to create complex sequences and reuse animations.
- Nonlinear Animation (NLA): The NLA Editor lets you blend and layer different actions, enabling you to build complex animations from simpler sequences.
- Animation Rendering: Finally, to share your animation, you\"ll need to render it. In the Render settings, choose your output format and location, then render your animation to a video file or sequence of images.
With these fundamentals, you\"re ready to start experimenting with animation in Blender. Remember, animation is an art form that requires practice and patience, so keep experimenting and learning.

Learn Blender 3D in 20 Minutes! Blender Tutorial for Absolute Beginners
\"Discover the limitless possibilities of Blender, the ultimate tool for 3D animation and design. Unleash your creativity as you dive into the world of digital art with this powerful software. Watch our video to learn how to master Blender and bring your ideas to life!\"
Blender Modeling Introduction: How to Create 3D Objects
\"Interested in creating stunning 3D models? Our modeling video tutorial will guide you through the step-by-step process of modeling your own unique characters and objects using professional techniques. Get ready to unlock your inner artist and watch the video now!\"
Rendering and Exporting
Rendering transforms your 3D scene into a final image or animation, while exporting allows you to use your creations outside of Blender. This section covers the essentials of rendering your projects and exporting them for various uses.
- Understanding Rendering Engines: Blender offers multiple rendering engines, including Eevee (real-time) and Cycles (ray-traced). Choose the engine that best suits your project\"s needs based on speed and realism.
- Render Settings: Access the Render settings in the Properties panel. Here, you can adjust resolution, sampling rates for Cycles, and performance settings to optimize rendering times.
- Lighting and Materials: Ensure your materials and lighting are set up correctly for the chosen rendering engine. Materials and lights behave differently in Eevee compared to Cycles, affecting the final look.
- Camera Setup: Position your camera carefully; it determines the viewpoint of your final render. Adjust camera settings such as focal length and depth of field for the desired effect.
- Rendering Images: To render a single image, position your scene at the desired frame, and press F12. Save the rendered image from the Image Editor.
- Rendering Animations: For animations, set the start and end frames in the Timeline. In the Render settings, choose your output format and directory, then click Render > Render Animation or press Ctrl + F12.
- Exporting Formats: Blender supports exporting to various file formats, including OBJ, FBX, and STL for 3D printing. Use File > Export to select your format and configure the export options.
- Post-Processing: After rendering, you may want to post-process your images or animations. Blender\"s Compositor offers tools for color correction, compositing, and adding effects.
- Batch Rendering: For multiple renders, consider using command line options or scripts to automate the process, saving time and ensuring consistency across your renders.
Rendering and exporting are the final steps in bringing your Blender projects to the world. With these guidelines, you\"re ready to produce high-quality images and animations that showcase your creativity and skill.

Advanced Modeling Tips and Tricks
Once you\"ve mastered the basics of Blender, it\"s time to dive into advanced modeling techniques that can help you create more complex and detailed models. These tips and tricks are designed to enhance your workflow, improve efficiency, and unlock new possibilities in your 3D projects.
- Use Modifiers Intelligently: Modifiers in Blender can dramatically simplify the modeling process. Experiment with the Boolean, Mirror, and Subdivision Surface modifiers to add complexity to your models without manually editing every detail.
- Topology and Edge Flow: Understanding topology and maintaining a clean edge flow are crucial for models that deform well during animation. Use loop cuts and the knife tool to direct edge flow and improve the deformability of your models.
- Custom Normals and Bevels: For hard-surface modeling, controlling edge sharpness and reflections is essential. Utilize custom normals and the Bevel modifier with weight assignments to achieve precise control over these aspects.
- Retopology Tools: For high-detail sculpting, retopology is a must. Blender\"s retopology tools, such as F2 and poly build, can help you create a low-poly mesh that captures the essence of your detailed sculpt.
- Non-Destructive Workflow: Embrace a non-destructive workflow by using modifiers and shape keys. This approach allows you to make significant changes to your model without permanently altering the original geometry.
- Advanced UV Unwrapping Techniques: Master the art of UV unwrapping for complex models. Utilize seams, UV squares, and the live unwrap feature to efficiently unwrap models and prepare them for texturing.
- Use Grease Pencil for Concepting: The Grease Pencil tool is not just for 2D animation. Use it to sketch out ideas, plan models, or even create 3D forms directly from your sketches.
- Shader Nodes for Material Creation: Dive deeper into Blender\"s shader nodes to create complex materials. Experiment with node groups, procedural textures, and the Principled BSDF shader to enhance the realism of your models.
- Optimize Your Models: For real-time applications like game development, optimization is key. Use techniques like LOD (Level of Detail), mesh decimation, and baking textures to reduce polygon count and improve performance.
- Experiment with Sculpting Brushes: Expand your sculpting skills by experimenting with different brushes and settings. Discover how each brush can affect your model and use dynamic topology for detailed sculpting.
By incorporating these advanced modeling tips and tricks into your Blender workflow, you\"ll be able to tackle more challenging projects and push the boundaries of your 3D art. Remember, practice and experimentation are the keys to mastering these advanced techniques.

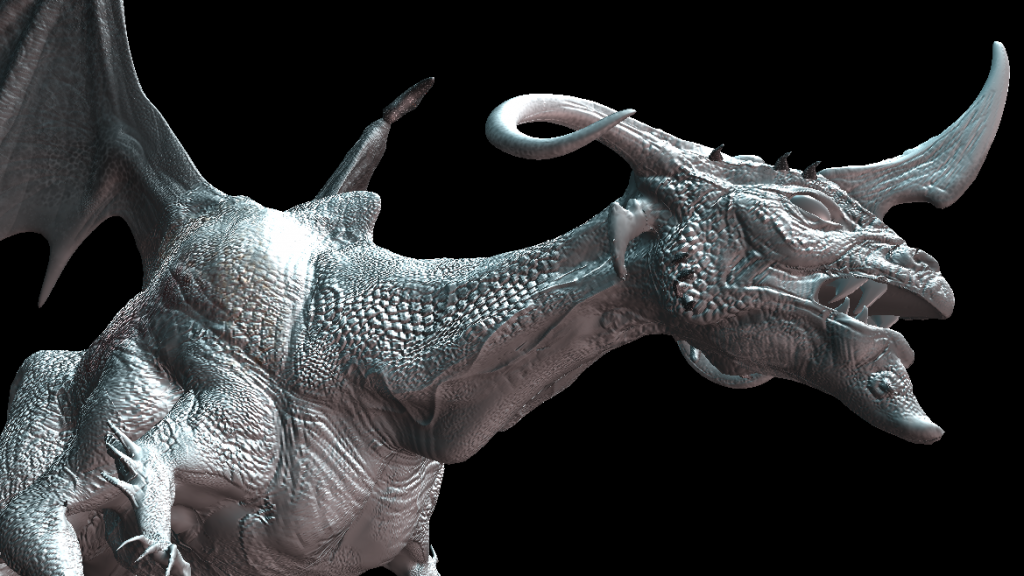
Sculpting with Blender
Sculpting in Blender opens up a world of creativity and detail, allowing you to shape your models like clay. This section will guide you through the essential techniques and tools to get started with digital sculpting in Blender.
- Setting Up Your Sculpting Workspace: Begin by selecting the Sculpting workspace from the top of the Blender interface. This workspace optimizes your layout for sculpting, providing quick access to sculpting tools and properties.
- Understanding Sculpting Brushes: Blender offers a variety of sculpting brushes, each with its purpose. Experiment with brushes like the Draw, Clay Strips, Crease, Inflate, and Smooth brushes to understand their effects on your mesh.
- Dyntopo for Dynamic Topology: Enable Dyntopo (Dynamic Topology) in the sculpting settings to add geometry dynamically as you sculpt. This feature allows for detailed sculpting without worrying about the initial mesh density.
- Symmetry and Proportions: Use the symmetry options to sculpt both sides of your model simultaneously. This is especially useful for creating characters and creatures, ensuring that both halves are symmetrical.
- Masking and Posing: Learn to use the Mask brush to isolate areas of your model. Masking allows you to sculpt specific areas without affecting the rest of the model. You can also use masking to pose your model by inverting the mask and rotating or moving the unmasked area.
- Using the Multiresolution Modifier: For models that need to maintain a base mesh, apply a Multiresolution modifier. This modifier lets you sculpt at higher resolutions while preserving the lower-resolution base mesh, ideal for animation-ready models.
- Detailing with Alphas: Incorporate alphas (grayscale images) to imprint textures and fine details onto your model. You can use Blender\"s built-in alphas or import custom ones to achieve intricate surface details.
- Stylized Sculpting Techniques: For stylized characters and models, focus on bold shapes and smooth transitions. Use the Flatten, Fill, and Scrape brushes to achieve a stylized look, emphasizing form over minute details.
- Refining and Polishing: After the main forms are established, refine your sculpture by adding wrinkles, scales, fabric folds, or other small details to bring your model to life. The Crease and Pinch brushes are excellent for adding sharp details.
- Remeshing for Uniform Geometry: Use the Remesh options to create a uniform mesh topology, essential for animation or further detailing. Remeshing consolidates your sculpted details into a cleaner, more manageable mesh structure.
With practice, these sculpting techniques will become second nature, allowing you to express your artistic vision through Blender\"s powerful sculpting tools. Remember, sculpting is a skill honed over time, so be patient and enjoy the creative process.
_HOOK_
Simulation and Effects
Blender\"s simulation and effects tools enable artists to create dynamic and realistic scenes. From natural phenomena like fire and smoke to complex cloth and fluid simulations, Blender provides a comprehensive set of tools to bring your scenes to life. Here\"s how to get started with simulations and effects in Blender:
- Understanding Physics Properties: Begin by familiarizing yourself with the Physics properties panel. Here, you can choose from various simulation types, including Cloth, Fluid, Soft Body, Smoke, and Rigid Body. Each type has its settings and parameters for customization.
- Creating Cloth Simulations: To simulate cloth, select your mesh and enable the Cloth modifier in the Physics properties. Adjust properties like Mass, Structural Stiffness, and Damping to achieve the desired cloth behavior. Use Pinning to fix certain vertices in place.
- Working with Fluids: For fluid simulations, you\"ll need to set up a domain to define the simulation\"s boundaries and an object to act as the fluid source. Adjust the resolution, viscosity, and gravity settings to control the fluid\"s behavior and appearance.
- Simulating Smoke and Fire: Smoke and fire simulations also require a domain and a flow source. The Flow object can emit smoke, fire, or both, with various settings to adjust the density, temperature, and color of the smoke or flames.
- Rigid Body Dynamics: For simulations involving collisions and physics-based interactions between objects, use the Rigid Body system. Define passive objects (like walls) and active objects (like falling dominoes) and adjust properties like Mass, Friction, and Bounciness.
- Soft Body Simulations: Soft Body physics simulate flexible materials. This is ideal for objects that need to deform in a realistic manner. Key settings include Soft Body Goal for controlling deformation and Soft Body Edges for defining elasticity.
- Particle Systems for Effects: Use Blender\"s Particle System to create effects like rain, snow, or foliage. Particles can also be used alongside physics simulations for added realism, such as debris in an explosion.
- Advanced Simulations with Mantaflow: Mantaflow is Blender\"s system for high-quality fluid and smoke simulations. Dive into Mantaflow for more complex and realistic simulations, adjusting settings for smoke density, flame heat, and liquid viscosity.
- Rendering Simulations: Ensure your simulations are set up correctly for rendering. This might involve baking the simulation to disk, adjusting lighting to highlight effects, and choosing render settings that balance quality with render time.
- Optimizing Simulations: Simulations can be computationally intensive. Optimize your scene by minimizing simulation resolutions during testing and only increasing them for final renders. Consider using simplified collision objects to speed up calculations.
With these techniques, you can harness Blender\"s powerful simulation and effects tools to add depth and realism to your 3D projects. Remember, the key to successful simulations lies in experimentation and practice, so don\"t hesitate to try different settings and approaches.
Compositing and Post-Processing
Compositing and post-processing in Blender are powerful steps in the 3D creation process that involve combining visual elements from separate sources into single images and enhancing or altering them after rendering. These techniques can significantly improve the visual quality of your scenes, adding depth, realism, and artistic flair. Here\"s how to utilize Blender\"s compositing and post-processing tools effectively:
- Understanding the Compositor: Blender\"s node-based compositor allows for non-destructive editing. Access it by switching to the Compositing workspace. Here, you can add, mix, and manipulate rendered layers and passes using nodes.
- Using Render Layers and Passes: Organize your scene into render layers to composite them separately. Utilize passes like Z-depth, Ambient Occlusion, and Shadow for more control over lighting and depth in your composition.
- Adding Effects with Nodes: Use nodes to apply effects such as blurs, color grading, and glare. The Node Editor provides a vast array of options to tweak your image, from simple adjustments to complex effects.
- Color Correction and Grading: Enhance the mood and tone of your renders with color correction and grading. Use the RGB Curves and Color Balance nodes to adjust the color dynamics and contrast of your image.
- Incorporating Glare and Lens Effects: Add realism to bright light sources with glare and lens flare effects. The Glare node can simulate camera lens flares, streaks, and glow effects to make your lighting pop.
- Utilizing the Z-Depth for Depth of Field: Create a depth of field effect by using the Z-Depth pass. This simulates camera focus, blurring objects that are too close or too far from the focal point, adding depth to your scene.
- Combining CG Elements with Live Footage: If you\"re integrating CG elements into live footage, use the compositor to match the lighting, color, and grain of the CG elements to the footage, creating a seamless blend between the two.
- Creating Motion Graphics Effects: Use the compositor to add motion graphics elements to your scene, such as animated text, logos, or other graphical overlays, enhancing the visual storytelling of your project.
- Rendering and Output: Once your composition is complete, adjust your rendering settings for the final output. Consider output formats and compression options based on your project needs, whether for web, broadcast, or print.
- Optimization Tips: Compositing can be resource-intensive. Optimize your workflow by previewing your composite in lower resolutions and only rendering at full resolution for the final output. Also, use backdrop and viewer nodes to preview your composited result in real-time.
By mastering compositing and post-processing in Blender, you can elevate the quality of your 3D projects, adding a professional polish that distinguishes your work. Remember, the best way to learn is by doing, so experiment with different techniques and effects to discover what works best for your artistic vision.
READ MORE:
Resources and Continuing Your Learning
The journey to mastering Blender is ongoing, with a wealth of resources available to support your learning and growth as a 3D artist. Here are some key resources and strategies for continuing your education in Blender and staying updated with the latest techniques and features:
- Blender Official Documentation: Start with Blender\"s official documentation for comprehensive guides on all features. It\"s regularly updated and an invaluable resource for both beginners and advanced users.
- Online Tutorials and Courses: Websites like Blender Guru, CG Cookie, and Udemy offer tutorials and courses ranging from beginner to advanced levels. These can be project-based or focus on specific aspects of Blender.
- Blender Community and Forums: Joining the Blender community through forums and social media groups can provide support, feedback, and insights from fellow Blender enthusiasts. Blender Artists and BlenderNation are great places to start.
- YouTube Channels: YouTube is a treasure trove of free Blender tutorials. Channels like Blender Guru, CG Geek, and Ducky 3D offer tutorials on a wide range of topics, from basic modeling to advanced VFX techniques.
- Books and E-Books: For those who prefer written material, there are many books and e-books available that cover Blender in detail. These can often provide a structured learning path compared to online tutorials.
- Practice Projects: Applying what you learn through practice projects is crucial. Challenge yourself with projects that cover various aspects of Blender, from modeling and texturing to animation and rendering.
- Participate in Challenges and Contests: Engaging in online challenges and contests can be a fun way to push your skills, get feedback, and see how other artists approach similar projects.
- Stay Updated with Blender Updates: Blender is constantly evolving. Keep up with the latest updates and features by following the official Blender Foundation and Blender Developers blog.
- Experiment with New Features: Don\"t be afraid to experiment with new features and tools in Blender. Personal experimentation is a great way to learn and discover unexpected techniques.
- Teach Others: Sharing your knowledge by teaching others can reinforce your own understanding and uncover gaps in your knowledge. Consider writing tutorials, creating videos, or hosting workshops.
With dedication and the wealth of resources available, your skills in Blender can grow exponentially. Remember, learning Blender is a marathon, not a sprint. Be patient with yourself, and enjoy the journey of becoming a proficient 3D artist.
Embark on a transformative journey with our comprehensive Blender 3D software tutorials, designed to empower your creativity and elevate your skills from novice to expert. Start sculpting your 3D dreams into reality today!