Topic blender 3d modeling tutorial beginner: Embark on a journey to unlock your creative potential with our Blender 3D Modeling Tutorial for Beginners, designed to guide you through the basics of 3D modeling, texturing, and rendering in a simple, engaging manner.
Table of Content
- How to get started with Blender 3D modeling as a beginner?
- Understanding Blender\"s Interface and Basic Concepts
- Setting Up Your First Project in Blender
- Basic Navigation and Object Manipulation
- Introduction to Meshes and Modeling Fundamentals
- Creating Simple 3D Models: From Shapes to Objects
- YOUTUBE: Beginner Blender Tutorial - Part 1
- Modifying Objects with Modifiers and Sculpting
- Materials and Texturing: Bringing Your Model to Life
- Lighting and Rendering: Showcasing Your Model
- Animation Basics: Making Your Model Move
- Exporting Your Work for Sharing or Further Use
- Next Steps: Advanced Techniques and Resources for Learning
How to get started with Blender 3D modeling as a beginner?
To get started with Blender 3D modeling as a beginner, you can follow these steps:
- Download and Install Blender:
- Explore the User Interface:
- Find Beginner Tutorials:
- Start with Basic Modeling:
- Learn Modeling Techniques:
- Study Mesh Topology:
- Experiment with Materials and Textures:
- Explore Advanced Modeling Techniques:
- Join Blender Communities:
- Practice regularly:
Go to the official Blender website (https://www.blender.org/) and download the latest version of Blender suitable for your operating system. Install the software by following the installation wizard instructions.
Open Blender and take some time to familiarize yourself with the user interface. Understand the various windows, panels, and menus available. Blender can be overwhelming at first, but don\'t worry, it will become more intuitive with practice.
Search for beginner tutorials specifically focused on Blender 3D modeling. There are numerous tutorials available on video-sharing platforms like YouTube and websites dedicated to Blender tutorials. Choose a tutorial that suits your learning style and preferences.
Follow the tutorial step-by-step and begin with basic modeling exercises. Start by creating simple objects like cubes, spheres, and cylinders. Learn how to manipulate and modify these objects using Blender\'s modeling tools.
As you progress, explore different modeling techniques like extruding, scaling, rotating, and subdividing. Understand how to create more complex objects by combining and manipulating basic shapes. Practice modeling various objects of your choice.
Mesh topology is crucial for creating realistic and efficient 3D models. Learn about edge loops, polygons, and proper geometry flow. Understand how to create clean and optimized meshes by avoiding triangles and ngons.
Once you have a grasp of basic modeling, learn how to apply materials and textures to your objects. Experiment with different shaders, textures, and lighting setups to create visually appealing renders.
Once you feel comfortable with the basics, delve into more advanced modeling techniques like sculpting, boolean operations, and retopology. These techniques will allow you to create detailed and complex models.
Engage with the Blender community by joining forums, online communities, and social media groups. Share your work, ask questions, and learn from experienced Blender users. Collaboration and feedback from others can greatly enhance your learning process.
Consistent practice is key to improving your skills in Blender 3D modeling. Dedicate regular time to work on projects, follow tutorials, and experiment with new techniques. The more you practice, the more proficient you will become.
READ MORE:
Understanding Blender\"s Interface and Basic Concepts
Blender\"s interface might seem daunting at first, but it\"s designed to streamline the 3D modeling process. This section will help you become familiar with the essential elements of Blender\"s UI and introduce you to its basic concepts.
- Layout: Blender\"s default layout is divided into several editors, such as the 3D Viewport, Timeline, Outliner, and Properties panel.
- 3D Viewport: This is where you\"ll spend most of your time, as it\"s where you can view and interact with your 3D scene.
- Properties Panel: Here, you can adjust the settings for objects, materials, modifiers, and world settings.
- Outliner: This provides a hierarchical view of all objects in your scene, making it easy to select and organize them.
- Timeline: At the bottom of the default layout, the timeline allows you to control animation playback and keyframes.
Understanding these areas will significantly enhance your modeling efficiency in Blender. Let\"s dive into each component:
- The 3D Viewport offers various shading modes to inspect your model\"s details, including wireframe, solid, material, and rendered.
- In the Properties Panel, you\"ll find tabs for different settings. The most frequently used ones are the Render, Object, Material, and World tabs.
- Using the Outliner, you can easily organize your scene by grouping objects, which is crucial for complex models.
- The Timeline provides tools for animation, including setting start and end frames for your animation sequence.
Additionally, Blender incorporates a range of keyboard shortcuts to speed up your workflow. For instance, \"G\" to move, \"R\" to rotate, and \"S\" to scale objects. Familiarizing yourself with these shortcuts can significantly improve your efficiency.
Lastly, understanding Blender\"s concept of object and edit modes is crucial. Object mode is used for selecting and manipulating the interaction between objects, while Edit mode allows for the modification of the geometry of the selected object.

Setting Up Your First Project in Blender
Starting your first project in Blender is an exciting step towards becoming proficient in 3D modeling. This guide will walk you through the initial setup process, ensuring you have a solid foundation for your creative endeavors.
- Download and Install Blender: Ensure you have the latest version of Blender installed from the official website.
- Choose a Project Theme: Decide on a simple project theme. A well-defined goal will keep you focused and motivated.
- Configure Blender Settings: Adjust Blender\"s settings to suit your project. This includes setting the unit scale, camera, and renderer.
- Interface Familiarization: Spend some time getting to know Blender\"s interface. Locate the 3D viewport, outliner, properties panel, and timeline.
- Basic Object Manipulation: Learn how to add, delete, and modify objects. Practice moving, rotating, and scaling objects in the 3D viewport.
- Setting Up the Workspace: Customize your workspace by adjusting the layout and adding any necessary panels for your project.
- Creating Your First Object: Start by adding a simple object to your scene, such as a cube, and modify its dimensions and position.
- Save Your Project: Develop a habit of saving your work regularly. Choose a clear naming convention for easy file management.
By following these steps, you\"ll have a well-organized start to your project, allowing you to focus more on the creative aspects of 3D modeling in Blender.

Basic Navigation and Object Manipulation
Mastering basic navigation and object manipulation is crucial for efficient 3D modeling in Blender. This section covers essential techniques to help you smoothly navigate the 3D viewport and manipulate objects with ease.
- Viewport Navigation:
- Rotate View: Hold the middle mouse button and move the mouse.
- Pan View: Hold Shift + middle mouse button and move the mouse.
- Zoom: Use the mouse scroll wheel or Ctrl + middle mouse button and move the mouse.
- Selecting Objects: Click on an object with the left mouse button to select it. To select multiple objects, hold Shift and click on additional objects.
- Moving Objects: Press \"G\" to grab an object and move it. Use the mouse to position the object and click to place it.
- Rotating Objects: Press \"R\" to rotate an object. Move the mouse to adjust the rotation. Click to confirm.
- Scaling Objects: Press \"S\" to scale an object. Move the mouse to adjust the size and click to confirm.
- Using the 3D Cursor: The 3D cursor acts as a pivot point for object placement and transformations. Place it by clicking with the right mouse button.
- Viewing from Different Angles: Use the Numpad keys (1, 3, 7, and 0 for camera view) to switch between front, right, top, and camera views.
- Undoing Actions: Press Ctrl + Z to undo your last action, a crucial feature for correcting mistakes.
Practicing these navigation and manipulation fundamentals will significantly enhance your workflow and allow you to focus more on the creative aspects of your projects in Blender.

Introduction to Meshes and Modeling Fundamentals
Meshes are the backbone of 3D modeling in Blender, serving as the basic structure for creating shapes and objects. Understanding mesh modeling fundamentals is essential for any aspiring 3D artist. This section introduces key concepts and techniques to get you started.
- What is a Mesh?
- A mesh is a collection of vertices, edges, and faces that define the shape of a 3D object. Vertices are points in 3D space, edges connect vertices, and faces are flat surfaces enclosed by edges.
- Adding a Mesh Object:
- To add a mesh object, go to the 3D viewport, press Shift+A, and select Mesh to choose from various shapes like cubes, spheres, cylinders, etc.
- Editing Meshes:
- Switch to Edit Mode (Tab key) to modify the mesh. You can select vertices, edges, or faces to move, scale, or rotate them.
- Selection Tools:
- Use Box Select (B key), Circle Select (C key), and Lasso Select (Ctrl+Right Mouse Button) for different selection methods.
- Extruding and Insetting:
- Extrude (E key) to create new geometry from a selected face. Inset (I key) to create a new face within a selected face, useful for creating complex shapes.
- Loop Cuts and Subdivision:
- Add loop cuts (Ctrl+R) to add more geometry for detailed shaping. Use subdivision surface modifier to smooth and refine the mesh.
- Modifiers:
- Modifiers like Mirror, Solidify, and Bevel add complexity to your model non-destructively, meaning you can adjust parameters without permanently changing the mesh.
Understanding these basics will set the foundation for more advanced modeling techniques, enabling you to create a wide variety of 3D objects and scenes in Blender.

_HOOK_
Creating Simple 3D Models: From Shapes to Objects
Creating simple 3D models is a great way to get started with Blender. This section will guide you through the process of turning basic shapes into more complex objects, step by step.
- Starting with Basic Shapes:
- Begin by adding a basic shape to your scene, such as a cube or sphere, by pressing Shift+A and selecting your desired mesh under the Mesh menu.
- Modifying the Shape:
- Enter Edit Mode (Tab) to modify your shape. You can extrude faces (E), create loop cuts (Ctrl+R), and move (G), rotate (R), and scale (S) components to alter the shape.
- Adding Detail:
- Use tools like extrusion and loop cuts to add detail to your model. Practice creating different forms by manipulating vertices, edges, and faces.
- Combining Shapes:
- To create more complex models, you can combine basic shapes. Use Boolean modifiers to merge or subtract shapes from one another.
- Smoothing Surfaces:
- Apply a Subdivision Surface modifier to smooth out the model. This modifier increases the number of polygons, creating a smoother appearance.
- Refining Your Model:
- Continue to refine your model by adding more details and adjusting the form. Use the Sculpt Mode to manually sculpt details on your model.
- Applying Materials:
- Once your model is shaped, apply materials to give it color and texture. Go to the Material Properties tab to create new materials and assign them to your object.
- Rendering Your Model:
- Finally, render your model to see it in full detail. Adjust the camera angle, lighting, and render settings to achieve the desired look.
By following these steps, you\"ll learn the basics of turning simple shapes into detailed 3D models, a fundamental skill in Blender.

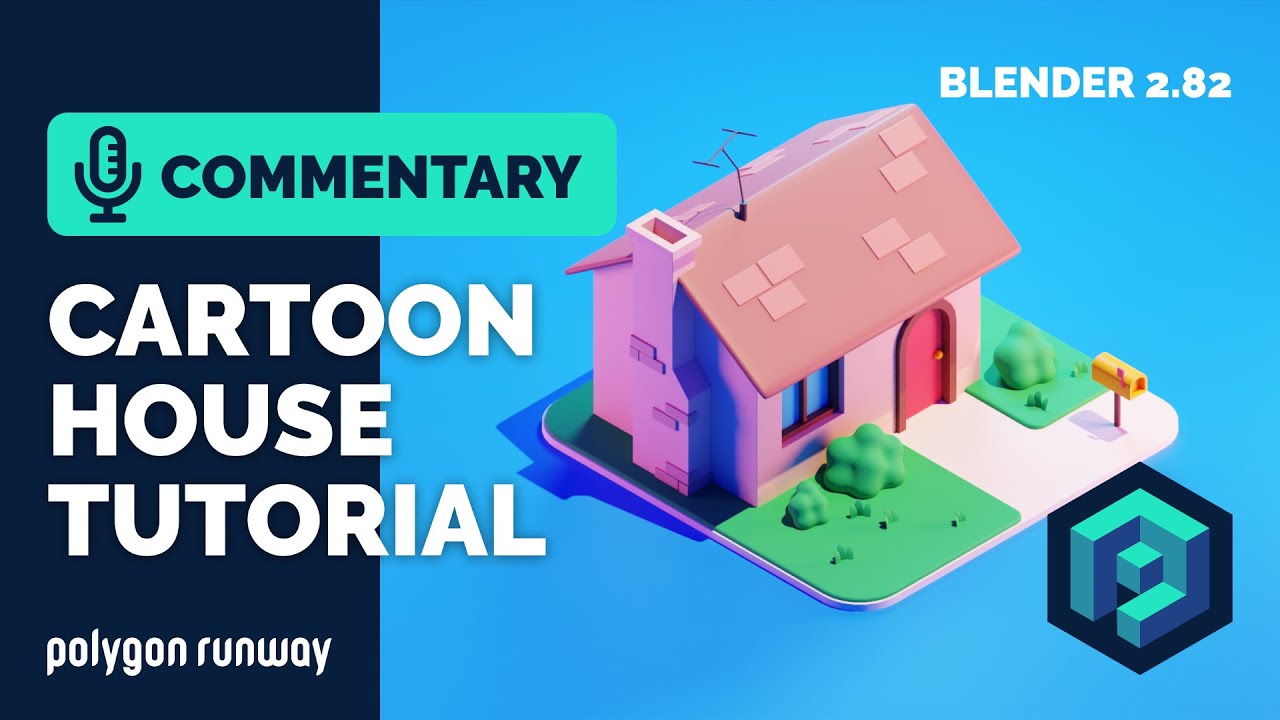
Beginner Blender Tutorial - Part 1
Blender: \"Discover the amazing capabilities of Blender, the ultimate software for 3D modeling and animation. Dive into this visually stunning video and unlock the potential of your creative projects using Blender!\"
Beginner Blender Modeling Tutorial - Part 1
Modeling: \"Master the art of modeling with this captivating video tutorial! Learn step-by-step techniques to bring your ideas to life, whether it\'s creating stunning characters, intricate architectural designs, or mind-blowing game assets. Get ready to unleash your imagination!\"
Modifying Objects with Modifiers and Sculpting
Modifiers and sculpting in Blender offer powerful ways to enhance and detail your 3D models. This section will guide you through using modifiers for non-destructive editing and the basics of sculpting to add intricate details to your objects.
- Understanding Modifiers:
- Modifiers are tools that affect your objects in various ways without permanently altering the original mesh. They can be stacked and adjusted any time.
- Commonly Used Modifiers:
- Subdivision Surface: Smooths your model by subdividing the mesh.
- Boolean: Combines two objects in ways that add, subtract, or find the intersection of their volumes.
- Array: Creates copies of your object in an array pattern.
- Mirror: Mirrors your object across a specified axis, useful for symmetrical designs.
- Solidify: Adds thickness to your object, useful for creating shells or clothing.
- Applying Modifiers:
- To apply a modifier, select your object, go to the Modifiers tab, choose a modifier, and adjust its settings to achieve the desired effect.
- Introduction to Sculpting:
- Sculpting mode in Blender allows you to manually shape your mesh with brush strokes, similar to sculpting clay in the real world.
- Basic Sculpting Brushes:
- Grab: Moves parts of your mesh.
- Clay Strips: Adds volume to your mesh.
- Smooth: Smooths out the surface of your mesh.
- Crease: Creates sharp creases or valleys.
- Sculpting Techniques:
- Start with a basic shape and use various brushes to add details. Use the Grab brush to shape the form, add volume with Clay Strips, refine with the Crease brush, and smooth rough areas.
- Dynotopo:
- Dynamic Topology (Dynotopo) is a sculpting feature that adds geometry dynamically as you sculpt, allowing for high levels of detail where needed.
By mastering modifiers and sculpting, you can transform simple models into complex, detailed works of art. Practice these techniques to bring your 3D creations to life.

Materials and Texturing: Bringing Your Model to Life
Materials and texturing are essential steps in 3D modeling to bring your creations to life. This section will introduce you to the basics of applying materials and textures in Blender, transforming your models from simple shapes to visually compelling objects.
- Understanding Materials:
- Materials define the color, shininess, and transparency of your objects. In Blender, you use the Shader Editor to create and apply materials.
- Creating a New Material:
- Select your object, go to the Material Properties panel, and click the \"New\" button to create a new material. Here, you can adjust properties like base color, specular, and roughness.
- Applying Textures:
- Textures are images or procedural patterns that add detail to your materials. They can simulate real-world surfaces like wood, metal, or fabric.
- Add a texture by going to the Shader Editor, adding an Image Texture node, and linking it to the Base Color input of the shader.
- Use UV Mapping to wrap the texture around your model accurately.
- UV Unwrapping:
- UV Unwrapping is the process of projecting a 3D model onto a 2D plane for texturing. In Edit Mode, select all faces and press U to unwrap. Use the UV Editor to adjust the layout.
- Procedural Texturing:
- Unlike image textures, procedural textures are mathematically generated. They offer infinite resolution and can be highly customizable.
- Using Nodes for Advanced Materials:
- The Node Editor allows you to build complex material setups by connecting different nodes. Experiment with nodes like Noise, Voronoi, and Gradient for dynamic textures.
- Lighting and Rendering:
- To see the full effect of your materials and textures, proper lighting and rendering settings are crucial. Experiment with different light types and intensities to highlight the details of your textures.
By mastering materials and texturing, you can add realism and depth to your 3D models, making them more engaging and lifelike.
Lighting and Rendering: Showcasing Your Model
Lighting and rendering are crucial final steps in 3D modeling, transforming your work into a visually compelling presentation. This section will guide you through the basics of setting up lights and rendering your models in Blender to achieve professional-looking results.
- Understanding Lighting:
- Good lighting can make a model come to life. Blender offers several types of lights, including Point, Sun, Spot, and Area lights, each with its unique effects.
- Setting Up Lights:
- Experiment with placing different lights in your scene to highlight your model\"s best features. Use three-point lighting for a balanced look.
- Adjusting Light Properties:
- In the Light Properties panel, adjust the color, intensity, and other settings of each light to suit your scene.
- Introduction to Rendering:
- Rendering is the process of generating a final image from your 3D scene. Blender\"s render engines, like Eevee and Cycles, offer different advantages.
- Choosing a Render Engine:
- Eevee is faster and great for real-time preview, while Cycles provides more realistic results through ray tracing.
- Render Settings:
- Access render settings in the Properties panel. Adjust settings like resolution, sampling, and output format based on your needs.
- Performing the Render:
- Once satisfied with your setup, press F12 to render your image or Ctrl+F12 for an animation. Adjust render settings as needed for the best quality.
- Post-Processing:
- Use Blender\"s Compositor for post-processing effects like color correction, glare, or depth of field to enhance your final image.
With proper lighting and rendering, your 3D models will stand out, showcasing your skills and the beauty of your creations.

Animation Basics: Making Your Model Move
Animation is a thrilling aspect of 3D modeling, allowing you to bring your creations to life. This section covers the basics of animating your models in Blender, from simple movements to complex animations.
- Understanding Keyframes:
- Keyframes are the foundation of animation in Blender. They define the start and end points of any animation. Insert a keyframe by selecting an object, moving to a specific frame, and pressing I to choose the property to keyframe (like location, rotation, scale).
- Timeline and Dope Sheet:
- Use the Timeline to scrub through your animation and the Dope Sheet to manage keyframes and animation actions more precisely.
- Animating Simple Movements:
- Start with simple animations, like moving an object across the screen. Insert keyframes for its starting and ending positions and Blender will interpolate the frames in between.
- Using the Graph Editor:
- The Graph Editor allows you to fine-tune the interpolation of keyframes, adjusting the speed and timing of animations with bezier curves.
- Adding Rotation and Scaling:
- Animate rotation and scaling by setting keyframes for these properties, creating more dynamic and complex movements.
- Principles of Animation:
- Apply basic animation principles like anticipation, squash and stretch, and follow-through to make your animations more natural and lively.
- Armature and Rigging:
- For character animation, create an armature (skeleton) and use it to rig your model for more detailed and complex animations.
- Animating with Modifiers:
- Explore animation with modifiers such as Wave, Build, or Array to achieve unique effects without manually keyframing each movement.
- Rendering Animations:
- Render your animations by setting the output properties (file format, codec, resolution) and pressing Ctrl+F12 to output your animated sequence.
By following these steps, you\"ll gain a solid foundation in animating within Blender, ready to explore more complex animation techniques and bring your 3D models to vibrant life.
_HOOK_
Exporting Your Work for Sharing or Further Use
Once you have completed your 3D model or animation in Blender, you might want to share it with others or use it in other applications. This section will guide you through the process of exporting your work from Blender into various formats for different purposes.
- Choosing the Right Format:
- Depending on your needs, choose the appropriate export format. Common formats include FBX for game development, OBJ for compatibility with other 3D software, and STL for 3D printing.
- Preparing Your Model:
- Before exporting, ensure your model is clean and optimized. This includes applying all modifiers, fixing any non-manifold edges, and unwrapping UVs if necessary.
- Exporting from Blender:
- Go to File > Export and select your desired format. Each format has its own set of options, such as scale, axis orientation, and what data to include (e.g., textures, animations).
- Exporting Textures:
- If your project includes textures, make sure to pack them into your file or export them separately. For some formats, you may need to manually include texture files in your export.
- Checking the Exported File:
- After exporting, it\"s a good practice to import the file into Blender or another software to check if everything looks correct. This can help you catch any issues that might have occurred during the export process.
- Sharing Your Work:
- Once you\"re satisfied with the exported file, you can share it on platforms like Sketchfab, ArtStation, or use it in your portfolio. For animations, consider formats like MP4 or GIF for web use.
- Using Your Model in Other Applications:
- If you\"re exporting your model for use in games or other interactive applications, ensure the format you choose is compatible with your target platform. Test the model in the destination application to ensure it behaves as expected.
Exporting your work effectively is crucial for showcasing your skills and integrating your models into larger projects. By following these steps, you can ensure that your 3D creations are ready for the world to see or for further development in other tools.

READ MORE:
Next Steps: Advanced Techniques and Resources for Learning
After mastering the basics of Blender, it\"s time to elevate your skills with advanced techniques and explore more resources for continuous learning. This section will guide you through next steps to enhance your 3D modeling, texturing, lighting, and animation skills.
- Advanced Modeling Techniques:
- Explore complex modeling methods such as retopology for cleaner topology, sculpting for detailed characters, and hard surface modeling for mechanical objects.
- Texturing and Shading:
- Delve into advanced texturing techniques using Blender\"s node-based shader system. Learn to create realistic materials and use UV mapping for intricate textures.
- Lighting and Rendering:
- Experiment with advanced lighting setups and rendering techniques, including HDR lighting and using Cycles for photorealistic rendering.
- Animation and Rigging:
- Move beyond basic animation to complex character rigging and animation. Explore inverse kinematics, facial rigging, and advanced animation curves.
- Simulation and Effects:
- Use Blender\"s physics engine for simulations such as fluid dynamics, cloth simulation, and particle systems for creating realistic environmental effects.
- Scripting and Automation:
- Learn Python scripting in Blender to automate repetitive tasks, create custom tools, and develop plugins that can speed up your workflow.
- Community and Continuing Education:
- Join Blender communities online like Blender Artists, BlenderNation, and the Blender subreddit for support and inspiration.
- Follow advanced tutorials and courses on platforms like Blender Cloud, CGCookie, and Udemy for structured learning paths.
- Participate in challenges and contests to practice your skills and get feedback from the Blender community.
By advancing your skills and engaging with the Blender community, you\"ll continue to grow as a 3D artist. Keep exploring, learning, and creating!
Embarking on your Blender 3D modeling journey opens a world of creativity and technical skill. Continue to explore, experiment, and expand your abilities, and you\"ll unlock endless possibilities in the realm of digital art and design.