Topic autocad drawing mechanical: Discover the secrets of AutoCAD drawing mechanical, a cornerstone for engineers and designers seeking to elevate their technical drawing skills to new heights.
Table of Content
- How to access the Mechanical Layer Manager in AutoCAD?
- Understanding AutoCAD Mechanical Toolset
- Setting Up Your Drawing Environment
- Basic Drawing Commands for Mechanical Design
- Advanced Techniques in Mechanical Drawing
- Creating and Assembling Mechanical Parts
- Utilizing AutoCAD Libraries for Mechanical Components
- YOUTUBE: AutoCAD 3D Practice Mechanical Drawing using Box and Cylinder Command | AutoCAD 3D Modeling Mechanical
- Best Practices for Mechanical Engineering Drawings
- Customizing AutoCAD for Mechanical Design Efficiency
- Troubleshooting Common Mechanical Drawing Challenges
- Resources for Learning and Mastering AutoCAD Mechanical
How to access the Mechanical Layer Manager in AutoCAD?
To access the Mechanical Layer Manager in AutoCAD, you can follow these steps:
- On the Ribbon, locate and click on the \"Mechanical Layer Manager\" button. This button is usually found in the \"Home\" or \"Mechanical\" tab.
- If you prefer using the command line, you can also type \"AMLAYER\" and press Enter.
By either clicking on the button or typing the command, the Mechanical Layer Manager dialog box will appear. From here, you can manage and control the layers specific to AutoCAD Mechanical.
READ MORE:
Understanding AutoCAD Mechanical Toolset
The AutoCAD Mechanical toolset is an industry-specific toolkit designed to accelerate the mechanical design process. It includes a comprehensive library of parts, intelligent drafting tools, and features that automate common design tasks, thereby increasing productivity.
- Library of Parts: Access over 700,000 standard parts and features for your mechanical designs.
- Intelligent Drafting: Utilize tools that understand the mechanics of drawing, such as automatically creating hidden lines or correctly sizing standard features.
- Layer Management: Automatically organize your drawings with industry-standard layer conventions.
- Power Dimensioning: Simplify the creation of accurate mechanical dimensions with specialized tools.
- Standards Compliance: Ensure your designs meet industry standards with tools designed to apply ISO, ANSI, DIN, and JIS standards.
- Efficient BOM Management: Automatically generate and update bill of materials (BOM) lists for your assemblies.
- Document 3D Parts and Assemblies: Easily create 2D drawings from 3D models, ensuring accurate representation of parts and assemblies.
This toolset is specifically designed to streamline and enhance the workflow for mechanical engineers and designers, making it an essential component of the AutoCAD suite for those in the mechanical design field.
Setting Up Your Drawing Environment
Setting up your drawing environment in AutoCAD for mechanical designs involves several key steps to ensure efficiency and accuracy in your work. Follow these guidelines to create an optimized workspace tailored to mechanical engineering.
- Choose the Right Template: Start by selecting a template that aligns with your project requirements. AutoCAD Mechanical provides templates with predefined settings for various standards.
- Set Drawing Units: Configure your drawing units (mm, cm, inch) based on the specifications of your mechanical project.
- Adjust Grid and Snap Settings: Tailor the grid and snap settings to match the precision level needed for your mechanical drawings.
- Customize Layers: Organize your drawing by setting up layers for different components of your mechanical design, adhering to industry standards.
- Configure Dimension Styles: Set up dimension styles that reflect the accuracy and details required in mechanical engineering drawings.
- Import Standard Parts and Features: Utilize the comprehensive library of standard parts and features available in AutoCAD Mechanical to streamline your design process.
- Save Workspace: Once you have tailored your environment, save your workspace for future use to maintain consistency across your mechanical drawings.
By carefully setting up your drawing environment, you can significantly enhance your productivity and ensure that your mechanical designs are precise, standardized, and ready for engineering use.

Basic Drawing Commands for Mechanical Design
Mastering basic drawing commands in AutoCAD is crucial for creating precise mechanical designs. These commands allow you to draw, modify, and manage your designs efficiently.
- LINE: Draws straight lines between two points. Essential for creating the outlines of mechanical parts.
- CIRCLE: Creates a circle based on a center point and radius. Used for representing round mechanical components.
- ARC: Draws an arc segment based on three points: the start, center, and end points. Useful for curved machine parts.
- RECTANGLE: Generates a rectangle from two diagonal corners. Frequently used for the base of mechanical assemblies.
- POLYLINE: Creates a series of connected lines and arcs, allowing more complex shapes to be designed efficiently.
- TRIM: Removes parts of objects to intersect with other objects. This command is vital for refining the mechanical parts.
- EXTEND: Lengthens objects to meet the edges of other objects, essential for connecting different mechanical components.
- COPY: Duplicates objects at a specified distance and direction. Useful for creating multiple instances of parts.
- MIRROR: Creates a mirrored copy of selected objects. This is particularly useful for symmetrical mechanical designs.
- ROTATE: Rotates selected objects around a base point. Necessary for aligning parts in mechanical assemblies.
These commands form the foundation of mechanical design in AutoCAD, enabling designers to create detailed and accurate mechanical drawings.
Advanced Techniques in Mechanical Drawing
Expanding your AutoCAD skills with advanced techniques is crucial for creating complex mechanical drawings with precision and efficiency. Here are some advanced strategies to enhance your mechanical designs.
- 3D Modeling and Visualization: Transition from 2D drafting to 3D modeling to provide a more comprehensive view of mechanical components. Use visualization tools to create realistic renderings and animations of mechanical systems.
- Parametric Constraints: Apply parametric constraints to ensure that your design adheres to specific dimensions and relationships, allowing for easy modifications and updates.
- Sheet Metal Design: Utilize the specialized tools for sheet metal design to create accurate flat patterns, folds, and cuts, essential for manufacturing processes.
- Assembly Modeling: Learn to assemble parts in a virtual environment to check for fit, clearance, and function without the need for physical prototypes.
- Custom Blocks and Tool Palettes: Create custom blocks for frequently used components and organize them in tool palettes for quick access, streamlining your design process.
- Advanced Dimensioning and Annotations: Employ advanced dimensioning techniques and annotations to clearly communicate complex mechanical details and specifications.
- Data Linking and Extraction: Link your drawings to external data sources and extract important information directly from your designs to create parts lists, BOMs, and more.
- Use of APIs for Customization: Automate repetitive tasks and customize your AutoCAD environment using APIs to increase productivity and reduce errors.
- Collaboration and Cloud Sharing: Leverage cloud-based collaboration tools to share and review designs with team members and stakeholders in real time, regardless of location.
By mastering these advanced techniques, mechanical engineers and designers can significantly improve the quality and efficiency of their drawings, leading to better designs and faster project completion.

_HOOK_
Creating and Assembling Mechanical Parts
Creating and assembling mechanical parts in AutoCAD involves a systematic approach to design that integrates individual components into complex assemblies. This process requires a detailed understanding of both the software tools and the mechanical design principles.
- Designing Individual Parts: Begin by using basic and advanced drawing commands to design the individual mechanical parts. Pay attention to dimensions, tolerances, and material specifications to ensure accuracy.
- Applying Materials: Assign materials to each part to accurately represent weight, surface properties, and other physical characteristics important for simulations and rendering.
- Assembling Components: Use the assembly environment in AutoCAD to combine individual parts into a single assembly. This involves positioning parts in relation to each other and using constraints to simulate realistic mechanical interactions.
- Checking for Interferences: Perform interference checks to ensure that parts do not improperly intersect and that there is adequate clearance for movement where necessary.
- Creating Subassemblies: For complex designs, create subassemblies first. This breaks down the overall assembly process into more manageable sections.
- Utilizing Assembly Constraints: Apply constraints to define how parts fit and move together. Common constraints include mate, flush, angle, tangent, and insert, which help in simulating the real-world operation of the assembly.
- Generating Exploded Views: Create exploded views of your assembly to illustrate how parts fit together, which is especially useful for assembly instructions and documentation.
By following these steps, you can effectively design and assemble mechanical parts in AutoCAD, creating detailed, accurate, and functional mechanical systems.

Utilizing AutoCAD Libraries for Mechanical Components
AutoCAD\"s extensive libraries for mechanical components are invaluable resources for mechanical engineers and designers. These libraries offer a wide range of standard parts and features that can dramatically speed up the design process. Here’s how to make the most of them:
- Accessing the Libraries: Navigate to the Content tab in the ribbon and select the Library panel to access Content Libraries. Here, you’ll find over half a million pre-drawn standard parts and features.
- Searching for Components: Use the search function within the libraries to quickly find the parts you need. You can search by name, category, or standard to locate the exact component.
- Inserting Components: Once you’ve found the right part, insert it directly into your drawing. These components come with predefined properties such as dimensions and materials, saving you time in design.
- Customizing Parts: While the libraries offer standard parts, you can also customize these parts or create your own libraries. This is particularly useful for specific components unique to your projects.
- Updating Libraries: Autodesk regularly updates these content libraries. Stay connected to Autodesk 360 to automatically receive the latest updates and ensure your library remains current.
- Creating Custom Content Libraries: For unique project needs, AutoCAD allows you to create and store custom content libraries. This feature is ideal for managing and reusing custom parts across different projects.
Leveraging AutoCAD libraries for mechanical components not only enhances efficiency but also ensures that your designs are consistent with industry standards.
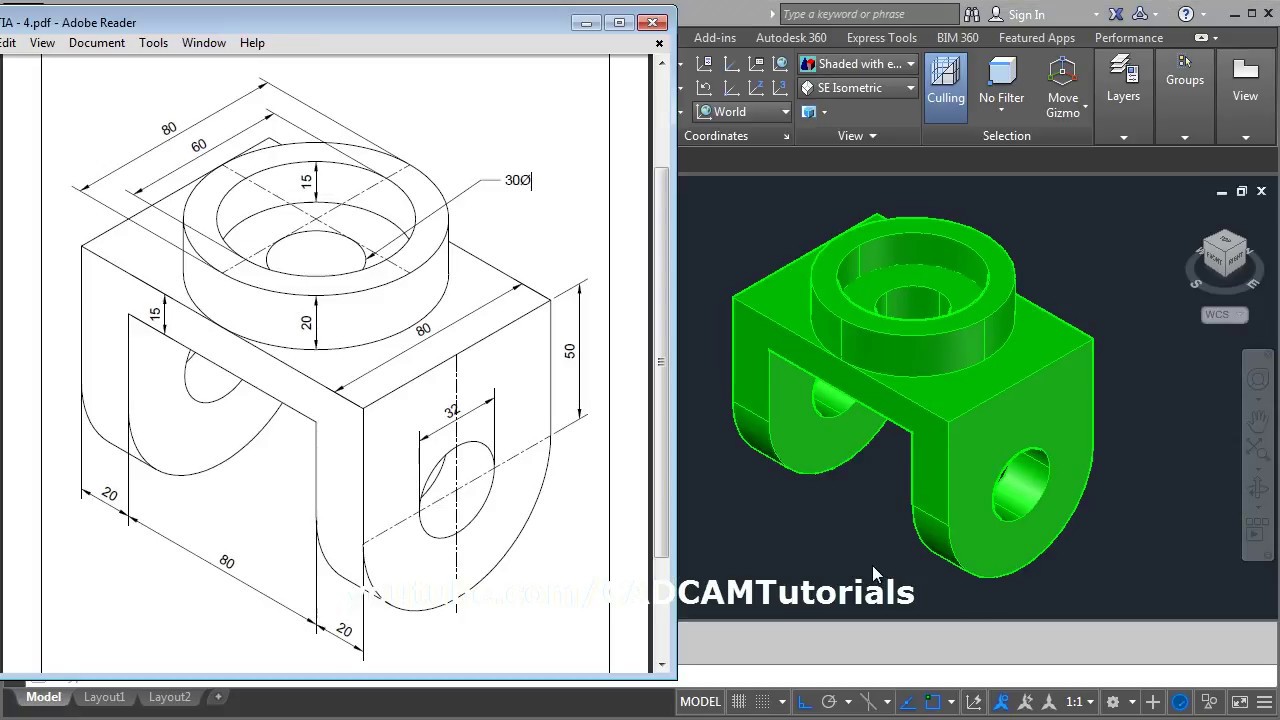
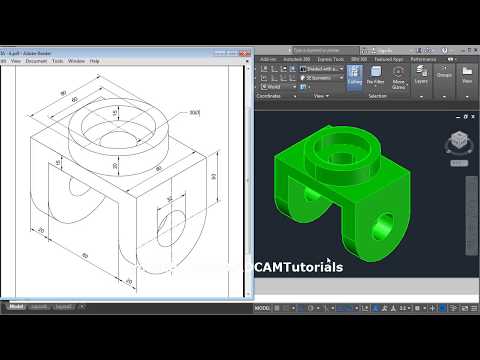
AutoCAD 3D Practice Mechanical Drawing using Box and Cylinder Command | AutoCAD 3D Modeling Mechanical
Discover the incredible world of AutoCAD 3D modeling and unleash your creativity! Watch this mesmerizing video tutorial to learn how to transform your designs into stunning three-dimensional masterpieces.
Wrench in AutoCAD Practice Drawing (6)
Calling all DIY enthusiasts and handy-folk! This captivating video showcases the power of a humble wrench and takes you on a journey of its many uses. Get ready to be inspired and learn some impressive wrench hacks!
Best Practices for Mechanical Engineering Drawings
Adhering to best practices in mechanical engineering drawings is crucial for the clarity, accuracy, and effectiveness of your designs. These practices ensure that drawings convey all necessary information to all stakeholders involved in the design, manufacturing, and inspection processes.
- Follow Industry Standards: Use recognized industry standards such as ANSI, ISO, DIN, or JIS for dimensioning, tolerancing, and symbols to ensure your drawings are universally understood.
- Be Clear and Concise: Ensure that every element of your drawing serves a purpose and contributes to the overall understanding of the part or assembly. Avoid cluttering the drawing with unnecessary details.
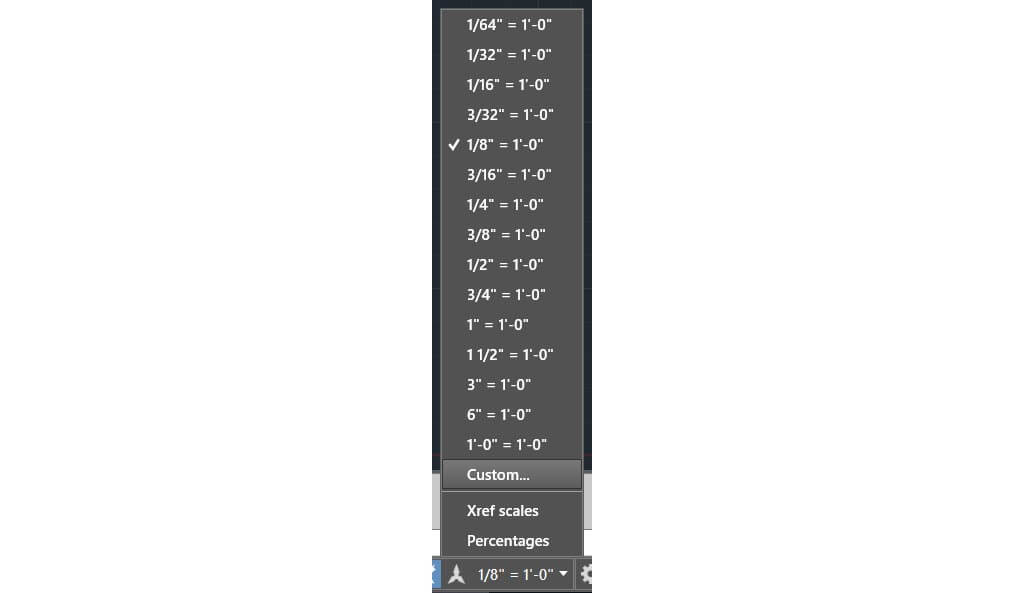
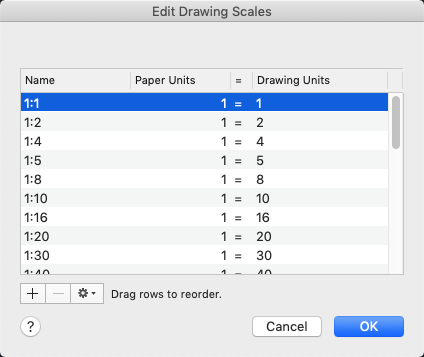
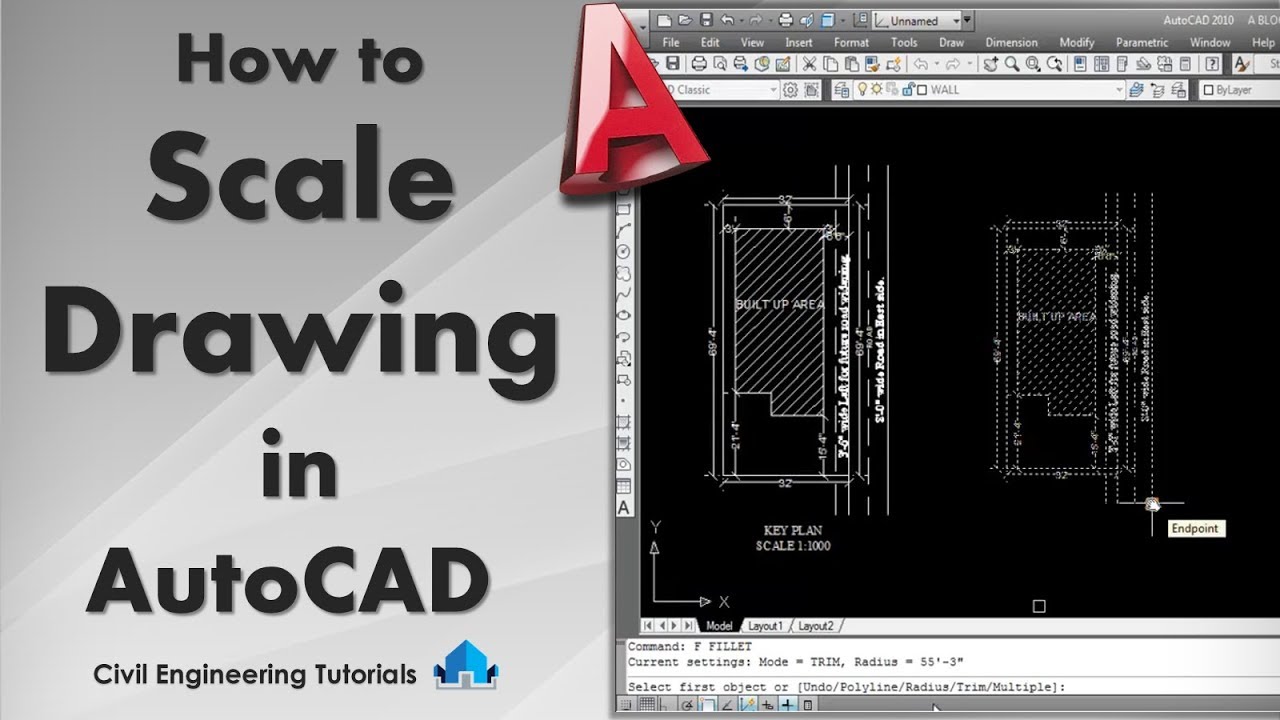
- Use the Correct Scale: Choose scales that clearly represent all details of the part or assembly without misinterpretation. Indicate the scale used in the drawing.
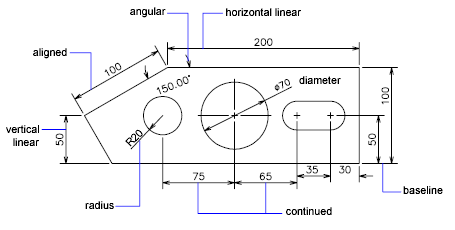
- Dimensioning and Tolerancing: Apply dimensions and tolerances precisely to communicate the size and allowable variation in each feature. Use geometric dimensioning and tolerancing (GD&T) where appropriate to specify the geometry precisely.
- Layer Management: Utilize layers to organize different types of information, such as dimensions, text, and critical features, making the drawing easier to read and modify.
- Annotations and Notes: Include clear annotations and notes to provide additional context that cannot be conveyed through graphics alone, such as material specifications or surface finishes.
- Check and Double-Check: Review drawings for accuracy and completeness. Peer reviews can help catch errors that the original designer may overlook.
- Version Control: Maintain a system for version control to track revisions and ensure that all team members are working from the most current design.
By implementing these best practices, mechanical engineers and drafters can create detailed and accurate engineering drawings that effectively communicate the required information for manufacturing and inspection.

Customizing AutoCAD for Mechanical Design Efficiency
Customizing AutoCAD to fit the specific needs of mechanical design can significantly enhance productivity and efficiency. By tailoring the software to the unique demands of mechanical engineering, designers can streamline workflows, reduce errors, and save time. Here are key steps and tips for customizing AutoCAD:
- Tool Palettes Customization: Organize and customize tool palettes with frequently used commands, blocks, and tools. This ensures quick access and reduces design time.
- Command Aliases: Create custom command aliases for common tasks to speed up execution. This can be done through the AutoCAD Alias Editor.
- Template Creation: Develop templates with predefined settings such as drawing scales, layer names, and styles. This helps maintain consistency across projects.
- LISP Routines: Utilize AutoLISP programming to automate repetitive tasks, such as generating parts lists or standard component placement.
- Dynamic Blocks: Create dynamic blocks for standard components, allowing for easy adjustments without the need to redraw the part.
- Layer Management: Implement a consistent layer management system to organize and simplify the visibility of different elements within a project.
- Custom Menus and Ribbons: Modify the user interface by creating custom menus and ribbons tailored to your workflow, placing essential tools at your fingertips.
- Use of APIs for Advanced Customization: For deeper customization, use AutoCAD\"s APIs to develop custom applications and plugins that fit your specific needs.
- Training and Resources: Invest time in training to fully understand the customization capabilities of AutoCAD. Autodesk and third-party sites offer tutorials and courses.
By customizing AutoCAD for mechanical design, engineers and designers can leverage the software\"s full potential to create precise, efficient, and high-quality mechanical drawings and models.

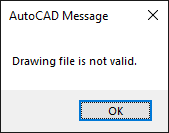
Troubleshooting Common Mechanical Drawing Challenges
Even the most experienced mechanical designers can encounter challenges with AutoCAD drawings. Addressing these issues promptly ensures the smooth progress of your project. Here are strategies to troubleshoot common mechanical drawing challenges:
- Issue with Opening Files: If you encounter problems opening drawings, try using the RECOVER command to repair corrupted files. Ensure your software is updated to the latest version to avoid compatibility issues.
- Slow Performance: Large files or complex drawings can slow down AutoCAD. Use the PURGE command to remove unused elements and LAYER FILTERS to manage layers efficiently. Consider upgrading your hardware for better performance.
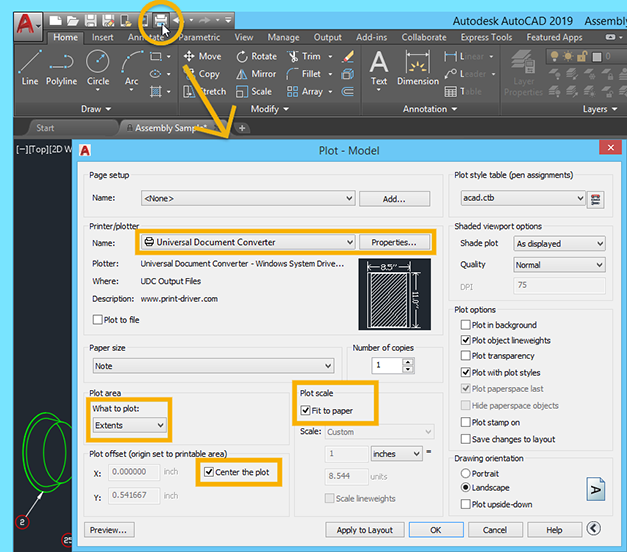
- Printing and Plotting Issues: Check your printer settings and update drivers. Use the PLOTTERMANAGER command to ensure your plotter configuration files are set up correctly.
- Problems with Scaling or Units: Verify that your drawing’s units are set correctly under the UNITS command and consistently apply the correct scale for model space and layout space.
- Difficulty in Managing Layers: Use the LAYER command to organize your drawing. Applying consistent naming conventions and color codes can simplify layer management.
- Issues with Dimensions and Text: Ensure DIMSTYLE settings are correct for your project requirements. Adjust text styles with the STYLE command for clarity and consistency.
- Challenges with Blocks and Dynamic Blocks: If blocks do not behave as expected, check block definitions and attribute settings. Use the BLOCKEDITOR to modify dynamic blocks.
- Error Messages and Crashes: Regularly save your work and use AUDIT and RECOVER commands to check and fix drawing errors. If AutoCAD crashes frequently, consider resetting the software to default settings or reinstalling.
By applying these troubleshooting tips, you can resolve common issues encountered in mechanical drawing projects, maintaining productivity and ensuring the accuracy of your designs.
_HOOK_
READ MORE:
Resources for Learning and Mastering AutoCAD Mechanical
Enhancing your AutoCAD Mechanical skills is essential for both beginners and seasoned professionals in mechanical design. Here are curated resources to aid in learning and mastering AutoCAD Mechanical:
- AutoCAD Tutorials and Guides: Start with Autodesk\"s own tutorials and user guides for an in-depth understanding of AutoCAD Mechanical\"s features and best practices.
- Online Courses: Platforms like Coursera, Udemy, and LinkedIn Learning offer comprehensive courses ranging from beginner to advanced levels, including AutoCAD Mechanical specifics.
- YouTube Channels: Channels such as CAD CAM Tutorials provide step-by-step video guides on various aspects of AutoCAD Mechanical, from basic operations to advanced techniques.
- Books and eBooks: Publications like \"Mastering AutoCAD 2021 and AutoCAD LT 2021\" offer detailed insights into the software, including mechanical design applications.
- Community Forums: Engage with the AutoCAD community on forums like Autodesk Community or CADTutor for tips, advice, and solutions to specific challenges.
- Workshops and Webinars: Participate in workshops and webinars hosted by Autodesk and other educational institutions for live demonstrations and Q&A sessions.
- Authorized Training Centers: Autodesk Authorized Training Centers offer professional courses and certification programs to validate your skills.
Combining these resources will provide a comprehensive learning path, from basic drafting techniques to advanced mechanical design in AutoCAD.
Embracing AutoCAD Mechanical equips you with the tools and techniques to excel in mechanical design. Begin your journey to mastery today and unlock the full potential of your engineering creativity and precision.