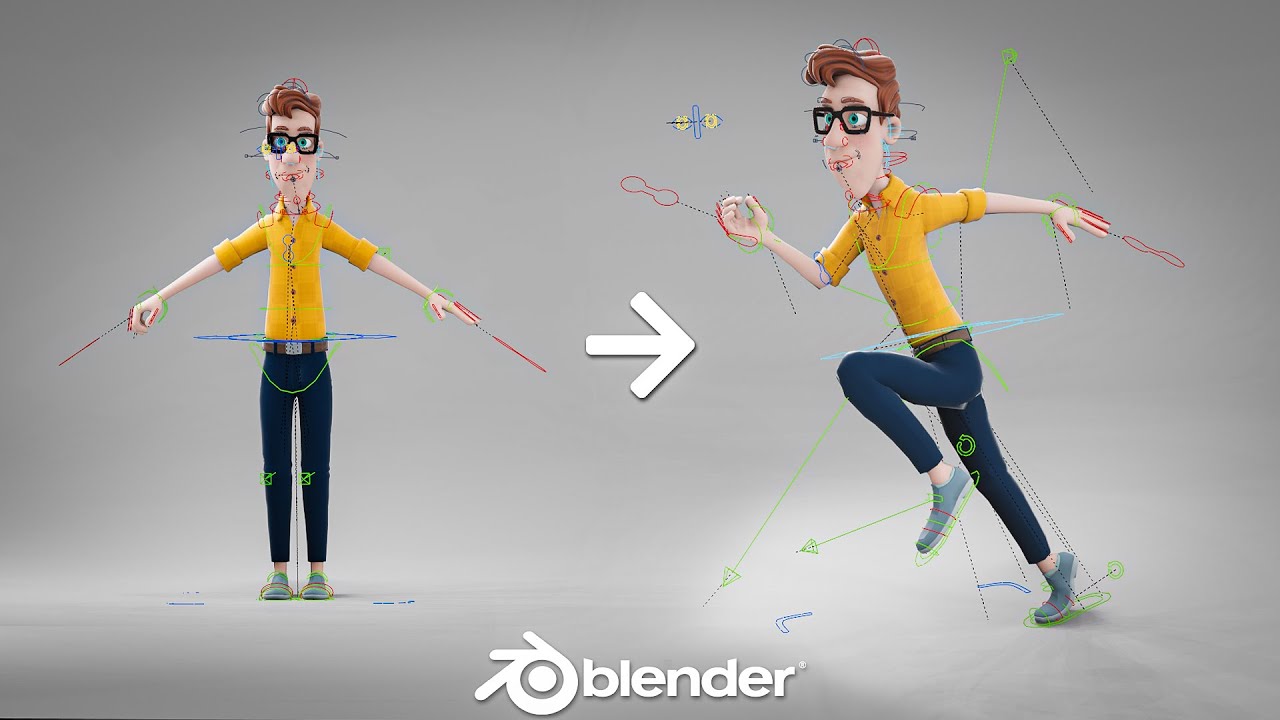
Topic how to animate a character in blender: Embark on an exciting journey to bring your characters to life with Blender. This comprehensive guide offers step-by-step instructions to master character animation, making it accessible for beginners and a joy to learn.
Table of Content
- How to animate a character in Blender?
- Understanding Blender\"s Interface and Setup for Animation
- Creating Your Character Model or Importing Pre-made Models
- Rigging Your Character: Basics of Armatures and Bones
- Weight Painting for Effective Deformation
- Introduction to Keyframe Animation and the Timeline
- Animating with Auto-Rig Pro for Quick Results
- YOUTUBE: Become a PRO at Animation in 25 Minutes with Blender Tutorial
- Creating Walk Cycles and Simple Animations
- Using Inverse Kinematics for Realistic Movements
- Facial Animation and Lip Sync Techniques
- Adding Constraints for More Complex Animations
- Non-Linear Animation (NLA) for Reusable Actions
- Rendering Your Animation: Output Settings and Optimization
How to animate a character in Blender?
To animate a character in Blender, you can follow these step-by-step instructions:
- Create or import your character model in Blender.
- Add an Armature to your character. This will be the skeleton that you\'ll use to animate your character.
- Select the character model, then shift-select the Armature and press Ctrl+P to parent the model to the Armature using automatic weights.
- Switch to Pose Mode by selecting the Armature and choosing it from the Mode dropdown menu in the viewport.
- Adjust the Armature\'s bones to match the desired pose for the initial keyframe.
- Set a keyframe for the initial pose by selecting the Armature, right-clicking on a bone, and choosing \"Insert Keyframe\". Select \"LocRotScale\" to save the position, rotation, and scale of the bones.
- Move to the next frame on the timeline and adjust the bones to create the next pose.
- Continue creating poses and setting keyframes for each frame to animate your character.
- Use the Graph Editor or Dope Sheet to refine and tweak your animation by adjusting keyframes, adding easing, or creating animation curves.
- Preview and render your animation to see the final result. You can play the animation directly in Blender by pressing Alt+A in the viewport.
By following these steps, you should be able to animate a character in Blender. Remember to practice and experiment with different poses and techniques to create engaging and lifelike animations.
READ MORE:
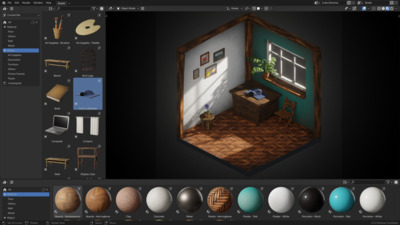
Understanding Blender\"s Interface and Setup for Animation
Blender\"s interface might seem daunting at first, but it\"s designed to streamline your animation workflow. Familiarizing yourself with its layout and tools is the first step to bringing your characters to life. Here\"s how to get started:
- Navigate the Interface: Blender\"s default layout includes 3D viewport, timeline, outliner, and properties editor. Spend time navigating through these areas to understand where everything is located.
- Customize Your Workspace: Blender allows you to customize the workspace to suit your animation needs. Use the \"Layout\" dropdown to switch to \"Animation\" layout for a setup more conducive to character animation.
- Importing Your Character: If you have a pre-made character model, import it using the File > Import option. Blender supports various file formats, including FBX and OBJ.
- Setting Up the Scene: Before animating, ensure your scene is set up correctly. This includes setting the frame rate (typically 24 fps for film) in the Dimensions section of the Render properties tab.
- Add a Camera and Lights: Use the \"Shift+A\" shortcut to add a camera and lighting to your scene. Position the camera to capture the desired angle of your animation.
Once you\"re comfortable with Blender\"s interface and have your scene set up, you\"re ready to start the exciting process of rigging and animating your character.

Creating Your Character Model or Importing Pre-made Models
Creating a character in Blender is an art that combines creativity with technical skills. Whether you\"re sculpting a character from scratch or importing a pre-made model, both approaches can lead to stunning animations. Here\"s how to get started:
- Modeling Your Character:
- Start with a simple shape, such as a cube, and use the sculpting tools to mold it into the basic form of your character.
- Refine your model by adding details like facial features, clothing, and accessories using the edit mode.
- Ensure your model is animation-ready by checking for proper topology and avoiding overly complex geometry.
- Importing Pre-made Models:
- Find a model that suits your project\"s needs from online repositories or marketplaces.
- Import the model into Blender using File > Import. Blender supports various formats, including FBX, OBJ, and DAE.
- Inspect the model for any required adjustments, such as scaling, rotation, or texture application.
- Preparing for Rigging:
- Once your character model is in Blender, prepare it for rigging. This involves ensuring the model\"s mesh is clean, and all normals are facing the correct direction. Use the mesh cleanup tools if necessary.
Whether you\"re crafting a character from your imagination or utilizing a pre-made model, the key is to prepare a solid base for animation. This ensures your character can be rigged and animated effectively, bringing your vision to life.
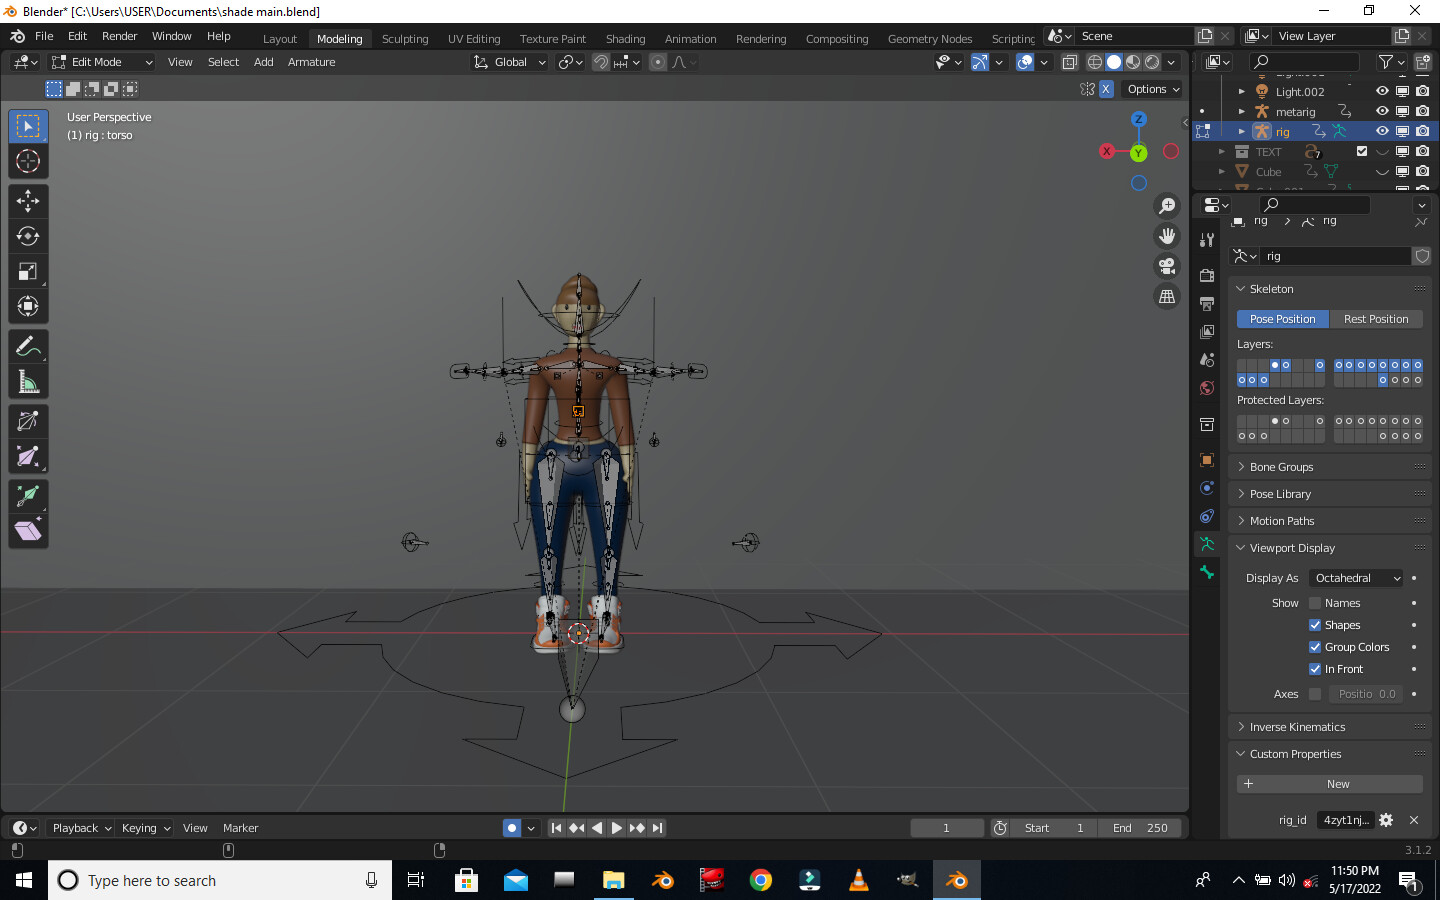
Rigging Your Character: Basics of Armatures and Bones
Rigging is a crucial step in character animation, allowing you to control your character\"s movements. Understanding the basics of armatures and bones is essential for effective animation in Blender. Follow these steps to rig your character:
- Adding an Armature: Start by adding an armature object to your scene with \"Shift+A\" > Armature > Single Bone. This bone will serve as the foundation of your rig.
- Editing Bones: Enter edit mode (\"Tab\") to adjust the bone size and duplicate (\"Shift+D\") to create new bones for different parts of the character, such as limbs, spine, and head.
- Naming Bones: Properly name each bone according to its function (e.g., \"Arm.L\", \"Leg.R\") to keep your rig organized and make the animation process smoother.
- Parenting Mesh to Armature: Select your character model, then shift-select the armature and press \"Ctrl+P\" to parent the mesh to the armature. Choose \"With Automatic Weights\" for Blender to automatically assign weights to the bones.
- Adjusting Weight Paint: In weight paint mode, you can adjust how much influence each bone has on different parts of the mesh. This step is crucial for realistic movements.
- Testing the Rig: Switch to pose mode and move the bones to test the rigging. Make adjustments as necessary to ensure natural movement.
Rigging your character properly is fundamental for bringing your animations to life. By following these steps, you can create a flexible and efficient rig that responds intuitively to your animations.
Weight Painting for Effective Deformation
Weight painting is a critical process in character rigging that defines how the mesh deforms in response to bone movements. Effective weight painting ensures your character moves naturally. Here\"s how to master weight painting in Blender:
- Select Your Character: In Object Mode, select your rigged character model.
- Enter Weight Paint Mode: With the character selected, switch to Weight Paint mode from the mode menu in the 3D viewport.
- Understanding Weights: Weights are represented by colors, from blue (no influence) to red (full influence). Your goal is to assign the right amount of influence each bone has over the mesh.
- Selecting Bones for Painting: Select a bone in Pose Mode or from the Vertex Groups in the Object Data properties to see its current weight distribution on the mesh.
- Adjusting Weights: Use the brush tools to paint weights on the mesh. You can increase (add influence) or decrease (reduce influence) the weight by painting over the mesh.
- Smoothing Weights: Use the Smooth brush to even out harsh transitions between weight zones for more natural deformation.
- Testing Deformations: Regularly switch back to Pose Mode to test how the mesh deforms with the current weights. Adjust as necessary for realistic movement.
- Use Auto Normalize: Enable the Auto Normalize option in the tool settings to automatically adjust weights so that the total influence for each vertex equals 1. This helps prevent unexpected deformations.
Effective weight painting is essential for achieving realistic animations. By carefully adjusting the influence of bones on your character\"s mesh, you can ensure smooth and natural movements that bring your character to life.
_HOOK_
Introduction to Keyframe Animation and the Timeline
Keyframe animation is a fundamental technique in Blender that allows animators to create movement by defining start and end points for an object\"s position, rotation, and scale. The timeline is where you manage these keyframes to create animation sequences. Here\"s a beginner\"s guide to using keyframes and the timeline in Blender:
- Understanding the Timeline: The timeline at the bottom of the Blender interface shows your animation\"s frame numbers. You can play, pause, and navigate through your animation here.
- Setting Your First Keyframe: Move your character or object to the desired starting position. With the object selected, press \"I\" to insert a keyframe. Choose the attribute you want to keyframe, such as Location, Rotation, or Scale.
- Creating Movement: Move the playhead on the timeline to a different frame. Move, rotate, or scale your object to its new position and insert another keyframe.
- Previewing Your Animation: Use the playback controls in the timeline to play back your animation. Adjust the start and end frame markers to loop a specific section.
- Editing Keyframes: Keyframes appear as diamonds on the timeline. You can select and move them to adjust the timing of your animation.
- Interpolation: Blender automatically creates smooth transitions between keyframes using interpolation. You can adjust the type of interpolation in the Graph Editor for more control over the motion.
- Adding More Complexity: As you become more comfortable with basic keyframe animation, start experimenting with more complex sequences by adding keyframes for different properties and using the Dope Sheet and Graph Editor for advanced timeline management.
Keyframe animation and understanding the timeline are essential skills for creating dynamic and engaging animations in Blender. By mastering these basics, you\"ll be well on your way to animating your characters and objects with precision and creativity.

Animating with Auto-Rig Pro for Quick Results
Auto-Rig Pro is a powerful Blender addon that simplifies the rigging and animation process, making it accessible for artists of all skill levels to create detailed and dynamic character animations quickly. Here\"s how to use Auto-Rig Pro for efficient character animation:
- Installing Auto-Rig Pro: Purchase and download Auto-Rig Pro from the Blender Market. Install it via Blender\"s Preferences under the Add-ons section by clicking \"Install\" and selecting the downloaded file.
- Preparing Your Character Model: Ensure your character model is ready for rigging. This means it should be fully modeled, textured, and with a clean topology.
- Quick Rigging with Auto-Rig Pro:
- Open the Auto-Rig Pro tab in the N-panel.
- Select your character mesh and click \"Smart Rig\" to automatically generate a rig tailored to your character.
- Adjust the generated rig as necessary to fit your character\"s unique proportions.
- Weight Painting Adjustments: Auto-Rig Pro does a good job with automatic weight painting, but you may need to make minor adjustments for optimal deformation.
- Animating Your Character: With the rig in place, you can now animate your character using the pose editor. Auto-Rig Pro provides additional tools for facial expressions and advanced movements.
- Using the Auto-Rig Pro Library: Take advantage of the Auto-Rig Pro\"s animation library for pre-made animations that can be easily applied and adjusted to fit your character.
- Exporting Animations: Auto-Rig Pro supports exporting animations to other software or game engines, making it a versatile tool for various projects.
By leveraging Auto-Rig Pro, animators can significantly reduce the time and effort required to rig and animate characters in Blender, allowing more focus on creativity and storytelling.

Become a PRO at Animation in 25 Minutes with Blender Tutorial
Get ready to be mesmerized by the magical world of character animation! Watch this captivating video as master animators breathe life into characters, creating incredible stories and emotions. From Disney classics to cutting-edge CGI, this video will leave you in awe of the power of animation!
Learn Blender Rigging and Animation in 1 Minute
Dive into the fascinating realm of rigging and animation with this incredible video! Witness how skilled artists manipulate digital skeleton structures to bring characters to life with fluidity and realism. Whether you\'re an aspiring animator or simply curious about the process, this video will showcase the creativity and technical skill behind this art form.
Creating Walk Cycles and Simple Animations
Walk cycles and simple animations are fundamental skills in character animation, bringing characters to life through movement. Creating these animations in Blender can be both rewarding and fun. Follow these steps to create your own walk cycles and simple animations:
- Understanding the Walk Cycle: A walk cycle typically consists of 8 key frames that depict the main phases of a step. These include the contact position, down position, passing position, and up position for each foot.
- Setting Up Keyframes: Start by posing your character in the first contact position and create a keyframe. Then, move to the next key position in the timeline and pose your character for the next step, adding a keyframe each time.
- Looping the Walk Cycle: Once you have the key poses set, use Blender\"s cycle feature in the Graph Editor to loop the animation, creating a continuous walk cycle.
- Refining the Animation: Adjust the timing and spacing of the keyframes in the timeline to smooth out the motion. Pay attention to the character\"s speed and make sure the movement looks natural.
- Adding Secondary Motion: Incorporate secondary movements such as arm swings, head bobs, and shoulder rotations to add realism and character to the walk cycle.
- Creating Simple Animations: Apply the same principles of keyframe animation to create simple actions like jumping, waving, or nodding. Start with key poses and refine the motion with in-between frames.
- Preview and Adjust: Regularly preview your animation by playing it back in the timeline. Adjust keyframes as needed to improve the fluidity and realism of the movement.
Creating walk cycles and simple animations is a great way to start animating characters in Blender. With practice, you can develop more complex animations that bring your characters to vivid life.

Using Inverse Kinematics for Realistic Movements
Inverse Kinematics (IK) is a technique in animation that allows for more natural and realistic movements by specifying the end point of a chain of bones. This is particularly useful for animating limbs. Here\"s how you can apply IK in Blender to enhance your character animations:
- Adding IK to a Bone Chain: Select the bone where you want the IK to end, usually a hand or foot bone. With the bone selected, go to the Bone Constraints tab and add an Inverse Kinematics constraint.
- Configuring the IK Chain: In the IK constraint settings, specify the chain length, which determines how many bones up the chain the IK effect will apply. For a leg or arm, this is typically around 2 or 3 bones.
- Creating a Target: IK requires a target to work effectively. Create an empty or a new bone to act as the target, and assign it in the Target field of the IK constraint. This will be what you move to control the IK chain.
- Setting Pole Targets: For additional control over the direction of the knee or elbow, add a pole target. Position this target so it guides the bending direction of the joint.
- Adjusting IK Properties: Fine-tune properties like influence, stiffness, and damping within the constraint to get the desired movement quality. These adjustments help in achieving more natural limb motions.
- Animating with IK: With IK setup, you can now animate the character by moving the target and pole target. This method often results in more intuitive and realistic animations, especially for walking or reaching movements.
- Combining FK and IK: For even greater flexibility, blend forward kinematics (FK) with IK in your rig. This allows for dynamic switching between IK for walking and FK for more nuanced, articulated motions.
Using Inverse Kinematics in Blender can significantly improve the realism and fluidity of your character animations, making it easier to create believable motion with less effort.

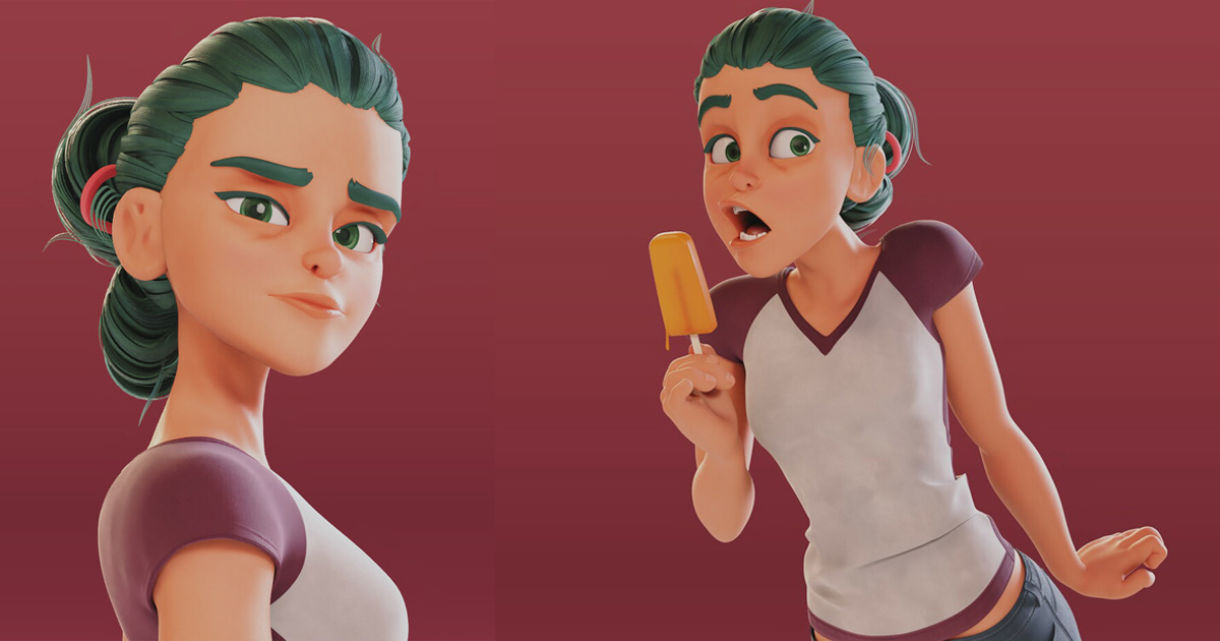
Facial Animation and Lip Sync Techniques
Facial animation and lip sync are essential for bringing characters to life and adding depth to their emotions and interactions. Blender offers powerful tools for creating detailed facial animations and syncing dialogue. Follow these steps to master facial animation and lip sync techniques:
- Creating Shape Keys: For facial animation, shape keys (also known as blend shapes) allow you to deform the mesh into different expressions. Create shape keys for common facial expressions like smiling, frowning, and blinking.
- Animating Shape Keys: Animate these expressions over time by adjusting the value sliders for each shape key in the timeline. This allows for smooth transitions between expressions.
- Setting Up Lip Sync: For lip sync, break down the dialogue into phonemes (distinct units of sound). Create shape keys for the mouth shapes corresponding to these phonemes.
- Synchronizing Dialogue: Use an audio clip of the dialogue as a reference in Blender. Animate the mouth shape keys to match the spoken words by aligning the phoneme shape keys with the audio waveform in the timeline.
- Using Add-ons for Lip Sync: Consider using Blender add-ons like Rhubarb Lip Sync, which automates the process of matching mouth shapes to dialogue, saving time and effort.
- Adding Eye and Eyebrow Movement: Don\"t forget to animate the eyes and eyebrows to match the facial expressions and dialogue. This adds life and realism to your character.
- Combining Techniques: Combine shape key animations with armature-driven facial rigging for more complex animations. This allows for detailed control over facial muscles and expressions.
- Practice and Reference: Use video references of real facial expressions and dialogue to guide your animation. Practice is key to mastering smooth and believable facial animations and lip sync.
Facial animation and lip sync are intricate processes that can significantly enhance your character\"s believability. By carefully shaping expressions and aligning them with dialogue, you can create compelling and emotionally resonant animations.
_HOOK_
Adding Constraints for More Complex Animations
Constraints in Blender are powerful tools that can control the behavior of objects and bones, making complex animations more manageable and realistic. Whether it\"s making an object follow another or simulating physics, constraints can significantly enhance your animation. Here\"s how to add and use constraints for complex animations:
- Understanding Constraints: Blender offers a wide range of constraints that can be applied to objects and bones, including Copy Location, Copy Rotation, Inverse Kinematics, and many more. Each serves a different purpose, from mimicking movements to restricting transformations.
- Applying Constraints: Select the object or bone you want to apply a constraint to, then go to the Properties panel, find the Constraints tab, and click \"Add Constraint\" to choose the type you need.
- Configuring Constraints: Each constraint has its own set of parameters that can be adjusted to control its effect. For instance, you can specify the target object for a Copy Location constraint or the influence level to blend the constraint with the object\"s original transformation.
- Using Targets: Many constraints require a target object or bone to function. This target acts as a reference point for the constraint, controlling the constrained object\"s behavior.
- Animating Constraints: Constraints can be animated over time by keyframing their properties, such as the influence, to create dynamic interactions between objects.
- Combining Constraints: For more complex animations, combine multiple constraints on a single object or bone. This allows for sophisticated motion control, such as a rigged character interacting with environmental objects.
- Constraint Stacks: The order of constraints in the stack matters. Blender evaluates them from top to bottom, so rearranging the order can change the animation outcome.
- Testing and Tweaking: Experiment with different constraints and settings. Adjusting the parameters and order of constraints can lead to more realistic and interesting animations.
By mastering the use of constraints, you can achieve more complex and realistic animations in Blender. Constraints allow for creative solutions to animation challenges, bringing your scenes to life with dynamic and interactive movements.

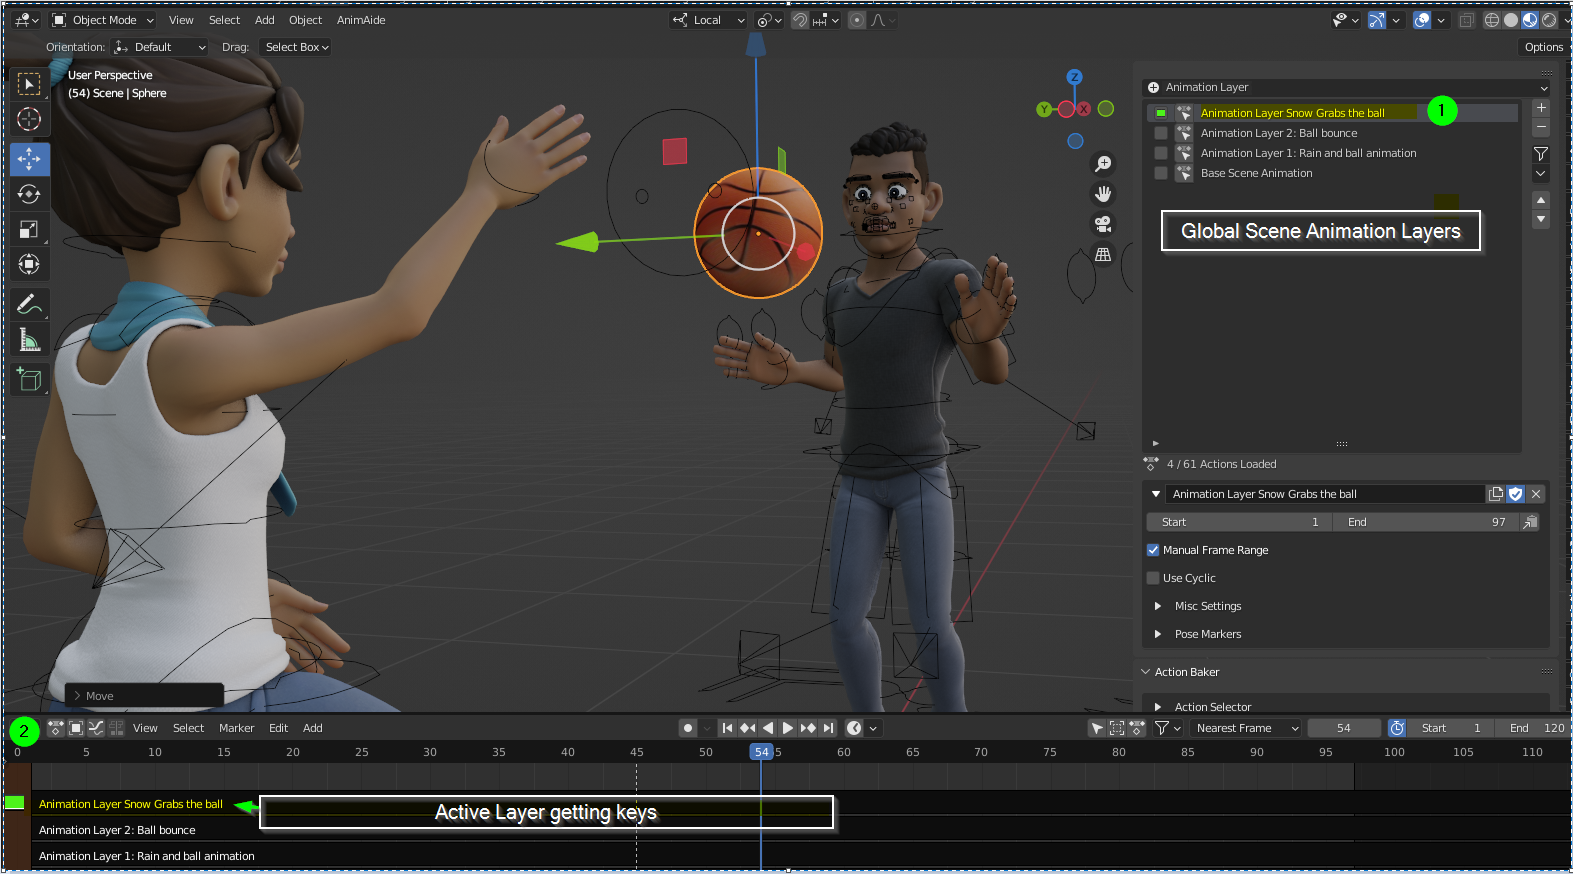
Non-Linear Animation (NLA) for Reusable Actions
Blender\"s Non-Linear Animation (NLA) editor is a powerful tool that allows animators to blend and layer different actions into a single animation sequence. This feature is especially useful for reusing animations and creating complex sequences efficiently. Here’s how to use the NLA editor for your projects:
- Understanding the NLA Editor: The NLA Editor lets you organize and manipulate animation actions in a non-linear fashion. Actions, such as walk cycles or gestures, can be layered, blended, and reused across different characters or scenes.
- Creating Actions: Before using the NLA Editor, create actions in the Action Editor. Each action should be a distinct set of movements, like a jump or a wave.
- Adding Actions to the NLA Editor: With an action selected, push it down to the NLA tracks using the \"Push Down Action\" button in the Action Editor. This converts the action into an NLA strip.
- Organizing Strips: In the NLA Editor, you can move, scale, and duplicate strips to organize your animation. Arrange them in tracks to control how they play back and interact.
- Blending Actions: Use the blending modes and influence sliders to blend between different actions. This can create smooth transitions and dynamic sequences.
- Adjusting Playback: Control the start time, end time, and repetition of actions by adjusting the properties of each NLA strip.
- Reusing Actions: The NLA Editor makes it easy to reuse actions across different characters or scenes. Simply link the action to a new character and adjust as necessary.
- Animating with Layers: Take advantage of the NLA Editor’s layering system to overlay actions, such as adding a waving motion on top of a walking cycle without altering the original actions.
The NLA Editor is a versatile tool for creating rich and complex animations in Blender. By efficiently reusing and blending actions, you can enhance your animation workflow and bring your characters to life with depth and variety.
READ MORE:
Rendering Your Animation: Output Settings and Optimization
Rendering transforms your animated scenes into final video files. Blender offers comprehensive settings for rendering animations, allowing for customization and optimization. Follow these steps to efficiently render your animations:
- Choosing the Right Renderer: Blender provides different rendering engines, such as Eevee and Cycles. Eevee is faster but less realistic, while Cycles offers photorealistic results at a higher computational cost.
- Setting the Resolution: In the Output properties, set your desired resolution. For HD video, 1920x1080 is standard. Lowering the resolution can speed up rendering times for test renders.
- Frame Rate: Ensure the frame rate matches your animation\"s intended playback speed. Common rates are 24, 30, or 60 frames per second (fps).
- Output Format: Choose your output format based on your needs. For final renders, use a high-quality format like AVI or MPEG. For test renders, a lower quality or even a series of PNG images might be sufficient.
- Sampling Settings for Cycles: If using Cycles, adjust the sampling rate to balance quality and rendering time. Higher samples increase quality but also render time.
- Optimizing Lighting and Shadows: Use light probes and shadow settings in Eevee for faster renders, or use denoising in Cycles to reduce noise in dark areas.
- Using View Layers and Compositing: For complex scenes, render in view layers and composite them together in Blender\"s Compositor. This can save time by not re-rendering the entire scene for minor changes.
- Rendering Animation: Once settings are optimized, go to Render > Render Animation or press Ctrl+F12 to start rendering your animation.
Rendering is the final step in the animation process, turning your creative work into a shareable format. By optimizing your output settings, you can achieve the best balance between quality and efficiency.
Embarking on your Blender animation journey opens a world of creative possibilities. With practice and patience, these techniques will elevate your storytelling, bringing your characters to vivid life. Start animating today and unleash your imagination!