Topic blender 3d tracking tutorial: Dive into the world of Blender 3D tracking with this comprehensive tutorial, designed to elevate your animations and VFX projects to new heights.
Table of Content
- What are the basics of 3D tracking in Blender?
- Understanding the Basics of Blender 3D Tracking
- Getting Started with Your First Tracking Project
- Step-by-Step Guide to Motion Tracking in Blender
- Advanced Techniques for Camera Solving and Object Tracking
- Integrating 3D Objects into Video Footage
- Tips for Improving Tracking Accuracy and Efficiency
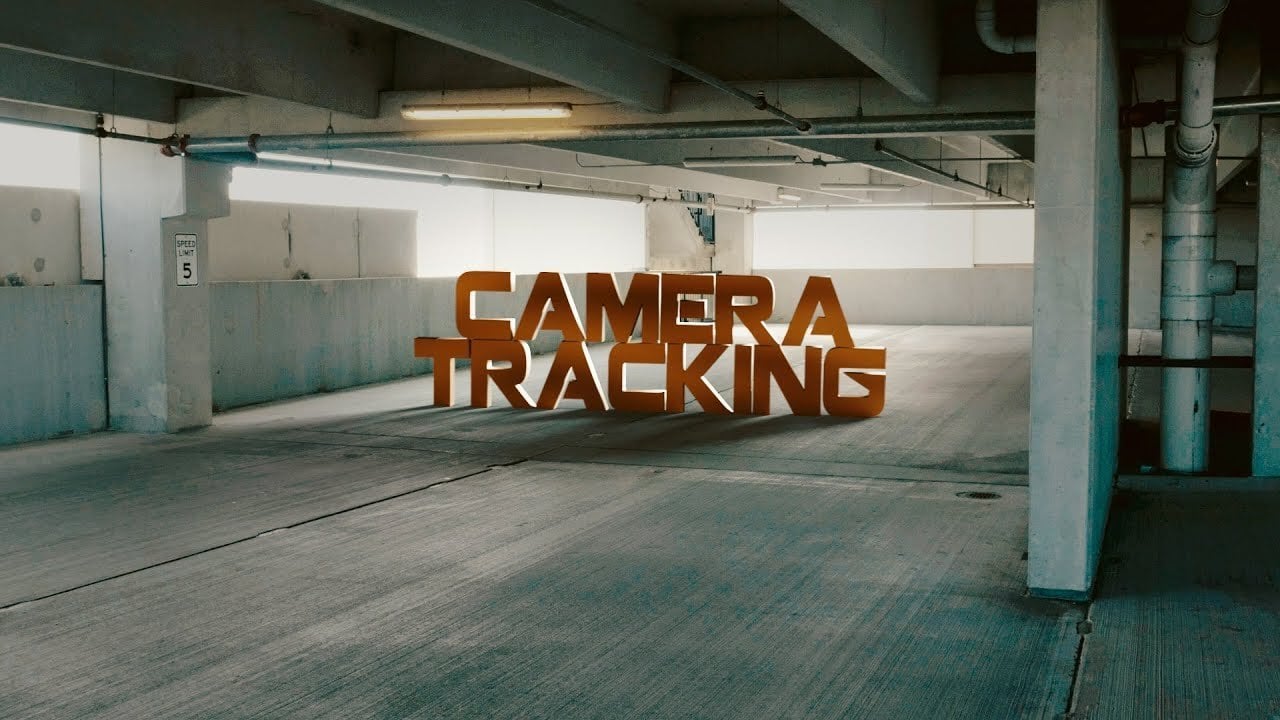
- YOUTUBE: Blender Motion Tracking Introduction - Add 3D elements to your Footage Tutorial
- Using Blender\"s Tracking Tools for VFX and Animation
- Common Tracking Problems and How to Solve Them
- Resources for Further Learning and Expert Advice
- Real-World Applications of Blender Tracking
What are the basics of 3D tracking in Blender?
Basics of 3D tracking in Blender:
- Open Blender and import your footage by going to \"File\" > \"Import\" > \"Movie Clip\".
- Select the footage in the \"Movie Clip Editor\" panel and enable \"Motion Tracking\" in the \"Track\" tab.
- Create a new tracking marker by clicking on \"Add\" and select the area in the footage to track.
- Track the marker by clicking on \"Track\" or pressing the \"T\" key. Blender will analyze the motion in the footage.
- Once the tracking is complete, you can refine the track by adjusting the tracking settings, like the tracker size or motion model.
- To create a 3D scene, go to the \"Scene\" tab and click on \"Set Up Tracking Scene\". This will create a new camera and settings based on the tracked footage.
- In the 3D viewport, you can add 3D objects by going to \"Add\" > \"Mesh\" or using other types of objects like lights or empty objects.
- For each object, you can set the tracking constraint by selecting the object, going to the \"Object Constraints\" tab, and choosing \"Track To\". This constraint will make the object follow the camera movement.
- Adjust the 3D objects in the scene to match the tracked footage. You can use the properties panel to modify the object\'s position, rotation, and scale.
- Preview the final result by playing the animation or scrubbing through the timeline.
READ MORE:
Understanding the Basics of Blender 3D Tracking
Blender\"s 3D tracking feature is a powerful tool for integrating 3D elements into real-world footage, enhancing animations, and creating visual effects. This section introduces the foundational concepts you need to start your journey in 3D tracking.
- What is 3D Tracking: A technique used to follow the movement of objects or the camera in a video, allowing for the addition of 3D elements that move realistically with the footage.
- Tracking Types: Blender offers two main types of tracking – Camera Tracking for moving the camera in a 3D scene to match the video, and Object Tracking for tracking specific objects within the scene.
- Setting Up Your Scene: Before tracking, ensure your video footage is imported into Blender and set up your scene with the correct settings for resolution and frame rate to match your footage.
- Markers and Tracking Points: Learn how to place and adjust markers on significant points in your footage that Blender can track across frames.
- Solving the Track: After placing markers, the next step is solving the track, where Blender calculates the camera\"s movement or the object\"s motion in 3D space.
- Refining the Track: Discover tips for refining the track to improve accuracy, including cleaning up tracking points and adjusting the solve error.
- Integrating 3D Elements: With a successful track, you can now integrate 3D models, animations, or other elements into your footage, positioning them to match the movement and perspective of the video.
Mastering these basics will prepare you for more advanced 3D tracking techniques, allowing you to create compelling and realistic visual effects in Blender.

Getting Started with Your First Tracking Project
Embarking on your first Blender 3D tracking project can seem daunting, but with the right steps, you\"ll soon be adding dynamic 3D elements to video footage with ease. Follow this guide to begin your tracking journey.
- Choose the Right Footage: Start with simple footage to make the tracking process easier. Look for videos with clear, distinct markers or features that can be easily tracked.
- Import Your Footage: In Blender, go to the Movie Clip Editor, and use the \"Open Clip\" button to import your video footage into Blender.
- Create a New Tracking Scene: Set up a new scene dedicated to tracking. This keeps your tracking work separate and organized.
- Adding Tracking Points: Analyze your footage and add tracking points to significant features in the video. Ensure these points have contrast and are visible throughout the clips.
- Starting the Tracking Process: With your points set, start the tracking process. Blender will follow these points across the frames, creating a motion path.
- Adjusting Tracking Settings: Adjust tracking settings like motion model and correlation to improve the accuracy of your track. These settings can be found in the tracking panel.
- Solving the Camera Movement: Once tracking points are followed correctly, solve the camera movement to understand how the camera was moving when the footage was taken.
- Review and Refine: Review the tracking and solving results. Refine your tracking points and solve again if necessary, aiming for a low solve error.
- Adding 3D Objects: With the track and solve completed, you can start adding 3D objects to your scene. Position them in 3D space to match the perspective and motion of the footage.
- Rendering Your Scene: Finally, render your scene. Ensure your 3D objects are integrated seamlessly into the footage, making adjustments as necessary for the most realistic look.
By following these steps, you\"ll gain confidence in your ability to execute 3D tracking projects in Blender, paving the way for more complex and creative endeavors.

Step-by-Step Guide to Motion Tracking in Blender
Motion tracking in Blender opens up a world of possibilities for merging CGI with live action footage. This step-by-step guide will walk you through the process to achieve professional results.
- Prepare Your Footage: Ensure your video is of high quality and stable for tracking. Use footage with minimal blur and clear points of interest for tracking.
- Import the Footage: Go to the Movie Clip Editor, click \"Open\" and select your video file. This will be your tracking workspace.
- Select Tracking Points: Scrub through your footage to find distinct, high-contrast areas to place your tracking markers. Avoid areas with motion blur or that move out of frame.
- Adding Markers: Press \"Add Marker\" and place markers on your selected points. Adjust the size of the markers to cover the entire feature you\"re tracking.
- Track Forward/Backward: Use the \"Track Forward\" tool to follow your markers through the footage. If a marker goes off track, stop, reposition it, and continue tracking.
- Check and Refine Tracks: Review each track for accuracy. Refine by adjusting marker positions where necessary and retrack sections as needed.
- Solve Camera Motion: With all markers tracked, solve the camera motion to reconstruct the camera\"s path and orientation during the shot.
- Setting Up the Scene: Once the camera is solved, set up your 3D scene. This includes adding a 3D camera that matches the solved camera\"s movements.
- Adding 3D Elements: Integrate 3D models or effects into your scene. Position them relative to the original footage, ensuring they move cohesively with the video.
- Composite and Render: Finally, composite your 3D elements with the original footage. Adjust lighting, shadows, and rendering settings to match the real-world scene.
Following these steps will help you create compelling motion-tracked scenes in Blender, blending the lines between reality and CGI.

Advanced Techniques for Camera Solving and Object Tracking
Enhance your Blender projects with advanced camera solving and object tracking techniques. These methods improve the realism and integration of 3D elements in live-action footage.
- Multi-Pass Tracking: Use multi-pass tracking to increase accuracy. First, track high-contrast markers through the entire footage. Then, add secondary tracks for areas with less detail or that are only partially visible.
- Manual Tracking for Difficult Shots: In cases where automatic tracking fails, manually adjust tracking markers frame by frame. This is time-consuming but ensures accuracy in complex sequences.
- Using Weighted Tracks: Assign weights to your tracking markers based on their reliability. Higher weights for stable, clear markers and lower weights for less reliable ones help improve the solve accuracy.
- Masking for Object Tracking: Utilize masking to isolate objects you\"re tracking. This is particularly useful when objects are obscured or overlap with other moving elements in the scene.
- Constraint-Based Tracking: Use Blender\"s constraint system to refine object tracking. For example, objects that should remain on the ground can be constrained to do so, improving realism.
- Integrating Match Move Techniques: For complex movements, match move techniques can be used to manually align 3D objects frame by frame, complementing the automated tracking data.
- Optimizing Solver Settings: Experiment with different solver settings, such as motion models and keyframe selection, to find the best solution for your specific footage.
- Triangulation for Object Placement: Use triangulation methods to accurately place 3D objects in the scene, based on multiple tracking points. This is especially useful for objects interacting closely with tracked elements.
- Using the Graph Editor for Refinement: Refine tracking and camera solves with Blender\"s Graph Editor. Adjusting the curves can smooth out any jitters or inaccuracies in the tracking data.
Mastering these advanced techniques will take your Blender tracking projects to a new level of professionalism, allowing for more complex and believable scenes.
_HOOK_
Integrating 3D Objects into Video Footage
Integrating 3D objects into video footage seamlessly combines the virtual and real worlds, creating compelling visual effects. Follow these steps to achieve realistic integration in Blender.
- Match Lighting and Shadows: Analyze the lighting in your footage. Use Blender’s lighting tools to mimic this lighting on your 3D objects. Pay special attention to the direction, color, and intensity of light sources.
- Adjust Material Properties: Make your 3D object\"s materials match the real-world environment. Adjust shaders, textures, and reflections to blend the object naturally into the footage.
- Camera Matching: Ensure the virtual camera in Blender matches the properties of the camera used to shoot your footage, including focal length, sensor size, and depth of field.
- Use Motion Tracking Data: Apply the motion tracking data to your 3D object to ensure it follows the correct path and orientation relative to the camera and scene movements.
- Shadow Catchers: Utilize shadow catchers to create realistic shadows cast by your 3D objects onto the video footage, enhancing the integration.
- Reflections and Refractions: If your scene requires, simulate reflections and refractions on your 3D objects that correspond with the real-world environment.
- Depth and Occlusion: For objects that interact closely with elements in the footage, use depth mapping and occlusion to ensure proper layering and interaction.
- Color Correction: After rendering, use color correction tools to fine-tune the appearance of your 3D objects, ensuring they match the video’s color palette and contrast levels.
- Rendering and Compositing: Render your scene with appropriate settings for quality and realism. Use Blender’s compositor to merge your 3D objects and the original footage, adjusting as necessary for a seamless blend.
By carefully following these steps, you can create visually stunning results that believably integrate 3D objects into your video footage, making them indistinguishable from the real environment.

Tips for Improving Tracking Accuracy and Efficiency
Enhancing the accuracy and efficiency of your tracking projects in Blender can significantly improve your workflow and the quality of your final output. Here are essential tips to achieve better results.
- Use High-Quality Footage: The clearer your footage, the easier it is to track. High resolution and minimal motion blur facilitate more accurate tracking.
- Select Distinct Tracking Points: Choose points with unique textures or contrasts. Avoid flat or repetitive patterns that can confuse the tracker.
- Optimize Tracker Settings: Experiment with different tracking settings such as motion models and correlation thresholds to find the best match for your footage.
- Incorporate Manual Adjustments: When automatic tracking fails, don’t hesitate to manually adjust the track. Frame-by-frame correction can significantly enhance accuracy.
- Leverage Masking: Use masks to exclude irrelevant or problematic areas from the tracking process, focusing the tracker on the most important parts of the footage.
- Maintain Consistent Lighting: Sudden changes in lighting can disrupt tracking. If possible, use footage with consistent lighting or manually adjust tracking points across changes.
- Utilize Tripod Tracks for Static Shots: For footage with a stationary camera, use tripod tracking mode. It simplifies the process by assuming the camera is not moving.
- Review and Clean Up Tracks: Regularly review your tracks for any drift or inaccuracies. Cleaning up bad tracks early can save time in the long run.
- Use Multiple Tracking Layers: Organize your tracking points in layers based on their importance or role. This can help manage complex scenes more efficiently.
- Stay Updated with Blender Versions: Newer versions of Blender often include improvements to tracking algorithms and features. Keeping up-to-date can make your tracking tasks easier and more efficient.
By implementing these tips, you can streamline your motion tracking process in Blender, leading to more precise and efficient outcomes.
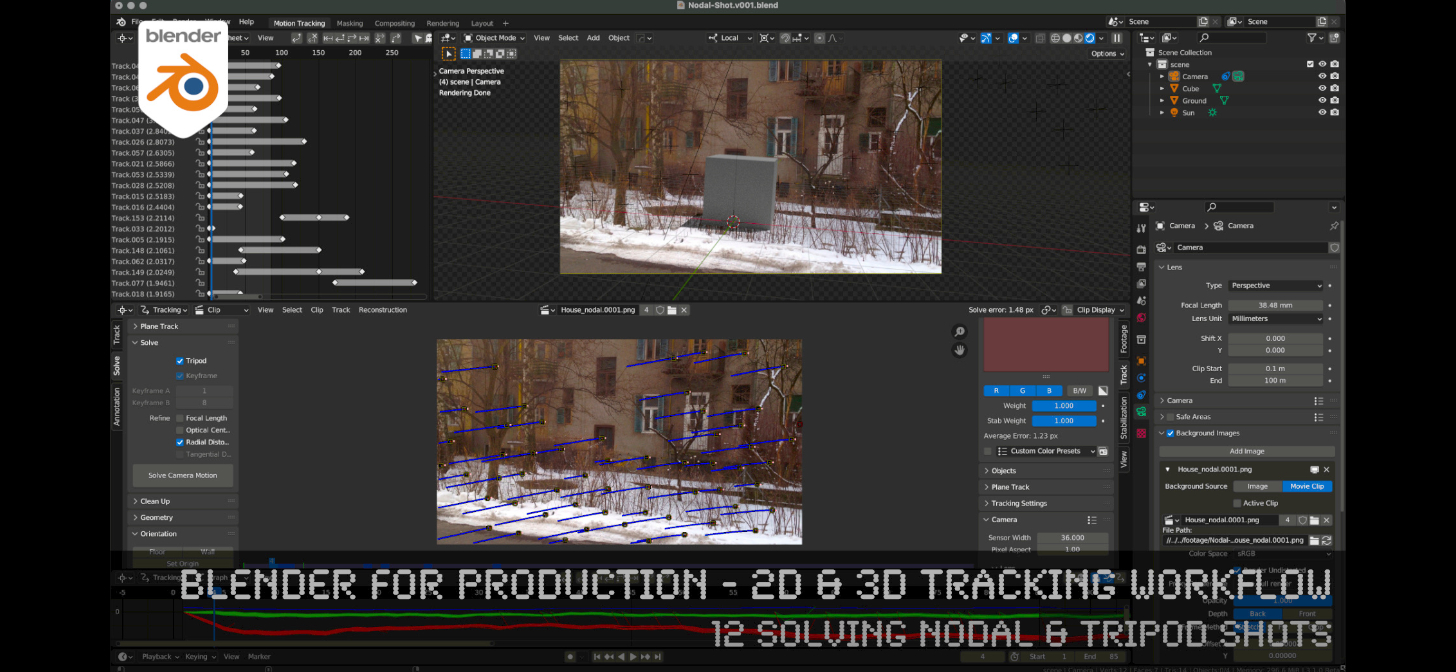
Blender Motion Tracking Introduction - Add 3D elements to your Footage Tutorial
\"Step into an alternate reality with our mind-blowing 3D elements. Join us on an awe-inspiring journey where objects and characters leap off the screen, offering a truly immersive experience like never before!\"
Blender Motion Tracking Introduction - Add 3D elements to your Footage Tutorial
\"Step into an alternate reality with our mind-blowing 3D elements. Join us on an awe-inspiring journey where objects and characters leap off the screen, offering a truly immersive experience like never before!\"
Using Blender\"s Tracking Tools for VFX and Animation
Blender’s tracking tools are not just for integrating 3D objects into live-action footage; they\"re also powerful aids for creating visual effects (VFX) and animations. Here’s how you can leverage these tools to enhance your projects.
- Simulating Realistic Environments: Use tracking data to create environments that react realistically to camera movements. This is essential for VFX scenes that require seamless integration with the real world.
- Adding Dynamic Objects to Scenes: Incorporate dynamic 3D models into your tracked footage. Objects can interact with the environment, like bouncing off the ground or casting shadows, to enhance realism.
- Character Integration: Track footage to integrate animated characters into live-action scenes. Use tracking data to ensure characters move perfectly in sync with the camera and environment.
- Creating Forced Perspective Shots: Use tracking and 3D models to create forced perspective shots that would be difficult or impossible to achieve in-camera.
- Reconstructing Scenes for Post-Production: Generate a 3D scene based on your tracking data. This allows for post-production adjustments like changing lighting or adding effects that interact with the physical environment.
- Stabilization for Animation: Stabilize shaky footage before adding VFX or animation. Blender\"s tracking tools can smooth out camera movements to prevent jarring visual inconsistencies.
- Match Moving for Dynamic Camera Moves: Create dynamic animations that move with the camera by using the match moving technique. This ensures that animated elements maintain their position relative to the camera.
- Enhancing Matte Paintings: Integrate matte paintings or digital backdrops with live-action footage. Tracking ensures these elements adhere to camera movements, selling the illusion of depth and space.
By mastering Blender’s tracking tools, you can push the boundaries of your VFX and animation projects, creating more immersive and dynamic scenes that captivate your audience.

Common Tracking Problems and How to Solve Them
Even with Blender\"s powerful tracking tools, you may encounter common problems that can hinder your progress. Understanding these issues and knowing how to solve them will keep your project on track.
- Slipping Markers: If markers start slipping, it\"s often due to low contrast or motion blur. Solve this by choosing areas with higher contrast and adjusting the search area size for each marker.
- Inconsistent Lighting: Changes in lighting can throw off your track. Use manual tracking for these sections or adjust the lighting in your scene to match the changes in the footage.
- Obstructed Tracking Points: When your tracking points get obstructed, add new markers before the obstruction occurs and stop tracking the obstructed marker. Blender can interpolate the motion between visible markers.
- Fast-Moving Objects: For fast-moving objects, increase the tracking search area and use motion blur to your advantage by tracking the blur trail if the object itself becomes too blurred.
- Camera Lens Distortion: Lens distortion can skew tracking data. Correct lens distortion in Blender by using the Movie Clip Editor\"s lens distortion tools before starting your tracking process.
- Reflections and Transparency: Avoid tracking points on reflective or transparent surfaces. If unavoidable, manually adjust the track or use static objects in the scene for additional tracking data.
- Low Resolution Footage: Increase the footage\"s resolution through upscaling techniques before importing it into Blender, ensuring better tracking marker detection.
- Insufficient Tracking Data: If Blender struggles to solve the camera movement, add more tracking points throughout the scene, especially on objects at different depths to provide a better sense of space.
By addressing these common tracking problems with the suggested solutions, you can improve the accuracy and reliability of your tracking results in Blender, leading to more professional and believable scenes.

Resources for Further Learning and Expert Advice
Advancing your skills in Blender 3D tracking and getting expert advice is crucial for mastering this complex tool. Here are invaluable resources to deepen your knowledge and refine your techniques.
- Blender Official Documentation: Start with the source. Blender’s own documentation offers in-depth guides and tutorials on every aspect of 3D tracking.
- Blender Artists Community: Join the Blender Artists forum to connect with other users, share your work, get feedback, and find answers to specific questions.
- Blender Network: The Blender Network is a professional platform that connects Blender professionals and enthusiasts worldwide, offering opportunities for collaboration and learning.
- Video Tutorials: Platforms like YouTube have countless tutorials from experienced users. Channels like Blender Guru, CG Geek, and Blender Foundation offer high-quality tutorials covering a wide range of topics, including tracking.
- Online Courses: Websites like Udemy, Coursera, and Lynda offer structured courses on Blender, including motion tracking, often taught by industry professionals.
- Books and eBooks: There are several comprehensive guides and books dedicated to learning Blender. They offer step-by-step instructions and project-based learning.
- Workshops and Webinars: Keep an eye out for workshops, webinars, and live streams hosted by Blender experts. These sessions provide real-time learning and Q&A opportunities.
- Blender Conferences: Annual Blender conferences and meetups are great places to learn from the best in the field and see how professionals use Blender in their workflows.
Utilizing these resources will significantly enhance your Blender skills, keep you updated with the latest tools and techniques, and connect you with a community of supportive professionals and hobbyists alike.

_HOOK_
READ MORE:
Real-World Applications of Blender Tracking
Blender\"s tracking capabilities are not just limited to creating stunning visual effects in films; they are used in a variety of real-world applications across different industries. Understanding these applications can inspire and expand the scope of your projects.
- Film and Television: Blender\"s tracking tools are extensively used in the film and television industry to integrate 3D characters and objects into live-action footage, creating immersive worlds that blend reality with imagination.
- Game Development: Game developers use Blender for creating detailed environments and characters by tracking motion capture data, enhancing the realism and interactivity of game worlds.
- Virtual Production: In virtual production, real-time tracking data from Blender is used to synchronize physical camera movements with virtual environments, allowing for dynamic and interactive scenes to be filmed on set.
- Augmented Reality (AR): Blender tracking tools facilitate the creation of AR content by enabling the integration of 3D models into real-world footage, enriching user experiences in apps and games.
- Scientific Visualization: Researchers and scientists use Blender to track and visualize complex data, from astronomical simulations to molecular biology, making abstract concepts visually understandable.
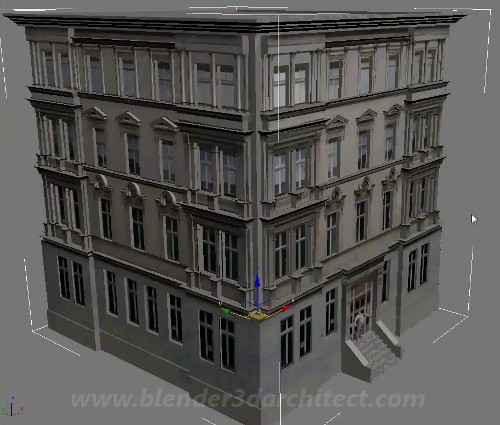
- Architecture and Engineering: Professionals in architecture and engineering utilize Blender’s tracking for virtual tours, by integrating 3D models of buildings or products into video footage of real-world locations.
- Education and Training: Educational content creators use Blender to produce engaging and interactive learning materials, including simulations and reconstructions of historical or scientific events.
- Marketing and Advertising: Advertisers leverage Blender’s tracking tools to create dynamic commercials that blend products seamlessly into diverse environments, captivating the viewer’s imagination.
These real-world applications demonstrate the versatility and power of Blender\"s tracking tools, offering limitless possibilities for creators across various fields.
Embark on a journey of creativity and innovation with Blender 3D tracking. Unlock the full potential of your projects, bringing your visions to life with precision and flair. Start mastering Blender tracking today!