Topic blender 3d car modeling tutorial: Embark on a journey to master Blender 3D car modeling with our comprehensive tutorial, designed to guide you through creating lifelike vehicles from scratch. Elevate your digital art skills today!
Table of Content
- How to model a car in Blender for 3D rendering?
- Choosing the Right Blender Version and Setting Up
- Understanding Blender\"s Interface for Car Modeling
- Setting Up Reference Images for Accuracy
- Basic Modeling Techniques: Starting with the Car Body
- Advanced Modeling Techniques: Detailing Your Car Model
- Creating Realistic Car Wheels and Tires
- YOUTUBE: Car in Blender - PART I - Modelling for Beginners
- Texturing and Shading for Realistic Car Surfaces
- Lighting and Rendering Your Car Model
- Tips for Interior and Exterior Details
- Animating Your Car Model in Blender
- Optimizing Your Workflow: Tricks and Shortcuts
- Exporting Your Car Model for Games or Other Media
How to model a car in Blender for 3D rendering?
Modeling a car in Blender for 3D rendering can be done by following these steps:
- Start by gathering reference images of the car you want to model from different angles. These images will serve as a guide throughout the process.
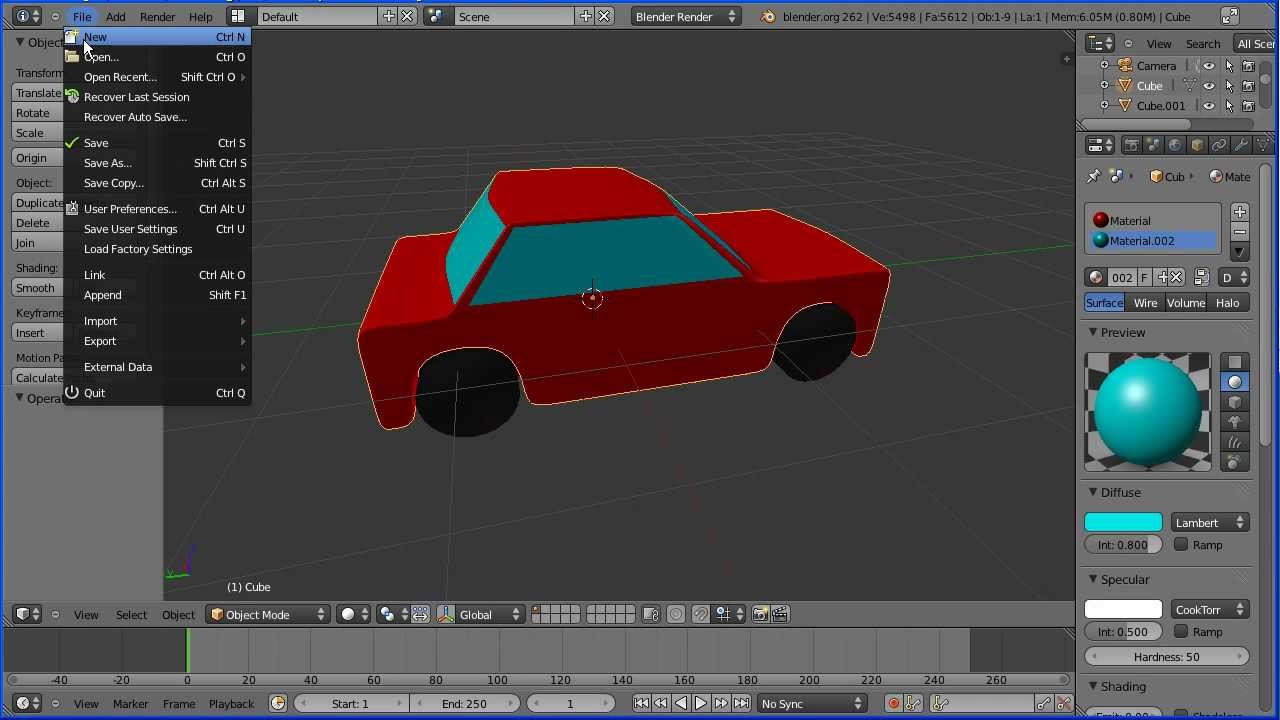
- Open Blender and delete the default cube object by selecting it and pressing the \"X\" key, then choose \"Delete\" from the context menu.
- Import the reference images into Blender by going to the \"Viewport\" tab in the \"Properties\" panel, enabling the \"Background Images\" option, and adding the images for the front, back, side, and top views.
- Switch to the \"Front\" orthographic view by pressing \"1\" on the numeric keypad.
- Add a plane object to serve as the base for the car\'s body by pressing \"Shift + A\" and selecting \"Mesh\" > \"Plane\".
- Enter Edit mode by pressing the \"Tab\" key and start shaping the car\'s body by extruding, scaling, and manipulating the vertices of the plane to match the reference images.
- Use the \"Mirror\" modifier to make modeling symmetric and easier. Enable the modifier in the \"Modifiers\" tab of the \"Properties\" panel and adjust the settings accordingly.
- Continue refining and adding details to the car\'s body by adding edge loops, extruding, and merging vertices as needed. Pay attention to the different sections of the car (hood, roof, doors, etc.) and ensure their shape matches the reference images.
- Once you\'re satisfied with the car\'s body, you can move on to modeling other parts like doors, windows, wheels, headlights, etc. They can be created as separate objects or by extruding and shaping the existing geometry.
- Apply materials and textures to the car\'s body and other parts to enhance the visual appearance. This can be done in the \"Materials\" and \"Textures\" tabs of the \"Properties\" panel.
- Set up lighting and a suitable environment for your car by adding light sources and adjusting their properties. You can also add a background image or set up a studio-like environment.
- Configure your rendering settings in the \"Render\" tab of the \"Properties\" panel, such as resolution, file format, and render engine (e.g., Cycles or Eevee).
- Hit the \"Render\" button or press \"F12\" to create the final 3D render of your car.
- Once the render is complete, you can save the image and make any necessary post-processing adjustments in an image editing software.
Remember, car modeling in Blender requires practice and patience. You might need to refer to additional tutorials, experiment with different techniques, and iterate on your model to achieve the desired results.
READ MORE:
Choosing the Right Blender Version and Setting Up
Selecting the appropriate Blender version is crucial for efficient car modeling. The latest version of Blender offers enhanced features and tools that can significantly improve your modeling process. Follow these steps to set up Blender for car modeling:
- Download the latest version of Blender from the official website to ensure you have access to the newest features and bug fixes.
- Install Blender and open it to familiarize yourself with the interface. Blender\"s user interface is customizable, allowing you to adapt the workspace to your needs.
- Configure Blender settings for car modeling. Go to the Preferences menu and adjust the settings according to your hardware capabilities, such as enabling GPU rendering for faster performance.
- Set up the default scene by deleting the default cube and setting up the camera and lighting according to your preference. This step ensures a clean workspace tailored for car modeling.
- Import reference images of the car you intend to model. Accurate reference images are essential for modeling realistic cars. Place them in the background to guide your modeling process.
By following these steps, you\"ll create an optimal environment in Blender for car modeling, paving the way for a successful project.

Understanding Blender\"s Interface for Car Modeling
Blender\"s comprehensive interface may seem daunting at first, but it\"s designed to offer powerful tools for 3D modeling, including car design. Familiarizing yourself with the interface is the first step towards mastering car modeling in Blender:
- 3D Viewport: This is the main area where you will spend most of your time. It\"s where you can view and edit your car model. You can rotate, pan, and zoom to inspect your model from all angles.
- Toolbar: Located on the left side of the 3D Viewport, the toolbar contains tools for manipulating objects, such as move, rotate, and scale, which are essential for shaping your car model.
- Properties Panel: On the right side, this panel offers various settings for the objects, materials, modifiers, and scene. Here, you can adjust the properties of your car model, such as applying textures or setting physics properties.
- Outliner: The Outliner, usually found in the top right corner, displays a hierarchical list of all objects in the scene, helping you organize and select different parts of your car model easily.
- Timeline: At the bottom of the interface, the Timeline allows you to manage animations. This is particularly useful if you plan to animate your car model, such as opening doors or rotating wheels.
Understanding these core components of Blender\"s interface will significantly streamline your car modeling process, enabling you to focus more on creativity and less on navigating the software.

Setting Up Reference Images for Accuracy
Using reference images is a crucial step in creating a realistic and accurate 3D car model in Blender. This guide will help you set up your reference images effectively to ensure your modeling process is both efficient and precise.
- Find High-Quality Reference Images: Begin by gathering high-quality images of the car you wish to model. Ensure you have images for all necessary views - front, back, side, top, and if possible, perspective shots for additional details.
- Preparing Images: If your reference images are not aligned (e.g., the front and back views are at different scales), use an image editing software to scale and crop them for consistency. This step is crucial for maintaining proportions in your model.
- Importing into Blender: In Blender, press Shift + A to access the Add menu, navigate to Image > Reference. This allows you to add your reference images as planes within your scene, which can then be positioned and scaled as needed.
- Positioning Reference Images: Place each reference image in the corresponding view (front, side, top) within the 3D viewport. Use the numpad keys (1 for front, 3 for side, 7 for top) to switch views and align the images accurately with the world axis.
- Adjusting Opacity: To make modeling easier, adjust the opacity of your reference images. This can be done in the Object Data Properties panel under the Visibility section, allowing you to see through the images while modeling.
- Locking Images: To prevent accidentally moving the reference images while modeling, lock their position in the Outliner by clicking the mouse icon next to each image. This ensures they stay fixed in place.
- Using Layers: For additional organization, place your reference images on a separate layer or collection. This way, you can easily hide or show them without affecting other objects in your scene.
By following these steps, you set a solid foundation for your car modeling project in Blender, ensuring that your work is accurate and true to the original design. Remember, spending time setting up your reference images correctly can save you time and effort in the modeling process.

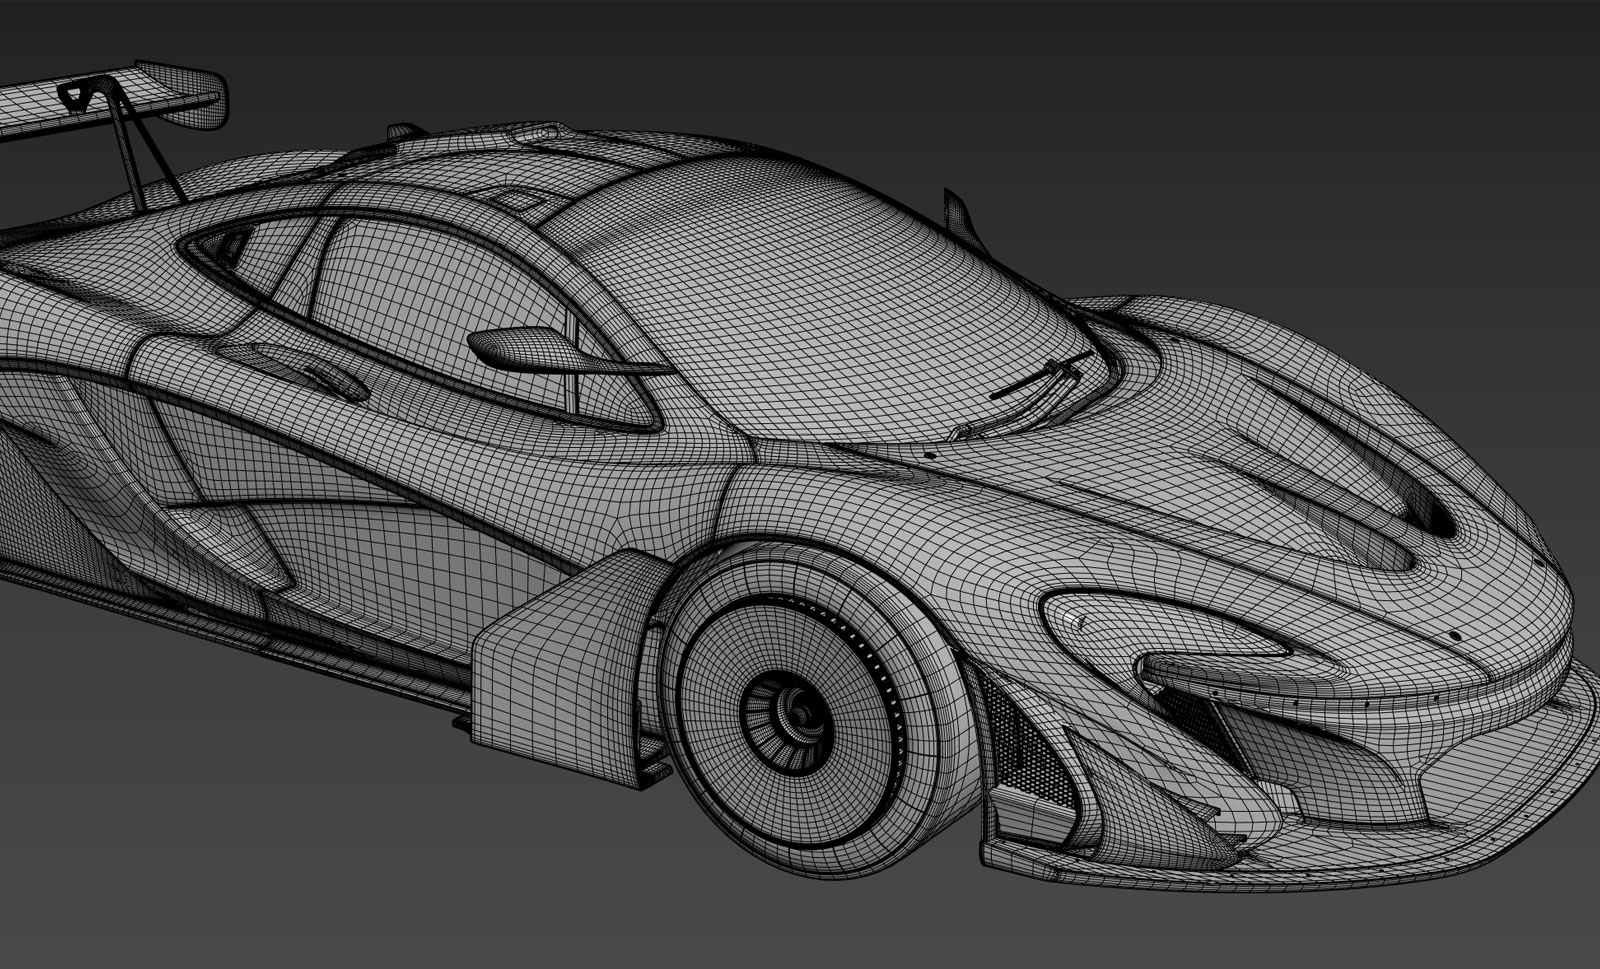
Basic Modeling Techniques: Starting with the Car Body
Beginning your journey into 3D car modeling in Blender starts with the car body. This foundational element sets the stage for detailing and refining your model. Here\"s a step-by-step guide to modeling a basic car body in Blender, ensuring a solid start for beginners.
- Setting Up Your Workspace: Before starting, ensure you have your reference images set up correctly. This will guide you in achieving the right proportions and details of the car.
- Creating the Base Mesh: Start with a simple shape that matches the general form of your car body. A cube or plane can be a good starting point. Press Shift + A to add a cube, then enter edit mode (Tab) to begin shaping.
- Shaping the Car Body: Use the vertex, edge, and face edit tools to start shaping the cube into the car body. Focus on creating the main silhouette first, without worrying about the smaller details yet.
- Adding Detail: Once the basic shape is formed, start adding more geometry to define the car\"s features. Tools like loop cuts (Ctrl + R) and extrusions (E) are invaluable here. Add more vertices and edges to outline doors, hoods, and other body parts.
- Subdivision Surface Modifier: To smooth out the geometry and give your car body a more refined look, apply a Subdivision Surface modifier. This will add more polygons automatically and smooth the shape. You can adjust the level of subdivision for more or less detail.
- Refining Shapes: With the Subdivision Surface modifier applied, continue refining the shape of your car. Use the sculpting tools for finer adjustments, ensuring that the curves and lines follow your reference images closely.
- Mirroring for Symmetry: Most cars are symmetrical, so utilize the Mirror modifier to make your modeling process more efficient. This way, you only need to model half of the car, and the other half will be created automatically, ensuring perfect symmetry.
Remember, the key to successful car body modeling is patience and attention to detail. Starting with a basic shape and progressively adding details allows you to gradually refine your model without becoming overwhelmed. Use your reference images as a guide throughout the process, and don\"t be afraid to make adjustments as you go. With practice, you\"ll develop a workflow that suits your style and leads to impressive results.
_HOOK_
Advanced Modeling Techniques: Detailing Your Car Model
Once you have the basic shape of your car model, the next step is to add details that bring it to life. Advanced modeling techniques in Blender allow you to create intricate details, realistic textures, and complex parts that make your model stand out. Here\"s how to elevate your car model with advanced detailing.
- Edge Loop and Creasing: Use edge loops (Ctrl + R) to add definition to areas like doors, hoods, and windows. Creasing (Shift + E) allows you to sharpen edges without adding extra geometry, making it perfect for defining crisp lines on the car body.
- Boolean Operations: For parts like air intakes, grilles, and complex cutouts, boolean operations can be a powerful tool. Use the Boolean modifier to subtract or add shapes from your car body, creating detailed and complex geometrical shapes.
- Hard Surface Modeling: Techniques like paneling are essential for creating realistic car surfaces. Separate the geometry into panels to simulate the car\"s bodywork. This technique adds realism by mimicking the way real car panels fit together.
- Details and Small Parts: For smaller details like screws, badges, and vents, consider using separate objects that can be modeled individually and then placed on the car. This approach allows for more detailed and complex shapes without overwhelming the main model.
- Shrinkwrap Modifier: To add details that conform to the car body’s shape, use the Shrinkwrap modifier. It\"s ideal for adding logos or other elements that need to sit flush with the car\"s surface.
- Sculpting for Fine Details: Blender’s sculpting tools are perfect for adding fine details like dents, creases, and subtle imperfections that give your model character and realism. Use a high subdivision level for the best results.
- Materials and Textures: While not strictly modeling, applying materials and textures adds depth to your model. Use Blender\"s node-based material system to create realistic car paint, including metallic flakes, clear coat finishes, and more.
Detailing your car model requires patience and an eye for detail. Experiment with different techniques to find what works best for your project. Remember, the goal is to create a model that\"s as realistic and detailed as possible, so take your time and focus on quality. With practice, you\"ll be able to add intricate details that make your car models truly stand out.

Creating Realistic Car Wheels and Tires
Wheels and tires are critical components of a car model that significantly impact its realism and overall appearance. In Blender, creating detailed and realistic wheels and tires involves a combination of modeling techniques and careful attention to detail. Follow these steps to craft wheels and tires that add authenticity to your car model.
- Start with the Tire: Begin by creating a cylinder in Blender to form the base of your tire. Adjust the number of vertices to ensure it has enough detail for realism but is not overly complex. Remember, tires are not perfectly circular, so slightly adjust the shape to reflect the weight of the car pressing down.
- Tread Pattern: For the tread, you can either model it directly into the tire using loop cuts and extrusions or create a bump map in a texture editing program. If modeling, consider using array and curve modifiers to wrap the tread pattern around the tire accurately.
- Wheel Rim: Next, model the rim starting with a circle. Use extrusions and loop cuts to form the basic shape of the rim, focusing on the central hub first and then detailing the spokes. Reference images are crucial here to capture the design accurately.
- Adding Details: With the basic shapes in place, add smaller details like lug nuts, rim patterns, and valve stems. These elements can be modeled as separate objects and then combined with the main wheel assembly for easier management.
- Materials and Textures: Apply realistic materials to your wheel and tire. For the tire, use a rubber material with a slight bump map for texture. For the rim, consider a metallic material with reflections to simulate metal. Adjust the roughness and specular settings to achieve the desired look.
- Subdivision for Smoothness: To ensure your wheel and tire look realistic, apply a subdivision surface modifier for smoothness. Be mindful of the modifier\"s impact on your model\"s geometry and adjust accordingly.
Creating realistic car wheels and tires in Blender is a meticulous process that adds significant visual appeal to your car model. By focusing on the details and applying appropriate materials, you can achieve a level of realism that brings your model to life. Practice and experimentation with different techniques and settings will help you refine your approach and produce high-quality results.

Car in Blender - PART I - Modelling for Beginners
\"Discover the endless possibilities of Blender and immerse yourself in the world of 3D animation. Learn how to create stunning visual effects and master the art of digital storytelling - all with the help of this exciting Blender video tutorial!\"
Low Poly Car Modeling Tutorial with Blender 3.5
\"Unlock your creativity with the art of modeling using the versatile software, Blender. Dive into a captivating tutorial where you\'ll learn the techniques to bring your imagination to life. Create intricate 3D models and watch your ideas come to life with every click!\"
Texturing and Shading for Realistic Car Surfaces
Texturing and shading are essential processes in creating a realistic car model in Blender. They involve applying materials and textures to give the model a lifelike appearance, simulating various surfaces such as metal, glass, and rubber. Follow these steps to texture and shade your car model effectively.
- Understanding Materials: Begin by familiarizing yourself with Blender\"s material system. Materials define the color, roughness, and metallic properties of surfaces. For car models, you\"ll often use materials with metallic and glossy finishes.
- Creating a Car Paint Material: Use the Principled BSDF shader to create a car paint material. Adjust the metallic and roughness sliders to simulate the reflective and shiny properties of car paint. Adding a clearcoat layer will give it an extra level of realism.
- Applying Textures: For more detailed surfaces like tire treads or car interiors, apply textures. You can use image textures for this purpose. UV mapping is crucial here to wrap the texture around your model accurately.
- Simulating Glass: For windows and headlights, use a glass shader. Adjust the IOR (Index of Refraction) to simulate how light bends when passing through glass. Adding a slight tint can mimic colored glass effectively.
- Detailing with Bump and Normal Maps: To add surface details without increasing geometry, use bump and normal maps. These can simulate small imperfections and textures on surfaces like leather seats or dashboard controls.
- Environment and Lighting: Shading looks best under realistic lighting. Use HDRI images for environmental lighting to provide a natural and diverse light source. This will enhance the reflections and shadows on your car model.
- Rendering Settings: Finally, adjust your rendering settings to maximize the quality of your textures and shaders. Ensure that you have enough samples for a clean render and consider using denoising to reduce any noise.
Texturing and shading your car model requires attention to detail and a good understanding of materials and lighting. By carefully applying materials, adjusting shaders, and setting up your lighting, you can achieve a highly realistic appearance for your car model. Experiment with different settings and textures to find the perfect look for your project.
Lighting and Rendering Your Car Model
Lighting and rendering are the final steps in bringing your Blender car model to life, showcasing it in its best light. Proper lighting highlights the details and materials of your car, while rendering transforms it into a stunning visual. Follow these steps to effectively light and render your car model.
- Choose the Right Lighting Setup: Start by selecting a lighting setup that complements your car model. Three-point lighting is a classic choice, offering a balanced way to highlight the model from key, fill, and back lights. Alternatively, HDRI lighting can provide a realistic environmental light.
- Positioning Lights: Carefully position your lights to enhance the model\"s features. The key light should be the strongest, highlighting the model\"s main angles. The fill light reduces shadows created by the key light, and the back light separates the model from the background.
- Adjusting Light Settings: Tweak the intensity, color, and size of your lights. Softer lights can create a more natural look, while sharper lights will emphasize textures and materials. Consider the mood and setting of your scene when adjusting these settings.
- Setting Up Cameras: Choose appropriate camera angles to showcase your car model. Experiment with different focal lengths and compositions to find the most flattering views. Ensure your camera settings, such as depth of field, are adjusted to enhance the realism of your shots.
- Choosing a Renderer: Blender offers several rendering engines, like Cycles and Eevee. Cycles is a ray-tracing renderer that provides more realistic results, while Eevee is a real-time engine that is faster but less detailed. Choose based on your needs and the level of detail you want to achieve.
- Rendering Settings: Adjust your rendering settings for the best quality. This includes setting the resolution, sample rate, and any post-processing effects like bloom or motion blur. Higher sample rates reduce noise but increase rendering time.
- Post-Processing: After rendering, use Blender\"s Compositor to adjust colors, contrast, and add any final touches. This step can significantly enhance the visual appeal of your render.
Lighting and rendering your car model effectively requires a blend of technical knowledge and artistic vision. By carefully selecting your lighting setup, adjusting your render settings, and applying post-processing effects, you can create stunning visuals that showcase your model in its best light. Remember, experimentation and practice are key to mastering these final steps in the 3D modeling process.
Tips for Interior and Exterior Details
Adding details to both the interior and exterior of your car model can significantly enhance its realism and appeal. These details, no matter how small, contribute to the overall authenticity and can make your model stand out. Here are some tips for adding interior and exterior details to your Blender car model.
- Study Reference Materials: Begin with thorough research. Look at photos, videos, and actual cars if possible. Pay attention to the small details like the stitching on seats, the texture of materials, and how different parts fit together.
- Exterior Detailing: For the exterior, focus on elements like headlights, tail lights, door handles, and mirrors. Use separate objects for these details to maintain a manageable workflow. Consider using textures and bump maps for intricate details like grilles and badges.
- Interior Complexity: The interior of a car is complex, with many different materials and textures. Break the interior down into components such as the dashboard, seats, steering wheel, and door panels. Model each piece individually for accuracy.
- Materials and Textures: Use varied materials to replicate the diverse textures found in car interiors and exteriors. Leather, plastic, metal, and fabric require different shaders to achieve a lifelike appearance. Pay attention to specular and roughness values to mimic real-world materials.
- Lighting for Details: Proper lighting can highlight the details you\"ve added. Use spotlights or area lights to accentuate interior details. For exteriors, ensure your environment lighting or HDRI map showcases the car\"s lines and details effectively.
- Decals and Emblems: Use decals for logos, emblems, and other branding. This approach allows for more flexibility and detail than modeling these features directly into the surface.
- Keep Proportions Accurate: Always ensure that the details you add maintain the correct scale and proportion relative to the rest of the model. Incorrect proportions can quickly detract from the realism of your model.
- Use Particle Systems: For complex textures like carpeting or the fibrous material on a speaker cover, consider using Blender\"s particle systems. This can add a level of detail and realism that is hard to achieve with textures alone.
Detailing is a time-consuming but rewarding part of the modeling process. By focusing on the small aspects that contribute to the overall look and feel of the car, you can create a model that truly stands out for its attention to detail and realism. Remember, patience and attention to detail are your best tools in this process.

_HOOK_
Animating Your Car Model in Blender
Animating your car model in Blender adds an exciting layer of realism and can bring your project to life. Whether it\"s for a presentation, a game, or a personal project, animation allows you to showcase your model in dynamic ways. Follow these steps to animate your car model effectively.
- Rigging the Car: Start by rigging your car model. Create an armature that includes bones for the wheels, steering wheel, and any other parts you want to animate. Ensure each bone is correctly parented to the corresponding mesh part.
- Wheel Rotation: To animate the wheels turning, keyframe the rotation of the wheel bones. You can use drivers to link the rotation of the wheels to the movement of the car, making them spin faster or slower depending on the speed of the car.
- Steering Animation: For the steering wheel, animate its rotation to correspond with the turning of the front wheels. This adds a layer of realism to the animation, especially in turns.
- Suspension Simulation: To simulate suspension, you can create a bone structure that allows for the body of the car to move up and down independently of the wheels. Keyframe these movements to match the terrain your car is moving over.
- Animating the Camera: A moving camera can add dynamism to your animation. Use path constraints to attach your camera to a curve that follows the car, ensuring smooth camera movements that showcase the car from multiple angles.
- Environment and Scene: Place your car model in an environment that complements the animation. Whether it\"s a racetrack or a city street, the setting can significantly impact the overall feel of the animation.
- Adding Sound Effects: For an added layer of realism, incorporate sound effects such as engine noise, tire screeches, and environmental sounds. Blender allows you to synchronize these sounds with your animation for a more immersive experience.
- Rendering the Animation: Finally, render your animation. Adjust your render settings to balance quality and rendering time. Consider using Eevee for faster render times if your project is time-sensitive.
Animating a car model in Blender requires careful planning and attention to detail. By rigging your model correctly and using keyframes to animate movement, you can create engaging and realistic animations that showcase your car model in motion. Remember to experiment with different techniques and settings to find what works best for your specific project.

Optimizing Your Workflow: Tricks and Shortcuts
Efficiency is key in 3D modeling, especially when working on complex projects like car models in Blender. Knowing the right tricks and shortcuts can significantly speed up your workflow, allowing you to focus more on creativity and less on tedious tasks. Here are some tips to optimize your Blender workflow.
- Use Hotkeys: Blender is known for its extensive use of hotkeys. Familiarize yourself with common shortcuts like G for grab/move, R for rotate, S for scale, and E for extrude. Mastering these can drastically reduce your modeling time.
- Customize Your Interface: Tailor Blender\"s interface to suit your workflow. You can create custom panels and toolbars with your most-used tools and functions. This customization can help keep your workspace organized and your tools within easy reach.
- Use Modifiers Wisely: Modifiers like Mirror, Subdivision Surface, and Boolean can automate repetitive tasks and create complex shapes with less effort. Apply them non-destructively to maintain flexibility in your modeling process.
- Modeling Efficiency: Focus on modeling with as few vertices as necessary in the early stages. This keeps the mesh manageable and speeds up the viewport performance. You can always add detail later with more subdivisions or sculpting.
- Library of Assets: Develop a library of reusable assets, such as wheels, seats, and headlights. This not only saves time but also ensures consistency across different projects.
- Use Layers and Collections: Organize your scene using layers and collections. This makes it easier to manage complex scenes, hide elements you\"re not currently working on, and focus on specific parts of your model.
- Batch Operations: Learn to use Blender\"s batch operations for tasks like applying materials to multiple objects at once, or duplicating transformations. This can be a massive time saver.
- Rendering Previews: Use low-resolution previews and simplified settings to test animations or lighting setups. This approach allows for quick iterations before committing to a final, high-quality render.
Improving your workflow in Blender comes down to a combination of using the software\"s built-in tools efficiently, customizing your workspace to suit your needs, and adopting practices that save time. Keep experimenting with new tools and techniques, and always look for ways to streamline your process.
READ MORE:
Exporting Your Car Model for Games or Other Media
Once you have completed your car model in Blender, you may want to export it for use in games, animations, or other media. The export process involves several important steps to ensure that your model is compatible with other software and platforms. Follow these guidelines to successfully export your Blender car model.
- Choose the Right Format: Different platforms and engines require different file formats. Common formats include FBX and OBJ for game engines like Unity or Unreal Engine, and Alembic or USD for animations. Choose the format that best suits your target platform.
- Apply Transforms: Before exporting, apply all transformations (location, rotation, scale) to your model. This ensures that the model retains its intended size and orientation in other software. Use Ctrl + A in Object Mode to apply transformations.
- Optimize the Mesh: Game engines and other media platforms have limitations on polygon count. Use modifiers like Decimate or tools like retopology to reduce the polygon count of your model without significantly impacting its appearance.
- UV Mapping: Ensure that your model is properly UV unwrapped. This is crucial for texturing in other software. Keep your UV maps clean and organized to avoid texture stretching or artifacts.
- Bake Textures: If your model uses procedural textures or complex shading nodes, consider baking these textures into image files. Baked textures can be applied to your model in other software, preserving the visual details.
- Include Necessary Assets: When exporting, make sure to include all necessary assets such as textures, normal maps, and any other external files your model uses. Some export formats allow you to embed these assets into the file.
- Testing: After exporting, import your model into the target software or engine to test it. Check for any issues with textures, animations, or scaling. This step is crucial to ensure compatibility and performance.
- Export Settings: Adjust export settings according to the needs of your project. Options such as smoothing groups, normals, and animation frames can be configured during the export process.
Exporting your car model from Blender to another platform requires careful preparation to ensure that it looks and performs as expected. By following these steps, you can make your model ready for use in a wide range of applications, from video games to animations and beyond. Always refer to the documentation of your target platform for specific requirements and recommendations.
Embark on a journey to master the art of 3D car modeling in Blender with our comprehensive guide. From basic shapes to intricate details and dynamic animations, unlock your creative potential and bring your automotive visions to life.