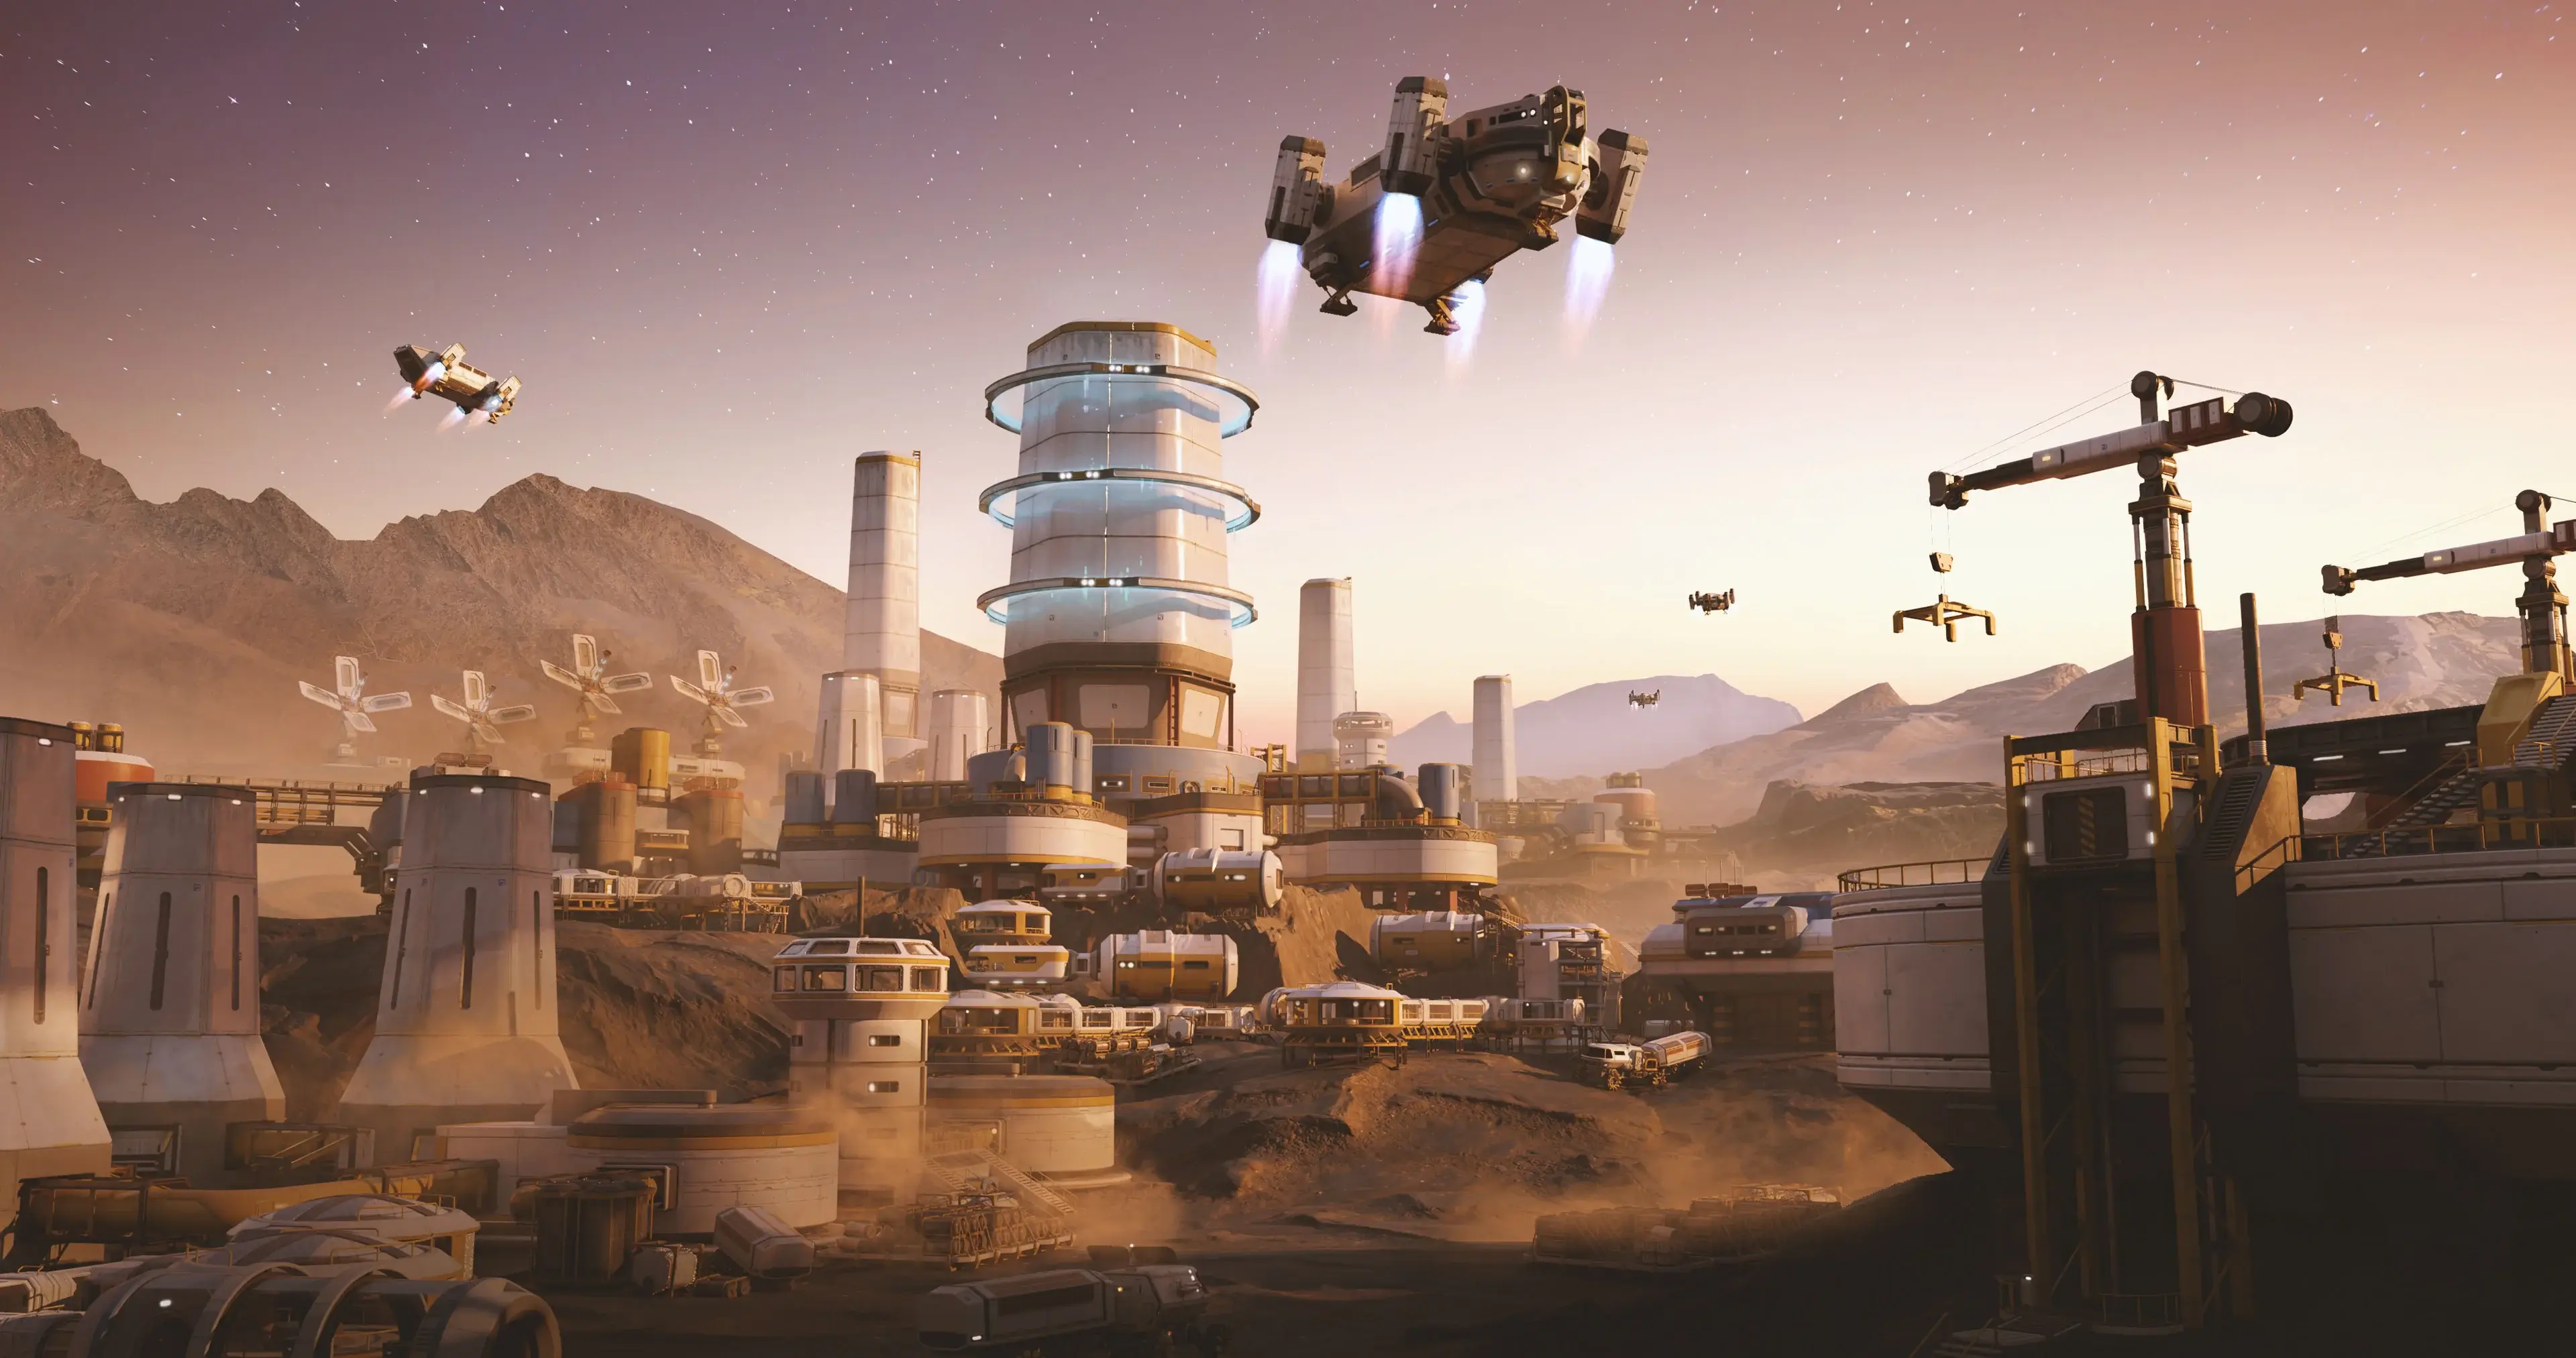
Topic 3d blender tutorial: Embark on a creative journey with our comprehensive 3D Blender tutorials, designed to transform beginners into skilled artists by mastering modeling, animation, and rendering techniques.
Table of Content
- What are some beginner tutorials for Blender 3D?
- Getting Started with Blender: Basics for Beginners
- Interface Overview: Navigating Blender\"s Layout
- Modeling Fundamentals: Shapes, Meshes, and Modifiers
- Sculpting Techniques: Tools and Tips for Detailed Creations
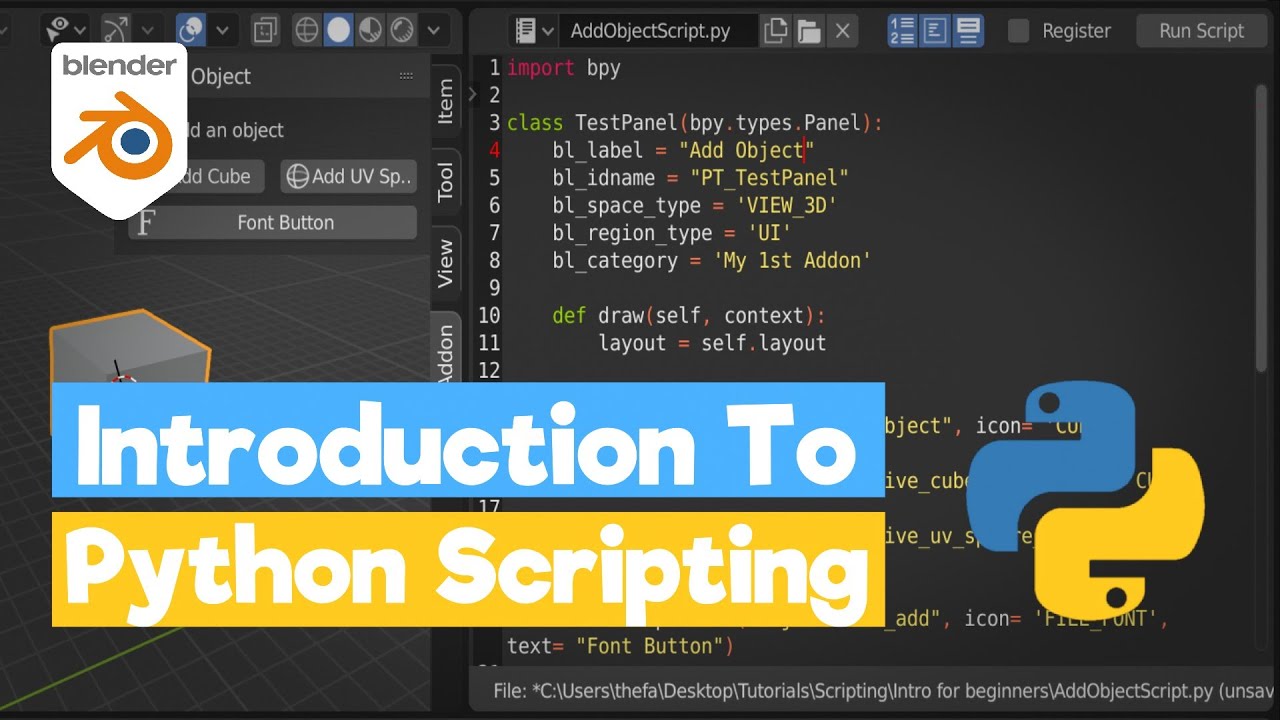
- YOUTUBE: Blender Tutorial for Complete Beginners - Part 1
- Texturing and Shading: Creating Realistic Materials
- Lighting and Rendering: Techniques for Professional Results
- Animation Basics: Bringing Your Creations to Life
- Advanced Animation: Rigging and Weight Painting
- Simulation Dynamics: Fluid, Cloth, and Particle Systems
- Compositing and Post-Processing: Enhancing Visuals
- 3D Printing with Blender: Preparing Models for Print
- Game Development: Assets Creation and Integration
What are some beginner tutorials for Blender 3D?
There are many beginner tutorials available for Blender 3D that can help you get started with the software. Here are some recommended tutorials:
- Blender Guru\'s Beginner Tutorial Series: This comprehensive tutorial series by Blender Guru covers all the basics of Blender, from navigation to modeling, lighting, and rendering. It\'s a great starting point for beginners.
- Blender Beginner Tutorial Series by CG Cookie: CG Cookie offers a beginner-friendly tutorial series that covers the essential tools and techniques in Blender. It provides step-by-step instructions to help you understand the basics of 3D modeling and rendering.
- Tutor4u\'s Blender Beginner Tutorial Series: Tutor4u\'s YouTube channel features a beginner tutorial series that covers various aspects of Blender, including modeling, texturing, and animation. The tutorials are easy to follow and provide a solid foundation for beginners.
By following these tutorials, you will gain a good understanding of Blender\'s interface, tools, and workflows. As you progress, you can explore more advanced tutorials and techniques to further enhance your 3D modeling and animation skills.
READ MORE:
Getting Started with Blender: Basics for Beginners
Welcome to the world of 3D modeling with Blender! This section will guide you through the initial steps of downloading Blender, understanding its interface, and creating your first simple 3D model. Let\"s dive in!
- Downloading and Installing Blender: Visit Blender.org and download the latest version of Blender. Follow the installation instructions for your operating system.
- Understanding the Blender Interface: Familiarize yourself with Blender\"s layout, including the 3D viewport, outliner, properties panel, and timeline.
- Basic Navigation: Learn to navigate the 3D viewport. Practice zooming, panning, and rotating the view.
- Creating Your First 3D Model: Start with a simple object like a cube. Learn to add a mesh object, edit its shape, and apply basic transformations such as scale, rotate, and move.
- Basic Modeling Tools: Get to know the essential modeling tools like extrude, loop cut, and inset faces to modify your objects further.
- Materials and Textures: Apply basic materials and textures to your model to give it color and detail.
- Rendering Your Scene: Learn how to light your scene and render a still image of your model.
By the end of this section, you\"ll have a solid foundation in Blender, ready to explore more advanced topics in 3D modeling, texturing, and animation.

Interface Overview: Navigating Blender\"s Layout
Blender\"s user interface might seem daunting at first, but it\"s designed to help you efficiently access all the tools you need. In this section, we\"ll break down the main areas of the interface and offer tips for navigating Blender\"s layout.
- 3D Viewport: The heart of Blender, where you visually interact with your models. Learn to rotate, pan, and zoom within this space.
- Properties Panel: Located to the right of the viewport, this panel provides access to the object\"s properties, including materials, modifiers, and scene settings.
- Outliner: The hierarchical view on the top right that shows all the objects in the scene. Use it to select, hide, or lock objects.
- Timeline: At the bottom, the timeline allows you to manage animations, keyframes, and playback controls.
- Tool Shelf and Properties Shelf: Accessible by pressing T and N in the viewport, these shelves offer quick access to tools and properties related to the selected object or scene.
- Editor Types: Blender includes various editors for specific tasks, such as the Node Editor for materials and compositing, the UV/Image Editor for texturing, and the Dope Sheet for animation.
To customize your workspace, Blender allows you to split and join panels, switch editor types, and save layouts. Familiarizing yourself with these capabilities can significantly speed up your workflow.
- Customizing Layouts: Drag the corner of any panel to split it into two. Right-click the dividing line to join panels back together.
- Switching Editor Types: Click on the editor type menu in the corner of any panel to switch its function. Experiment with different editors to find the best setup for your project.
- Saving Workspaces: Save your customized layout as a new workspace by clicking on the \"+\" icon in the top right workspace tab bar.
Understanding Blender\"s interface is crucial for efficient 3D modeling, texturing, and animation. Spend time familiarizing yourself with the layout and customizing it to fit your workflow for a smoother creative process.
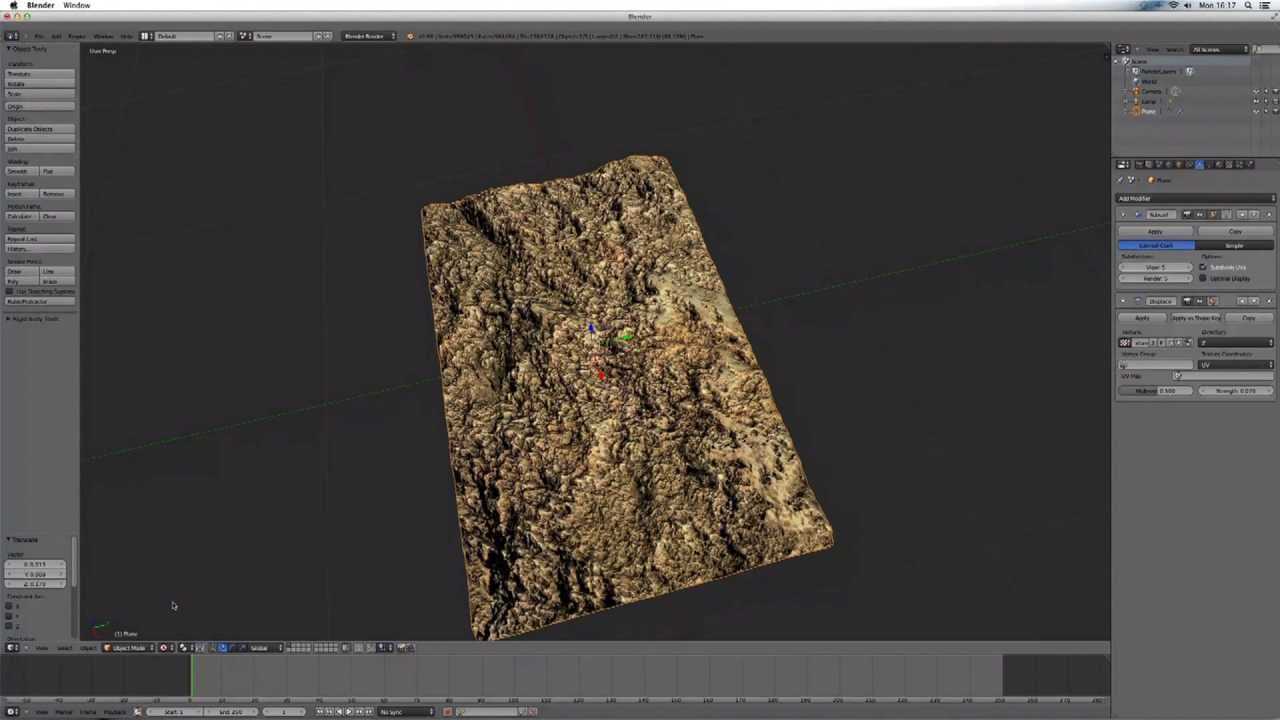
Modeling Fundamentals: Shapes, Meshes, and Modifiers
Modeling in Blender is a core skill every artist needs. This section will introduce you to the basics of creating and manipulating objects, understanding mesh topologies, and using modifiers to enhance your models.
- Understanding Basic Shapes: Start by exploring Blender\"s primitive shapes like cubes, spheres, and cylinders. Learn how these can be the foundation of complex models.
- Mesh Editing Techniques: Dive into edit mode, where you\"ll learn to select, move, rotate, and scale vertices, edges, and faces. Understand the importance of mesh flow and topology for creating clean models.
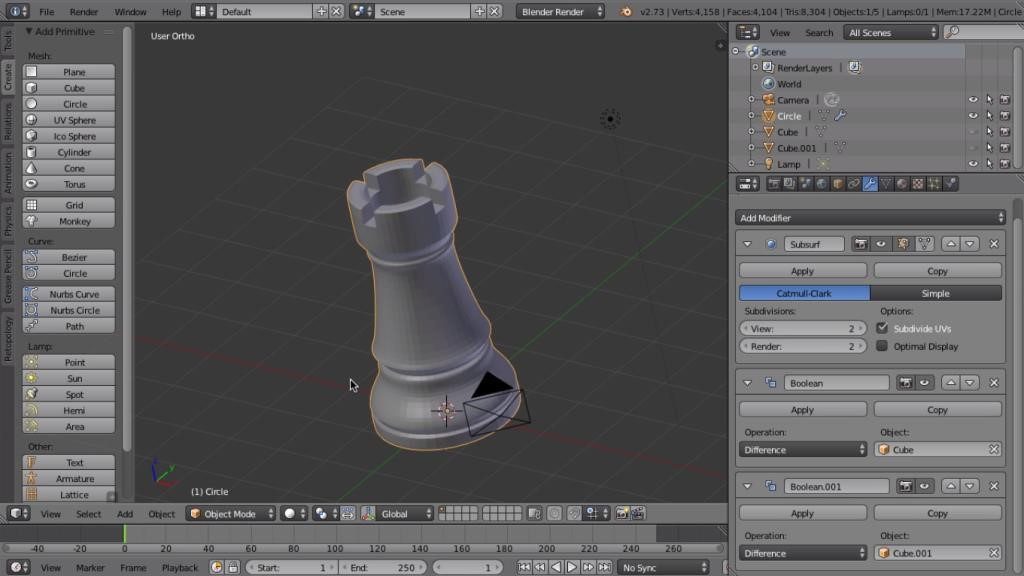
- Modifiers Overview: Modifiers are powerful tools that automate common modeling tasks. Get to know essential modifiers like Subdivision Surface for smoothing, Boolean for merging and subtracting shapes, and Mirror for symmetrical modeling.
Practice these fundamentals by modeling simple objects and gradually move to more complex projects. Remember, patience and practice are key to mastering 3D modeling in Blender.
- Exercise: Create a Simple Object: Start with a basic shape and modify it using extrusion and loop cuts. Apply a Subdivision Surface modifier to smooth the object.
- Exercise: Modifier Stack: Experiment with stacking multiple modifiers to achieve complex effects. Try combining a Mirror modifier with a Solidify modifier to see how they interact.
By mastering these modeling fundamentals, you\"ll be well on your way to creating detailed and complex 3D models in Blender. Remember, the key to becoming proficient is continuous practice and exploration of Blender\"s vast toolset.
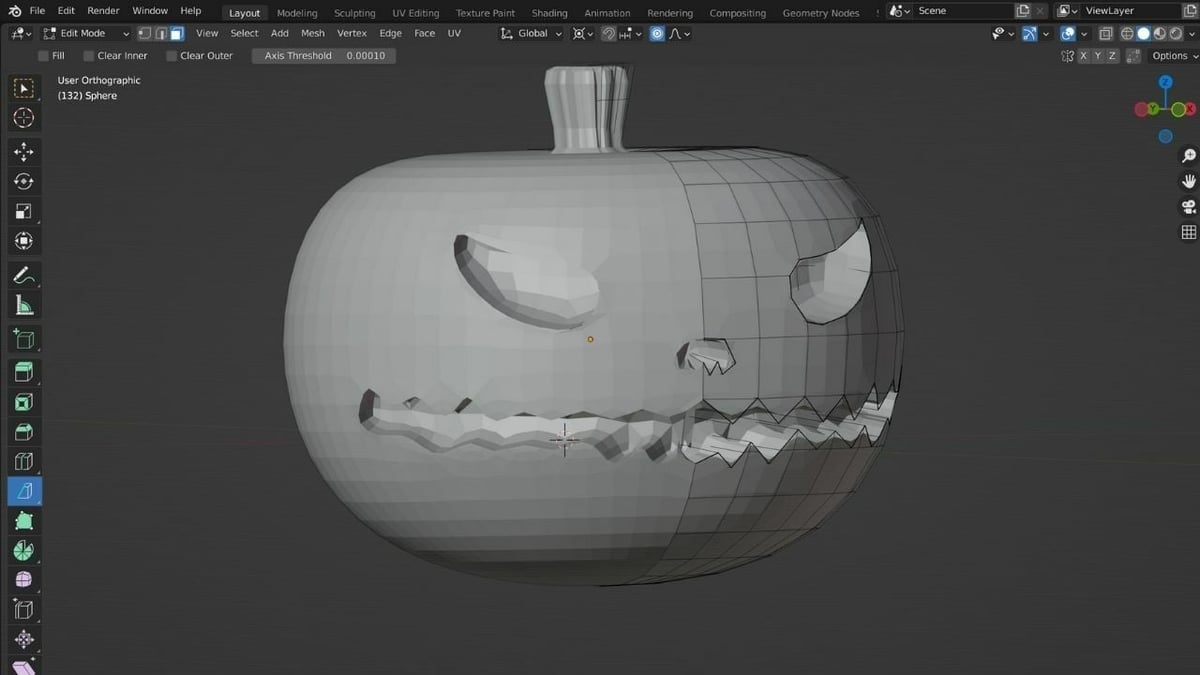
Sculpting Techniques: Tools and Tips for Detailed Creations
Blender\"s sculpting mode offers a powerful set of tools for adding intricate details to your 3D models. This section covers the basics of sculpting in Blender, including the tools and techniques that will help you create detailed and lifelike creations.
- Brushes: Learn about the different sculpting brushes available in Blender, such as the Grab, Clay, Crease, Smooth, and Inflate brushes, and when to use each one.
- Dynamic Topology: Understand how dynamic topology (Dyntopo) allows for flexible sculpting by adding geometry dynamically as you sculpt, making it easier to create complex shapes and details.
- Symmetry: Utilize symmetry sculpting to mirror your actions across the model, saving time and ensuring uniformity for symmetrical objects.
- Masking: Discover how to use masking to protect certain areas of your model while sculpting, allowing for precise control over the sculpting process.
- Strokes: Explore different stroke methods, such as Space, Airbrush, and Anchored, to achieve various effects with your sculpting brushes.
Practice these techniques by starting with simple forms and gradually adding complexity as you become more comfortable with the tools. Experimentation and practice are key to mastering sculpting in Blender.
- Project 1: Sculpt a Basic Character Head: Begin with a basic sphere, using the Grab brush to shape the outline of the head and features, then add details with the Crease and Clay brushes.
- Project 2: Create a Detailed Landscape: Use a combination of the Flatten, Clay, and Grab brushes to sculpt mountains, valleys, and other terrain features, employing Dyntopo for added detail.
Through sculpting, you can add life and realism to your models. Remember, the more you practice, the more intuitive the process will become. Happy sculpting!
_HOOK_
Blender Tutorial for Complete Beginners - Part 1
\"Discover the secrets of creating stunning 3D animations with our comprehensive blender tutorial! Unleash your creativity and master the art of modeling, texturing, and rendering in this step-by-step guide. Get ready to bring your ideas to life in the most captivating way!\"
Blender 3D - Create a 3D Isometric BEDROOM in 15 minutes - Beginner Tutorial
\"Escape to a world of modern elegance and impeccable design with our mesmerizing isometric bedroom video. Immerse yourself in the intricate details of this beautifully crafted space, and let the soothing ambiance transport you to a realm of tranquility. Get inspired and redefine your own personal haven with our enchanting video!\"
Texturing and Shading: Creating Realistic Materials
Texturing and shading are essential in bringing your 3D models to life, giving them color, depth, and realism. This section will guide you through the process of creating and applying textures, and using Blender\"s powerful shading system to achieve realistic materials.
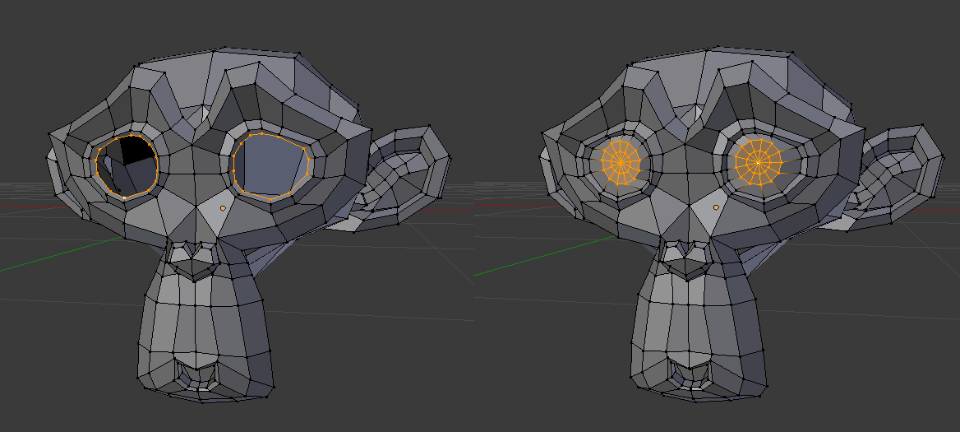
- Understanding UV Mapping: Learn how to unwrap your 3D model to apply textures accurately. This process involves projecting your 3D model onto a 2D plane to create a UV map, which serves as a guide for applying textures.
- Creating Textures: Explore different methods for creating textures, including painting directly on your model in Blender, using photo references, or creating procedural textures that offer endless customization.
- Applying Textures: Understand how to apply your created or sourced textures to your model using the UV maps as a guide.
- Using Shaders: Dive into Blender\"s shader editor to combine textures with shaders, like the Principled BSDF, to create materials that mimic real-world properties such as metal, glass, fabric, and more.
- Lighting and Reflections: Learn how lighting and reflections affect the appearance of your materials and how to set up your scene for the best results.
With practice, you\"ll be able to create materials that add realism and depth to your models, enhancing the overall look of your projects.
- Exercise: Texturing a Simple Object: Start with a basic object like a cube or sphere and practice applying different textures and materials to it. Experiment with both image-based and procedural textures.
- Exercise: Advanced Material Creation: Create a more complex material using the shader editor. Combine various nodes to simulate materials like aged metal, translucent plastic, or weathered wood.
Mastering texturing and shading in Blender opens up a world of possibilities for your 3D projects, allowing you to achieve more lifelike and detailed results. Keep experimenting with different techniques and textures to continually improve your skills.

Lighting and Rendering: Techniques for Professional Results
Lighting and rendering are pivotal in transforming your 3D models into visually stunning artworks. This section delves into the core principles and advanced techniques to achieve professional-quality results in Blender.
- Understanding Blender\"s Lighting System
- Begin by familiarizing yourself with Blender\"s lighting types, including Point, Sun, Spot, and Area lights. Each type offers unique characteristics, suitable for different scenarios. Experimenting with these can help you understand how to effectively illuminate your scenes.
- Three-Point Lighting Setup
- A classic technique that involves using three lights: the key light, fill light, and back light. This setup creates depth, defines form, and enhances the overall appearance of your model.
- Working with HDRIs
- High Dynamic Range Images (HDRIs) provide realistic environmental lighting with minimal effort. They can simulate complex lighting situations, such as outdoor scenes or studio settings, adding depth and realism to your render.
- Color Theory in Lighting
- Colors play a crucial role in setting the mood and emotion of your scene. Understanding color temperature and how different colors affect the perception of your scene is vital. Warm colors can create a cozy atmosphere, while cool colors can evoke a calm, serene environment.
- Shadow Control for Depth and Dimension
- Shadows are essential for adding depth and realism. Manipulating shadow softness, direction, and length can greatly impact the mood and spatial relationships within your scene.
- Advanced Rendering Techniques
- Explore advanced rendering features in Blender such as Ray Tracing, which simulates realistic light behavior, or Ambient Occlusion, which adds depth by accentuating the crevices and corners of your models. Utilizing these features can dramatically enhance the realism of your renders.
- Post-Processing Effects
- Blender\"s Compositor offers a variety of post-processing effects to enhance your renders further. Learn how to use effects like glare, bloom, and color grading to add the final touches to your artwork.
- Optimizing Render Settings
- Understanding render settings is key to achieving the best balance between quality and render time. Adjust settings such as samples, resolution, and light bounces to optimize your rendering process for different scenarios.
By mastering these lighting and rendering techniques in Blender, you can elevate your 3D creations from simple models to immersive, lifelike scenes. Remember, practice and experimentation are essential in harnessing the full potential of these tools for your digital artistry.
Animation Basics: Bringing Your Creations to Life
Animation in Blender opens up a world of dynamic storytelling and visual expression. Whether you\"re animating characters, objects, or effects, the basics of animation are foundational to bringing your creations to life. Let\"s explore the steps and techniques essential for beginner animators.
- Understanding Keyframes
- Keyframes are the cornerstone of animation, marking the start and end points of any movement. Learning how to set and manipulate keyframes in Blender is your first step towards creating fluid animations.
- The Timeline and Dope Sheet
- Blender\"s timeline and Dope Sheet provide a visual representation of your animation\"s keyframes. Mastering these tools allows you to edit the timing and sequence of movements, making your animations more precise and dynamic.
- Interpolation and Easing
- Interpolation controls how Blender transitions between keyframes, affecting the velocity and smoothness of animation. Utilizing different interpolation modes, such as linear or Bezier, helps in creating more natural movements.
- Animating with Bones and Armatures
- For character animation, understanding how to rig and animate with bones and armatures is crucial. These tools allow for more complex and realistic movements by defining a skeletal structure for your model.
- Shape Keys for Facial Expressions
- Shape keys are powerful for animating facial expressions and other deformations. By defining different poses or expressions as shape keys, you can smoothly transition between them to add life to your characters.
- Principles of Animation
- Familiarize yourself with the 12 principles of animation established by Disney animators. Concepts like squash and stretch, anticipation, and follow through can significantly enhance the realism and appeal of your animations.
- Adding Sound and Music
- Sound effects and music can elevate the emotional impact of your animations. Blender allows you to synchronize audio with your animations, adding depth and atmosphere to your scenes.
- Rendering Your Animation
- Once satisfied with your animation, rendering is the final step. Understanding Blender\"s render settings is essential for producing high-quality animations while managing file size and render times.
Starting with these basics, practice and experimentation will guide you through the vast possibilities of animation in Blender. Keep exploring and learning to bring your unique visions to life.
Advanced Animation: Rigging and Weight Painting
Advancing from basic animation to more complex character movements requires a solid understanding of rigging and weight painting. This section guides you through the processes of creating a flexible rig and applying weight painting to control how your mesh deforms during animation.
- Introduction to Rigging
- Rigging is the process of creating a skeleton (armature) for a model that defines how it moves. Start by learning how to add bones within Blender and position them to match the anatomy of your character for realistic movement.
- Parenting Mesh to Armature
- Once your rig is ready, the next step is to parent the mesh to the armature. This crucial step ensures that when you move the bones, the mesh follows accordingly. Blender offers several methods for parenting, including automatic weights, which can provide a good starting point for weight painting.
- Basics of Weight Painting
- Weight painting allows you to fine-tune how each bone influences parts of the mesh. This step is essential for smooth and realistic deformations. Begin with understanding the weight paint mode in Blender, where blue indicates no influence and red indicates full influence.
- Adjusting Weights for Natural Movement
- Adjusting the weights is a detailed process that involves painting on the mesh to define the influence of each bone. Practice adjusting these weights to achieve natural movements, especially in challenging areas like joints.
- Creating Custom Bone Shapes
- For better control and a more intuitive rig, you can replace the default bone shapes with custom ones. Custom shapes can make your rig easier to understand and manipulate, especially in complex animations.
- Inverse Kinematics (IK) for Dynamic Poses
- IK is a technique used to automate the positioning of the rig, making it easier to create dynamic poses. Setting up IK constraints can simplify the animation process, particularly for limbs and repetitive movements.
- Testing and Refining Your Rig
- After setting up your rig and weight painting, test the deformation by posing the character in various positions. This testing phase is crucial for identifying and correcting any issues with the rig or weight distribution.
- Utilizing Drivers and Constraints for Advanced Control
- Blender\"s drivers and constraints offer advanced control over your rig, allowing for more sophisticated animations. Learning how to use these tools can help automate movements and create more complex animation sequences.
Mastering rigging and weight painting is a journey that requires patience and practice. By following these steps and continuously refining your skills, you can create rigs that bring your characters to life in a realistic and compelling way.

Simulation Dynamics: Fluid, Cloth, and Particle Systems
Blender\"s simulation dynamics offer powerful tools for creating realistic animations involving fluids, fabrics, and particle systems. This section covers the fundamentals of setting up and utilizing these features to add complexity and realism to your 3D projects.
- Getting Started with Fluid Simulations
- Fluid simulations in Blender allow you to create realistic water, smoke, and fire effects. Begin by setting up a domain to define the boundaries of your simulation, then add a fluid source. Adjusting parameters such as viscosity and flow rate can help achieve the desired effect, whether it\"s a gentle stream or a raging inferno.
- Creating Realistic Cloth Simulations
- Cloth simulation brings fabrics to life, allowing them to interact naturally with forces and objects. Start by applying a Cloth modifier to your mesh and define the material properties, like cotton or silk, to determine how the fabric behaves. Wind and collision settings add further realism as your fabric moves through the environment.
- Mastering Particle Systems
- Particle systems in Blender are used for creating complex effects such as rain, snow, or swarms of creatures. By emitting particles from a source object, you can control their life span, velocity, and interaction with other objects. Using force fields, you can simulate natural forces like gravity and wind to influence the particles’ movement.
- Integrating Simulations with Animations
- Combining simulations with character animations or scene movements adds another layer of immersion. Learn to synchronize your simulations with the timeline to ensure they interact correctly with animated elements.
- Optimizing Simulations for Performance
- High-quality simulations can be computationally intensive. Explore techniques for optimizing your simulations, such as reducing particle count or simplifying fluid resolution, to maintain a balance between visual fidelity and performance.
- Baking Simulations for Consistency
- Baking records the simulation data, ensuring consistency across renders and saving computational resources during playback. This step is crucial for complex scenes or when finalizing your project.
- Advanced Techniques and Tips
- As you become more comfortable with Blender\"s simulation tools, experiment with advanced techniques like mixing different simulation types for unique effects or using the Mantaflow system for more realistic fluid dynamics.
By mastering these simulation dynamics, you can significantly enhance the realism and depth of your Blender projects. Remember, the key to successful simulations is experimentation and practice, so don\"t hesitate to try new settings and combinations to achieve your creative vision.

_HOOK_
Compositing and Post-Processing: Enhancing Visuals
Compositing and post-processing in Blender are crucial for adding the final touches that elevate your visuals to professional levels. This section explores the tools and techniques to enhance your renders, from basic adjustments to advanced compositing.
- Introduction to Blender\"s Compositor
- The compositor in Blender is a powerful post-processing tool that allows you to combine multiple images, add effects, and adjust the final image. Familiarize yourself with the node-based interface to start enhancing your renders.
- Basic Color Correction
- Color correction is essential for achieving a balanced and appealing look. Use the compositor to adjust brightness, contrast, saturation, and color balance. These adjustments can significantly impact the mood and realism of your scene.
- Adding Effects with Nodes
- Blender\"s compositor offers a variety of nodes for adding effects like blur, glare, and vignette. Experiment with these nodes to create depth of field, highlight bright areas, or draw focus to specific parts of your image.
- Using Masks and Layers
- Masks and layers enable selective editing and effects application. This technique is particularly useful for complex scenes where you want to apply adjustments to specific elements without affecting the entire image.
- Integrating Render Passes
- Render passes separate your image into components such as shadows, reflections, and ambient occlusion. By combining these passes in the compositor, you gain finer control over the final look of your render.
- Enhancing Visuals with Glare and Bloom
- Glare and bloom effects add a cinematic quality to bright areas, simulating how light behaves in a real camera. Use these effects to emphasize sunlight, reflections, or other light sources in your scene.
- Finalizing with Color Grading
- Color grading is the process of altering or enhancing the color of your entire scene to achieve a specific atmosphere or style. It\"s a powerful tool for setting the tone of your render, whether it\"s a warm sunset or a cold, moonlit night.
- Optimizing for Output
- Before exporting your final image or animation, ensure your composition is optimized for your intended output, whether it\"s for web, print, or video. Consider factors like resolution, aspect ratio, and file format to maintain quality.
By applying these compositing and post-processing techniques, you can transform a good render into a great one. The key to mastery is experimentation, so don\"t hesitate to try different combinations of effects to achieve your desired result.
3D Printing with Blender: Preparing Models for Print
Blender is not just for creating stunning 3D animations and models; it\"s also a powerful tool for preparing models for 3D printing. This section will guide you through the essential steps to ensure your Blender models are print-ready, focusing on optimization, error checking, and export settings.
Model Optimization
- Check Model Scale: Ensure your model\"s size matches the physical dimensions you intend to print. Use Blender\"s measurement units to adjust the scale accurately.
- Apply Modifiers: Before exporting, apply any modifiers to your mesh to ensure changes are permanent and visible in the exported file.
- Reduce Mesh Complexity: Simplify your model by reducing the mesh complexity without compromising detail, to make printing easier and more reliable.
Error Checking and Repair
- Remove Doubles: Merge vertices that are too close to each other to avoid unnecessary edges and vertices that could complicate the print.
- Ensure Manifoldness: Your model should be watertight, meaning it has no holes, non-manifold edges, or inverted normals. Use Blender\"s \"Select Non-Manifold\" option to identify and fix these issues.
- Check Wall Thickness: Make sure the walls of your model are thick enough to be printed. This can vary depending on your printer\"s capabilities and the material used.
Texture and Material Considerations
Most 3D printers print objects in a single color or material, so any textures or materials used in Blender will not directly translate to the printed object. However, you can use textures to create a color map for full-color 3D printing or to plan out where different materials will be used in multi-material prints.
Exporting Your Model
Once your model is optimized and error-free, it\"s time to export it for printing:
- Choose the Right Format: STL and OBJ are the most common formats for 3D printing. Select the format that works best with your 3D printer.
- Export Settings: Ensure normals are consistent, and the scale is correct. If your printer supports it, include color information in the OBJ files.
- Final Check: Open your exported file in a 3D printing software to perform a final check for any errors and to ensure it\"s ready for printing.
Following these steps will help you create 3D prints that are not only beautiful but also structurally sound and functional. Whether you\"re creating prototypes, functional parts, or artistic sculptures, Blender can be an invaluable tool in your 3D printing arsenal.
READ MORE:
Game Development: Assets Creation and Integration
Blender is a versatile tool that can be used for creating and integrating assets into game development projects. This guide will take you through the process of designing, optimizing, and exporting models for use in game engines like Unity or Unreal Engine.
Creating Game Assets
- Conceptualize Your Asset: Start with a clear idea or concept art. Knowing what you need to create will guide your modeling process.
- Modeling: Use Blender\"s modeling tools to create your asset. Focus on topology and keep your geometry as clean as possible to ensure good performance in game engines.
- Texturing: Create textures that bring your asset to life. Consider using PBR (Physically Based Rendering) textures for realism.
- UV Mapping: Properly unwrap your model for texturing. Good UV mapping is crucial for the asset\"s appearance in the game.
Optimizing for Game Engines
- Reduce Polycount: Optimize your model by reducing the number of polygons without significantly affecting the visual quality. Use modifiers like Decimate judiciously.
- LOD (Level of Detail): Create multiple versions of your asset with varying levels of detail for performance optimization in different viewing conditions.
- Bake Textures: Bake complex shaders or high-poly details into textures to reduce runtime processing while maintaining visual quality.
Exporting and Integration
Once your assets are ready and optimized, you\"ll need to export them to a format compatible with your game engine:
- Export Formats: Common formats include FBX and OBJ. Choose the format based on your game engine\"s requirements.
- Asset Import: Import your assets into the game engine. This process can vary, so refer to your engine\"s documentation for specific instructions.
- Asset Setup: Set up materials, textures, and shaders within the game engine. Adjust settings to achieve the desired look under various lighting conditions.
Testing and Iteration
Place your assets in the game environment and test them under different conditions. Pay attention to performance and visual fidelity, making adjustments as necessary. Iteration is key to refining assets for the optimal balance of quality and performance.
By following these steps, you can create high-quality assets for your game development projects using Blender. Remember, practice and experimentation are essential to mastering the art of asset creation and integration.
Embark on a transformative journey with our comprehensive 3D Blender tutorials, designed to elevate your skills from novice to expert. Unleash your creative potential and bring your imaginative visions to life in the captivating world of 3D art and design.