Topic how to animate in blender roblox: Embark on a creative journey to master animating in Blender for Roblox with this comprehensive guide. Unlock the potential to bring your Roblox characters and worlds to life through engaging animations.
Table of Content
- How can I animate in Blender for Roblox?
- Setting Up Blender for Roblox Animation
- Understanding Roblox Rigging Requirements
- Creating Your First Animation in Blender
- Utilizing Roblox Blender Plugin for Efficient Workflow
- Utilizing Roblox Blender Plugin for Efficient Workflow
- Exporting and Importing Animations from Blender to Roblox
- Exporting and Importing Animations from Blender to Roblox
- YOUTUBE: Roblox Blender Animation Tutorial - Roblox Studio Blender
- Optimizing Animations for Roblox Platform Limitations
- Optimizing Animations for Roblox Platform Limitations
- Advanced Animation Techniques in Blender
- Advanced Animation Techniques in Blender
- Troubleshooting Common Issues with Blender Animations in Roblox
- Troubleshooting Common Issues with Blender Animations in Roblox
- Community Resources and Support for Blender Animators
- Community Resources and Support for Blender Animators
How can I animate in Blender for Roblox?
To animate in Blender for Roblox, you can follow these steps:
- Download and install Blender on your computer.
- Open Blender and create or import your 3D model.
- Create an Armature (skeleton) for your model by going to Add > Armature > Single Bone.
- Select your model and then shift-select the armature bone.
- Press Ctrl+P and choose \"With Automatic Weights\" to assign the armature to your model.
- Go to the Object Data tab in the Properties panel and rename the bone to something meaningful.
- Switch to Pose Mode by selecting the armature and choosing it from the Mode dropdown menu.
- Start animating your character by posing the bones.
- Move the timeline to a new frame and adjust the pose to create a smooth animation.
- Repeat step 9 for each frame in your animation.
- To export your animation for Roblox, go to File > Export > FBX.
- Select a location to save your FBX file and configure the export settings according to your needs.
- Click \"Export FBX\" to save your animation.
- In Roblox, you can then import the FBX file and apply the animation to your character or object.
By following these steps, you should be able to animate in Blender for Roblox smoothly and bring life to your creations.
READ MORE:
Setting Up Blender for Roblox Animation
Starting your journey into Roblox animation with Blender involves a few key setup steps to ensure a smooth workflow. Follow this guide to prepare Blender for creating animations that can be imported into Roblox.
- Download and Install Blender: Ensure you have the latest version of Blender installed on your computer for compatibility and access to the latest features.
- Install Roblox Studio: Roblox Studio is essential for testing and publishing your animations. Download it from the official Roblox website.
- Get the Roblox Blender Plugin: This plugin facilitates the export of animations directly to Roblox. Download and install it from the Blender or Roblox developer community.
- Import Roblox Character Rig: Download a Roblox character rig or use the plugin to import one directly into Blender. This will be your animation\"s foundation.
- Set Up Blender Workspace: Customize your Blender workspace by enabling the Animation and Rigging workspaces for easier access to tools you\"ll frequently use.
- Learn Blender\"s Basics: If you\"re new to Blender, familiarize yourself with its interface, keyframe animation, and basic modeling tools to streamline your animation process.
- Save Your Project: Create a dedicated project folder for your Roblox animations to keep your work organized and easily accessible.
With Blender set up for Roblox animation, you\"re ready to start bringing your characters to life. Remember, practice and experimentation are key to mastering animation in Blender for Roblox.

Understanding Roblox Rigging Requirements
Rigging in Blender for Roblox is a crucial step in animation, requiring attention to detail to ensure characters move realistically. Here\"s what you need to know about Roblox\"s rigging requirements for seamless animation integration.
- Roblox Rig Structure: Understand that Roblox uses a specific skeleton structure. Your Blender rigs should match this structure, including the naming conventions for bones, to ensure compatibility.
- Bone Naming Conventions: Each bone in your rig must be named according to Roblox standards. This includes naming spine, arms, legs, and other parts in a way that Roblox can recognize.
- Exporting Rigs: When your rig is ready, it needs to be exported in a format that Roblox supports. Typically, this is the FBX format, which preserves the rigging information for use in Roblox Studio.
- Testing Rig Compatibility: Before finalizing your animation, import the rigged model into Roblox Studio to test the rig. This ensures that all movements are correctly mapped and that the rig functions as expected within Roblox.
- Optimizing for Performance: Roblox games are accessed on various devices, so it\"s crucial to optimize your rigs for performance. This includes minimizing the number of bones and ensuring efficient use of resources.
By adhering to these rigging requirements, you ensure that your Blender animations will integrate smoothly into Roblox, providing a seamless experience for game developers and players alike.

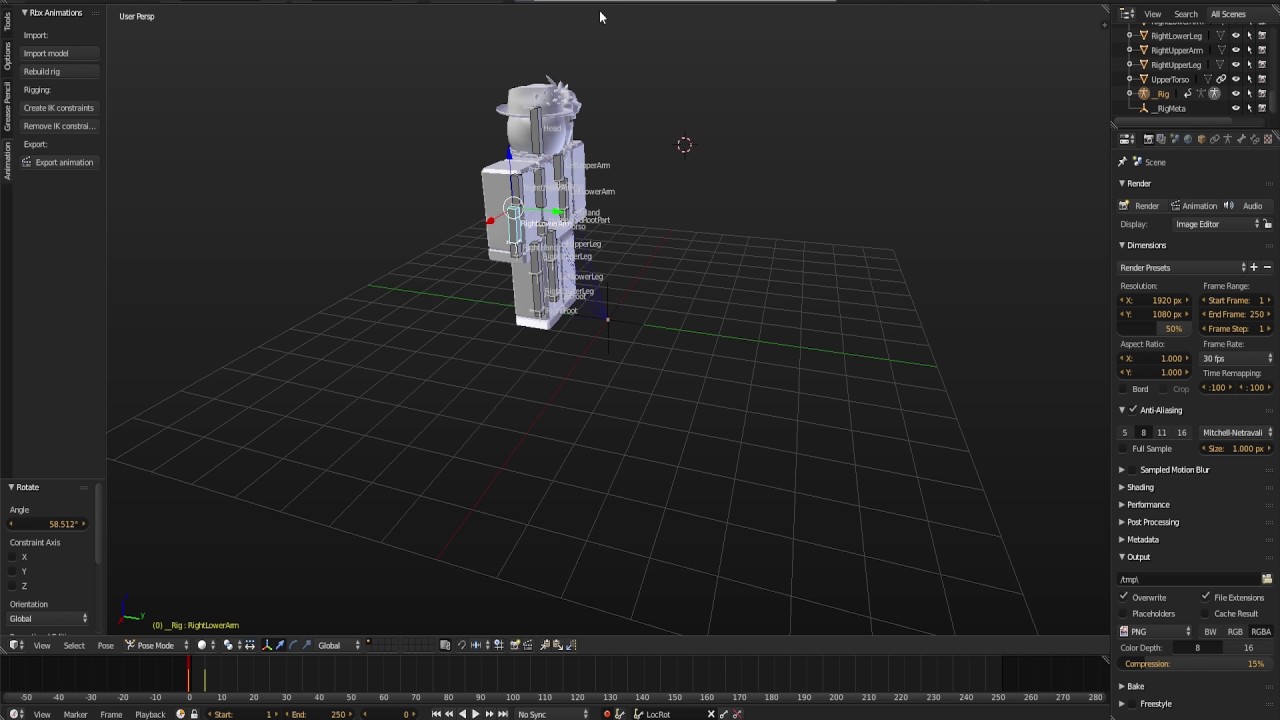
Creating Your First Animation in Blender
Creating your first animation in Blender for Roblox can be an exciting journey. This guide will walk you through the basic steps to bring your creations to life.
- Setup Your Blender Scene: Start by opening Blender and setting up a new scene. Ensure your scene is clean and organized to avoid any distractions while animating.
- Import Your Roblox Model: Import the Roblox model you wish to animate. You can download pre-rigged models or use the Roblox Blender plugin to import your character directly.
- Understand the Rig: Familiarize yourself with the rig\"s bones and how they control the character. This understanding is crucial for creating realistic movements.
- Create a Pose: Move to the frame where you want to start your animation, and pose your character by selecting and moving the bones. This will be your animation\"s starting point.
- Insert Keyframes: Once you\"re happy with the pose, insert a keyframe by pressing \"I\" and selecting \"LocRotScale\" to save the position, rotation, and scale of all bones.
- Animate Your Character: Move forward in the timeline to where you want your next pose to be. Adjust the bones to create a new pose and insert another keyframe. Repeat this process to continue creating your animation.
- Play Back and Refine: Use the playback feature in Blender to review your animation. Make adjustments as needed to ensure smooth and realistic motion.
- Export Your Animation: Once satisfied with your animation, export it in a format compatible with Roblox (usually FBX). Make sure to select the option to include animations during the export process.
Remember, animation is an art that requires practice and patience. Don\"t be discouraged by initial challenges. With time, you\"ll improve and be able to create more complex animations for your Roblox games.

Utilizing Roblox Blender Plugin for Efficient Workflow
_HOOK_
Utilizing Roblox Blender Plugin for Efficient Workflow
The Roblox Blender plugin is a powerful tool designed to streamline the process of creating and importing animations from Blender to Roblox. By utilizing this plugin, animators can significantly enhance their workflow efficiency. Here\"s how to make the most out of the Roblox Blender Plugin:
- Installation: Begin by downloading the Roblox Blender Plugin from the official Roblox or Blender community resources. Follow the instructions to install and enable the plugin within Blender.
- Importing Models: Use the plugin to directly import Roblox models into Blender. This feature saves time and ensures that the models are accurately scaled and oriented for animation.
- Setting Up Rigging: The plugin often comes with tools to simplify the rigging process. It may automatically rig your Roblox models, preparing them for animation without the need for complex manual rigging.
- Animating: With your model rigged, you can start animating immediately. The plugin may offer custom controls or presets specifically designed for Roblox characters, facilitating easier manipulation of bones and movements.
- Exporting Animations: After completing your animation, the plugin provides options to export your work in a format that\"s compatible with Roblox, often streamlining the process with predefined settings that match Roblox\"s requirements.
- Testing in Roblox Studio: Once exported, import your animation into Roblox Studio to test it within your game. The plugin ensures that the animations are compatible and ready for use in the Roblox environment.
By integrating the Roblox Blender Plugin into your animation workflow, you can save time, reduce errors, and focus more on the creative aspects of animation. This tool is invaluable for anyone looking to create professional-level animations for Roblox games.

Exporting and Importing Animations from Blender to Roblox
Exporting and Importing Animations from Blender to Roblox
Transferring animations from Blender to Roblox involves a series of steps to ensure compatibility and functionality within the Roblox environment. This section will guide you through the process of exporting animations from Blender and importing them into Roblox Studio.
- Finalize Your Animation: Before exporting, make sure your animation is complete and plays back as intended within Blender. Check for any issues with the rigging or animation frames.
- Choose the Right Export Format: Roblox animations need to be exported in a format that Roblox Studio can import, typically FBX (.fbx). In Blender, go to File > Export > FBX (.fbx).
- Configure Export Settings: In the export window, adjust the settings to suit Roblox\"s requirements. Ensure that you select \"Armature\" and \"Mesh\" under the \"Objects Types\" and enable the \"Bake Animation\" option. Set the scale to 1.00 to maintain the correct size.
- Export the Animation: Choose a memorable location on your computer to save the FBX file, and click \"Export FBX\".
- Import into Roblox Studio: Open Roblox Studio and the game project where you want to use the animation. Navigate to the \"Plugins\" tab and select \"Animation Editor\". Inside the Animation Editor, click on \"Import\" and select your exported FBX file.
- Review and Edit: After importing, review the animation within Roblox Studio. You may need to make adjustments or refine the animation using the Animation Editor to ensure it fits perfectly with your game\"s environment and character models.
- Publish Your Animation: Once satisfied with the animation in Roblox Studio, publish it to your Roblox account. You will receive an Asset ID, which can be used to implement the animation into your game scripts.
By following these steps, you can successfully bring your Blender animations into Roblox, adding dynamic and engaging content to your games. Remember, practice and experimentation are key to mastering the export and import process for seamless integration of animations.

Roblox Blender Animation Tutorial - Roblox Studio Blender
Animation: Dive into a world of creativity and imagination with this captivating animated video. Get ready to be mesmerized by the stunning visuals and heartwarming story that unfolds before your eyes. Don\'t miss out on this magical journey!
How To Animate Roblox In Blender
Blender: Discover the power of Blender, the ultimate tool for creating jaw-dropping 3D animations. Unleash your artistic potential and learn how to bring your wildest visions to life. Join us as we take you on a thrilling adventure through the endless possibilities of Blender!
Optimizing Animations for Roblox Platform Limitations
Optimizing Animations for Roblox Platform Limitations
Creating animations for Roblox requires not only creativity but also an understanding of the platform\"s limitations. Optimizing animations ensures they run smoothly on various devices, providing a seamless experience for all players. Here\"s how you can optimize your Blender animations for Roblox:
- Keep It Simple: Start by simplifying your animations. Complex animations with too many bones or movements can lead to performance issues. Focus on the essential movements that convey the action or emotion effectively.
- Reduce Keyframes: Limit the number of keyframes in your animations. More keyframes mean more data for Roblox to process. Use the minimum number of keyframes needed to maintain the animation\"s fluidity.
- Optimize Bone Structure: When rigging your model, use as few bones as necessary. Each bone adds to the computational load during gameplay. Consider merging bones that do not contribute significantly to the animation\"s quality.
- Animation Length: Shorter animations are generally better optimized for Roblox. Long animations can be broken down into smaller segments if possible, especially for actions that are looped or repeated.
- Use Roblox\"s Animation Editor: Once you\"ve imported your animation into Roblox Studio, use Roblox\"s Animation Editor to make further optimizations. It allows you to adjust keyframes and reduce complexity without returning to Blender.
- Test on Multiple Devices: Test your animations on different devices to ensure they perform well across the board. Pay special attention to mobile devices, which have more significant limitations than PCs.
- Consider the Game Environment: Factor in the game\"s environment when creating animations. An animation that looks smooth in isolation may perform differently when multiple animations are running simultaneously in a complex game scene.
By following these optimization strategies, you can create animations that are not only visually appealing but also perform well within Roblox\"s diverse platform ecosystem. Optimization is a balance between maintaining the quality of your animation and ensuring it runs smoothly across all devices.

_HOOK_
Advanced Animation Techniques in Blender
Advanced Animation Techniques in Blender
Once you\"re comfortable with the basics of animation in Blender, it\"s time to explore some advanced techniques that can add depth and realism to your Roblox animations. These methods can help you create more sophisticated and engaging animations.
- Non-Linear Animation (NLA) Editor: Use Blender\"s NLA Editor to blend and layer different animations. This powerful feature allows for the combination of multiple actions into one seamless animation, perfect for creating complex sequences without cluttering the timeline.
- Shape Keys: Shape keys are used for facial expressions or morphing objects within your animations. They can add a level of detail and realism to characters by allowing for smooth transitions between expressions or states.
- Graph Editor for Fine-tuning: The Graph Editor is a crucial tool for refining the movement of your animations. It provides control over the interpolation of keyframes, allowing you to adjust the velocity and timing of actions for smoother or more dynamic effects.
- Rigging with Constraints: Advanced rigging techniques involve using constraints to automate movements and create more natural-looking motions. Constraints can make rigging complex models easier by controlling how bones influence each other.
- Dynamic Effects with Physics: Incorporate physics simulations into your animations for dynamic effects like cloth movement, hair, or rigid body dynamics. These can add a layer of realism to your animations, especially for environmental interactions.
- Custom Bone Shapes: Custom bone shapes can improve the rigging process by making the control of your character more intuitive. This technique involves creating custom gizmos that are easier to select and manipulate during animation.
- Driver-Based Automation: Drivers can automate the relationship between different properties, such as making an object\"s rotation dependent on another object\"s location. This can be used to create complex, interconnected animations efficiently.
Mastering these advanced techniques requires practice and experimentation. However, the effort can significantly enhance the quality of your animations, making your Roblox games stand out. Remember to always test your animations within Roblox Studio to ensure compatibility and performance.
Troubleshooting Common Issues with Blender Animations in Roblox
Troubleshooting Common Issues with Blender Animations in Roblox
When importing animations from Blender into Roblox, creators may encounter several common issues. Identifying and resolving these problems is crucial for a smooth animation process. Below are strategies to troubleshoot frequent challenges:
- Animations Not Playing: If your animation doesn\"t play in Roblox, check the animation ID and ensure it\"s correctly linked in your script. Also, verify that the animation is published and not set to private on your Roblox account.
- Incompatible Rigging: Roblox uses a specific rigging system. If your Blender model\"s rig doesn\"t match, animations may not import correctly. Ensure your rigging is compatible with Roblox\"s requirements, focusing on bone hierarchy and naming conventions.
- Scale Issues: Sometimes, animations appear too small or too large in Roblox. This discrepancy usually stems from incorrect scale settings during the export from Blender. Ensure the scale is set to 1.0 in Blender\"s export settings and matches Roblox\"s units.
- Missing Bones or Deformations: If bones are missing or deformations occur, it could be due to unsupported bone constraints or incorrect parenting. Simplify your rig, and ensure all bones are correctly parented to the main armature.
- Animation Speed Issues: Animation playback speed can vary between Blender and Roblox. To fix this, adjust the animation frame rate in Blender to match Roblox\"s default frame rate or use Roblox Studio\"s animation editor to modify the playback speed.
- Export/Import Errors: Errors during the export or import process can occur due to incorrect file formats or settings. Double-check that you\"re exporting as an FBX file with the correct options selected, such as including armatures and animations.
- Testing on Different Devices: Performance can vary across devices. Test animations on multiple platforms to ensure they work as intended. If issues persist, consider optimizing animations for lower-end devices.
Addressing these common issues can greatly improve the compatibility and performance of Blender animations in Roblox, enhancing the gaming experience for all players. Patience and persistence in troubleshooting are key to successful animation integration.
Community Resources and Support for Blender Animators
_HOOK_
READ MORE:
Community Resources and Support for Blender Animators
The Blender and Roblox communities are rich sources of support and resources for animators of all skill levels. From beginners looking to create their first animation to advanced users seeking to refine their techniques, numerous platforms and tools are available to assist. Here\"s how you can tap into these resources:
- Online Forums and Communities: Websites such as Blender Artists, DevForum Roblox, and Reddit offer spaces where animators can ask questions, share their work, and receive feedback from peers. These communities are great for solving specific issues or getting inspiration for your projects.
- Tutorials and Guides: There\"s a wealth of tutorials available on YouTube, Udemy, and Coursera that cover every aspect of animation in Blender and Roblox. Whether you\"re looking for basic rigging instructions or advanced animation techniques, there\"s likely a tutorial out there for you.
- Blender Add-ons: The Blender community has developed numerous add-ons that can simplify the animation process. These include tools for automatic rigging, animation retargeting, and more. Many of these add-ons are free and can be easily integrated into your workflow.
- Template Models and Rigs: Both Blender and Roblox communities offer pre-made models and rigs that can be used as a starting point for your animations. Using these resources can save time, especially if you\"re new to modeling or rigging.
- Workshops and Webinars: Keep an eye out for workshops and webinars hosted by experienced animators or official Blender and Roblox events. These sessions can provide deeper insights into specific techniques or updates in the software.
- Collaboration Opportunities: Community platforms can also be a place to find collaboration opportunities. Working with other creators can be a great way to learn and produce content that might be too challenging to tackle alone.
Leveraging these community resources and support networks can significantly enhance your animation skills and open up new possibilities for your Roblox games. Always be open to learning and sharing within these communities to get the most out of your animation journey.
Embark on your journey to mastering Blender animations for Roblox with our comprehensive guide, designed to elevate your games with captivating visuals. Unleash your creativity and transform your ideas into reality, enhancing the gaming experience for players worldwide.