Topic how to 3d animate in blender: Unlock the world of 3D animation with Blender, the powerful, free software that brings your digital creations to life. This guide will walk you through the basics to advanced techniques, making 3D animation accessible and fun for everyone.
Table of Content
- How to create 3D animations using Blender?
- Understanding Blender\"s Interface and Basic Setup
- Creating Your First 3D Model
- Introduction to Rigging for Animation
- Keyframing and Animation Principles
- YOUTUBE: The ABSOLUTE BASICS of 3D Animation in Blender - LeeDanielsART Tutorial
- Advanced Animation Techniques
- Working with Physics and Simulations
- Rendering and Exporting Your Animation
- Common Issues and How to Solve Them
- Resources for Further Learning and Community Support
How to create 3D animations using Blender?
To create 3D animations using Blender, follow these steps:
- First, download and install Blender from the official website (https://www.blender.org/download/).
- Launch Blender and familiarize yourself with the user interface. You will see various windows such as the viewport, timeline, and properties panel.
- Create or import the 3D objects you want to animate. Blender supports a wide range of file formats, so you can import existing models if needed.
- Position and arrange the objects in your scene using the transformation tools. You can move, rotate, and scale the objects to achieve the desired composition.
- Set up the animation timeline by selecting the desired frame range and frame rate. This will determine the duration and smoothness of your animation.
- Select an object you want to animate and go to the \"Object\" menu. Choose \"Animation\" and then \"Keyframe Insertion\" to insert keyframes for the object\'s properties.
- In the timeline, move to the desired frame where you want to set a keyframe. Then, adjust the properties of the object (e.g., location, rotation, scale) using the transform tools or by changing the values in the properties panel.
- After making the desired changes, go back to the \"Object\" menu and select \"Animation\" and then \"Insert Keyframes\" to set keyframes for the selected properties at the current frame.
- Repeat the previous steps to insert keyframes at different frames and adjust the object\'s properties to create the desired animation.
- To preview the animation, click the \"Play\" button in the timeline or use the playback controls. You can also make further adjustments to the keyframes and properties as needed.
- Once you are satisfied with the animation, you can render the final result. Set up the rendering options in the \"Render\" tab of the properties panel, such as output format, resolution, and lighting.
- Click the \"Render\" button to start the rendering process. Blender will generate the frames for the animation based on your settings.
- After rendering, you can save the animation as an image sequence or a video file, depending on your requirements.
READ MORE:
Understanding Blender\"s Interface and Basic Setup
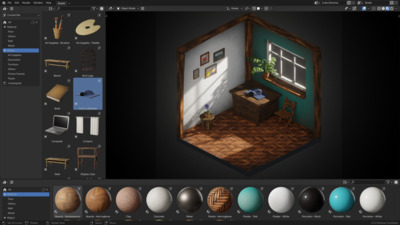
Welcome to the exciting world of 3D animation with Blender! Understanding Blender\"s interface is your first step towards creating stunning 3D animations. Blender\"s interface may seem daunting at first, but with a bit of guidance, you\"ll find it incredibly powerful and user-friendly. Let\"s dive into setting up and navigating Blender.
First, when you open Blender, you\"re greeted with the default screen which is divided into several sections called \"editors\". The most prominent ones are the 3D Viewport, where you model and animate; the Timeline, for controlling animations; the Outliner, which lists all the objects in your scene; and the Properties editor, where you adjust settings for objects, materials, world settings, and more.
To customize your workspace in Blender, you can drag the edges of any editor to resize it or split it into multiple editors. You can also change the type of editor by clicking on the editor type selector in the top-left corner of each editor. Blender offers various layouts tailored for different tasks such as \"Layout\", \"Modeling\", \"Sculpting\", \"UV Editing\", \"Texture Paint\", \"Shading\", \"Animation\", \"Rendering\", and \"Compositing\".
Here are some basic steps to get you started:
- Adjusting User Preferences: Go to Edit > Preferences. Here, you can customize themes, keymaps, and addons. It\"s especially useful to enable \"Emulate 3 Button Mouse\" if you don’t have a middle mouse button.
- Navigating the 3D Viewport: Use the middle mouse button to orbit around your scene, scroll to zoom in and out, and shift + middle mouse button to pan. Practice these to get comfortable moving around your scene.
- Selecting Objects: Right-click to select objects in your scene. You can shift + right-click to select multiple objects.
- Adding Objects: Press Shift + A to add a new object. This menu lets you add meshes, curves, cameras, lights, and more.
- Manipulating Objects: Use the tools in the toolbar to move (G), rotate (R), and scale (S) objects. You can also use the transform widgets in the 3D Viewport for a more intuitive control.
- Switching between Object and Edit Mode: Tab switches between Object Mode (where you select and manipulate whole objects) and Edit Mode (where you can modify the individual vertices, edges, and faces of a mesh).
- Using the Properties Editor: This editor is crucial for modifying object properties, including materials, modifiers, physics, and render settings. Click on the different icons at the top of the Properties Editor to access these settings.
- Setting Up Your Camera: The camera is essential for rendering your scenes. Select the camera and press N to open the sidebar in the 3D Viewport, then go to the View tab and click \"Lock Camera to View\" for easier positioning.
- Saving Your Project: Don’t forget to save your work regularly! Use File > Save As to save your project. Blender\"s file browser also allows you to create new directories, toggle the visibility of file extensions, and use a thumbnail view for blend files.
These are the basics to get you started with Blender. The interface is designed to be fully customizable, so you can tweak it to fit your workflow as you become more familiar with it. Remember, practice and exploration are key to mastering Blender\"s interface. Happy animating!

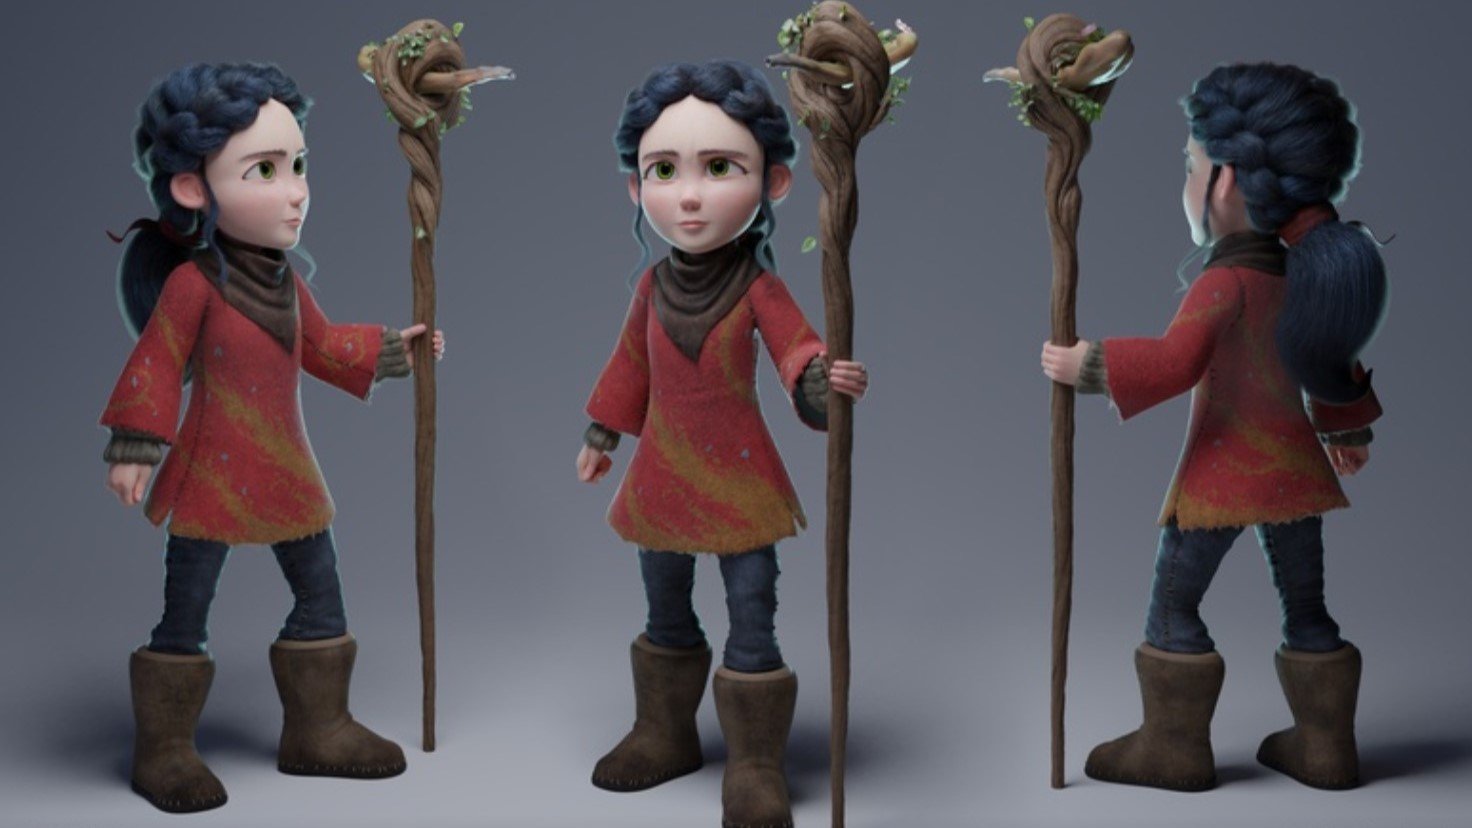
Creating Your First 3D Model
Embarking on the journey of 3D modeling in Blender is a thrilling experience. Creating your first 3D model is a significant milestone. This guide will walk you through the basic steps to model a simple object in Blender, ensuring you understand the process from start to finish.
Let\"s create a simple 3D model of a coffee cup, which introduces you to basic modeling techniques while keeping the process manageable for beginners.
- Setting Up Your Scene: Start with a new Blender file and delete the default cube by selecting it and pressing \"X\" or \"Delete\" on your keyboard.
- Adding a Cylinder: Press Shift + A and select Mesh > Cylinder. This will be the base of your coffee cup. In the Add Cylinder options (left bottom corner of the 3D Viewport), set the Vertices to 32 for a smoother circle, and adjust the Radius and Depth to your liking.
- Entering Edit Mode: With the cylinder selected, press \"Tab\" to enter Edit Mode. You will see the vertices, edges, and faces that make up the cylinder.
- Shaping the Cup: In Edit Mode, you can start shaping your cup. Use the Face Select mode (3 on the keyboard) to select the top face of the cylinder. Press \"I\" to inset the face slightly, which will create the inner wall of your cup. Then, press \"E\" to extrude the inset face downward to form the inside of the cup.
- Adding a Handle: To add a handle, you can use the Loop Cut tool (Ctrl + R) to add a vertical loop where you want the handle. Then, select the faces where the handle will be, extrude them out slightly, and use the Scale (S) and Move (G) tools to shape the handle.
- Smoothing Your Model: Right-click on your model and choose \"Shade Smooth\" to give your cup a smoother appearance. You can also add a Subdivision Surface modifier from the Properties panel for even more smoothness.
- Applying Materials: Go to the Material Properties tab (the little red sphere icon in the Properties Editor) and click \"New\" to add a new material to your cup. You can adjust the color, specular intensity, and roughness to customize the look of your cup.
- Final Adjustments: Take a moment to review your model. You can adjust the shape, add more details, or refine the handle. Use the Sculpt Mode for more organic adjustments if needed.
Congratulations! You\"ve created your first 3D model in Blender. This coffee cup is a basic project, but it introduces you to essential modeling tools and techniques in Blender. Practice by modeling more objects and experimenting with different shapes and modifiers. Remember, 3D modeling is a skill that improves with time and experience. Keep exploring and have fun with your 3D modeling projects!
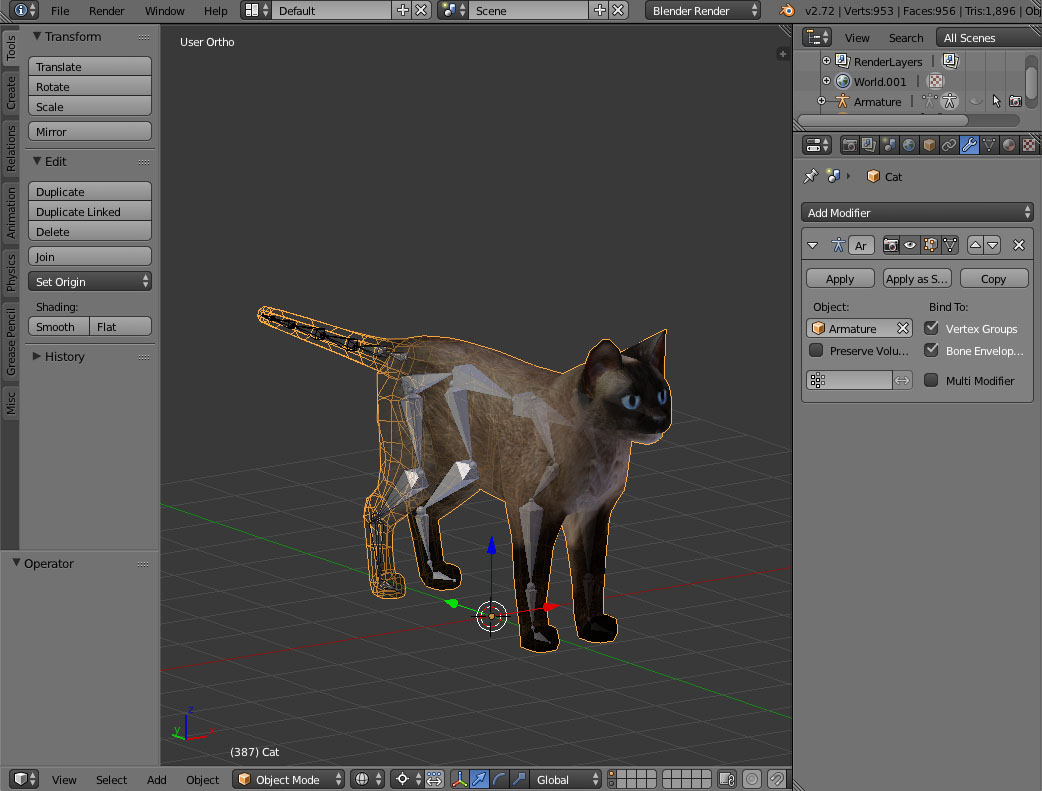
Introduction to Rigging for Animation
Rigging is a crucial step in the animation process, providing a skeleton to your 3D model so it can move and be animated realistically. This guide introduces you to the basics of rigging in Blender, ensuring you understand how to prepare your model for animation.
Rigging involves creating an armature (a collection of bones) and assigning parts of the mesh to different bones. When a bone moves, the connected mesh moves with it. This allows for realistic and complex movements in your animations.
- Understanding Armatures: Armatures are the bones of your model. In Blender, you create an armature by pressing Shift + A and selecting Armature > Single Bone. This initial bone can be the starting point of your rig.
- Editing Bones: Enter Edit Mode (Tab) with the armature selected to add more bones. You can extrude (E) from an existing bone to create new bones. This is useful for creating chains of bones like a spine or fingers.
- Naming Bones: It\"s essential to name your bones clearly, especially in complex rigs. Select a bone, go to the Bone Properties tab, and give it a descriptive name. This practice keeps your rig organized and makes animating easier later on.
- Parenting With Automatic Weights: Once your armature is complete, you need to connect it to your mesh. Select your mesh, shift-select the armature, and press Ctrl + P. Choose \"With Automatic Weights.\" Blender will attempt to automatically assign mesh parts to the closest bones.
- Weight Painting: Blender’s automatic weights might not always be perfect. Weight painting allows you to manually adjust how much influence a bone has on different parts of the mesh. Enter Weight Paint mode with your mesh selected to make adjustments.
- Testing Your Rig: Before animating, it\"s crucial to test your rig. Select your armature, switch to Pose Mode, and try moving various bones. Ensure that the mesh deforms as expected. If not, you may need to adjust your weight painting or bone placement.
- Adding Constraints: For more advanced rigs, you might need to use constraints. Constraints control how bones can move relative to each other, making it easier to create realistic movements. You can find constraints in the Bone Constraints tab.
- IK (Inverse Kinematics): IK is a powerful feature for animating limbs. It allows you to control a chain of bones by moving the last bone in the chain, which is ideal for legs and arms. Add an IK constraint to a bone, and define the chain length to set it up.
Rigging is both an art and a science, requiring patience and practice. Start with simple rigs to understand the basics, and gradually move on to more complex characters and mechanisms. Remember, a well-rigged model is the foundation of a great animation. Happy rigging!
Keyframing and Animation Principles
Keyframing is the cornerstone of animation in Blender, allowing you to define specific moments of action for your characters or objects. Understanding keyframing, along with fundamental animation principles, sets the stage for producing compelling and lifelike animations. This section will guide you through the basics of keyframing and introduce you to essential animation principles.
- Understanding Keyframes: A keyframe marks the start or end point of any transition, storing the position, rotation, and scale of your object or character at a particular frame. In Blender, you create a keyframe by moving your playhead to the desired frame, positioning your object as required, and pressing \"I\" to insert a keyframe. You can choose from various attributes to keyframe, such as location, rotation, scale, or a combination of these.
- Creating Your First Animation: To animate, you need at least two keyframes. For example, to make an object move across the screen, position it at the starting point on frame 1, insert a keyframe for its location, then move to another frame, move the object to the end position, and insert another location keyframe. Blender interpolates the frames between your keyframes, creating the animation.
- Principles of Animation: Incorporating the 12 principles of animation, such as anticipation, squash and stretch, and timing, can bring your animations to life. For instance, adding a slight backward movement (anticipation) before a jump can make the action feel more realistic.
- Editing Keyframes: The Dope Sheet and Graph Editor are powerful tools in Blender for editing your animation. The Dope Sheet gives you an overview of all keyframes and allows you to move them around easily. The Graph Editor provides a detailed view of the interpolation between keyframes, letting you adjust the timing and easing of animations for smoother results.
- Interpolation and Easing: Blender automatically interpolates the frames between keyframes, but you can change the type of interpolation to control the animation\"s speed and feel. For example, using \"Ease In\" and \"Ease Out\" can make the movement start slowly, accelerate, and then slow down again, adding realism to your animations.
- Looping Animations: For animations that repeat, such as a walk cycle, you can use the NLA Editor to loop your animation without manually copying keyframes.
- Animating with Rigged Characters: When animating rigged characters, you insert keyframes for the bones of your rig. This process is similar to animating objects, but you work in Pose Mode.
- Practice Makes Perfect: Experiment with different types of movements, play with timing and spacing, and try to incorporate the animation principles into your work. Watching real-life references can help you understand how to animate more naturally.
Keyframing and understanding animation principles are fundamental skills in Blender that require practice and patience to master. As you become more comfortable with these concepts, you\"ll find your animations becoming more fluid and expressive. Keep experimenting and learning, and enjoy the creative process of bringing your characters and scenes to life!

_HOOK_
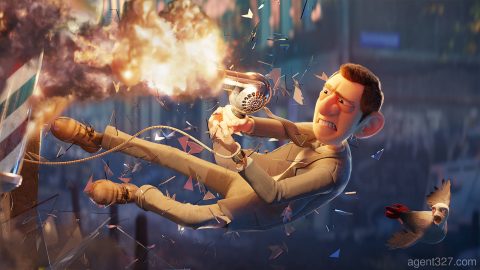
The ABSOLUTE BASICS of 3D Animation in Blender - LeeDanielsART Tutorial
Experience the amazing world of Blender 3D animation, where you can bring your imagination to life! Unlock endless possibilities and create stunning visuals with this powerful, intuitive software. Watch our video and discover the magic of Blender animation today!
Advanced Animation Techniques
As you become more familiar with the basics of animation in Blender, you may wish to explore more complex and sophisticated techniques to elevate your work. This section delves into advanced animation techniques that can add depth, realism, and professionalism to your animations. Embracing these methods will help you create more dynamic and engaging content.
- Motion Tracking: Motion tracking allows you to incorporate real-world movements into your animations. By tracking the movement of objects in video footage and applying it to your 3D scene, you can achieve realistic interactions between virtual and live elements.
- Non-Linear Animation (NLA): The NLA Editor is a powerful tool for blending and layering animations. You can combine multiple actions, such as walking and waving, into a single, seamless animation. This technique is especially useful for creating complex character animations.
- Shape Keys: Shape keys are used to deform objects in a smooth transition from one shape to another. This feature is particularly useful for facial animations and expressions, allowing you to animate a character\"s emotions and speech realistically.
- Constraints: Using constraints with your rigs can add realism to your animations. Constraints limit how bones can move, which is crucial for maintaining realistic joint movements and interactions between objects.
- Particle Systems: Particle systems can simulate complex phenomena like rain, smoke, fire, or even crowds. Learning how to control particle systems can add a new layer of realism to your scenes.
- Physics Simulations: Blender\"s physics simulations, including rigid bodies, cloth, and fluids, allow for the realistic animation of physical interactions and movements. These simulations can greatly enhance the realism and dynamic quality of your scenes.
- Grease Pencil for 2D Animation: Blender\"s Grease Pencil tool bridges the gap between 2D drawing and 3D animation. You can use it to create traditional frame-by-frame animation, storyboard, or even integrate 2D elements into 3D scenes.
- Scripted Animation: For technical animators, Blender\"s Python API allows for scripted animations. Scripts can automate repetitive tasks, generate animations procedurally, or create custom animation tools.
- Camera Movements and Cinematography: Advanced camera techniques, such as depth of field, camera tracking, and dramatic angles, can significantly improve the storytelling aspect of your animations. Experimenting with camera movements can bring a cinematic quality to your work.
Mastering these advanced animation techniques requires time, experimentation, and practice. Each method opens up new possibilities for creativity and expression in your animations. Continue to explore and push the boundaries of what you can achieve with Blender, and you\"ll find yourself creating increasingly sophisticated and compelling animations.
How to Rig and Animate in Blender
Dive into the fascinating world of Blender rigging and animation, where you can learn how to breathe life into your characters. Whether you\'re a beginner or an experienced artist, our video tutorial will guide you step-by-step through the intricacies of rigging and animation in Blender. Unleash your creativity and watch our video now!
Working with Physics and Simulations
Blender\"s physics and simulations capabilities allow for the creation of stunningly realistic and dynamic scenes. Whether you\"re simulating the flow of water, the drape of cloth, or the collision of rigid bodies, Blender provides a robust set of tools to bring your animations to life. This section will guide you through the basics of working with physics and simulations in Blender, helping you to add realism and complexity to your projects.
- Rigid Body Simulations: Rigid body simulations are perfect for simulating the physics of non-deforming objects. To use this, enable the Rigid Body physics in the Physics tab for your object. You can simulate collisions, tumbling objects, and stacked structures realistically. Adjust properties like Mass, Friction, and Bounciness to achieve desired effects.
- Cloth Simulations: To simulate cloth, such as flags or clothing, add the Cloth modifier to your mesh. The Cloth physics properties allow you to control how the fabric behaves—its stiffness, damping, and how it interacts with other objects, including wind forces. Use Pinning to fix parts of your cloth mesh in place.
- Fluid Simulations: Fluid simulations in Blender allow you to create realistic liquid behaviors. Start by setting up a domain to define the simulation’s boundaries, then add fluid objects to the scene. Blender’s fluid system can simulate water flow, splashes, and even complex interactions like a glass filling with water.
- Smoke and Fire Simulations: To simulate smoke and fire, you\"ll also use a domain object to define the simulation space. Adding a Flow object as smoke or fire enables you to create realistic smoke and fire effects. Tweak the attributes like Vorticity, Dissolve, and Flame Rate for different effects.
- Particle Systems: Particle systems can be used for more than just simulating hair or fur. They\"re also great for creating rain, snow, or even crowds of people. Particles can interact with physics forces, enabling them to be blown by wind or attracted by gravity.
- Soft Body Simulations: Soft body physics simulate deformable objects like rubber, jelly, or soft tissues. Adjusting the Soft Body settings lets you control the object’s stiffness, damping, and plasticity, providing a wide range of deformable behaviors.
- Force Fields: Force fields affect the behavior of particles and simulations. They can simulate effects like wind, turbulence, gravity, and vortexes. You can use them to add realism to your particle systems and physics simulations.
- Combining Simulations: Often, the most impressive effects are achieved by combining different types of simulations. For example, you might use a particle system with a smoke simulation to create a fiery explosion that emits smoke.
Working with physics and simulations can be computationally intensive, so it\"s wise to start with lower resolution settings for testing and increase the resolution as you refine your scene. Blender’s physics and simulations open up a universe of possibilities for adding realism and dynamics to your animations. With practice and experimentation, you’ll be able to incorporate these effects into your projects seamlessly.
Rendering and Exporting Your Animation
Rendering is the process of turning your 3D scene into a final image or animation. This step is where your creative work comes to life, showcasing the movements, textures, lighting, and effects you\"ve meticulously crafted. Exporting your animation allows you to share your creations with the world. Follow these steps to render and export your animation in Blender:
- Choose Your Render Engine: Blender offers several render engines, including Eevee (real-time), Cycles (ray-traced), and Workbench (simple). Select the one that best fits your project\"s needs in the Render Properties tab.
- Setting Up Render Properties: In the Render Properties tab, adjust your render settings. Set the resolution, frame rate, and quality. For animations, ensure you set the frame start and end to capture the entire animation sequence.
- Camera Setup: Position your camera to frame your scene correctly. You can animate the camera itself if needed by keyframing its position, rotation, and other properties.
- Lighting and Materials: Verify that all objects have the correct materials and textures, and ensure your scene is properly lit. Good lighting can significantly enhance the quality of your render.
- Previewing Your Animation: Use the Timeline\"s play button to preview your animation. Make adjustments as necessary to ensure everything moves smoothly and as expected.
- Render Settings: Choose your output format in the Output Properties tab. For animations, common formats include AVI, MPEG, and MOV. You can also render your animation as a sequence of images (e.g., PNG, JPEG), which is useful for post-processing.
- Rendering: When you\"re ready, go to Render > Render Animation or press Ctrl + F12. Blender will begin rendering your animation, which can take a significant amount of time depending on the complexity of your scene and the settings you\"ve chosen.
- Reviewing and Exporting: Once rendering is complete, review your animation. If everything looks good, you can export it if necessary. If you rendered your animation as an image sequence, you could compile it into a video file using Blender\"s Video Sequencer or another video editing software.
- Optimizing Render Times: To reduce render times, consider optimizing your scene. Simplify meshes, reduce subsurface modifiers, use less computationally intensive materials, and adjust render settings like samples and resolution.
Rendering and exporting your animation is the final step in bringing your 3D creations to an audience. By carefully preparing your scene, choosing the right settings, and optimizing for render times, you can produce high-quality animations ready to be shared and enjoyed.

Common Issues and How to Solve Them
Working with Blender, like any complex software, can sometimes lead to encountering issues or challenges. Understanding how to troubleshoot and solve these common problems will keep your workflow smooth and efficient. Here are some frequent issues Blender users might face and strategies to overcome them:
- Objects Not Rendering: If your objects are not appearing in the render, ensure they are not set to be invisible in renders in the Outliner. Check the eye icon for viewport visibility and the camera icon for render visibility. Also, verify that the objects are within the camera\"s field of view and clipping range.
- Slow Performance: Large scenes or high-poly models can slow down Blender. To improve performance, consider using simpler models for distant objects, reducing subsurface modifier levels, and hiding objects not currently being worked on. Also, ensure your computer\"s graphics drivers are up to date.
- Textures Not Displaying Correctly: Ensure your textures are properly linked and the mapping coordinates are correctly set. Using the UV Editing layout can help you adjust and troubleshoot texture placements.
- Animation Looks Stiff or Unnatural: This can often be improved by revisiting the 12 principles of animation. Pay special attention to easing in and out, squash and stretch, and anticipation. Use the Graph Editor to adjust the interpolation of your keyframes for smoother transitions.
- Problems with Rigging and Weight Painting: If a mesh deforms oddly when rigged, check the weight painting for each bone. Ensure that the vertices are correctly assigned to the bones, and adjust the weight painting as needed for smoother deformations.
- Simulation Not Behaving as Expected: Physics simulations can be unpredictable. Make sure your scale is correct (Blender units can affect simulations), and check that all physics settings, like mass and friction, are realistically set. Also, consider simplifying your simulation by breaking it down into manageable parts.
- Crashes or Unstable Behavior: Regularly save your work and consider enabling Blender\"s auto-save feature. If Blender consistently crashes, try reducing the complexity of your scene, or consider updating Blender and your graphics drivers to the latest versions.
- Materials Look Flat or Unrealistic: Spend time learning about PBR (Physically Based Rendering) materials and the importance of lighting in your scene. Using an HDRI for environment lighting can significantly improve the realism of your materials.
Encountering issues is a natural part of learning and working with Blender. The key is to remain patient and methodical in troubleshooting. Blender\"s community forums, tutorials, and documentation are valuable resources that can offer solutions and advice for overcoming these challenges. Keep experimenting and learning, and you\"ll find your skill and confidence with Blender growing with each project.

READ MORE:
Resources for Further Learning and Community Support
The journey of mastering Blender is an ongoing process, enriched by a vast array of resources and a supportive community. Whether you\"re a beginner looking to learn the basics or an experienced user aiming to explore advanced techniques, numerous resources are available to help you grow your skills. Below are key resources for further learning and finding community support:
- Blender Official Documentation: The Blender Manual (docs.blender.org/manual/en/latest/) is an invaluable resource for understanding every aspect of Blender. It offers detailed explanations of tools, features, and workflows.
- Blender Tutorials: There are countless Blender tutorials available on platforms like YouTube and Vimeo. Channels like Blender Guru, CG Geek, and Darrin Lile offer tutorials ranging from beginner to advanced levels.
- BlenderNation: BlenderNation (www.blendernation.com) provides daily news, articles, tutorials, and showcases from the Blender community. It\"s a great way to stay updated on what\"s happening in the Blender world.
- Blender Artists Community: The Blender Artists forum (blenderartists.org) is one of the largest Blender communities online. It\"s a place to ask questions, share your work, and connect with other Blender enthusiasts.
- Blender Stack Exchange: For specific questions and troubleshooting, the Blender Stack Exchange (blender.stackexchange.com) is a Q&A site where you can find answers to technical issues and workflows.
- Blender Conferences and Meetups: Participating in Blender conferences and local meetups can provide valuable learning experiences and networking opportunities. The annual Blender Conference features workshops, talks, and showcases of exceptional work.
- Blender Cloud: Blender Cloud (cloud.blender.org) offers training, assets, and film production files. It\"s a subscription service that supports the Blender Foundation\"s projects.
- Books and Academic Courses: Numerous books and online courses offer structured learning paths for Blender. They can be particularly useful for learners who prefer a more traditional educational approach.
- Project-Based Learning: Engaging in real projects, participating in challenges, and contributing to open-source projects are excellent ways to apply your skills, learn new techniques, and gain practical experience.
Exploring these resources and engaging with the community can significantly enhance your learning journey in Blender. Remember, the process of mastering Blender is as much about the creativity and passion you bring to your projects as it is about the technical skills you develop. Keep learning, stay curious, and don\"t hesitate to share your knowledge and experiences with others.
Embark on your 3D animation journey with Blender, a path filled with creative exploration and endless possibilities. Let this guide be your companion as you unlock the power of Blender, transforming your imaginative visions into captivating realities.

_HOOK_