Topic drawing in autocad: Embark on a journey to master Drawing in AutoCAD, enhancing your design precision and creativity with our comprehensive guide, tailored for both beginners and seasoned professionals alike.
Table of Content
- How can I learn to draw in AutoCAD using step-by-step video lessons?
- Getting Started with AutoCAD
- Understanding AutoCAD Interface
- Basic Drawing Commands
- Setting Up a New Drawing
- Creating Simple and Complex Shapes
- Layers, Colors, and Line Types
- YOUTUBE: Making a simple floor plan in AutoCAD: Part 1 of 3
- Using Object Snaps for Precision
- Drawing Organization and Management
- Dimensioning and Annotation
- Creating and Using Blocks
- Printing and Plotting
- Advanced Drawing Techniques
- Tips for Efficient AutoCAD Workflow
How can I learn to draw in AutoCAD using step-by-step video lessons?
If you want to learn how to draw in AutoCAD using step-by-step video lessons, you can follow the below steps:
- Start by searching for video tutorials on AutoCAD drawing. You can use platforms like YouTube or websites dedicated to CAD tutorials.
- Watch the videos that provide step-by-step instructions on drawing in AutoCAD. Look for lessons that are comprehensive and cover different aspects of drawing.
- Pay attention to the instructor\'s explanations and demonstrations. Follow along with the videos using your own AutoCAD software.
- Practice what you learn by drawing different objects or following the exercises provided in the video lessons.
- Take quizzes or tests if they are provided along with the video lessons. This will help you assess your understanding of the concepts and identify any areas that need further improvement.
- Repeat the process with additional video lessons to expand your knowledge and skills in drawing with AutoCAD.
By following these step-by-step video lessons, you can gradually develop your proficiency in drawing with AutoCAD and gain confidence in using the software for various design and drafting tasks.
READ MORE:
Getting Started with AutoCAD
Welcome to the exciting world of AutoCAD! Starting with AutoCAD can unlock endless possibilities in drafting, designing, and engineering. Here\"s how to begin your journey:
- Install AutoCAD: Download and install the latest version of AutoCAD from the official Autodesk website. Ensure your system meets the software requirements.
- Familiarize with the Interface: Spend some time exploring the AutoCAD interface. Understand the workspace, ribbon, command line, and tool palettes.
- Set Up Your Drawing Environment: Configure the drawing units, limits, and other settings appropriate for your project. This foundation is crucial for precise designs.
- Learn Basic Commands: Start with basic commands like LINE, CIRCLE, RECTANGLE, and ARC. Practice creating simple shapes to get comfortable with command usage.
- Practice Object Selection: Learn how to select objects efficiently. Mastering selection techniques can significantly speed up your workflow.
- Explore Drawing Tools: Experiment with different drawing and modification tools. Understanding these tools is key to developing complex designs.
- Use Layers: Learn how to create and manage layers. Layers help organize your drawing, making it easier to edit and understand.
- Save Your Work: Develop a habit of saving your work frequently. AutoCAD files are saved with a .dwg extension.
Remember, mastering AutoCAD is a step-by-step process. Be patient, practice regularly, and utilize online resources and tutorials to expand your skills. Welcome to the world of precision design with AutoCAD!

Understanding AutoCAD Interface
AutoCAD\"s interface is a key to unlocking its powerful features and tools. Here\"s a breakdown of its main components:
- Ribbon: The Ribbon at the top contains tabs (Home, Insert, Annotate, etc.) with various commands organized in panels. It\"s your go-to for accessing AutoCAD\"s functions.
- Command Line: Located at the bottom, the command line is where you input commands directly, receive feedback, and access recent commands.
- Tool Palettes: Tool palettes provide easy access to commonly used tools, blocks, and commands. They can be customized and saved.
- Workspace: The workspace is your main drawing area where you create and modify your designs. It can be customized to suit your workflow.
- Navigation Bar: The navigation bar on the right side offers tools for pan, zoom, and view 3D models from different angles.
- Properties Palette: This displays information about the selected object and allows you to modify object properties like color, layer, and dimensions.
- File Tabs: Located below the Ribbon, file tabs allow for easy switching between open drawings.
- Status Bar: At the very bottom, the status bar shows the current drawing status and provides access to tools like grid, snap, and ortho mode.
Getting familiar with the AutoCAD interface is crucial for efficient design work. Each component is designed to streamline your workflow and enhance your design process.
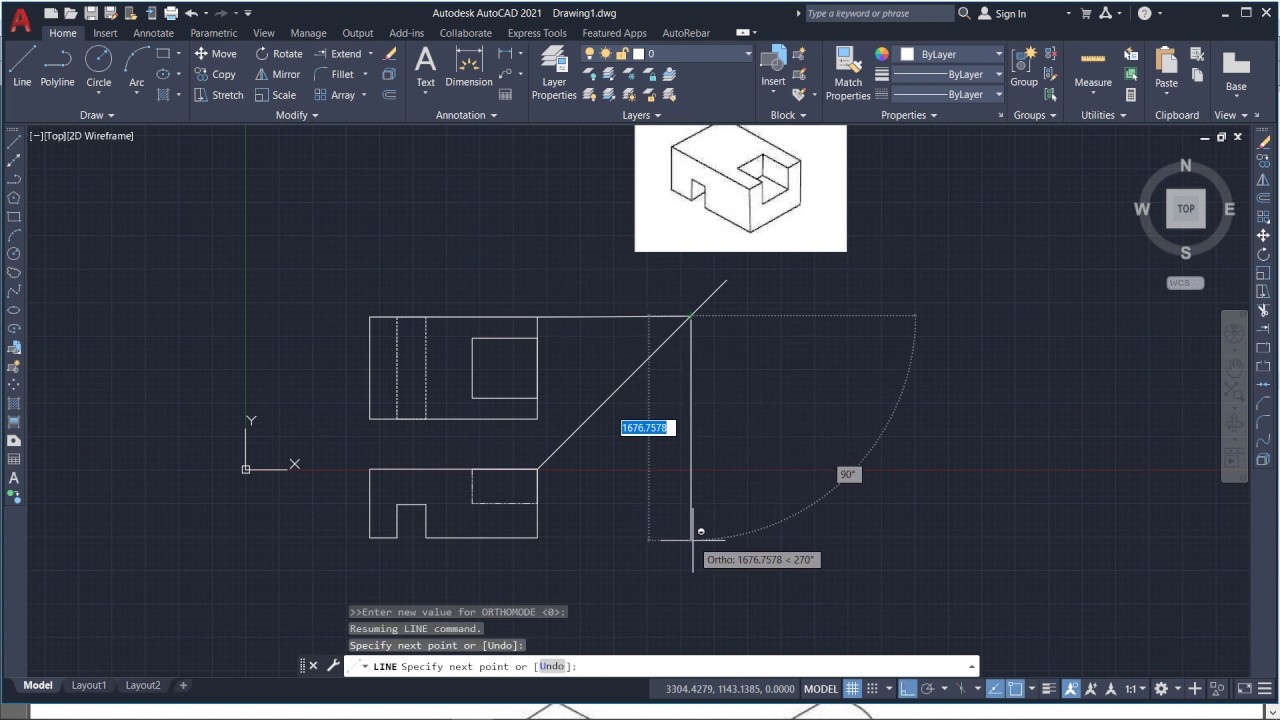
Basic Drawing Commands
Mastering AutoCAD begins with understanding its basic drawing commands, essential for creating precise and detailed designs. Here\"s an overview of fundamental commands to get you started:
- LINE: Creates straight line segments. Click two points in the drawing area to define the start and end points of the line.
- CIRCLE: Draws a circle based on a center point and radius. After selecting the circle command, click to define the center and then specify the radius.
- RECTANGLE: Generates a rectangle. Click in the drawing area to set one corner point, then another to define the opposite corner.
- POLYLINE: Creates a sequence of connected lines and arcs. Click to start, then continue clicking to add segments, and close the polyline with a double-click.
- ARC: Draws an arc segment. You can define an arc by specifying three points: start, end, and a point along the arc path.
- ELLIPSE: Creates an ellipse or an elliptical arc. For a full ellipse, define the center, then specify distances to the major and minor axes.
- POLYGON: Draws a regular polygon. Specify the center, then enter the number of sides and the radius.
- TRIM: Removes portions of an object that cross other objects. Select the cutting edges first, then the portions to be trimmed away.
- EXTEND: Lengthens objects to meet the edges of other objects. Select boundary edges, then the objects to extend.
Practice these commands to build your confidence and prepare for more complex projects. With time and experience, you\"ll find these commands integral to your design process.

Setting Up a New Drawing
Setting up a new drawing in AutoCAD is a foundational step for all your design work. Follow these steps to start your project on the right foot:
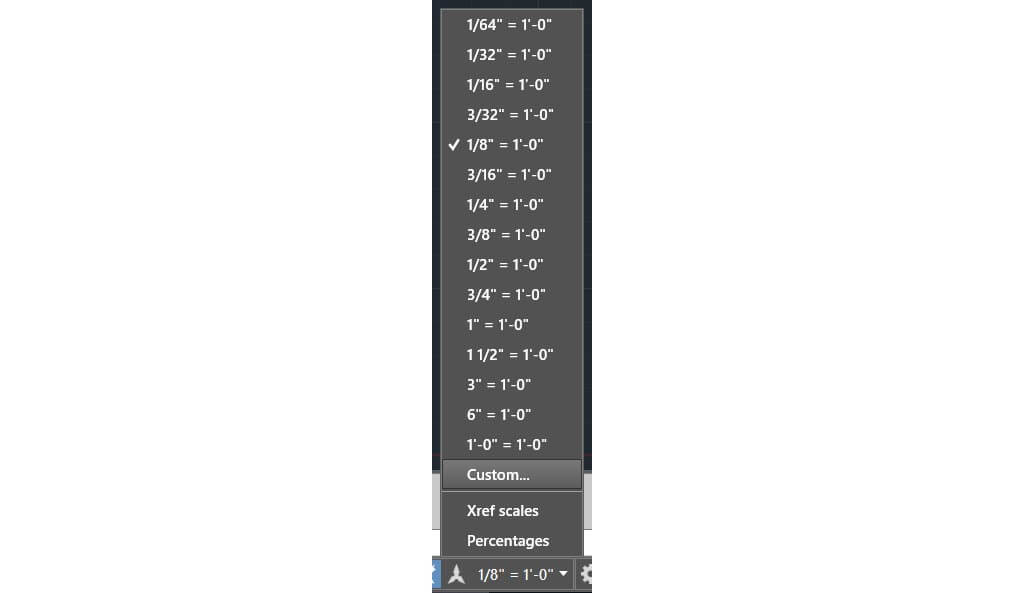
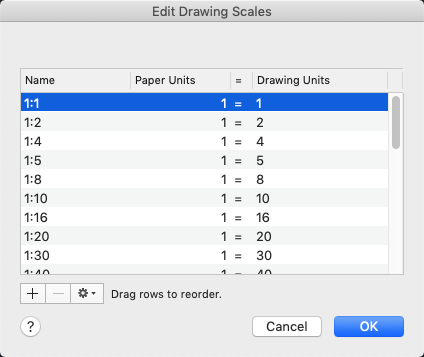
- Choose a Template: Start by selecting a template that matches your project requirements. AutoCAD offers various templates with predefined settings for units, drawing scales, and paper sizes.
- Set Units: Go to the application menu, click on \"Drawing Utilities\", and then \"Units\". Choose the type of units you will be working with (e.g., architectural, metric).
- Define Drawing Limits: Set the drawing limits to establish the work area\"s size. Enter the \"LIMITS\" command, specify the lower left corner at 0,0 and then enter the upper right corner based on your project\"s size.
- Adjust Drawing Settings: Configure additional settings such as layer properties, line types, and text styles. Organizing these settings early helps streamline your workflow.
- Set Up Layers: Layers are crucial for managing different elements of your drawing. Create layers for various components of your design, such as walls, doors, and annotations. Assign different colors, line types, and line weights to each layer.
- Save Your Drawing: Before you start designing, save your drawing file. Use a descriptive name and save regularly to avoid losing your work.
With these steps, your new drawing will be correctly set up, providing a solid foundation for your design work. Remember, spending time on this initial setup can save you time and ensure accuracy in your projects.

_HOOK_
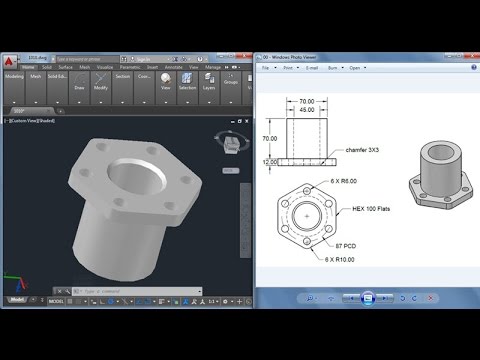
Creating Simple and Complex Shapes
AutoCAD is a powerful tool for creating both simple and complex shapes, essential for detailed design work. Here\"s how to create various shapes:
- Simple Shapes:
- Lines and Polylines: Use the \"LINE\" or \"PLINE\" command for straight and connected line segments.
- Circles and Arcs: \"CIRCLE\" and \"ARC\" commands help you draw perfect circles and arc segments.
- Rectangles: The \"RECTANGLE\" command creates rectangles and squares with just two clicks.
- Ellipses: Use the \"ELLIPSE\" command to draw ellipses by specifying the major and minor axes.
- Complex Shapes:
- Polylines with Width: \"PLINE\" can be used to draw polylines with varying widths, creating complex shapes.
- Splines: The \"SPLINE\" command creates smooth curves that pass through or near specified points.
- Hatches: Use \"HATCH\" to fill areas with patterns or solid fills, adding depth or distinguishing parts of your design.
- Blocks and Groups: Combine multiple objects into a block (using \"BLOCK\") or group (using \"GROUP\") for easier manipulation and reuse.
Understanding and practicing these commands will enhance your ability to create both basic and intricate designs in AutoCAD. Experiment with these tools to discover the full potential of your designs.
Layers, Colors, and Line Types
Layers, colors, and line types are fundamental elements in AutoCAD that help organize and differentiate aspects of your drawing. Understanding how to effectively use these features can greatly enhance the clarity and efficiency of your work.
- Layers:
- Create layers for different types of information (e.g., structural, electrical, landscaping) to keep your drawing organized.
- Assign specific colors, line types, and line weights to each layer for easy identification.
- Utilize layer properties to control the visibility and editability of different elements within your drawing.
- Colors:
- Use colors to distinguish between different materials, phases of construction, or other categorizations within your project.
- Color coding can also be used to indicate the status of drawing elements (e.g., approved, pending review).
- Be mindful of print settings; certain colors may not translate well to black and white prints.
- Line Types:
- Line types (e.g., continuous, dashed, dotted) can convey different meanings, such as boundaries, utilities, or paths.
- Customize line types to match industry standards or project requirements.
- Adjust line type scales to ensure they are clearly visible at different drawing scales.
Effectively managing layers, colors, and line types is essential for creating professional and readable drawings. Practice and experimentation with these elements will help you develop a workflow that best suits your design needs.
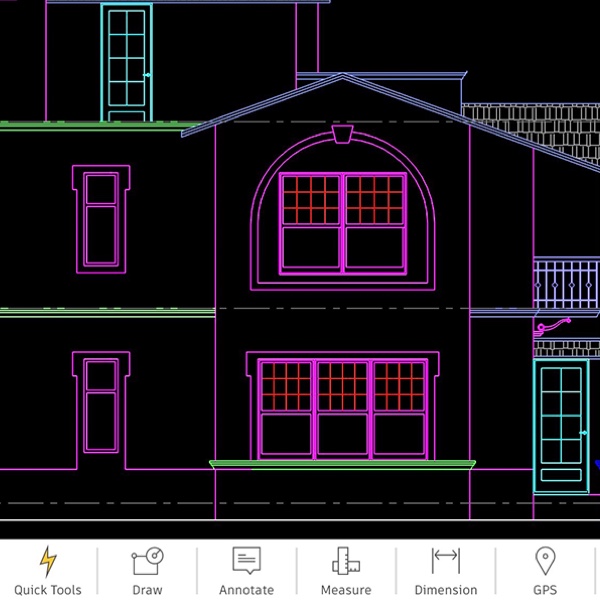
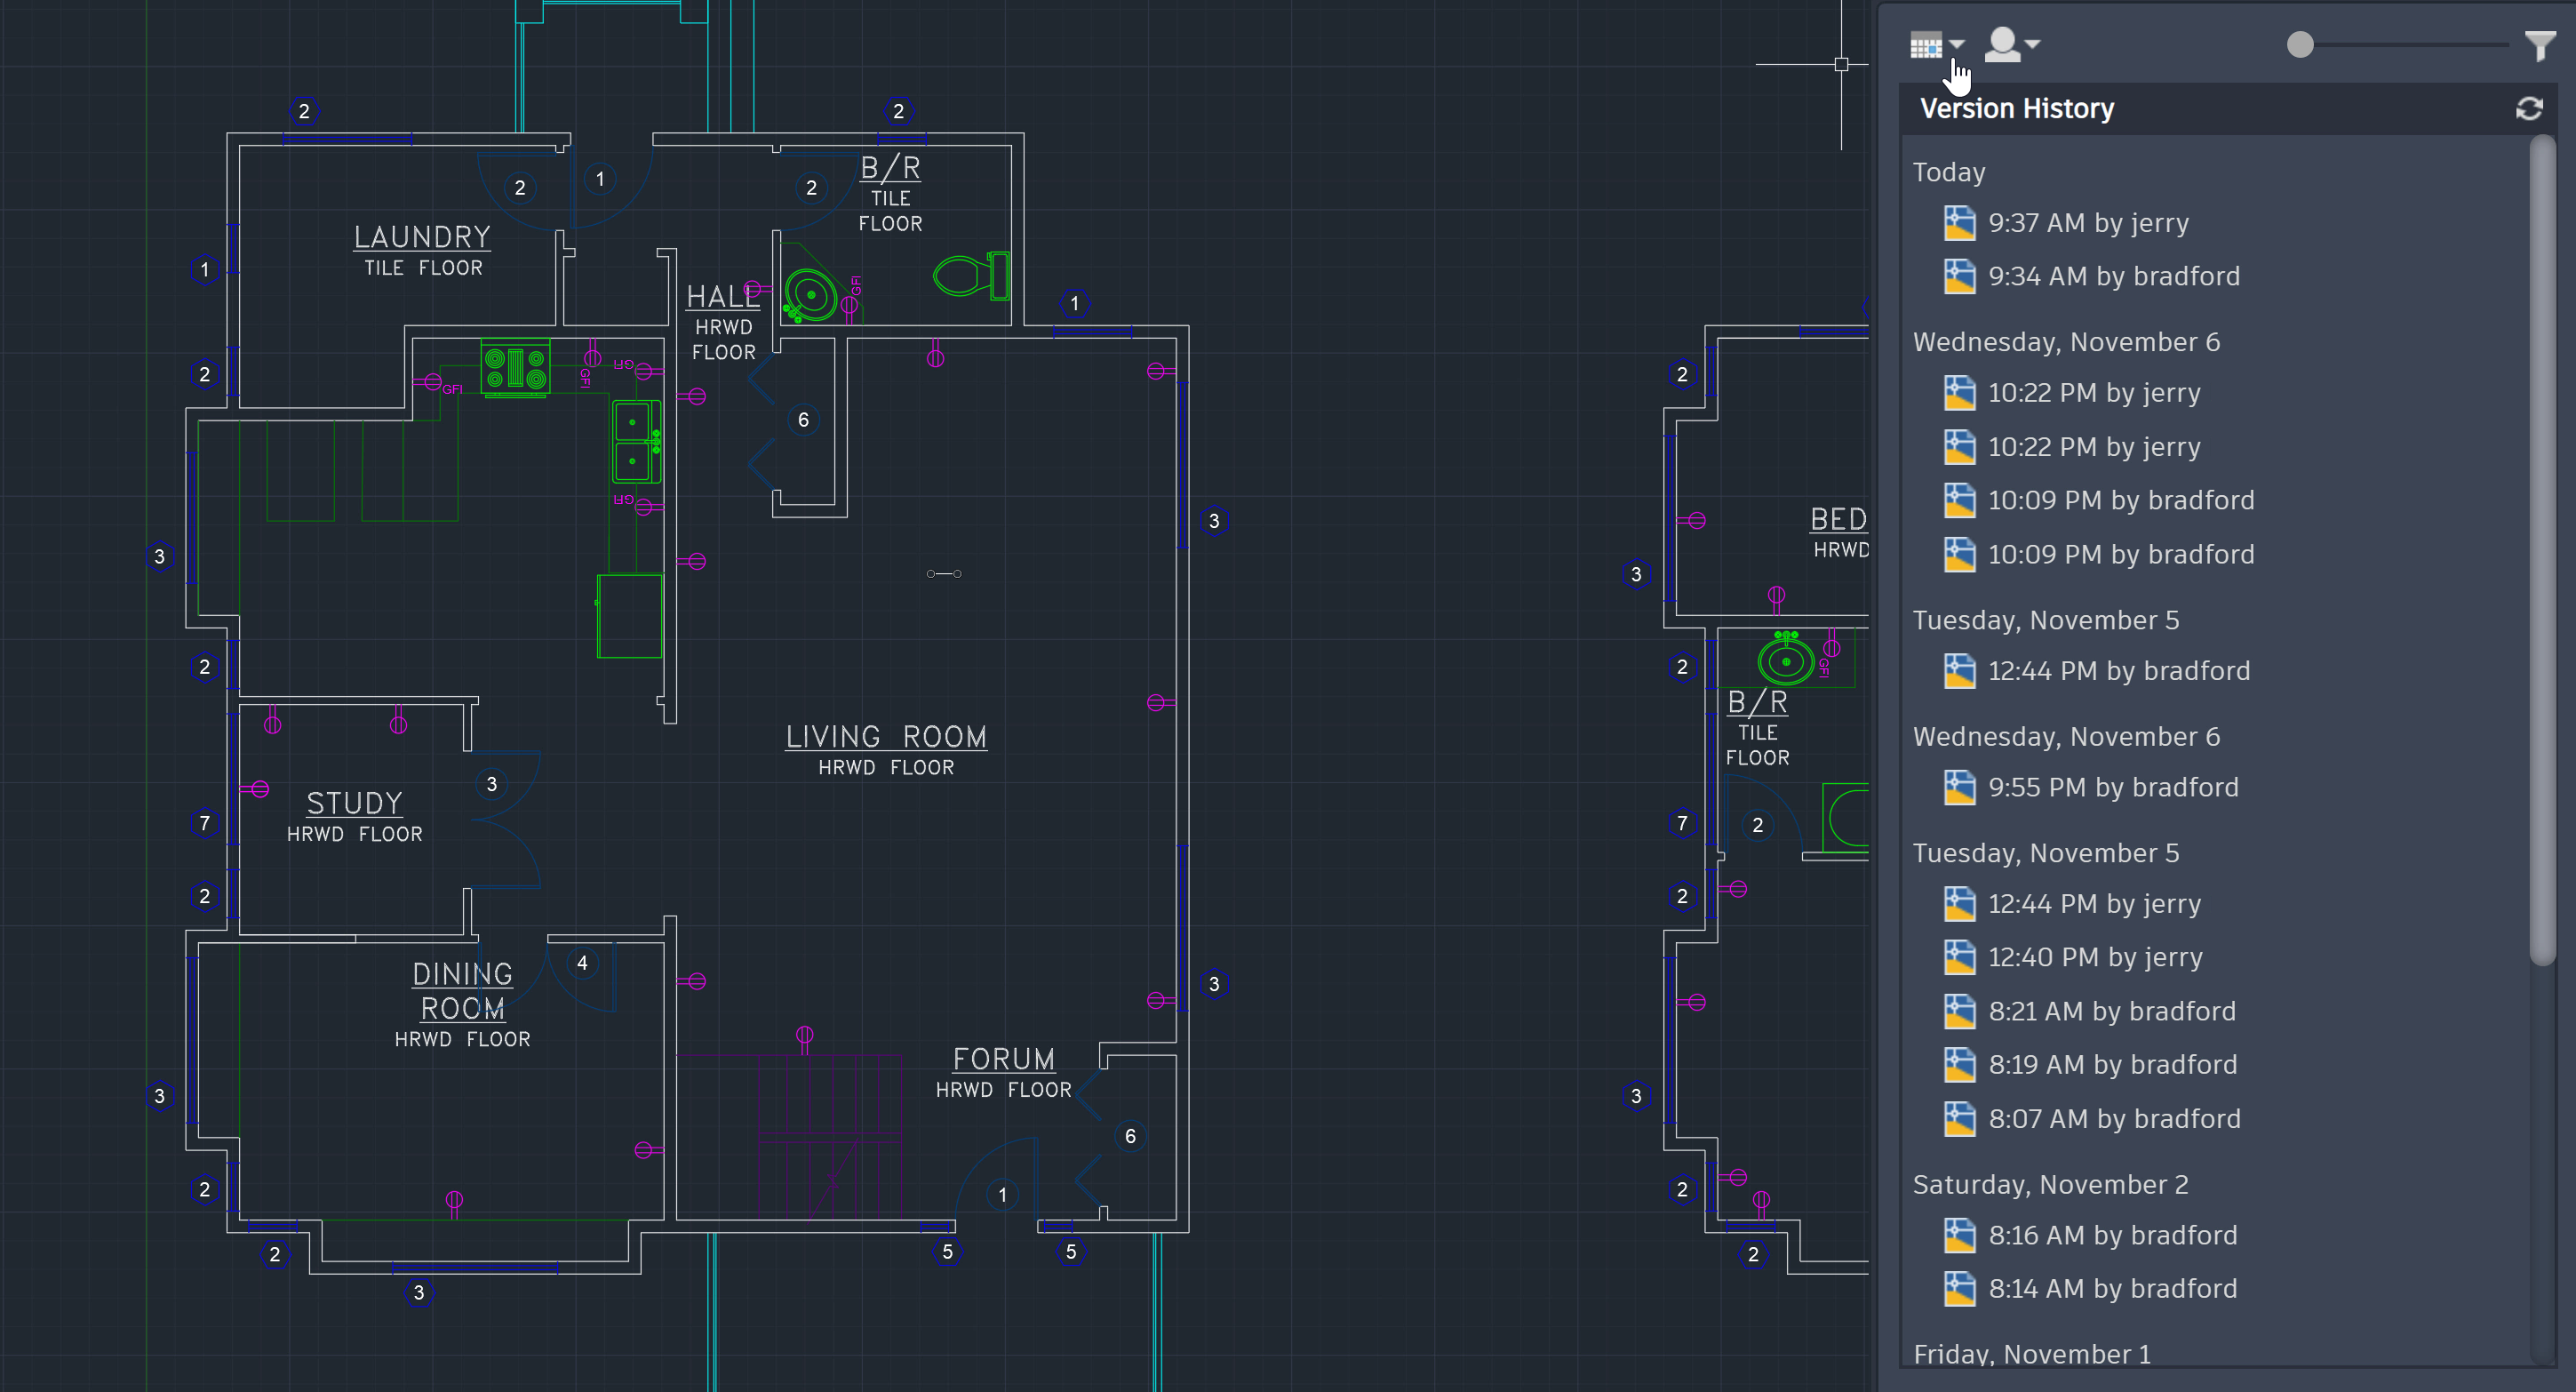
Making a simple floor plan in AutoCAD: Part 1 of 3
Are you excited about designing your dream home? Our video showcases how to create the perfect floor plan that maximizes space and functionality, making your interior dreams come true!
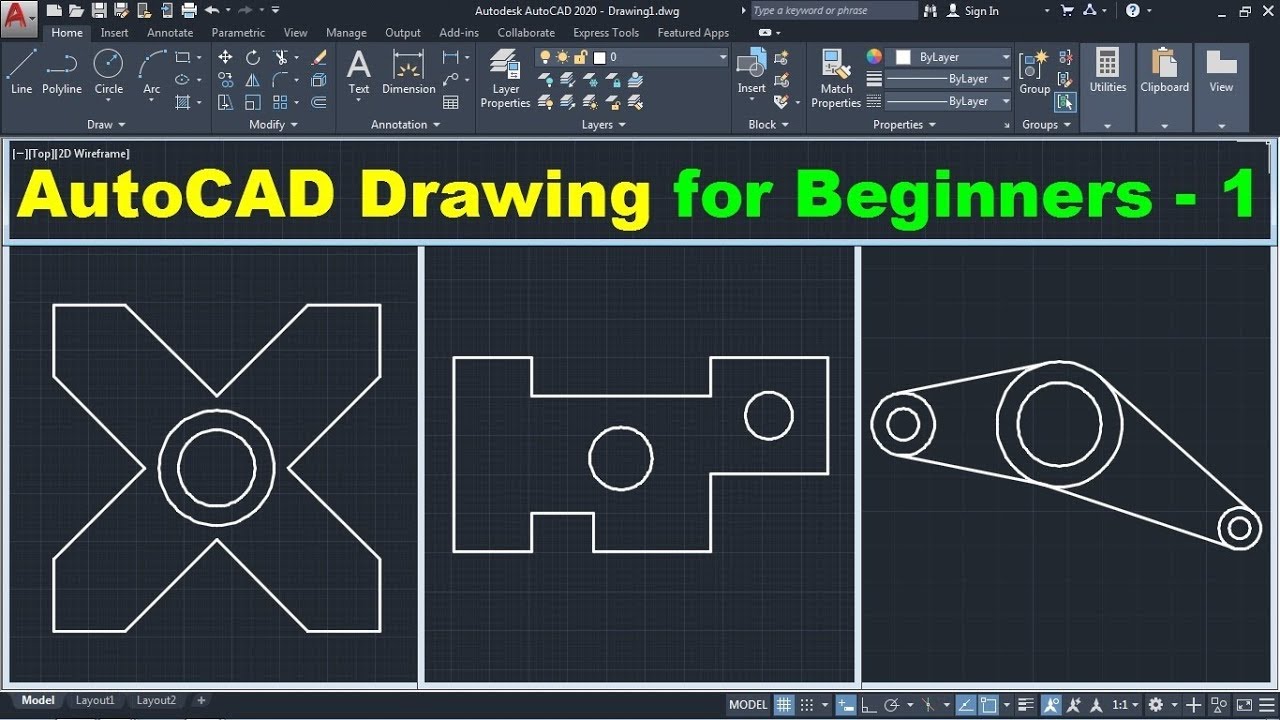
AutoCAD Drawing Tutorial for Beginners - 1
Have you always wanted to learn a new skill? Our tutorial video takes you step-by-step through the process of mastering a new technique, which you can easily follow at your own pace. Get ready to impress everyone with your newfound expertise!
Using Object Snaps for Precision
Object snaps (Osnap) in AutoCAD are essential for achieving precise alignment when creating or modifying your drawing. They allow you to snap to specific points on existing geometry, ensuring accuracy and saving time. Here\"s how to use them effectively:
- Enable Object Snaps: Right-click on the Osnap button in the status bar and select \"Settings\". Here, you can choose which object snaps you want to activate, such as endpoints, midpoints, centers, and intersections.
- Use Running Object Snaps: For continuous use, enable running object snaps to automatically snap to specified points. This is ideal for most drafting tasks.
- Temporary Overrides: Hold down the \"Shift\" key and right-click to bring up a temporary override menu. This allows you to select a different snap mode without changing your running settings.
- Object Snap Tracking: Combine object snaps with tracking to align objects in relation to other objects’ points. This can be used to create elements that are aligned or spaced precisely without drawing construction lines.
- Mid Between 2 Points: Use this snap for finding a point exactly in the middle between two other points, perfect for dividing lines or placing objects at equal distances.
- Use Snap Overrides: Typing the command name for a specific object snap (e.g., \"END\", \"MID\", \"CEN\") allows you to temporarily use that snap for the next point selection.
Mastering object snaps is key to drafting accurately in AutoCAD. Practice using these tools to streamline your workflow and enhance the precision of your designs.
Drawing Organization and Management
Efficient drawing organization and management in AutoCAD is crucial for handling complex projects and maintaining productivity. Implementing a systematic approach can significantly enhance your workflow:
- Use Layers Wisely: Organize different elements of your drawings into layers. This makes it easier to edit, hide, or lock specific parts of your drawing without affecting the whole.
- Name Conventions: Develop a consistent naming system for layers, blocks, and files. This helps in quickly locating specific elements and ensures smooth collaboration with others.
- External References (Xrefs): Utilize external references for incorporating other drawings into your current project. This keeps the file size down and allows for easier updates to shared components.
- Block Usage: Create blocks for frequently used components. Blocks save time and reduce file size by referencing the same geometry multiple times instead of duplicating it.
- Template Creation: Develop templates with predefined settings such as drawing units, layers, and title blocks. Templates streamline the creation of new drawings and maintain consistency across projects.
- Regular Audits and Cleanups: Use the \"PURGE\" and \"AUDIT\" commands regularly to clean up your drawings. This removes unused elements and repairs any errors, keeping your files tidy and efficient.
- Data Extraction: Use data extraction tools to generate tables and lists from your drawing objects. This is useful for creating bills of materials, schedules, and other documentation.
By implementing these practices, you can ensure your AutoCAD drawings are well-organized, manageable, and optimized for performance, making your design process more efficient and effective.
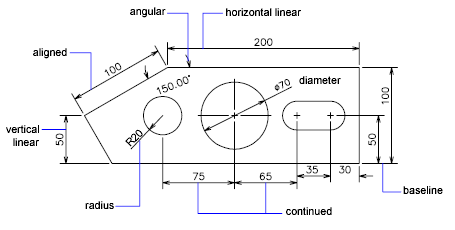
Dimensioning and Annotation
Dimensioning and annotation are crucial for communicating the specifics of your design in AutoCAD. Here are steps and tips to effectively use dimensioning and annotation tools:
- Dimensioning:
- Use the \"DIM\" command to access various dimensioning tools such as linear, radial, angular, and ordinate dimensions.
- For precision, utilize object snaps to place dimensions accurately.
- Customize dimension styles through the \"Dimension Style Manager\" to ensure consistency in text size, arrowheads, and line types.
- Consider the scale of your drawing when setting dimension sizes to ensure readability in different viewports.
- Annotation:
- Text annotations can be added using the \"TEXT\" command, allowing you to specify the font, size, and orientation.
- Use \"MTEXT\" for multiline text to create paragraphs, labels, or detailed notes.
- Leaders can be created with the \"LEADER\" command, pointing to specific details or parts of your drawing and providing information through attached text.
- Tables can be inserted to organize data, specifications, or a bill of materials directly within your drawing.
- Managing Styles: Regularly manage and update your dimension and text styles to maintain uniformity across your drawings.
- Layer Control: Place dimensions and annotations on separate layers from the drawing geometry. This simplifies toggling visibility and editing.
Effective dimensioning and annotation not only enhance the clarity and professionalism of your drawings but also facilitate better communication with team members and clients.

_HOOK_
Creating and Using Blocks
Blocks in AutoCAD are a powerful feature that allows you to create reusable symbols and objects. They can simplify your drawing process and reduce file sizes by enabling the reuse of common elements. Here’s how to create and use blocks effectively:
- Creating a Block:
- Select the objects you want to include in the block.
- Type \"BLOCK\" in the command line to open the Block Definition dialog box.
- Enter a block name, specify a base point, and select the objects. Optionally, add a description.
- Choose whether to retain, delete, or convert the selected objects into a block.
- Click OK to create the block.
- Inserting Blocks:
- Type \"INSERT\" to open the Insert dialog box, where you can choose from a list of available blocks.
- Specify the insertion point, scale, and rotation angle.
- Click OK to insert the block into your drawing.
- Editing Blocks: To modify a block, use the \"BEDIT\" command to open the Block Editor. Here, you can add or remove objects, and then save changes to update the block throughout your drawing.
- Using Block Libraries: Organize commonly used blocks into libraries for efficient access and insertion. Libraries can be shared with your team to ensure consistency across projects.
- Dynamic Blocks: For more flexibility, consider creating dynamic blocks with adjustable parameters and actions. This allows for a single block to accommodate different sizes or configurations.
By mastering the creation and use of blocks, you can streamline your workflow, ensure consistency in your drawings, and save significant time on repetitive tasks.
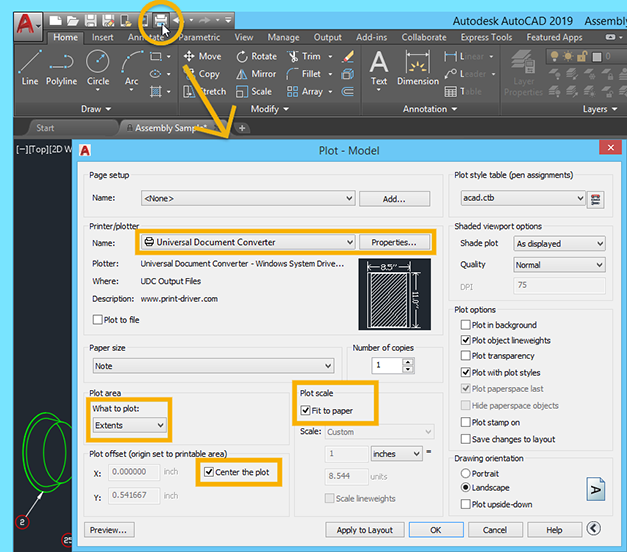
Printing and Plotting
Printing and plotting in AutoCAD are essential processes that enable you to produce hard copies of your designs. These steps will guide you through configuring your layouts, choosing the right plotting settings, and ensuring your drawings are print-ready:
- Prepare Your Layout: Begin by setting up a layout tab for your drawing. This involves configuring the paper size, scale, and viewports to display the necessary parts of your design.
- Configure Page Setup: In the Layout tab, use the Page Setup Manager to select your printer/plotter, paper size, and specify plot area, scale, and plot style.
- Choose Plot Style: Plot styles control the appearance of your drawing when printed, including line weights, colors, and linetypes. Assign a plot style table (CTB or STB file) as needed.
- Preview Before Printing: Use the \"Plot Preview\" option to check how your drawing will look when printed. This helps in identifying and correcting any issues before the final print.
- Select the Correct Plotter: Ensure you select the correct printer or plotter and the appropriate paper size. AutoCAD supports various printers and plotters, including virtual plotters for PDF creation.
- Adjust Plot Settings: Fine-tune the plot settings for your specific requirements. This includes orientation (portrait or landscape), plot scale, and plot offset.
- Save Plot Settings: After configuring your settings, save them for future use. This can streamline the printing process for similar projects.
- Execute the Plot Command: Once everything is set, execute the plot command. You can plot to a physical printer or plotter, or create a digital file (e.g., PDF).
Following these steps will ensure your AutoCAD drawings are accurately represented in print, maintaining the integrity of your design and ensuring that it meets the project\"s documentation standards.
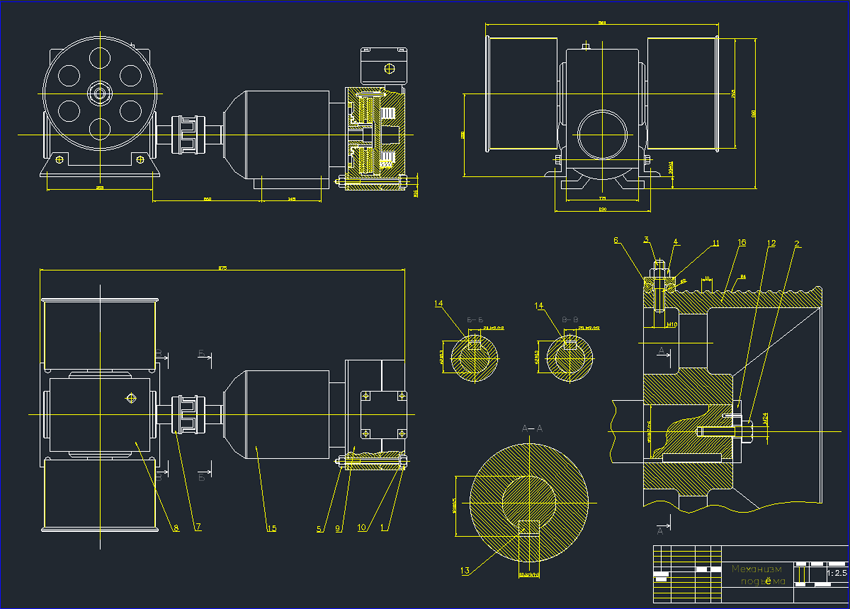
Advanced Drawing Techniques
As you become more comfortable with AutoCAD, you can explore advanced drawing techniques to enhance your designs further. These methods allow for greater efficiency and creativity in your projects:
- 3D Modeling: AutoCAD is not just for 2D drawings; you can create detailed 3D models using commands like EXTRUDE, REVOLVE, and SWEEP. These tools bring your designs to life, offering a new perspective and depth.
- Parametric Constraints: Apply parametric constraints to control the dimensions and relationships between objects. This ensures that your design adheres to specific requirements and changes dynamically as you modify elements.
- Custom Linetypes and Hatch Patterns: Beyond the standard options, AutoCAD allows you to create custom linetypes and hatch patterns. This customization can help convey additional information or aesthetic preferences in your designs.
- Advanced Text Features: Explore beyond basic text commands to include fields, lists, and even linking text to external data sources. This can automate and enrich the annotation process in your drawings.
- Dynamic Blocks: Enhance your block library with dynamic blocks that include parameters and actions. This allows for more versatile and adaptable components within your designs.
- Visual Styles: Use visual styles to apply shading, lighting, and edge effects to your 3D models. This enhances the visual appeal and can make your designs more understandable to clients or colleagues.
- Layouts and Viewports: Master the use of layouts and viewports for efficient presentation of your designs. This includes setting up multiple views and scales within a single layout for comprehensive project overviews.
- Collaboration Tools: Utilize AutoCAD’s collaboration tools like Xrefs and sharing options to work effectively with teams. These tools ensure that everyone has access to the latest versions of drawings and can contribute seamlessly.
By incorporating these advanced techniques into your workflow, you can significantly enhance the functionality, aesthetic, and efficiency of your AutoCAD drawings, setting a professional standard for your projects.
READ MORE:
Tips for Efficient AutoCAD Workflow
Maximizing efficiency in AutoCAD not only saves time but also enhances the quality of your designs. Here are some tips to streamline your AutoCAD workflow:
- Customize Your Workspace: Tailor the AutoCAD interface to suit your workflow. Customize toolbars, palettes, and ribbons to keep essential tools at your fingertips.
- Use Keyboard Shortcuts: Learn and use keyboard shortcuts for common commands to speed up your work. Customize shortcuts to fit your preferences and workflow.
- Implement Templates: Create templates with pre-set layers, styles, and settings. Starting projects with templates can save setup time and ensure consistency across your drawings.
- Utilize Blocks and Tool Palettes: Store and use blocks for frequently used elements. Organize blocks and other tools in tool palettes for easy access.
- Practice Layer Management: Efficient layer management keeps your drawings organized and makes it easier to edit and navigate your designs.
- Master Object Snaps: Use object snaps to draw more accurately and quickly. Familiarize yourself with different snap options and use them to your advantage.
- Regularly Save and Backup: Develop a habit of saving your work frequently. Use AutoCAD’s incremental save feature and keep backups to prevent data loss.
- Use Data Extraction: Extract information from objects in your drawings for use in tables or external files. This can streamline the creation of bills of materials and other documentation.
- Keep Learning: AutoCAD is constantly evolving. Stay updated with new features and tools through tutorials, forums, and training sessions.
By incorporating these strategies into your daily use of AutoCAD, you can significantly improve your productivity and the overall quality of your work.
Embrace the power of AutoCAD to transform your design ideas into precise digital realities. With practice, these tips will lead to more efficient projects, turning complex challenges into creative opportunities.