Topic autocad line drawing: Discover the essentials of AutoCAD line drawing, unlocking the secrets to precision, efficiency, and creativity in your design projects. Start mastering this foundational skill today.
Table of Content
- How do I draw lines in AutoCAD?
- Understanding Basic Line Commands in AutoCAD
- Steps to Draw Straight Lines with Precision
- Techniques for Drawing Lines at Specific Angles
- How to Utilize the Line By Direction and Distance Feature
- Creating and Managing Construction Lines
- Adjusting Line Properties for Enhanced Drawing Quality
- YOUTUBE: AutoCAD - Drawing a Line with a Specific Length
- Tips for Efficient Line Drawing in AutoCAD Web App
- Advanced Line Drawing Techniques for Professionals
- Common Mistakes in Line Drawing and How to Avoid Them
- Resources for Further Learning and Practice
How do I draw lines in AutoCAD?
To draw lines in AutoCAD, you can follow these steps:
- Open AutoCAD and create a new drawing or open an existing one.
- Switch to the Home tab in the top menu.
- In the Draw panel, click on the Line command.
- Specify the starting point of the line by clicking anywhere in the drawing area.
- Specify the ending point of the line by clicking on another location in the drawing area.
- Continue this process to draw additional lines if needed.
- When finished, you can either save the drawing or continue working on it.
Note that you can also define the properties of the line such as its length, angle, or coordinates by using additional options and commands in AutoCAD. Additionally, you can utilize various tools like snaps, tracking, and ortho to aid in drawing accurate lines.
READ MORE:
Understanding Basic Line Commands in AutoCAD
AutoCAD\"s line drawing commands are essential for creating precise and detailed drawings. Mastering these commands enhances your drafting efficiency and accuracy. Here\"s a guide to understanding and using basic line commands in AutoCAD.
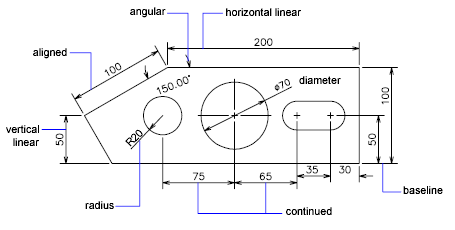
- LINE Command: This fundamental command is used to draw straight lines between two points. Activate it by typing \"LINE\" or \"L\" in the command line, then click or enter coordinates for the start and end points.
- Construction Line (XLINE): Use this command to create infinite lines that assist in drafting. They\"re especially useful for aligning objects and can be initiated by typing \"XLINE\" or \"XL\".
- POLYLINE (PLINE): This command draws a series of connected lines and arcs. Type \"PLINE\" and click to specify the start point, then continue adding segments. You can switch between straight lines and arcs by entering \"A\".
- RECTANGLE (REC): Create rectangles by specifying two opposite corners. Type \"REC\", then click or enter coordinates for these points. Modify the shape by entering options like width, length, and fillet during the command.
- CIRCLE (C): Draw circles by specifying the center point and radius or diameter. Type \"C\", click to set the center, and then define the circle\"s size.
Practicing these commands will significantly improve your ability to create accurate and complex drawings in AutoCAD. Remember, the key to proficiency in AutoCAD is not only knowing what commands to use but also how to use them efficiently.
Steps to Draw Straight Lines with Precision
Drawing straight lines with precision in AutoCAD is crucial for creating accurate designs. Follow these steps to enhance your drafting skills:
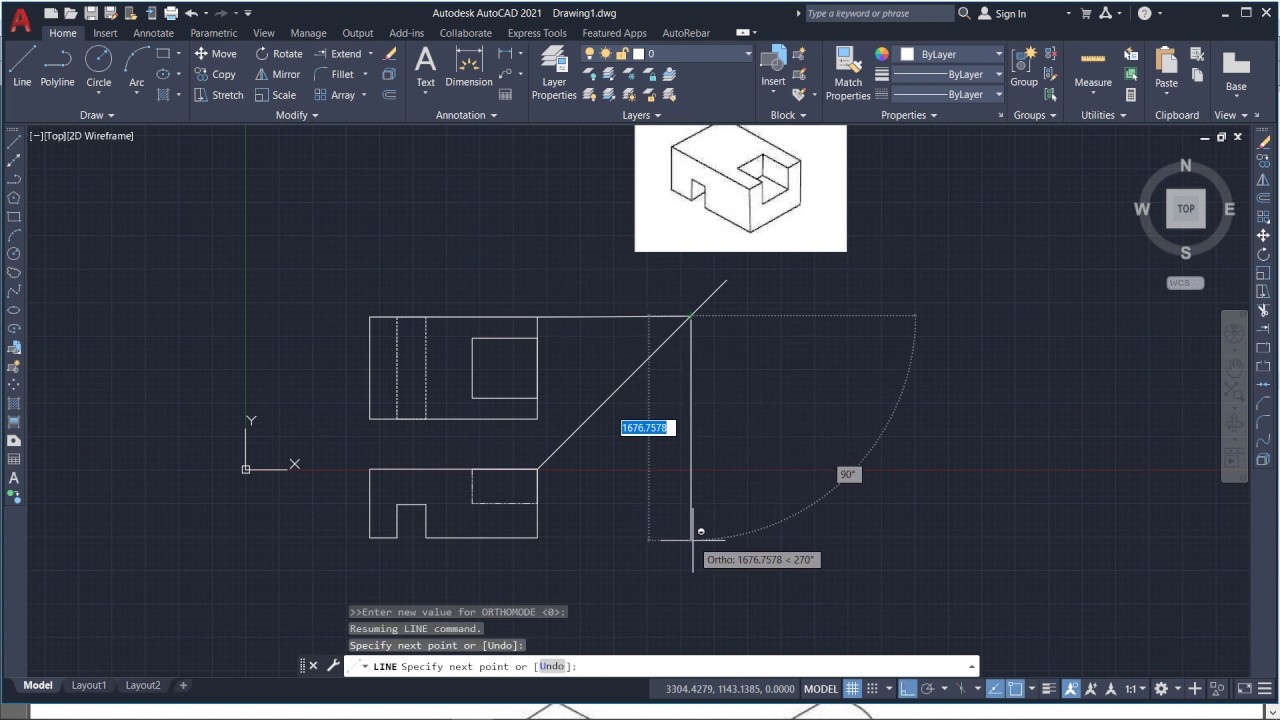
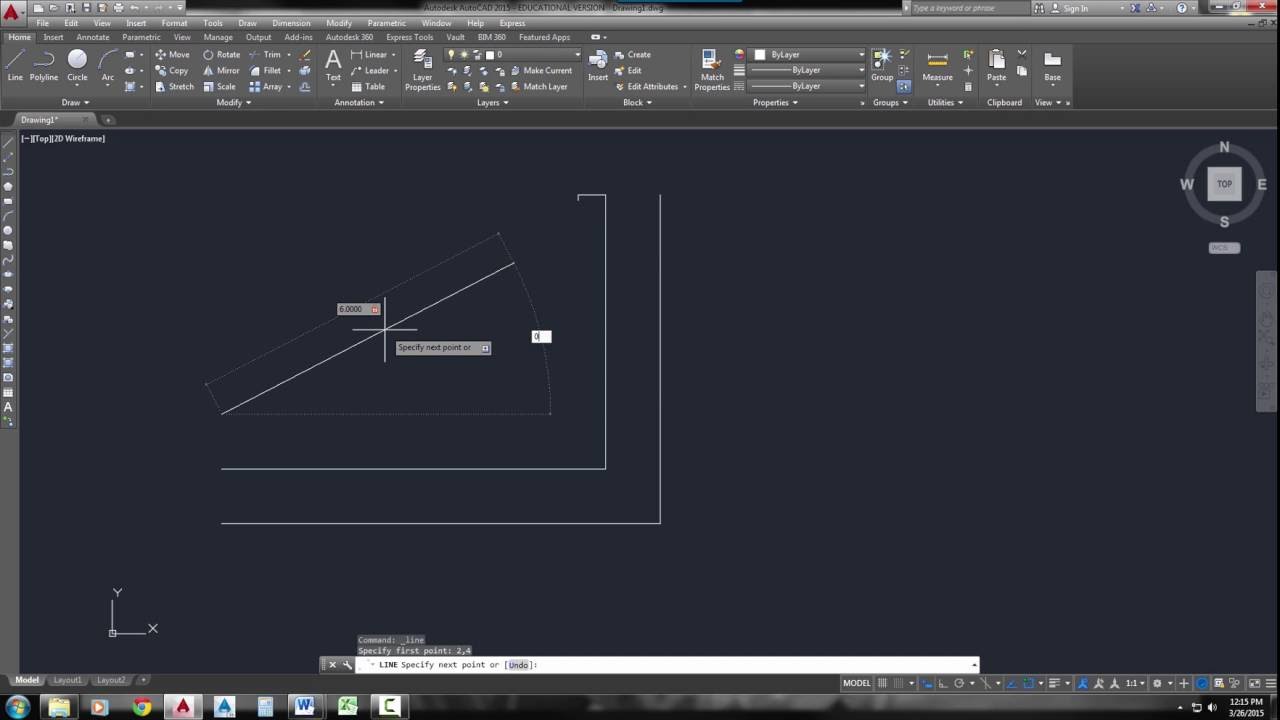
- Start the LINE Command: Type \"LINE\" or \"L\" in the command line, then press Enter to initiate the line drawing tool.
- Specify the Start Point: Click in the drawing area or type the coordinates to set the start point of your line.
- Specify the End Point: Again, click in the drawing area or type the coordinates for the line\"s end point. AutoCAD will draw a straight line between these two points.
- Use Ortho Mode for Horizontal or Vertical Lines: Activate Ortho Mode by pressing \"F8\". This ensures your lines are perfectly horizontal or vertical.
- Utilize Object Snaps for Accuracy: Object snaps (Osnap) help in drawing lines that are precisely connected to other parts of your drawing. Use them by right-clicking and selecting an Osnap mode or by pressing \"F3\".
- Repeat the Process: Continue specifying start and end points for additional lines or press \"Enter\" to finish.
Remember, precision in line drawing forms the foundation of all accurate AutoCAD designs. Practice these steps to improve both speed and accuracy in your work.
Techniques for Drawing Lines at Specific Angles
Drawing lines at specific angles in AutoCAD can add precision and complexity to your designs. Follow these techniques to achieve accurate angled lines:
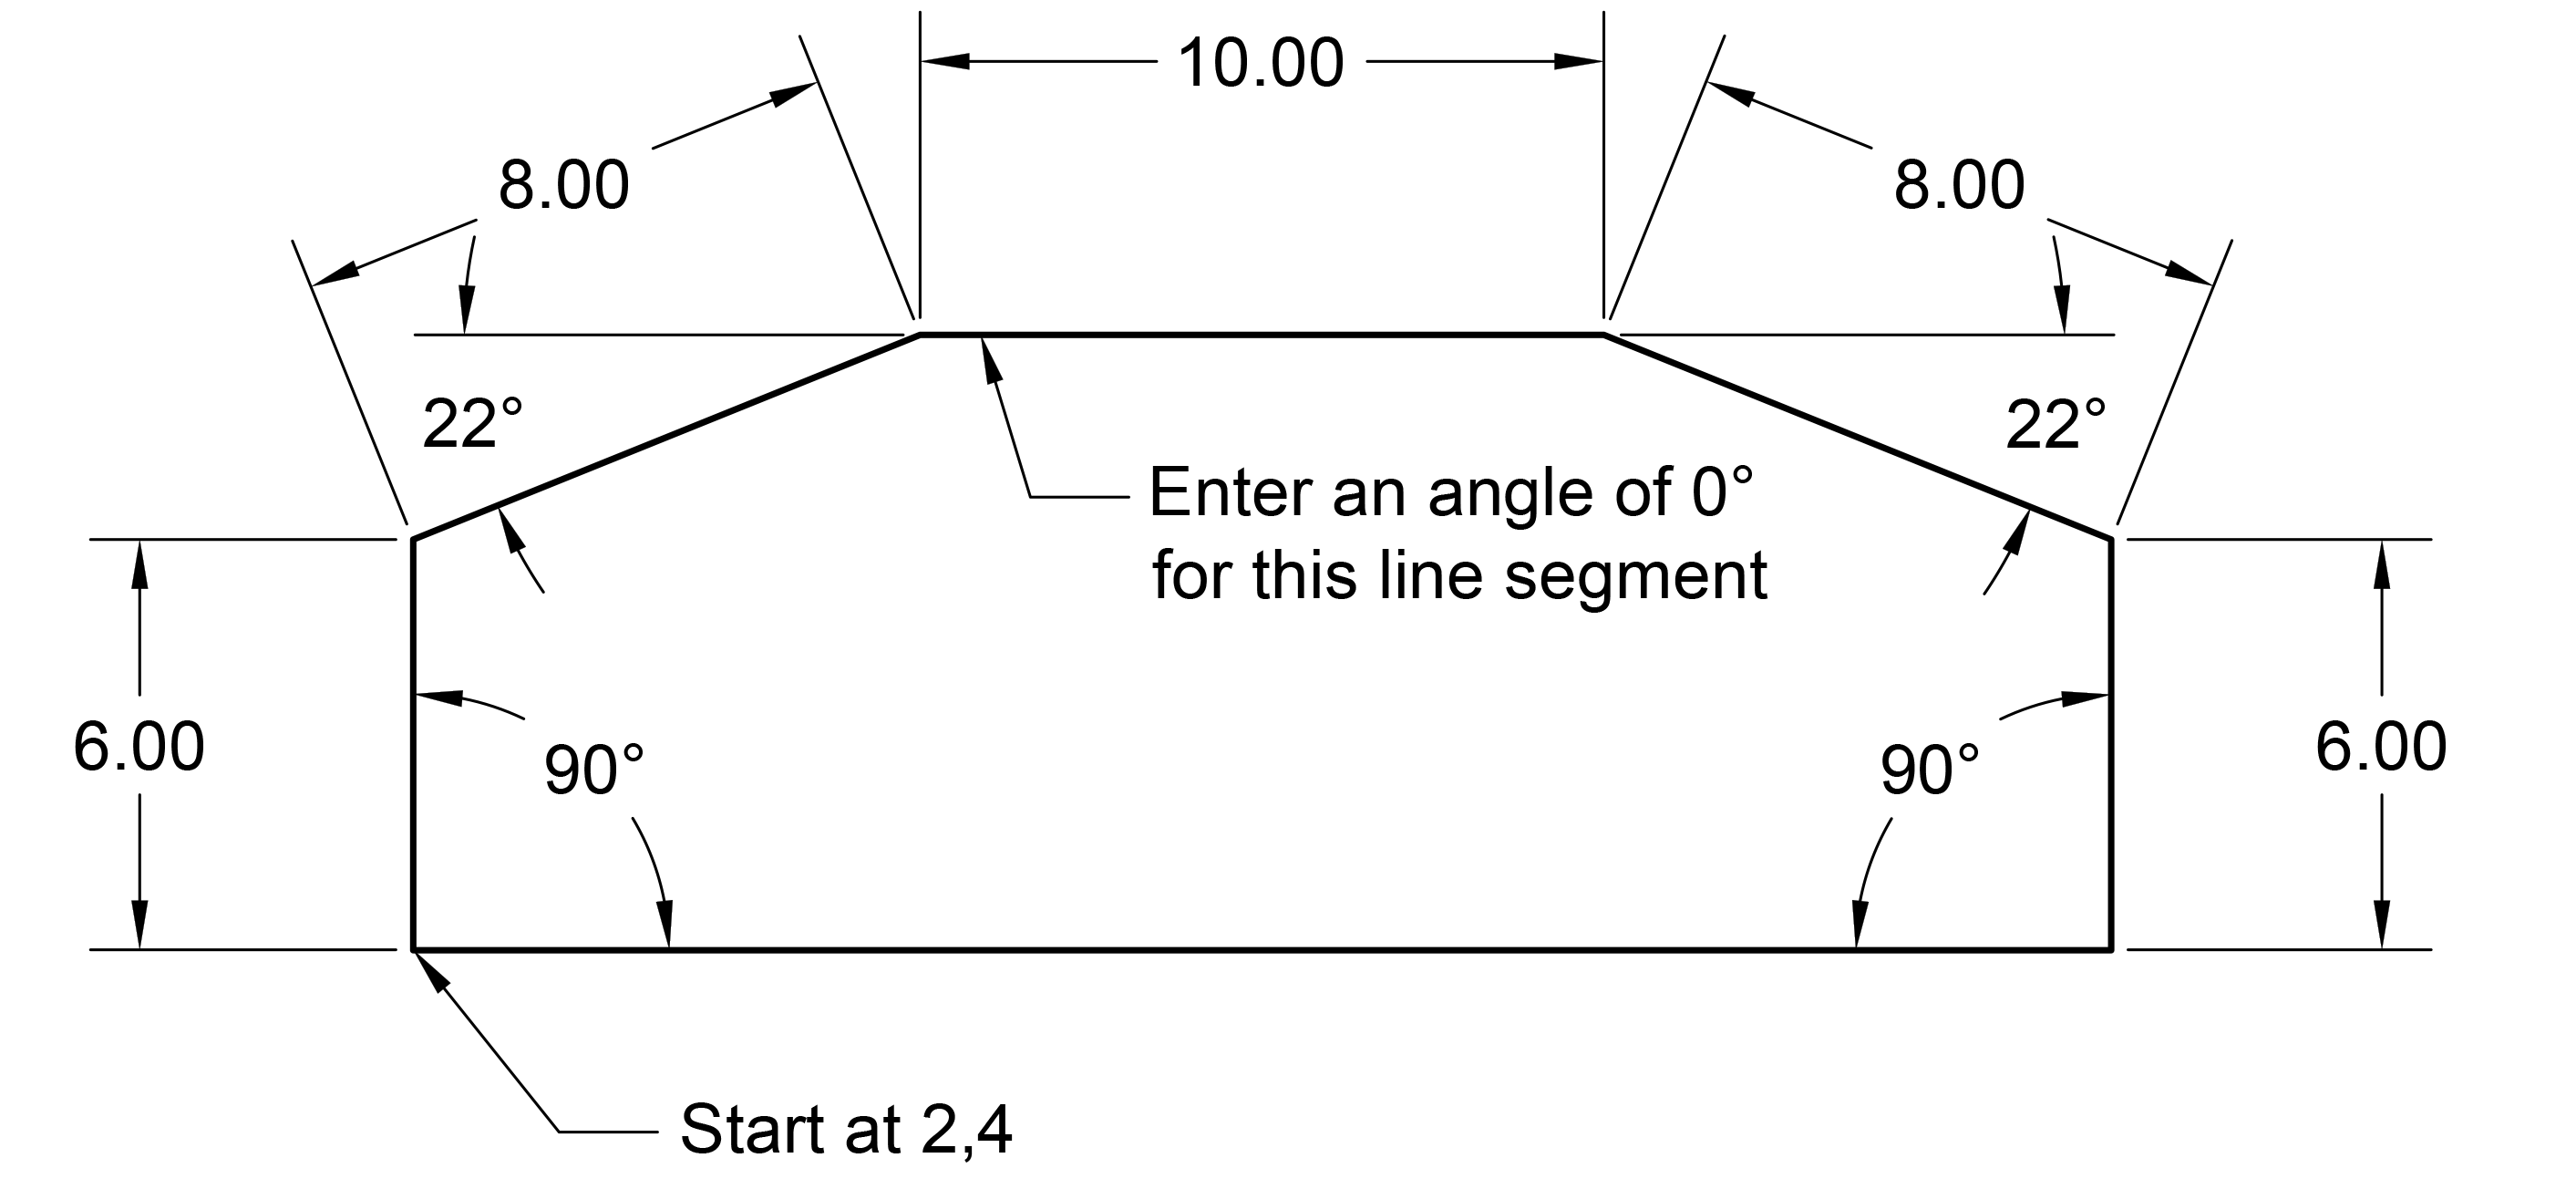
- Using the LINE Command with Angles: Start the LINE command, then type the start point. Enter the angle in degrees using the format
- Polar Coordinates for Angled Lines: Instead of just entering a distance, use polar coordinates by specifying the distance and angle (e.g., 10<45 to draw a line 10 units long at a 45-degree angle).
- Ortho Mode for Right Angles: Activate Ortho Mode (F8) to easily draw lines at 90-degree angles. This is helpful for creating perpendicular lines quickly.
- Polar Tracking for Common Angles: Turn on Polar Tracking to snap lines to specific angles as you draw. This is useful for maintaining consistency in angles throughout your drawing.
- Using Object Snap (Osnap): Utilize Osnap settings to draw lines that connect precisely to specified points, edges, or intersections at desired angles.
- Temporary Tracking Point: Use a temporary tracking point to specify an angle by creating a reference point from an existing point. Type \"TT\" then move your cursor to define the angle and distance from the reference point.
By mastering these techniques, you can draw lines at any specific angle, enhancing the accuracy and aesthetic appeal of your AutoCAD designs.

How to Utilize the Line By Direction and Distance Feature
AutoCAD allows precise line creation using direction and distance, a valuable feature for drafting detailed designs. Follow these steps to master it:
- Activate the LINE Command: Begin by typing \"LINE\" or \"L\" in the command prompt and hit Enter.
- Select the Start Point: Click in the drawing area or type coordinates to establish the starting point of your line.
- Specify Direction and Distance: After the start point, instead of clicking a second point, type the distance and angle in the format @distance
- Use Polar Coordinates: Polar coordinate entry is another method, where you input coordinates in the form of distance
- Repeat for Additional Lines: Continue drawing by specifying new distances and angles, or press Enter to finish the command.
This feature significantly enhances drawing accuracy by allowing for precise control over the length and orientation of lines, making it an essential skill for advanced AutoCAD users.
_HOOK_
Creating and Managing Construction Lines
Construction lines, or xlines, are essential in AutoCAD for creating precise and scalable drawings. They serve as infinite guidelines that help in aligning objects and ensuring accuracy in your designs. Here\"s how to create and manage them:
- Starting with Construction Lines: Access the construction line tool by typing \"XLINE\" or accessing it through the \"Draw\" panel. You can specify a base point and then a direction point to create an infinite line.
- Horizontal and Vertical Lines: For perfectly horizontal or vertical lines, use the Ortho Mode (F8) or specify the direction by typing \"H\" for horizontal or \"V\" for vertical after activating the xline command.
- Angled Construction Lines: You can also create construction lines at specific angles by setting the angle during the command process. After specifying the first point, enter the angle in degrees.
- Using Object Snaps with Construction Lines: To ensure your construction lines are accurately placed in relation to existing geometry, use object snaps (Osnap). This allows your construction lines to snap to exact points, edges, or intersections.
- Managing Construction Lines: While construction lines are infinite, they can be easily managed through the \"Modify\" panel. You can move, rotate, or even trim them to work as finite guidelines within your design space.
- Deleting Construction Lines: To remove construction lines, select them and press the \"Delete\" key. You can also use the \"ERASE\" command for a more controlled deletion process, selecting multiple lines at once if needed.
Understanding how to effectively create and manage construction lines will significantly improve your drafting workflow, making it easier to conceptualize and execute complex designs in AutoCAD.
Adjusting Line Properties for Enhanced Drawing Quality
Adjusting line properties in AutoCAD is crucial for enhancing the visual quality of your drawings. Here\"s a guide to modifying line weight, type, and color for improved clarity and aesthetics:
- Accessing Line Properties: Select the line(s) you wish to adjust. Right-click and choose \"Properties\" from the context menu, or press \"CTRL\" + \"1\" to open the Properties palette.
- Adjusting Line Weight: In the Properties palette, find \"Lineweight\". Choose from a range of predefined weights, or custom define one to affect the line\"s thickness on your drawing and printouts.
- Changing Line Type: Locate \"Linetype\" in the Properties palette. You may need to load new linetypes through the Linetype Manager (\"LT\" command) if your desired type isn\"t listed.
- Modifying Line Color: Under \"Color\" in the Properties palette, select a color that enhances the visibility and organization of your drawing. Utilizing layer standards for color coding can significantly improve drawing readability.
- Layer Management for Line Properties: Assign lines to layers with predefined properties for efficient management. Use the Layer Properties Manager (\"LA\" command) to adjust line properties for entire layers, enhancing consistency across your drawing.
- Utilizing Plot Styles: Plot styles can further refine how line properties are translated in printouts. Assign plot styles to control the printed appearance of lines based on their color, weight, and type.
By mastering these adjustments, you can significantly enhance the quality and precision of your AutoCAD drawings, making them more understandable and visually appealing.

AutoCAD - Drawing a Line with a Specific Length
Line Drawing: Dive into the world of line drawing with this mesmerizing video! Discover the art of creating intricate and visually captivating artwork using just lines. Whether you\'re a beginner or a seasoned artist, this tutorial will inspire and elevate your drawing skills to new heights.
Tips for Efficient Line Drawing in AutoCAD Web App
Maximizing efficiency in the AutoCAD Web App is crucial for professionals on the go. Here are tips to enhance your line drawing capabilities:
- Get Familiar with the Interface: Spend time understanding the web app\"s interface. Knowing where tools and features are located can save time during the design process.
- Use Command Shortcuts: Familiarize yourself with command shortcuts for line drawing, such as \"L\" for LINE. This can significantly speed up your workflow.
- Utilize Object Snaps: Turn on Object Snaps (Osnap) to ensure precision in your line drawings by snapping to specific geometric locations on objects.
- Enable Ortho Mode: For perfectly horizontal or vertical lines, use Ortho Mode (F8). It constrains the line drawing to 90-degree angles.
- Employ Polar Tracking: Polar Tracking can help draw lines at specific angles. It guides your cursor along preset angle increments, aiding in precision.
- Leverage Layers: Organize your drawings by using layers. Assigning lines to specific layers can help manage visibility and editability throughout the project.
- Customize the Tool Palette: Customize your tool palette with frequently used line types and properties for quick access during your drawing sessions.
- Practice with Direct Distance Entry: After starting a line, move your cursor in the desired direction and type the length. Press Enter to confirm, creating precise lines without needing to click a second point.
- Adjust Line Properties: Use the properties panel to adjust line weight, type, and color for visual differentiation and clarity in your drawings.
- Keep Software Updated: Ensure you\"re using the latest version of the AutoCAD Web App. Updates can bring new features and improvements to the line drawing tools and overall application performance.
Adopting these tips can significantly enhance your productivity and precision when drawing lines in the AutoCAD Web App, making your design process more efficient and enjoyable.
Advanced Line Drawing Techniques for Professionals
For professionals seeking to refine their AutoCAD line drawing skills, advanced techniques can elevate the precision and creativity of your work. Here are strategies to master:
- Dynamic Blocks and Parametric Constraints: Utilize dynamic blocks for repetitive elements and parametric constraints to maintain relationships between lines, enhancing drawing efficiency and adaptability.
- Custom Linetypes and Line Weights: Create custom linetypes for specific project needs and adjust line weights for visual hierarchy, improving readability and professionalism in your drawings.
- Advanced Snapping Techniques: Beyond basic object snaps, use advanced snapping options like geometric constraints for more control over line placement and orientation.
- Layer Management Strategies: Implement sophisticated layer management techniques, using layer properties and filters for organized, efficient drawing navigation and editing.
- Using Express Tools for Lines: Explore Express Tools for unique line creation and editing capabilities, such as joining or splitting lines, that streamline complex tasks.
- Scripting and Automation for Repetitive Tasks: Develop scripts or use AutoLISP for automating repetitive line drawing tasks, saving time on large projects.
- 3D Polylines for Spatial Drawing: Apply 3D polylines for projects requiring spatial context, enhancing the dimensional aspect of your line drawings.
- Efficient Use of External References (Xrefs): Incorporate external references efficiently to manage large projects with multiple dependencies, ensuring consistency across your drawings.
- Advanced Editing Techniques: Master advanced editing tools like grip editing, stretch, and trim to modify lines precisely for complex designs.
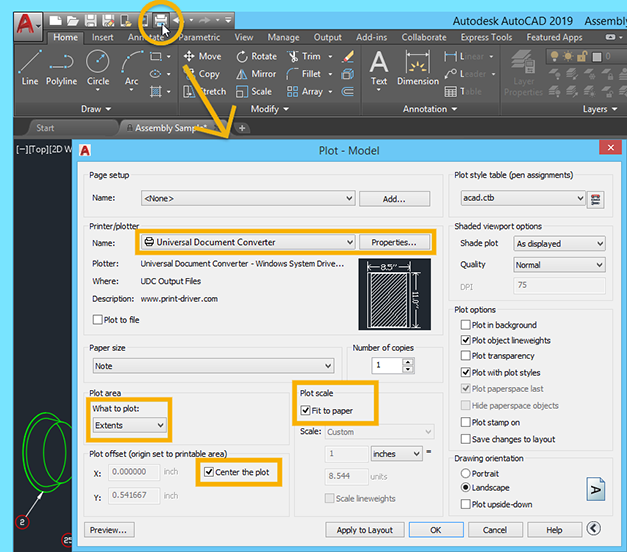
- Plotting and Publishing: Fine-tune plotting settings for high-quality outputs and utilize publishing tools for sharing and collaboration, ensuring your line drawings are presented at their best.
By integrating these advanced techniques into your workflow, you can achieve greater efficiency, accuracy, and creativity in your AutoCAD line drawings, setting a professional standard for your work.
Common Mistakes in Line Drawing and How to Avoid Them
Avoiding common mistakes in AutoCAD line drawing is crucial for producing clean, accurate, and professional drawings. Here are some common pitfalls and how to steer clear of them:
- Ignoring Object Snaps (Osnap): Failing to use Osnap can lead to inaccuracies. Always enable Osnap to ensure lines are precisely connected at their intended points.
- Not Using Ortho Mode for Straight Lines: Ortho Mode (F8) constrains movement to horizontal or vertical, crucial for drawing straight lines. Activate it to avoid skewed lines.
- Overlooking Layer Management: Proper layer management organizes a drawing and makes it easier to edit. Use layers to separate different elements and enhance drawing clarity.
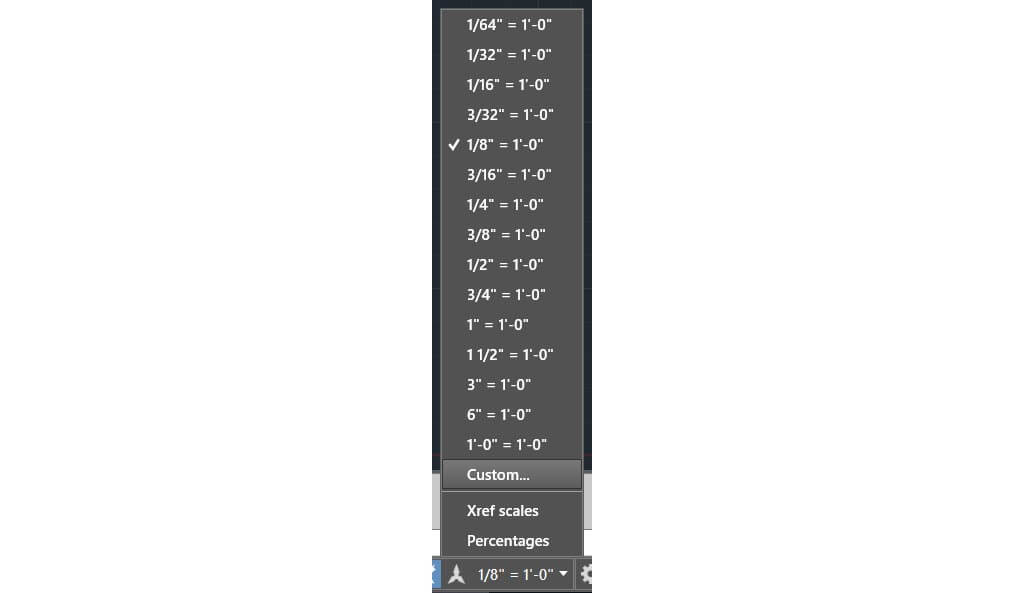
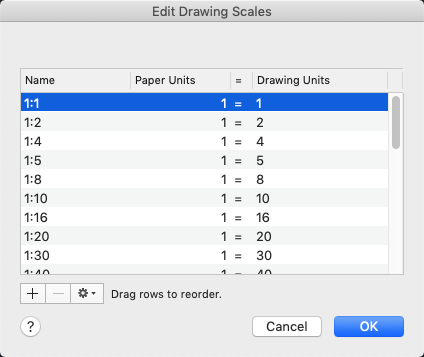
- Incorrect Unit Settings: Starting a project without setting the correct units can cause scale issues. Check and set your drawing units before beginning to avoid rework.
- Misusing Scale: Applying incorrect scale factors can distort your drawing. Understand the scale settings and how they impact your drawing\"s dimensions and appearance.
- Overcomplicating with Too Many Details: Adding excessive detail can clutter your drawing and confuse viewers. Simplify by focusing on essential elements and use layers to manage visibility.
- Not Customizing AutoCAD Settings: AutoCAD allows customization to suit your workflow. Customize settings, such as pointer size and snap spacing, to improve efficiency.
- Forgetting to Save Regularly: AutoCAD can be unpredictable. Regular saves prevent loss of work due to crashes or other issues. Utilize AutoSave features for added security.
By recognizing and avoiding these common mistakes, you can enhance the quality of your line drawings, making them more precise, understandable, and aesthetically pleasing.

_HOOK_
READ MORE:
Resources for Further Learning and Practice
Expanding your AutoCAD skills requires practice and learning from a variety of resources. Here are valuable tools and platforms to deepen your understanding and enhance your line drawing capabilities:
- AutoCAD Tutorials and Courses: Websites like Autodesk’s official site, SourceCAD, and Alison offer free tutorials and courses for both beginners and advanced users.
- Online Learning Platforms: Explore courses on platforms like edX, Udemy, and Coursera that offer structured learning paths from basic to advanced AutoCAD skills, including certification options.
- YouTube Channels: Numerous channels provide step-by-step tutorials covering a wide range of AutoCAD topics, from basic line drawing to complex 3D modeling techniques.
- AutoCAD Blogs and Forums: Communities like CAD-notes and the Autodesk forums are great for tips, tricks, and troubleshooting advice from seasoned professionals.
- Books and eBooks: Look for comprehensive guides and practice books that offer exercises and projects to work on, available in both digital and print formats.
- Official AutoCAD Certification: Consider pursuing AutoCAD certification through Autodesk to validate your skills and enhance your professional credibility.
- Practice Exercises: Regular practice with exercises from sites like SourceCAD or through downloadable exercise files can significantly improve your drafting skills.
Utilizing a mix of these resources can provide a well-rounded approach to mastering AutoCAD, allowing you to tackle projects with confidence and creativity.
Embracing the power of AutoCAD for line drawing opens up a world of design precision and creativity. With the right techniques and resources, you can transform your visions into detailed realities, propelling your projects to new heights.