Topic drawing for autocad: Explore the world of AutoCAD drawing, a pivotal skill for professionals seeking to elevate their design capabilities and bring their architectural visions to life.
Table of Content
- What are the best resources for learning and practicing drawing in AutoCAD?
- Understanding AutoCAD Drawing Basics
- Getting Started with AutoCAD Drawings
- Exploring AutoCAD Drawing Tools and Techniques
- Advanced Drawing Techniques in AutoCAD
- Managing Layers and Properties in AutoCAD Drawings
- Optimizing Drawing Workflows in AutoCAD
- YOUTUBE: Wrench in AutoCAD Practice Drawing
- AutoCAD Drawing Tips and Best Practices
- Creating 2D and 3D Drawings in AutoCAD
- Utilizing AutoCAD Drawing Templates
- Sharing and Collaborating on AutoCAD Drawings
What are the best resources for learning and practicing drawing in AutoCAD?
There are several resources available for learning and practicing drawing in AutoCAD. Here are some of the best options:
- Official AutoCAD Tutorials: This is a great place to start, as AutoCAD provides a wide range of tutorials and learning materials on their official website. These tutorials cover various aspects of drawing in AutoCAD and can help you understand the software\'s features and tools.
- Online Courses: There are numerous online platforms that offer AutoCAD courses specifically focused on drawing. Websites like Udemy, Coursera, and LinkedIn Learning offer structured courses taught by experts in the field. These courses usually include video tutorials, assignments, and quizzes to help you practice and improve your drawing skills.
- Books and eBooks: Many authors have written books and eBooks on AutoCAD drawing techniques. These resources can provide in-depth explanations and step-by-step instructions for different types of drawings. Some popular titles include \"AutoCAD 2024: A Problem-Solving Approach\" and \"Mastering AutoCAD 2022 and AutoCAD LT 2022.\"
- Community Forums and Blogs: Participating in AutoCAD-related forums and reading blogs can be beneficial for learning and gaining insights from experienced users. Websites like AutoCAD Forums and AUGI (Autodesk User Group International) provide a platform for users to ask questions, seek advice, and share their experiences.
- Practice Exercises: To enhance your drawing skills, regularly practicing with AutoCAD exercises is crucial. You can find practice exercises in books, online courses, and websites dedicated to AutoCAD practice. Additionally, AutoCAD offers sample files that you can use to practice specific techniques and explore different drawing scenarios.
Remember, consistent practice along with hands-on experience is key to improving your drawing skills in AutoCAD. Utilize these resources to enhance your knowledge and proficiency in the software.
READ MORE:
Understanding AutoCAD Drawing Basics
AutoCAD, a cornerstone in the world of computer-aided design (CAD), provides a robust platform for drafting and designing in both two-dimensional (2D) and three-dimensional (3D) spaces. Mastering the fundamentals of AutoCAD drawing is essential for anyone looking to excel in engineering, architecture, or design. This section explores the foundational elements of AutoCAD drawing, ensuring a solid base for further exploration and proficiency.
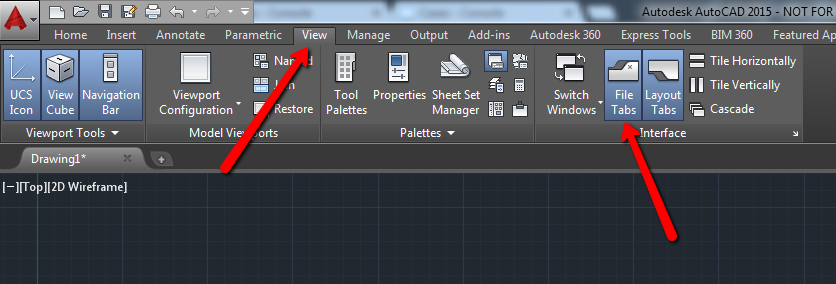
- Interface Familiarization: Begin by familiarizing yourself with the AutoCAD interface, including the ribbon, toolbars, command line, and drawing area. Understanding these components is crucial for efficient navigation and tool utilization.
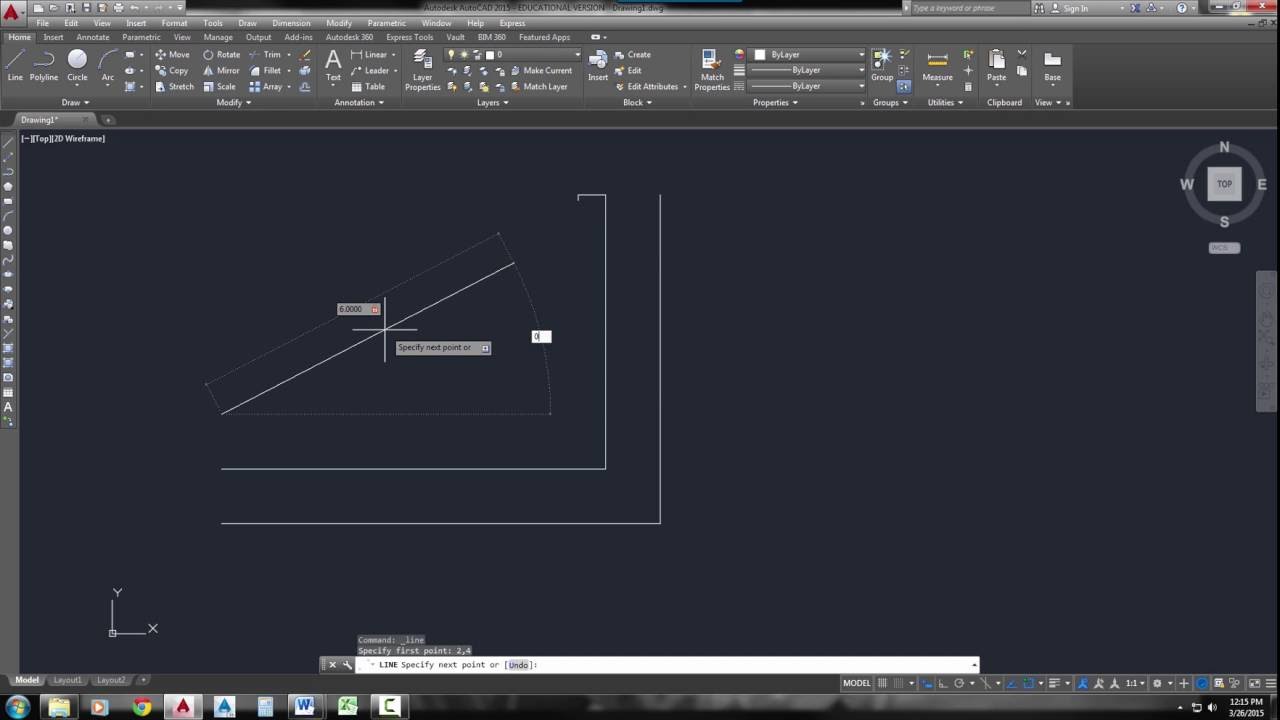
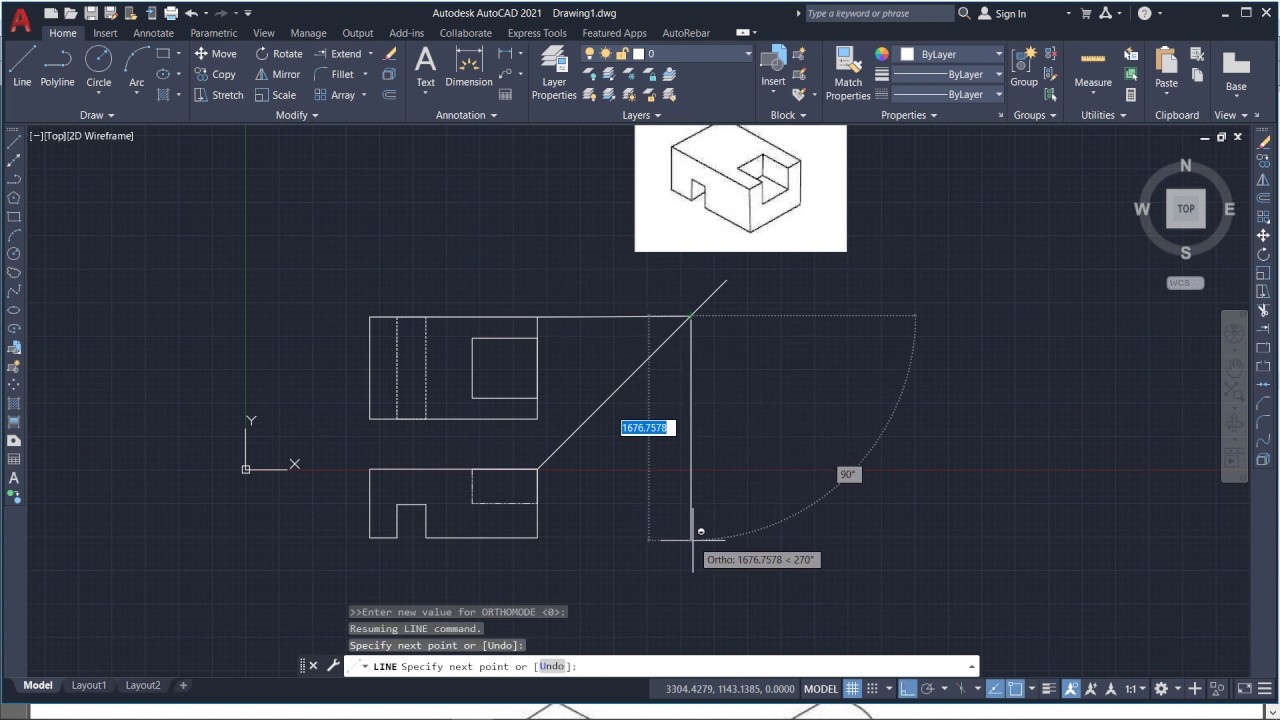
- Basic Drawing Commands: Learn the core drawing commands such as LINE, POLYLINE, CIRCLE, RECTANGLE, and ARC. These commands form the building blocks of most AutoCAD drawings.
- Using Snap and Grid: Utilize the snap and grid features to draw with precision. These tools help in aligning objects and maintaining consistency in your drawings.
- Object Properties: Get to know how to manipulate object properties like color, line type, and line weight. These properties can significantly impact the readability and aesthetic of your drawings.
- Layer Management: Layers are a powerful tool for organizing your drawing. Learning how to create, manage, and assign objects to layers will make your drawing process more efficient and your drawings more manageable.
- Modifying Objects: Mastering modification commands such as MOVE, COPY, ROTATE, SCALE, and TRIM is vital for editing your drawings and refining your designs.
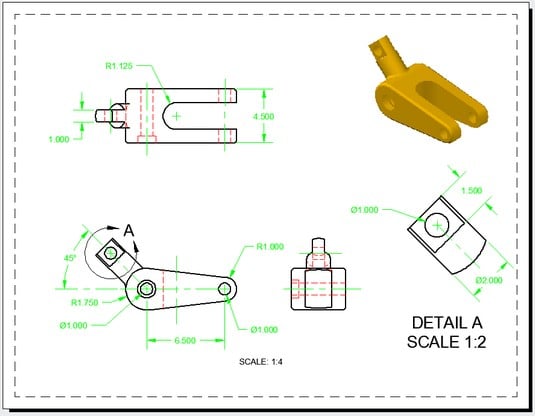
- Dimensioning and Text: Adding dimensions and text to your drawings is essential for clarity and communication. Explore how to use AutoCAD\"s dimensioning and text tools to annotate your designs accurately.
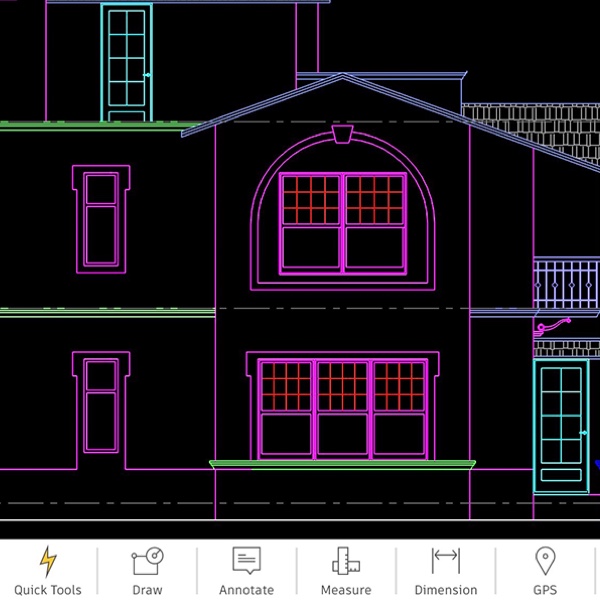
- Creating Simple 2D Drawings: Apply your knowledge by creating simple 2D drawings. Practice using the basic drawing and modification commands to build your confidence and understanding of AutoCAD\"s capabilities.
By grasping these basics, you will set a strong foundation for your journey in AutoCAD drawing. Continuous practice and exploration of these fundamental concepts will pave the way for advanced techniques and complex projects.
Getting Started with AutoCAD Drawings
Embarking on the AutoCAD journey opens up a world of possibilities for creating detailed, precise drawings. Whether you\"re new to CAD software or transitioning from another platform, this section will guide you through the initial steps to start creating your own AutoCAD drawings. Follow these steps to begin your design journey confidently.
- Install AutoCAD: Ensure you have the latest version of AutoCAD installed on your computer. Autodesk offers various AutoCAD versions, including specialized toolsets for different industries.
- Open a New Drawing: Launch AutoCAD and start a new drawing by selecting \"New\" from the file menu. You can choose from a variety of templates based on the type of drawing you intend to create.
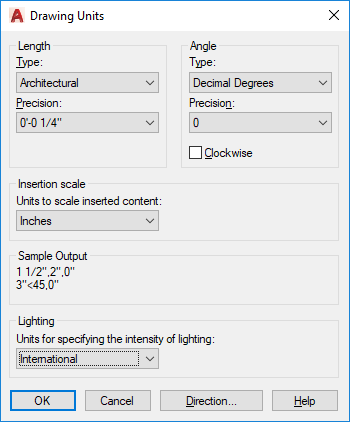
- Set Units and Precision: Before starting your drawing, set the drawing units and precision to match the requirements of your project. This ensures that your dimensions and measurements are accurate and consistent.
- Learn Basic Commands: Familiarize yourself with basic AutoCAD commands such as LINE, CIRCLE, RECTANGLE, and POLYLINE. Understanding these commands is crucial for creating your initial drawings.
- Practice Drawing Simple Shapes: Begin by drawing simple shapes to get comfortable with the drawing tools. Experiment with creating both 2D and 3D shapes to understand the versatility of AutoCAD.
- Explore Object Properties: Learn how to modify object properties, such as line type, color, and layer. This knowledge allows you to organize and differentiate elements of your drawing effectively.
- Use Layers: Organize your drawing by using layers. Assign different elements of your drawing to specific layers to keep your work organized and manageable.
- Save Your Work: Develop a habit of saving your work frequently. AutoCAD offers options to save drawings locally or in the cloud, enabling easy access and collaboration.
- Experiment with Modification Tools: As you become more comfortable with basic drawing tools, start experimenting with modification tools like MOVE, COPY, ROTATE, and SCALE to refine your drawings.
- Seek Resources and Tutorials: Take advantage of the vast array of online tutorials, forums, and documentation available to AutoCAD users. Engaging with the AutoCAD community can provide valuable insights and accelerate your learning process.
Starting with AutoCAD drawings can seem daunting, but by breaking down the process into manageable steps, you\"ll quickly gain confidence and skill in creating professional-level designs.

Exploring AutoCAD Drawing Tools and Techniques
Delving deeper into AutoCAD reveals a suite of sophisticated tools and techniques designed to enhance drawing efficiency and precision. This section highlights some of the advanced features and methodologies that can transform the way you approach design and drafting in AutoCAD.
- Dynamic Blocks: Learn to create and use dynamic blocks, which offer enhanced flexibility and functionality over standard blocks. Dynamic blocks can be modified on the fly, reducing the need for multiple block definitions.
- Parametric Constraints: Utilize parametric constraints to enforce geometric and dimensional relationships between objects. This feature ensures that designs adhere to specified standards and modifications are consistently applied.
- Layer Management: Master advanced layer management techniques to streamline your workflow. Utilize layer filters and layer states to manage complex drawings more effectively.
- Customization and Automation: Discover how to customize the AutoCAD interface and use AutoLISP or macros for automation. These tools can significantly speed up repetitive tasks and personalize the AutoCAD experience.
- Annotation Tools: Explore the advanced annotation tools for adding text, dimensions, and other descriptive elements to your drawings. Effective use of annotations can greatly enhance the clarity and professionalism of your designs.
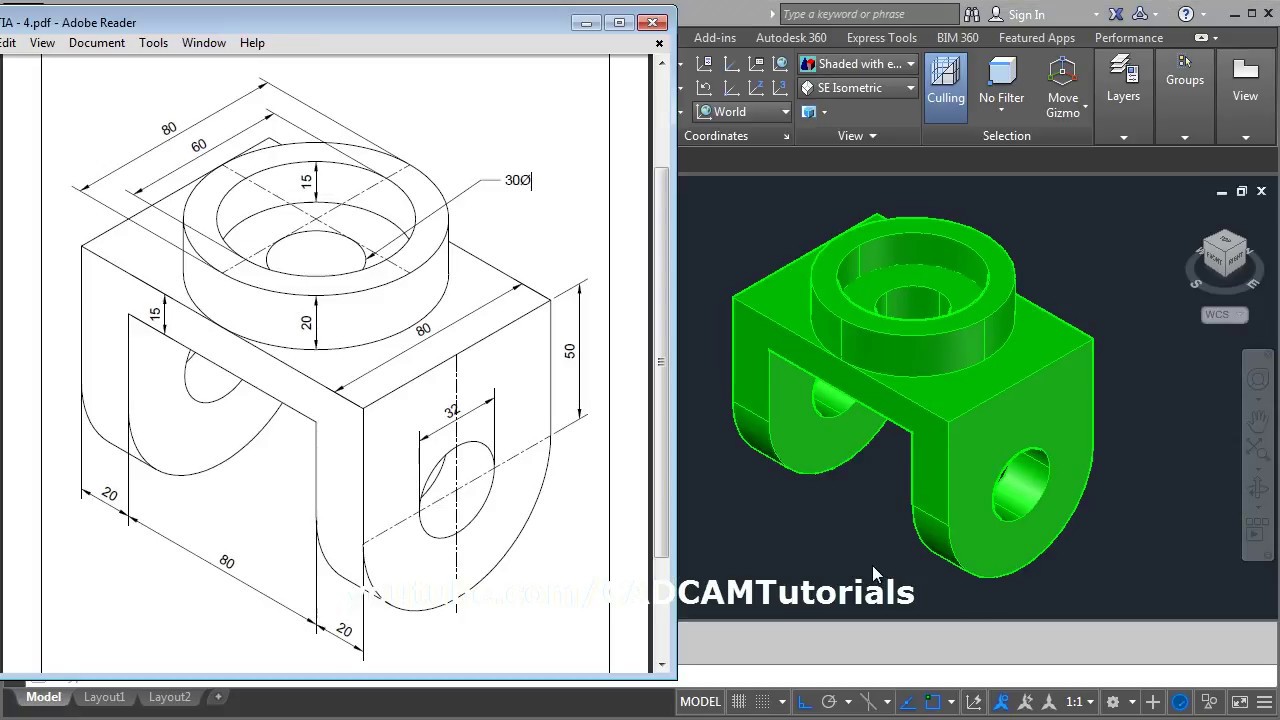
- 3D Modeling Tools: If your work involves 3D designs, familiarize yourself with AutoCAD’s 3D modeling tools. Learn to navigate the 3D workspace and use commands like EXTRUDE, REVOLVE, and SWEEP to create complex 3D shapes.
- Rendering and Visualization: AutoCAD’s rendering tools allow you to create photorealistic images of your 3D models. Explore lighting, materials, and rendering techniques to bring your designs to life.
- Data Extraction: Learn to extract data from your drawings to create schedules, tables, or lists automatically. This technique is invaluable for managing large projects and ensuring accuracy in documentation.
- Collaboration Features: Utilize AutoCAD’s collaboration features to work with team members or clients. Cloud storage, XREFs, and the ability to import and export various file formats enhance teamwork and flexibility.
- Custom Tool Palettes: Create custom tool palettes to access your most frequently used commands, blocks, and tools quickly. This customization improves efficiency and keeps essential tools at your fingertips.
By exploring these advanced tools and techniques, you can unlock new potentials in AutoCAD drawing, leading to more innovative designs and efficient workflows.

Advanced Drawing Techniques in AutoCAD
For professionals looking to push the boundaries of design and drafting, AutoCAD offers advanced techniques that can significantly enhance drawing quality and innovation. These methods not only improve efficiency but also enable the creation of complex and precise designs. Below, we explore some of the advanced drawing techniques that can elevate your AutoCAD projects.
- Spline Curves: Gain proficiency in using splines for creating smooth, curved lines that can be adjusted to fit any shape or contour. Splines are essential for intricate designs and organic shapes.
- Surfaces and Meshes: Explore the creation of surfaces and meshes to model complex 3D forms. Understanding how to manipulate these elements is crucial for advanced 3D modeling and rendering.
- Custom Linetypes and Hatch Patterns: Learn how to create and apply custom linetypes and hatch patterns. This customization allows for more detailed and specific representation of materials and elements in your drawings.
- Advanced Text Options: Utilize advanced text options to control formatting, alignment, and style. This is especially useful for creating technical documentation and detailed annotations.
- Dynamic Input and Constraints: Use dynamic input and parametric constraints to automate and refine the design process. These features ensure precision and adherence to specific design requirements.
- 3D Modeling and Visualization: Master the techniques of 3D modeling, including solid, surface, and mesh modeling. Enhance your models with advanced visualization techniques for presentations or client reviews.
- Scripting and Automation: Automate repetitive tasks with scripting. Learning to write simple scripts in AutoLISP or Python can save time and reduce errors in complex projects.
- Efficient Use of Reference Files: Improve project organization and efficiency by mastering the use of external reference files (Xrefs). This technique helps in managing large and complex drawings by referencing other files without incorporating them into the main drawing.
- Advanced Layouts and Viewports: Create complex layout configurations with multiple viewports to present your designs more effectively. Understanding how to customize layouts and viewports is key for professional presentation and documentation.
- Collaboration and Cloud Integration: Leverage AutoCAD’s collaboration tools and cloud integration for working on projects with teams across different locations. This includes sharing files, cloud storage, and using mobile apps to view and edit drawings on the go.
Mastering these advanced techniques in AutoCAD not only enhances your capability to execute complex designs but also increases your value as a professional in the fields of architecture, engineering, and design.

_HOOK_
Managing Layers and Properties in AutoCAD Drawings
Effective layer management and property control are fundamental to organizing and navigating complex AutoCAD drawings. These features not only improve drawing clarity but also enhance productivity by simplifying modifications and revisions. Here, we discuss strategies to efficiently manage layers and properties within your AutoCAD projects.
- Understanding Layers: Think of layers as transparent sheets stacked on top of each other, where each layer contains different elements of your drawing. Proper use of layers helps in organizing various components of your design, making it easier to edit, hide, or display specific parts of your drawing.
- Creating and Naming Layers: Create layers for different types of information (e.g., electrical, plumbing, structural) and use clear, consistent naming conventions. This practice helps in quickly identifying and selecting the appropriate layer for editing or review.
- Layer Properties: Familiarize yourself with layer properties such as color, linetype, and lineweight. Adjusting these properties can help differentiate elements in your drawing, improving readability and visual appeal.
- Using Layer States: Save specific configurations of layer properties and visibility as layer states. This feature allows you to quickly switch between different views of your drawing, facilitating easier presentation and review processes.
- Layer Filters: Utilize layer filters to manage large numbers of layers by grouping them into categories. Filters can simplify the process of finding and working with layers related to specific aspects of your project.
- Locking and Freezing Layers: Lock layers to prevent accidental modifications while still displaying their contents. Freeze layers to hide them from view and reduce the computational load when working on complex drawings.
- Assigning Objects to Layers: Be diligent in assigning objects to the correct layer as you create them. This practice keeps your drawing organized and reduces the time spent rearranging elements later.
- Layer Transparency: Adjust layer transparency to de-emphasize certain elements in your drawing without hiding them entirely. This technique can be useful in creating background information or reference points.
- Managing Properties with Match Properties: Use the Match Properties tool to quickly copy properties from one object to another. This tool can significantly speed up the process of ensuring consistency across your drawing.
- Organizing with Layer Groups: Group layers that are frequently used together to streamline the selection process. Layer groups can be particularly useful in complex projects with many layers.
Mastering layer management and property settings in AutoCAD is crucial for maintaining an organized, efficient, and effective design workflow. These strategies form the backbone of successful drawing management, enabling designers to focus on creativity and precision.
Optimizing Drawing Workflows in AutoCAD
Efficiency in AutoCAD is not just about mastering commands and tools; it\"s also about optimizing your drawing workflow to save time and reduce errors. This section provides practical tips and strategies to streamline your design process, enhancing both productivity and drawing quality in AutoCAD.
- Customize Your Workspace: Tailor the AutoCAD interface to suit your workflow. Customize toolbars, command aliases, and palette locations to ensure that your most frequently used tools are easily accessible.
- Use Templates: Develop and use drawing templates for common project types. Templates can include predefined layers, styles, and settings, reducing the setup time for new projects.
- Implement Keyboard Shortcuts: Learn and use keyboard shortcuts for common commands. Keyboard shortcuts can significantly speed up your workflow by reducing reliance on the mouse.
- Employ Command Macros: Create macros for sequences of commands that you use regularly. Macros can automate repetitive tasks, saving time and ensuring consistency across your drawings.
- Batch Processing: Utilize batch processing for repetitive tasks across multiple drawings, such as printing, converting formats, or applying updates. Tools like the Sheet Set Manager can automate these processes.
- Data Linking: Link external data sources to your drawings to automate the updating of tables and annotations. This technique ensures accuracy and saves time on manual updates.
- Regularly Purge Drawings: Use the PURGE command regularly to remove unused objects and reduce file size. This practice can improve drawing performance and organization.
- Optimize Layer Usage: Keep your drawings organized by efficiently managing layers. Use layer states to quickly switch between different layer configurations.
- Effective Use of Blocks and References: Use blocks and external references (Xrefs) to manage repetitive elements and large files more effectively. This approach can significantly reduce file size and facilitate collaboration.
- Continuous Learning: Stay updated with new features and tools introduced in AutoCAD updates. Regularly exploring new techniques can uncover workflow improvements and enhance your design capabilities.
By implementing these strategies, you can create an optimized drawing workflow in AutoCAD that not only improves productivity but also enhances the quality of your designs. Remember, the key to workflow optimization is continuous improvement and adaptation to new tools and practices.

Wrench in AutoCAD Practice Drawing
\"Discover the magic of effortless repairs with our innovative wrench that effortlessly tackles any stubborn nut or bolt. Watch our video to learn the secret behind its incredible grip and how it can completely transform your DIY projects!\"
Making a simple floor plan in AutoCAD: Part 1
\"Unlock the potential of your dream home with our expertly crafted floor plan designs. Our video showcases stunning floor plan ideas, customizable to your unique style and preferences. Don\'t miss out on this opportunity to visualize your ideal living space!\"
AutoCAD Drawing Tips and Best Practices
Mastering AutoCAD is not just about learning the software\"s functions; it\"s also about adopting a set of best practices that can lead to more efficient and error-free designs. Here are key tips and best practices to enhance your AutoCAD drawing skills.
- Consistent Use of Layers: Maintain consistency in layer management. Use a logical and standardized layer naming convention to make it easier for anyone to understand and work with your drawings.
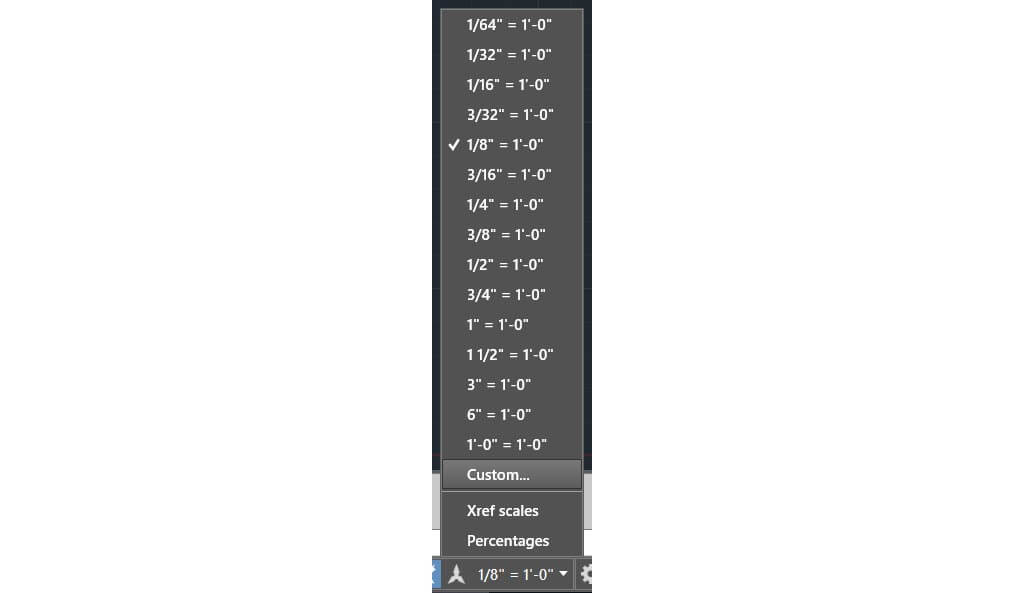
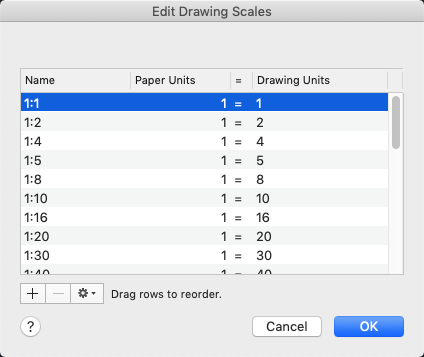
- Accurate Use of Drawing Scales: Ensure that you are drawing at the correct scale from the start. This practice is crucial for the accuracy of dimensions and annotations in your designs.
- Keep Drawings Clean: Regularly use the PURGE and AUDIT commands to clean up unused elements and errors in your drawings. This helps in reducing file size and improving performance.
- Utilize Blocks Wisely: Make extensive use of blocks for repetitive elements. This not only saves time but also ensures consistency across your drawings. Consider creating a library of commonly used blocks.
- Embrace Keyboard Shortcuts: Familiarize yourself with AutoCAD\"s keyboard shortcuts. Using shortcuts for frequently used commands can significantly speed up your workflow.
- Make Use of Data Extraction: Use data extraction tools to generate tables and lists from your drawing data. This can be a powerful way to create schedules and inventories without manual input.
- Apply Dimensioning and Text Styles: Create and apply consistent dimensioning and text styles. Consistency in these elements enhances the professionalism and readability of your drawings.
- Save Regularly: Develop a habit of saving your work frequently. Consider using AutoCAD\"s autosave feature to protect against data loss.
- Use External References (Xrefs): For large projects, use external references instead of inserting files. This reduces the overall file size and facilitates easier updates.
- Continuous Learning: AutoCAD is constantly evolving, with new features and tools being added. Stay engaged with the AutoCAD community and continue learning to keep your skills sharp and up to date.
Adhering to these tips and best practices will not only improve your efficiency in AutoCAD but also lead to higher quality drawings and designs. Always aim to refine your workflow and embrace new techniques and features as they become available.
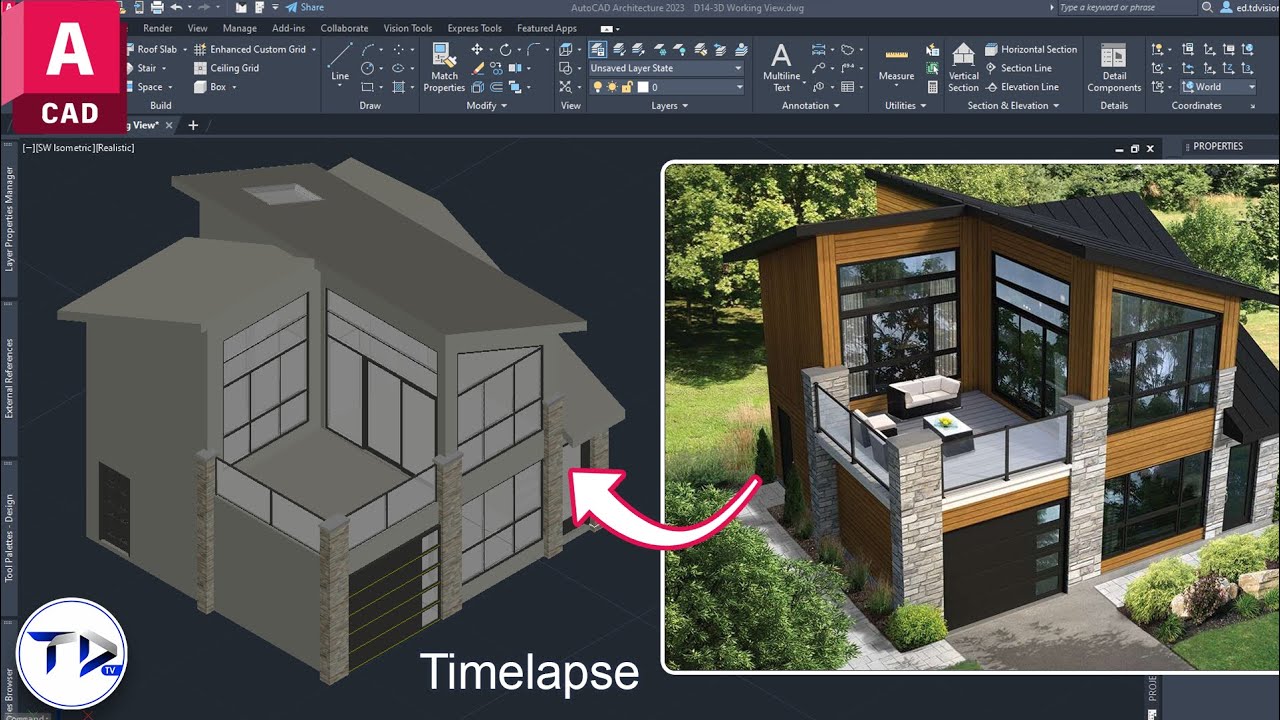
Creating 2D and 3D Drawings in AutoCAD
AutoCAD is renowned for its flexibility in creating both 2D and 3D drawings, catering to a wide range of design and drafting needs across industries. This section guides you through the essential steps and considerations for creating detailed 2D plans and elevating those designs into 3D models.
- Starting with 2D Drawings:
- Begin by setting up your drawing with the correct units and drawing limits.
- Utilize layers to organize your drawing, assigning different elements such as walls, doors, and furniture to separate layers.
- Draw your basic floor plan or object outlines using commands like LINE, POLYLINE, and CIRCLE.
- Apply dimensions and annotations to provide clarity and further details to your design.
- Use blocks for repetitive elements to save time and ensure consistency.
- Transitioning to 3D Drawings:
- Switch to a 3D workspace to access tools specifically designed for 3D modeling.
- Extrude 2D shapes to create 3D forms. Use the EXTRUDE command on your 2D shapes to add depth.
- Apply modifiers such as REVOLVE, SWEEP, and LOFT to create complex shapes and surfaces.
- Utilize the 3DORBIT command to view your model from different angles and refine your design.
- Add materials and textures to give a realistic appearance to your 3D model.
- Use lighting and rendering tools to create photorealistic images of your designs.
- Best Practices for 2D and 3D Drawings:
- Keep your designs as simple as possible to avoid unnecessarily complex models that can slow down your workflow.
- Regularly save different versions of your project to prevent data loss and to experiment with different design options.
- Take advantage of AutoCAD’s vast library of materials and objects to enhance your 3D models.
- Stay organized by using layers effectively, even in 3D space, to manage different elements of your model.
By mastering these techniques, you can leverage AutoCAD\"s powerful capabilities to create intricate and precise 2D and 3D drawings, from basic layouts to sophisticated models, enhancing both the functionality and visual appeal of your designs.

Utilizing AutoCAD Drawing Templates
AutoCAD drawing templates (DWT files) are a powerful feature for streamlining your design process. These templates save time and ensure consistency across your projects by pre-defining settings, styles, and layouts. Here’s how to effectively utilize AutoCAD drawing templates in your work.
- Understanding the Benefits:
- Templates can include predefined layers, styles, blocks, and drawing settings such as units and scales. This standardization ensures that every new drawing starts with the same set of guidelines, reducing setup time and errors.
- Creating Your Template:
- Start with a new drawing and set up all the elements you commonly use, such as layers, dimension styles, text styles, and layouts.
- Include any standard blocks or references that you frequently use in your projects.
- Adjust the drawing settings to match the requirements of your typical projects, including units, precision, and drawing limits.
- Save this drawing as a DWT file by choosing “Save As” and selecting the template format. Give your template a descriptive name that indicates its purpose.
- Using Templates:
- When starting a new project, select your template as the basis for the new drawing. This automatically imports all the predefined settings and elements, allowing you to begin designing immediately with all the necessary tools at your disposal.
- Customizing Templates for Different Projects:
- Create different templates for various types of projects (e.g., architectural, mechanical, electrical). This customization allows you to quickly switch between project types without needing to manually adjust settings each time.
- Maintaining and Updating Templates:
- As your design needs evolve, periodically review and update your templates to reflect new standards, tools, or efficiency improvements. This ensures that your templates always represent the best practices and settings for your current work.
Effectively utilizing AutoCAD drawing templates can significantly enhance your productivity and project consistency, allowing you to focus more on the creative aspects of your designs rather than setup and configuration.

_HOOK_
READ MORE:
Sharing and Collaborating on AutoCAD Drawings
Collaboration is key in the design process, and AutoCAD provides various tools and features to facilitate sharing and collaboration on drawings. Whether you\"re working with a team in the same office or with partners around the globe, these strategies ensure efficient and effective teamwork.
- Using AutoCAD\"s Collaboration Features:
- AutoCAD’s collaboration tools, such as \"Share\" and \"Collaborate,\" allow you to share drawings directly from the software. These features enable team members to view, comment, and even edit drawings, depending on the permissions you set.
- Cloud Storage and Access:
- Store your drawings in the cloud (e.g., Autodesk’s A360) for easy access and sharing. Cloud storage facilitates real-time collaboration, ensuring that all team members have access to the latest version of a drawing.
- External References (Xrefs):
- Utilize external references to collaborate on large projects. Xrefs allow multiple users to work on different parts of a project simultaneously, which are then compiled into a single drawing without increasing file size significantly.
- Using PDFs for Reviews and Comments:
- Convert drawings to PDF format for review and commenting. PDFs are widely accessible and can be annotated by team members or clients without needing AutoCAD software.
- Data Linking for Dynamic Updates:
- Link external data sources to your AutoCAD drawings. This allows for dynamic updates of the drawing based on changes in the linked data, ensuring that all collaborators are working with the most current information.
- Communication Tools:
- Incorporate communication tools such as Autodesk’s Design Review for managing feedback and revisions. These tools can help streamline the review process, making it easier to incorporate changes and updates.
- Version Control:
- Implement version control practices to track changes and maintain a history of revisions. This is crucial for auditing and understanding the evolution of a drawing over time.
- Training and Standards:
- Ensure all team members are trained on AutoCAD’s collaboration features and your team\"s specific collaboration protocols. Establishing clear standards and practices for sharing and collaboration can prevent confusion and errors.
By leveraging AutoCAD\"s powerful sharing and collaboration features, teams can work more efficiently and effectively, improving the quality and accuracy of their designs.
Embrace the power of AutoCAD to transform your design ideas into precise drawings. Whether you\"re a novice or an expert, mastering AutoCAD\"s tools and techniques will unlock endless possibilities for creativity and innovation in your projects.