Topic adobe illustrator text effects: Explore the vibrant world of Adobe Illustrator text effects, where creativity meets versatility. From glossy 3D typography to retro-inspired designs, unlock endless possibilities to elevate your graphic projects.
Table of Content
- How to design live text effects in Adobe Illustrator?
- Creating 3D Text Effects
- Chrome Text Effect
- Comic Book Style Text
- Mummy and Polished Raised Text Effects
- Sketch and Blueprint Style Text
- YOUTUBE: Design Live Text Effects in Illustrator
- Environmentally Friendly Green Type Treatment
- Grunge and Distressed Text Effects
- Hand-Lettered Watercolor and Toothpaste Effects
- Grainy & Shaded Type Effect
- Vibrant 3D Pixel Type
How to design live text effects in Adobe Illustrator?
Creating live text effects in Adobe Illustrator is a great way to enhance your designs. Here is a step-by-step guide on how to do it:
- Open Adobe Illustrator and create a new document or open an existing one.
- Select the Text tool from the toolbar on the left or press the T key on your keyboard.
- Click on the canvas and type the text you want to apply the effects to.
- Select the text by clicking and dragging over it or double-clicking on a word to select it all.
- Go to the Appearance panel (Window > Appearance).
- Click on the \"Add New Effect\" button at the bottom of the panel and choose the effect you want to apply, such as \"Drop Shadow\" or \"Glow\".
- Adjust the settings of the effect in the dialog box that appears, such as the color, opacity, and distance.
- Click OK to apply the effect to the text.
- You can add multiple effects by clicking on the \"Add New Effect\" button again and choosing a different effect.
- To edit or remove an effect, select the text and go to the Appearance panel. Click on the effect you want to modify or delete and use the options available.
- Continue experimenting with different effects and settings until you achieve the desired result.
- Remember to save your work regularly to avoid losing any changes.
By following these steps, you\'ll be able to design captivating live text effects in Adobe Illustrator and enhance your designs with creativity.
READ MORE:
Creating 3D Text Effects
Mastering 3D text effects in Adobe Illustrator opens a world of creative possibilities. This section guides you through key steps to create stunning 3D typography.
- Basic 3D Text Creation: Start by typing your text using the Type tool. Convert the text to outlines to manipulate it as a shape. This foundational step is crucial for all 3D text effects.
- Applying 3D Extrude & Bevel: Go to the Effect menu, select 3D, and then choose Extrude & Bevel. Here, you can adjust the depth of the extrusion and the direction of the bevel to give your text a three-dimensional appearance.
- Color and Texture: After giving your text a 3D form, add colors and textures. Utilize gradients for a smooth color transition or patterns for a textured look. This enhances the realism of your 3D text.
- Adding Lighting Effects: Use the lighting options in the 3D effect panel to create shadows and highlights on your text. This step brings out the depth and dimension of the 3D effect.
- Final Touches with Shadows: For added depth, create a shadow by duplicating the text shape, coloring it black, lowering its opacity, and positioning it beneath the original text. This gives a grounded and realistic look to your 3D text.
Experiment with different perspectives, colors, and lighting to create diverse 3D text effects that stand out in your design projects.

Chrome Text Effect
Create a stunning Chrome Text Effect in Adobe Illustrator, perfect for capturing the essence of \"80s and \"90s aesthetics. This guide walks you through the process, step-by-step.
- Begin with Your Text: Start by typing your desired text using a bold font. This creates a strong base for the chrome effect.
- Convert to Outlines: Right-click on the text and choose \"Create Outlines\". This allows you to manipulate the text as a shape, providing more flexibility for the effect.
- Applying Gradient: The key to achieving a chrome look is using gradient fills. Experiment with linear gradients that include shades of gray, white, and black to mimic the reflective surface of metal.
- Adjust Gradient Angle: Modify the angle and position of the gradient to simulate light reflections typical of a chrome surface.
- Add Highlights and Shadows: Enhance the realism of your chrome text by adding highlights and shadows. Duplicate the text shape, adjust gradients, and play with blending modes and opacity.
- Refine Your Effect: Finalize your chrome text by refining the gradients, adjusting the stroke settings, and possibly adding effects like a drop shadow for added depth.
Remember, the beauty of Illustrator is in its flexibility. You can always return to your design to make adjustments, ensuring your chrome text perfectly suits your project.

Comic Book Style Text
Unleash the dynamic world of comic books with vibrant text effects in Adobe Illustrator. Follow these steps to create your own comic book style text that leaps off the page.
- Choose a Bold Font: Start with a bold, impactful font typical of comic books. Look for fonts with thick lines and a fun, expressive style.
- Outlining the Text: Convert your text into outlines by right-clicking and selecting \"Create Outlines\". This allows for more advanced editing and customization.
- Apply Bright Colors: Comic book text is known for its vivid colors. Use the Color Picker tool to apply bright, eye-catching colors to your text.
- Adding Stroke for Emphasis: Add a thick stroke to your text. This is a hallmark of comic book lettering, adding weight and drama to the words.
- Creating a Background: Design a simple shape or a more complex background scene behind your text. Use colors and patterns that complement the text and add to the comic book feel.
- Special Effects: Experiment with Illustrator’s effects like drop shadows or glows. These can add depth and make your text more dynamic.
- Sound Effects Words: For an authentic comic book look, include classic sound effect words like “Bam!”, “Pow!” or “Zoom!” in a stylized, graphical way around your main text.
- Final Adjustments: Arrange your text and background elements to achieve the desired layout. Play with layering and scaling for the best visual impact.
Remember, comic book style is all about fun and expression, so don\"t hesitate to experiment with different combinations of effects and styles to create your unique comic book text effect.

Mummy and Polished Raised Text Effects
Discover the art of creating intriguing Mummy and Polished Raised Text Effects in Adobe Illustrator. These effects will add a unique touch to your designs, perfect for thematic projects.
Mummy Text Effect
- Choosing the Right Font: Begin with a bold, blocky font suitable for the mummy wrapping effect.
- Wrap Creation: Use the Pen or Brush Tool to draw lines around the text, mimicking bandages. Ensure these lines follow the text contours.
- Adding Texture: Apply a cloth-like texture with an off-white or beige gradient. Add shadows for a more 3D appearance.
- Detailing: Enhance realism with frayed edges or additional shadows beneath the wraps.
Polished Raised Text Effect
- Text Preparation: Create your text and convert it to outlines for full customization.
- Base Gradient Application: Start with a smooth gradient as the base. Use subtle color transitions for a glossy look.
- 3D Effects: Utilize \"Extrude & Bevel\" options in the 3D tools for a raised effect.
- Adding Highlights: Apply highlights and shading to accentuate the raised areas, simulating light reflections.
- Refinement: Adjust gradients and shadows for a sleek, polished finish.
These text effects leverage Illustrator\"s capabilities, offering creative ways to enhance your typography for various themes and occasions.

_HOOK_
Sketch and Blueprint Style Text
Create stunning Sketch and Blueprint Style Text in Adobe Illustrator, perfect for giving your projects an artistic or technical flair.
Sketch Style Text
- Selecting the Right Font: Begin with a hand-drawn style font. The font\"s inherent characteristics will significantly contribute to the sketch effect.
- Outline Your Text: Convert your text to outlines (right-click and select \"Create Outlines\") for more detailed manipulation.
- Applying the Scribble Effect: Use the Scribble effect in Illustrator (Effects -> Stylize) to add a sketched look. Adjust settings like stroke width and curviness to achieve the desired style.
- Hand-Drawn Touches: Utilize the Brush tool to manually add lines and details, enhancing the hand-drawn appearance.
Blueprint Style Text
- Start with Simple Text: Choose a clean, straightforward font for your blueprint text.
- Background Setup: Use a grid or blueprint pattern as the background. Create this with lines or use a pre-made pattern.
- Color Scheme: Apply a color scheme typical of blueprint drawings, usually white or light blue text on a darker blue background.
- Enhance with Effects: Use the Appearance panel to add strokes or drop shadows, contributing to the technical drawing style.
Experiment with different combinations of effects and styles in Illustrator to achieve unique and eye-catching Sketch and Blueprint Style Text.

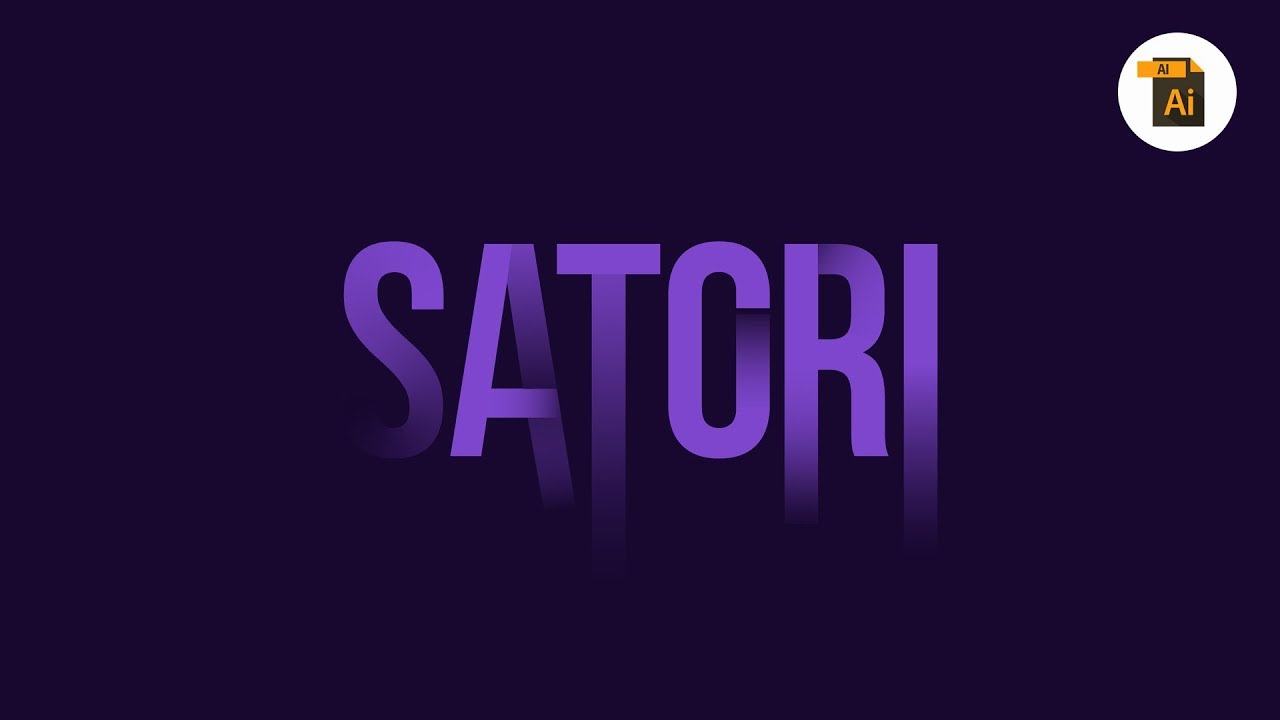
Design Live Text Effects in Illustrator
Discover the captivating world of design as this video takes you on a journey through the mesmerizing art of creating immersive and visually stunning experiences. Get ready to be inspired!
Soul Faded 3D Text Effect in Illustrator
Dive deep into the depths of the soul as this video explores the intricacies of our inner selves, shedding light on the beauty, resilience, and endless possibilities that lie within. Prepare to be moved and enlightened!
Environmentally Friendly Green Type Treatment
Create a sustainable and nature-inspired text effect in Adobe Illustrator, perfect for eco-friendly branding and design projects.
- Select Eco-Friendly Fonts: Choose fonts that evoke a natural feel, such as those with organic shapes or nature-inspired designs.
- Green Color Palette: Utilize various shades of green to represent eco-friendliness. Consider using gradients for a more dynamic effect.
- Incorporate Nature Elements: Blend nature-inspired graphics, like leaf patterns, into your text or use them as a background.
- Create a Natural Background: Design a background that complements your theme, such as a texture resembling recycled paper or a nature scene.
- Apply Natural Effects: Use Illustrator’s tools to add effects like drop shadows or bevels that mimic natural elements.
- Add a Sustainability Message: Integrate themes of sustainability into your text or as a tagline to enhance the green message.
- Refinement: Adjust color balance and alignment for clarity and aesthetic appeal, ensuring the design aligns with eco-friendly principles.
This approach emphasizes environmental awareness through design, making it ideal for green initiatives, eco-friendly brands, or any project looking to highlight a connection with nature.

Grunge and Distressed Text Effects
Master the art of creating Grunge and Distressed Text Effects in Adobe Illustrator, adding a rugged and vintage charm to your designs.
Grunge Text Effect
- Select a Bold Font: Begin with a thick, bold font that can effectively showcase the grunge texture.
- Applying Texture: Overlay a grunge texture onto your text. You can use existing textures or create one using Illustrator\"s brush tools.
- Edge Distressing: Use the Roughen tool or similar effects to fray the text edges, giving a worn-out appearance.
- Layering for Depth: Combine multiple textures and effects with varying opacities to add complexity to the grunge effect.
- Color Choices: Employ a palette of muted, dark, or earthy tones to enhance the rugged look.
Distressed Text Effect
- Base Font Selection: Choose a simpler font that suits a distressed appearance.
- Weathered Texture Application: Add a texture that provides an aged and weathered look to the text.
- Text Distortion: Slightly warp the text using Illustrator\"s warp effects for an uneven distressed look.
- Detailing with Brushes: Manually add imperfections such as scratches or marks using brushes.
- Subdued Color Scheme: Stick to a limited color palette with subtle variations for an authentic aged effect.
These effects are ideal for vintage-themed designs, evoking a sense of time-worn beauty and ruggedness.

Hand-Lettered Watercolor and Toothpaste Effects
Explore the artistic realms of Adobe Illustrator by creating Hand-Lettered Watercolor and unique Toothpaste Text Effects.
Hand-Lettered Watercolor Text Effect
- Start with Hand Lettering: Use a hand-lettered style font or create/import your own hand-lettered text.
- Apply Watercolor Textures: Add watercolor textures using brushes or pre-made textures for an artistic effect.
- Blend and Layer: Blend the textures with the text and adjust layer modes and opacity for a natural look.
- Use Soft Colors: Experiment with soft, pastel watercolor hues to enhance the artistic feel.
Toothpaste Text Effect
- Choose Rounded Font: Select a thick, rounded font that resembles the shape of toothpaste.
- Toothpaste Texture: Use glossy effects and light-colored gradients to create a toothpaste-like texture.
- Sculpt the Effect: Adjust text edges with the Pen or Blob Brush tool to mimic the squeezed toothpaste look.
- Add Realistic Details: Include highlights and shadows for a more lifelike representation of toothpaste.
These effects bring a creative and whimsical dimension to your text, perfect for unique branding and design projects.
Grainy & Shaded Type Effect
Learn to create a sophisticated Grainy & Shaded Type Effect in Adobe Illustrator, adding a tactile and depth-filled appearance to your text.
- Select Suitable Font: Choose a font that complements a grainy and shaded style, preferably a bold one.
- Shading Techniques: Apply gradient fills or use shading brushes to add depth to key areas of the letters.
- Add Grainy Texture: Overlay a grain texture onto your text using Illustrator\"s texture effects or by importing a grainy image.
- Blend Mode Adjustment: Experiment with different blend modes to integrate the grainy texture naturally into your text.
- Effect Refinement: Fine-tune the effect by adjusting the texture’s opacity, color, and position.
This approach allows you to create text with a tactile feel, perfect for designs that need a touch of sophistication and ruggedness.

_HOOK_
READ MORE:
Vibrant 3D Pixel Type
Create an eye-catching 3D pixel text effect using Adobe Illustrator with this detailed tutorial. This technique is perfect for making your text pop with a modern, digital look.
- Start with Basic Text: Begin by typing your text using the Type tool. Choose a bold, sans-serif font for better visibility of the pixel effect.
- Convert Text to Shapes: Right-click on the text and select \"Create Outlines\" to convert your text into editable shapes.
- Apply 3D Extrude & Bevel: Go to Effect > 3D > Extrude & Bevel. Adjust the settings to give a 3D look to your text. Play around with the depth to get the desired thickness.
- Create the Pixel Effect: After applying the 3D effect, use the Rectangular Grid Tool to create a grid over the text. Then, use the Pathfinder tool to intersect the grid with the text shapes, creating a pixelated effect.
- Add Color and Gradients: Use vibrant gradients to fill the pixel squares. You can experiment with different color schemes to make your text stand out.
- Final Touches: For added depth and realism, apply subtle shading and highlights to the edges of your text. This can be done using the Gradient tool or by manually adding lighter and darker areas.
With these steps, you\"ll be able to create a stunning vibrant 3D pixel type effect that can enhance any digital design project. Remember, experimentation is key – feel free to tweak settings and colors to achieve the perfect look for your text!
Explore the limitless possibilities of Adobe Illustrator to elevate your text effects to new heights. Whether you\"re a beginner or a seasoned pro, these techniques will add a splash of creativity and professionalism to your designs. Dive in and unleash your artistic potential!