Topic change background color adobe illustrator: Unlock your creative potential by mastering how to change the background color in Adobe Illustrator, enhancing your designs with ease and precision.
Table of Content
- How can I change the background color in Adobe Illustrator?
- Step-by-Step Guide to Changing Background Color
- Understanding Artboards and Backgrounds in Illustrator
- Using the Rectangle Tool for Background Color
- Changing Background Color for Print Documents
- Adjusting Background Colors for Web Projects
- Tips for Selecting the Perfect Background Color
- YOUTUBE: How to Change Background Color in Adobe Illustrator
- How to Save and Export Your Project with the New Background Color
- Common Mistakes to Avoid When Changing Background Color
- Advanced Techniques: Gradient and Pattern Backgrounds
- Troubleshooting Background Color Issues in Adobe Illustrator
How can I change the background color in Adobe Illustrator?
To change the background color in Adobe Illustrator, you can follow these steps:
- Open Adobe Illustrator on your computer.
- Create a new document or open an existing one.
- Go to the \"Edit\" menu at the top of the screen.
- From the drop-down menu, choose \"Preferences\".
- In the Preferences dialog box, select \"User Interface\" from the left-hand menu.
- Under the \"Appearance\" section, click on the color swatch next to \"Application Background\".
- A Color Picker dialog box will appear.
- In the Color Picker, you can either choose a color from the available swatches or enter specific values for the desired color.
- Click \"OK\" to apply the new background color.
Once you have followed these steps, the background color of your Adobe Illustrator workspace will change to the color you selected.

READ MORE:
Step-by-Step Guide to Changing Background Color
Changing the background color in Adobe Illustrator is a straightforward process that can significantly impact the visual appeal of your design. Follow these steps to ensure you do it correctly:
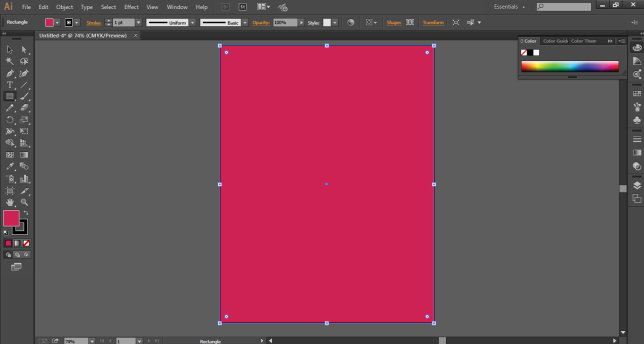
- Open your project in Adobe Illustrator.
- Select the \"Rectangle Tool\" from the toolbar or press \"M\" on your keyboard.
- Click and drag on the canvas to create a rectangle that covers the entire area of your artboard.
- Ensure the rectangle is selected and navigate to the \"Color Picker\".
- Choose your desired color. If you have a specific color code, you can enter it directly into the Color Picker.
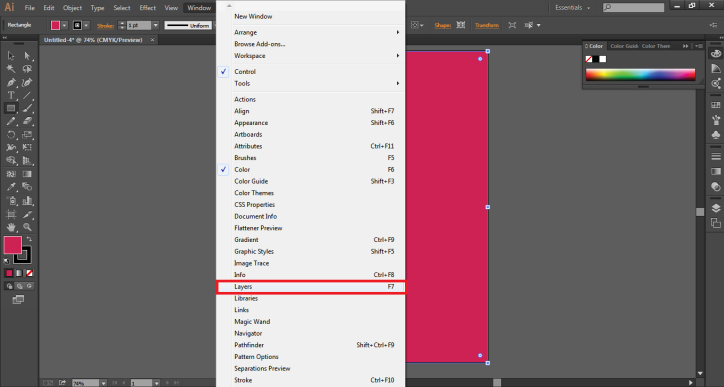
- Arrange the rectangle layer behind your artwork by right-clicking on the rectangle, selecting \"Arrange\", and then \"Send to Back\".
- If necessary, lock the background layer to prevent accidental edits by selecting the layer and clicking on the small padlock icon.
- Save your project to preserve the new background color.
By following these steps, you can effortlessly change the background color in Adobe Illustrator, giving your artwork a fresh and professional look.
Understanding Artboards and Backgrounds in Illustrator
Artboards in Adobe Illustrator are essential for managing your design workspace effectively. Understanding how artboards and backgrounds interact is crucial for creating impactful designs. Here\"s a detailed look into artboards and how to manage backgrounds within them:
- What is an Artboard: Artboards represent the printable or exportable area of your work. You can have multiple artboards for different components of a project within a single Illustrator file.
- Creating and Managing Artboards: Use the Artboard Tool (Shift + O) to create, resize, and rearrange artboards. Organize your work by dedicating separate artboards for various elements of your design.
- Backgrounds in Artboards: Illustrator does not have a \"background layer\" by default. Backgrounds are often created manually by drawing a rectangle shape and sizing it to the artboard dimensions.
- Setting a Background: Draw a rectangle with the Rectangle Tool (M) and resize it to match the artboard\"s dimensions for a full background. This shape can then be sent to the back (Object > Arrange > Send to Back) and locked to serve as a static background.
- Coloring Backgrounds: With the rectangle selected, use the Color Picker to choose a background color. For more complex backgrounds, consider using gradients or pattern fills.
- Consistency Across Artboards: If your project involves multiple artboards and you wish to maintain a consistent background, replicate the background layer across all artboards, ensuring each has the same color or pattern.
By understanding and utilizing artboards and background settings in Illustrator, you can create more structured and visually appealing designs. This foundational knowledge is key to producing professional and polished artwork.

Using the Rectangle Tool for Background Color
The Rectangle Tool in Adobe Illustrator is a versatile tool that can be used to create simple yet effective backgrounds. Here\"s how to use the Rectangle Tool to set or change the background color of your artboard:
- Select the \"Rectangle Tool\" from the toolbar or press \"M\" on your keyboard.
- Click on your artboard and drag to draw a rectangle. To ensure it covers the entire artboard, you can also click once on the artboard and then enter the exact width and height of the artboard in the dialog box that appears.
- With the rectangle selected, open the \"Color Picker\" to choose your desired color. Alternatively, you can use the \"Swatches\" panel if you have predefined colors.
- Adjust the rectangle\"s size by using the \"Selection Tool\" (V) if it doesn\"t perfectly cover the artboard.
- Send the rectangle to the back by right-clicking on it, selecting \"Arrange\", and then \"Send to Back\". This will ensure that your rectangle serves as the background and does not obstruct other elements on your artboard.
- Lock the background layer to prevent any accidental edits. You can do this by clicking on the small padlock icon in the Layers panel.
By using the Rectangle Tool, you can quickly and easily set a background color for your artboards, giving your design a solid foundation. Remember, the color and placement of your background can significantly influence the overall look and feel of your design.

Changing Background Color for Print Documents
When preparing a document for print in Adobe Illustrator, the background color is an important aspect to consider for professional and accurate print results. Here’s how to effectively change the background color for print documents:
- Open your document in Adobe Illustrator and determine the dimensions and layout of your artboard, considering bleed and trim areas if necessary.
- Select the \"Rectangle Tool\" (M) and create a rectangle that covers the entire artboard, including the bleed area to ensure the background color extends to the edges after trimming.
- With the rectangle selected, choose a color for your background. For print documents, consider using CMYK color mode for color accuracy.
- Ensure the color fills the rectangle completely by checking the \"Fill\" option and not the \"Stroke\" in the toolbar.
- Send the rectangle to the back of all layers (Object > Arrange > Send to Back) to set it as the background.
- If your document will be printed professionally, consult with your printer about the need for adding printer marks, such as crop marks or color bars, and adjust your background accordingly.
- Before finalizing, preview your document in \"Overprint Preview\" mode to get an accurate representation of how colors and overprinting will appear when printed.
- Save your document with the correct settings, preferably as a PDF with the \"Preserve Illustrator Editing Capabilities\" option unchecked to reduce file size for printing.
Changing the background color for print documents in Adobe Illustrator involves careful consideration of color modes and document setup. By following these steps, you can ensure your printouts look as intended with professional quality.
_HOOK_
Adjusting Background Colors for Web Projects
Adjusting background colors for web projects in Adobe Illustrator involves understanding of web-specific color considerations and export settings. Follow these steps to ensure your background colors are optimized for web use:
- Launch your project in Adobe Illustrator and ensure your document is set up with the correct dimensions and resolution for web, typically 72 PPI.
- Use the \"Rectangle Tool\" (M) to create a rectangle that covers the entire artboard for your background. This ensures consistency in background color across different devices and screen sizes.
- Select the rectangle and choose your desired background color. For web projects, it\"s best to use the RGB color mode, as it\"s specifically designed for screen displays.
- Consider web-safe colors to ensure that the background color is displayed consistently across different browsers and devices.
- Send the rectangle to the back (Object > Arrange > Send to Back) to set it as the background layer, ensuring it doesn\"t interfere with other design elements.
- When saving your file for the web, use the \"Export for Screens\" or \"Save for Web (Legacy)\" feature in Illustrator. This allows you to choose the appropriate file format (e.g., PNG, JPEG, SVG) and optimize your file for web performance.
- Check your design in different browsers and devices if possible, to ensure the background color appears as expected across various platforms.
Adjusting background colors for web projects requires careful consideration of color profiles, file formats, and export settings. By following these steps, you can ensure that your design maintains its intended appearance when viewed online.
Tips for Selecting the Perfect Background Color
Selecting the perfect background color for your design in Adobe Illustrator can significantly impact the overall look and feel of your project. Here are some tips to help you choose the right background color:
- Understand Color Psychology: Different colors evoke different emotions. Consider the psychological impact of colors and choose a background that aligns with the message and mood you want to convey.
- Consider Your Audience: Different cultures perceive colors differently. Make sure your background color resonates well with your target audience and their cultural context.
- Contrast for Readability: Ensure there is sufficient contrast between the background color and the text or other design elements to make the content easily readable and visually appealing.
- Use Color Theory: Familiarize yourself with color theory principles. Complementary colors, analogous colors, and triadic color schemes can help create a balanced and harmonious design.
- Test on Multiple Devices: Colors may display differently on various screens. Test your design on different devices to ensure your background color looks consistent and as intended.
- Keep Branding Consistent: If you\"re designing for a brand, ensure the background color aligns with the brand\"s color palette to maintain consistency and brand recognition.
- Start with a Mood Board: Create a mood board with different color options and visual inspirations. This can help you visualize and decide the best background color for your design.
- Consider the Context: The context in which your design will be viewed can greatly influence how the background color is perceived. Consider factors like lighting, surrounding colors, and the medium (print or digital).
Choosing the right background color is crucial for creating a visually appealing design that communicates effectively with its audience. Take your time to consider these tips and experiment with different options to find the perfect hue.
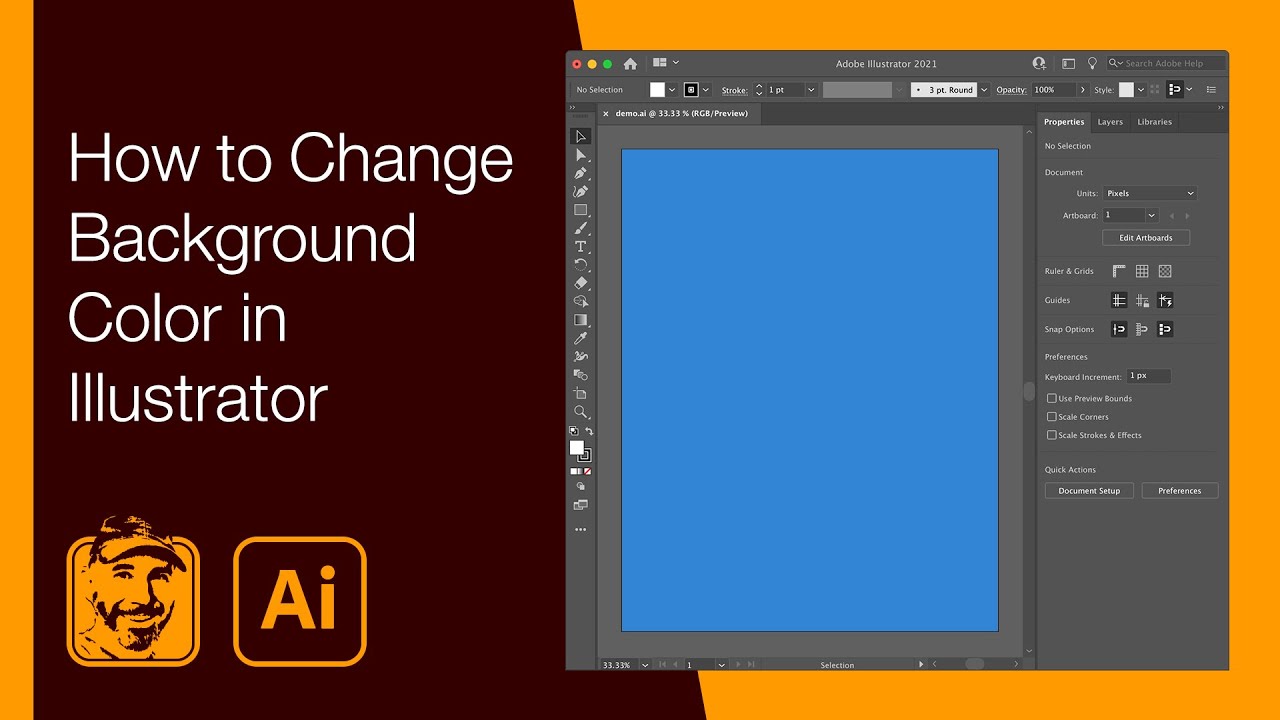
How to Change Background Color in Adobe Illustrator
\"Discover the power of change in this captivating video. Uncover how small shifts in mindset and behaviors can lead to remarkable transformations and a brighter future. Get ready to be inspired!\"
How to Change Background Color in Adobe Illustrator
\"Step into a mesmerizing journey through time and explore the hidden depths of diverse backgrounds in this visually stunning video. Unearth the fascinating stories and rich experiences that shape individuals and society. Don\'t miss out on this captivating cultural exploration!\"
How to Save and Export Your Project with the New Background Color
After you\"ve successfully changed the background color in your Adobe Illustrator project, it\"s essential to save and export your work correctly to ensure the new background color is accurately preserved. Follow these steps for optimal results:
- Save Your Illustrator File: Go to \"File\" > \"Save\" or press \"Ctrl + S\" (Windows) or \"Cmd + S\" (Mac). Saving your work as an .ai file allows you to preserve layers, making future edits easier.
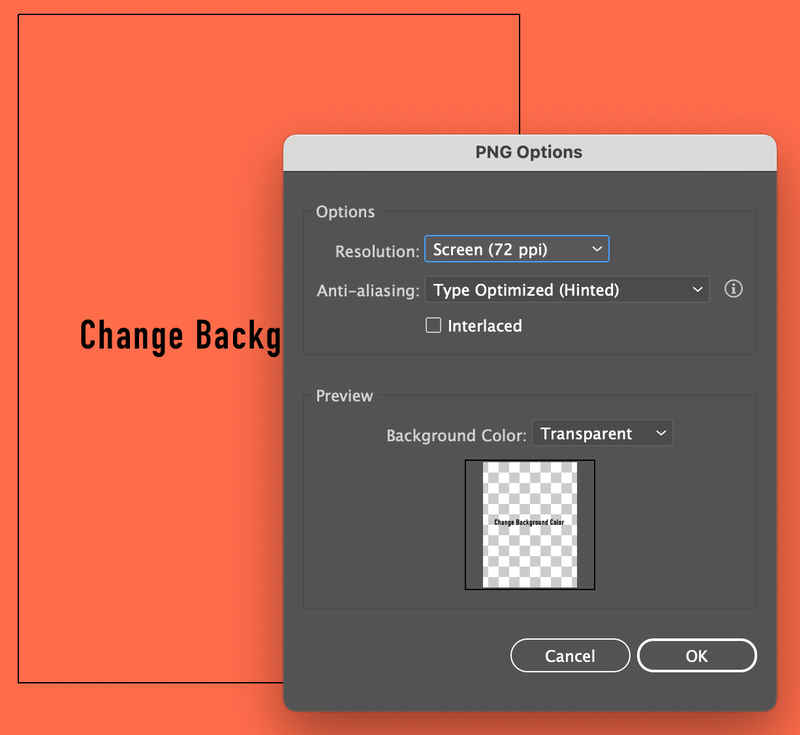
- Choose the Right Format for Export: Depending on your project\"s end-use, choose an appropriate format. \"File\" > \"Export\" > \"Export As\" offers formats like PNG, JPG, PDF, SVG, etc.
- Export for Screens: For digital projects, use \"File\" > \"Export\" > \"Export for Screens\". This gives you control over format, resolution, and artboards to export.
- Set Color Profiles Correctly: When exporting, ensure the correct color profile is selected. Use RGB for screen-based projects and CMYK for print projects to maintain color accuracy.
- Include Bleed Settings: If you\"re working with print, set bleed settings under \"Marks and Bleeds\" to ensure your background color extends to the edge of your printed material after trimming.
- Preview Before Exporting: Before finalizing, use \"Window\" > \"Separation Preview\" to check how different colors, including your background color, will appear in the final export.
- Save Your Export Settings: If you\"ll be exporting similar projects in the future, save your export settings to streamline your workflow.
Properly saving and exporting your Illustrator project ensures that your design, including the new background color, appears as intended across various mediums and devices.
Common Mistakes to Avoid When Changing Background Color
Changing the background color in Adobe Illustrator might seem straightforward, but there are common pitfalls that can affect the outcome of your design. Being aware of these can save you time and ensure your design looks professional:
- Ignoring Color Consistency: Make sure the background color is consistent across all artboards or related project files. Inconsistencies can lead to an unprofessional look.
- Forgetting About Color Profiles: Not using the correct color profile (RGB for digital, CMYK for print) can result in colors that look different than expected when printed or displayed on screens.
- Overlooking Readability: Ensure that there is sufficient contrast between the background color and the text or forefront elements. Poor contrast can make your content hard to read.
- Not Considering the Final Medium: The background color that looks good on your screen might not look the same in print or on other devices. Always preview your design in its final medium.
- Ignoring the Mood: Colors have psychological impacts. Make sure your background color aligns with the mood or tone you want to set for your audience.
- Not Using Layers Properly: Failing to use layers effectively can lead to editing issues. Always place your background on a separate layer and lock it to avoid accidental changes.
- Forgetting to Save Frequently: Illustrator might crash, or you might make changes you want to undo. Regular saving can prevent the loss of your work and allow you to revert to previous versions.
By avoiding these common mistakes, you can ensure that changing the background color in your Illustrator project contributes positively to your design\"s overall impact.
Advanced Techniques: Gradient and Pattern Backgrounds
Enhance your Adobe Illustrator projects by incorporating gradient and pattern backgrounds. These advanced techniques can add depth, texture, and visual interest to your designs:
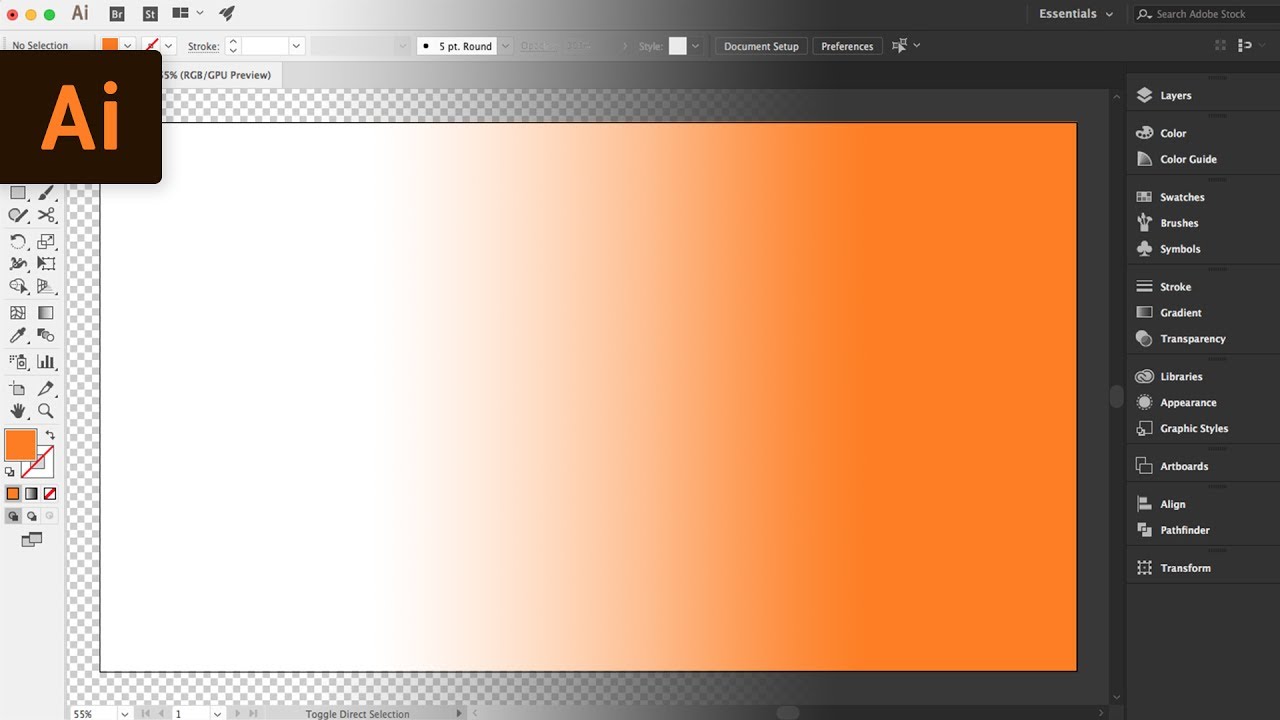
- Creating Gradient Backgrounds:
- Select the \"Rectangle Tool\" (M) and draw a rectangle to cover your artboard.
- With the rectangle selected, go to the \"Gradient Panel\".
- Choose a gradient type: Linear or Radial.
- Adjust the gradient colors by adding, removing, or modifying the color stops in the gradient slider.
- Modify the angle and location of the gradient for desired effect.
- Experiment with opacity and blending modes to achieve unique effects.
- Implementing Pattern Backgrounds:
- Create or import your pattern design into Illustrator.
- Select the pattern and go to \"Edit\" > \"Define Pattern\" to save it as a swatch.
- Select the \"Rectangle Tool\" (M) and draw a rectangle over your artboard.
- With the rectangle selected, click on your newly defined pattern swatch to apply it as the fill.
- Adjust the scale and rotation of your pattern by using the \"Scale Tool\" (S) or \"Rotate Tool\" (R) while making sure to uncheck \"Transform Objects\".
Whether you\"re aiming for a subtle background or a bold statement piece, mastering gradient and pattern backgrounds can elevate your Illustrator projects to the next level.
_HOOK_
READ MORE:
Troubleshooting Background Color Issues in Adobe Illustrator
Encountering issues when changing or applying a background color in Adobe Illustrator can be frustrating. Here are some common problems and their solutions to help you troubleshoot effectively:
- Background Color Not Printing Correctly:
- Ensure your document is set to the correct color mode (CMYK for print, RGB for digital).
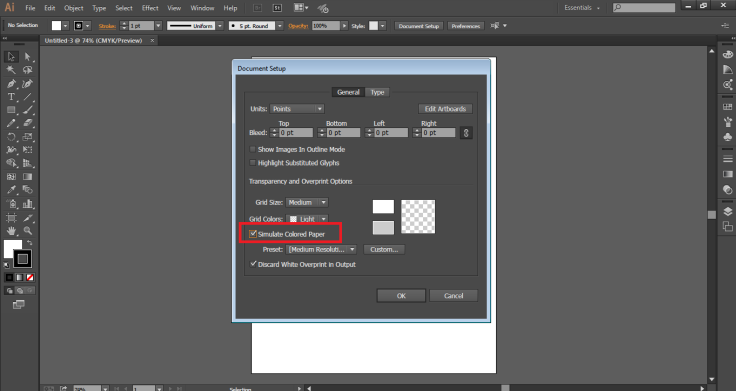
- Check if \"Simulate Colored Paper\" is enabled in \"Document Setup\". If so, disable it, as it can affect how colors print.
- Verify that your printer settings match Illustrator\"s color settings.
- Background Color Appears Different on Different Screens:
- Calibrate your monitor to ensure accurate color representation.
- Remember that different screens may display colors differently due to variations in technology and settings.
- Background Color is Not Visible Behind Objects:
- Ensure the background layer is positioned behind all other layers (Object > Arrange > Send to Back).
- Check for any locked layers or objects that may be blocking the background.
- Issues with Gradient or Pattern Fills:
- For gradients, ensure the correct gradient type is selected and the color stops are properly placed.
- For patterns, check the scale and ensure the pattern fills the intended area completely.
By systematically addressing these common issues, you can resolve most background color problems in Adobe Illustrator, ensuring your design appears as intended.
Mastering background color changes in Adobe Illustrator can elevate your designs, making them more impactful and visually compelling. Embrace these techniques to transform your creative ideas into stunning realities.