Topic fill tool adobe illustrator: Discover the vibrant world of color in Adobe Illustrator with the "Fill Tool." This essential feature transforms your artwork, allowing for intricate designs and stunning visuals. Perfect for both beginners and professionals, it"s a gateway to endless creative possibilities.
Table of Content
- How do I use the fill tool in Adobe Illustrator to add color to objects?
- Understanding the Basics of Fill and Stroke
- Accessing the Fill Tool
- Using the Color Picker for Precise Fills
- Keyboard Shortcuts for Efficiency
- Exploring the Live Paint Bucket Tool
- Advanced Techniques: Filling Shapes with Images
- YOUTUBE: Adobe Illustrator - Fill Color with Paint Bucket Tool
- Working with Patterns and Swatches
- Creating and Editing Custom Patterns
- Applying Fills to Text and Complex Shapes
- Additional Tools for Enhanced Color Control
How do I use the fill tool in Adobe Illustrator to add color to objects?
To use the fill tool in Adobe Illustrator to add color to objects, follow these steps:
- Open Adobe Illustrator and create a new document or open an existing one.
- Select the object(s) you want to fill with color by clicking on it.
- Choose the fill tool from the toolbar. It is represented by a solid square icon.
- After selecting the fill tool, you can customize the color by clicking on the fill swatch in the toolbar, which is typically located on the left side.
- A color picker will appear, allowing you to select a color from the available options, or you can input a specific color value if desired.
- Click on the desired color and the selected object(s) will be filled with that color.
- Repeat the process for any other objects you want to fill with color.
- To remove the fill, simply choose the fill tool again and select the \"None\" option in the color picker.
READ MORE:
Understanding the Basics of Fill and Stroke
In Adobe Illustrator, mastering the Fill and Stroke tools is essential for effective design. A Fill represents the color, pattern, or gradient within an object, applicable to both open and closed shapes. The Stroke, conversely, defines the outline of an object, path, or edge of a Live Paint Group. It\"s versatile, allowing the application of swatches, gradients, and patterns, and can be styled with various effects like zigzags or dots.
- Accessing Fill and Stroke: These controls are available in the Properties, Control, Color, and Tool panels. You can easily switch between fill and stroke using the keyboard shortcut \"X\", or swap their colors with \"Shift + X\".
- Using the Fill/Stroke Buttons: To apply a color, select the object and double-click on the Fill or Stroke button in any panel. This opens the Color Picker, where you can choose or customize colors.
- Live Paint Bucket Tool: A more intuitive method for coloring, especially useful for complex designs with intersecting paths. It allows coloring of individual regions within a design as if they were on the same layer, offering a coloring-book like experience.
- Appearance Panel: When an object is selected, this panel shows options for both Fill and Stroke. It\"s a handy tool for fine-tuning the appearance of your objects.
- Color Panel Customization: For more color control, use the Color panel. It lets you choose colors from a spectrum or input RGB/CMYK values for precision.
Understanding these basics and efficiently using the Fill and Stroke tools will significantly enhance your design capabilities in Adobe Illustrator, allowing for more creative and detailed artwork.

Accessing the Fill Tool
The Fill Tool in Adobe Illustrator is a crucial feature for adding color, patterns, or gradients to your designs. To access it, follow these steps:
- Locating the Fill Tool: Generally found at the bottom of the Tools panel, the Fill Tool icon resembles a solid square. You can also find fill and stroke controls in the Properties, Control, Color, and Tool panels.
- Using the Tools Panel: Click the Fill box in the Tools panel to apply a fill rather than a stroke. Double-click the Fill box to open the Color Picker, where you can select or customize your color.
- Appearance Panel: When an object is selected, the Appearance panel will show options for both Fill and Stroke. You can open it from Window > Appearance.
- Color Panel for Customization: For more precise color adjustments, use the Color panel, which can be accessed from Window > Color. This panel allows you to select colors from a spectrum or input RGB/CMYK values.
- Keyboard Shortcuts: Press \"X\" to switch between fill and stroke. You can use this shortcut to quickly access the fill options in the Toolbar and Color panels.
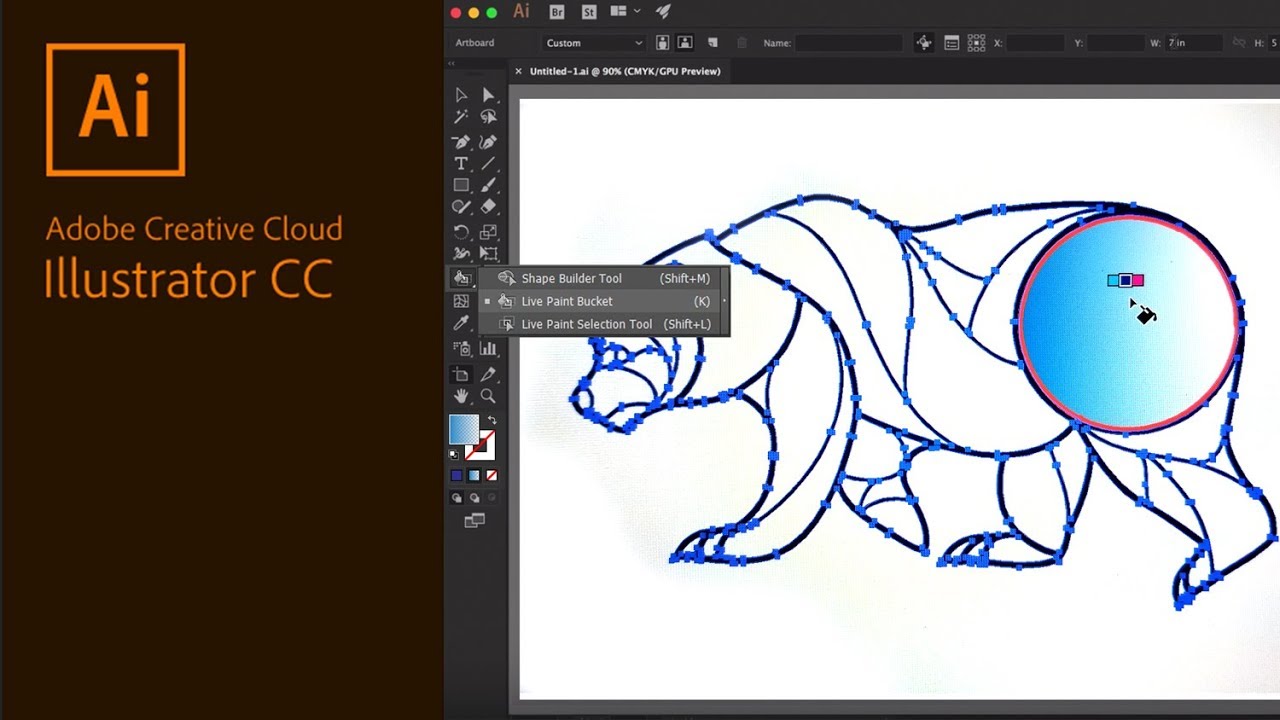
- Live Paint Bucket Tool: For complex designs with intersecting paths, use the Live Paint Bucket Tool, found under the Shape Builder tool in the Advanced Toolbar or accessed with the \"K\" shortcut. This tool is particularly useful for filling multiple shapes and paths.
- Additional Methods: The Eyedropper Tool can be used to sample and apply colors from other elements in your design. Swatches offer a range of color options, and you can create unique swatches for future use.
Understanding these methods will streamline your design process, making it easier to apply and customize fills in your Adobe Illustrator projects.
Using the Color Picker for Precise Fills
Adobe Illustrator\"s Color Picker is an essential tool for achieving precise fills in your designs. Here\"s a step-by-step guide to using it effectively:
- Accessing the Color Picker: You can access the Color Picker by double-clicking on the Fill icon in the Tools, Properties, Control, or Color panels. This action brings up the Color Picker window, where you can choose from a wide range of colors.
- Selecting Colors: In the Color Picker, pick the color you desire. You have the option to either select a color from the available spectrum or manually input specific RGB or CMYK values for exact color matching.
- Applying the Color: Once you\"ve selected your color, click \"OK\" to apply it to your selected object. This method is ideal for ensuring color consistency, especially in branding and visual identity projects.
- Using Keyboard Shortcuts: A quick way to switch between fill and stroke is to use the \"X\" key. This shortcut brings the fill options to the forefront in the Toolbar and Color panels.
- Live Paint Bucket Tool: For more complex designs, the Live Paint Bucket Tool can be extremely useful. It allows for coloring individual regions within a design, which is especially handy for images with intersecting paths.
- Additional Color Tools: Illustrator also offers other color tools such as Swatches, Eyedropper, Gradient Tool, and Color/Color Guide for different coloring needs.
Mastering the Color Picker in Illustrator will elevate the precision and quality of your designs, allowing you to create visually stunning and cohesive artworks.

Keyboard Shortcuts for Efficiency
Adobe Illustrator offers a range of keyboard shortcuts to streamline your design process. Here are some key shortcuts to improve your efficiency:
- Swap Fill and Stroke (Shift + X): This swaps the attributes of the Fill and Stroke. Note that this won\"t work if the current Fill is a gradient.
- Toggle Between Fill and Stroke (X): This shortcut allows you to switch between active Fill and Stroke.
- Apply None (/): Use this to apply a \"none\" attribute to the active Fill or Stroke.
- Default Stroke and Fill (D): Resets any object to the default black Stroke and white Fill.
- Access Fill Options (\"X\" Key): For the Fill tool in the Toolbar and Color panels, pressing \"X\" brings the Fill options to the front.
- Color and Gradient Shortcuts (\"<\" and \">\"): These are used to make the current unfilled Fill or Stroke filled, and to change the current Fill to a gradient, respectively.
- Common Actions: Standard shortcuts like Undo (Ctrl + Z or Command + Z), Copy (Ctrl + C or Command + C), and Paste (Ctrl + V or Command + V) are also crucial for efficient workflow.
Mastering these shortcuts can significantly speed up your design process in Adobe Illustrator.

_HOOK_
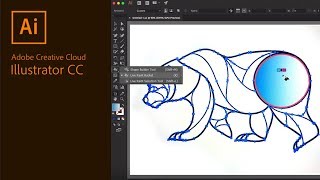
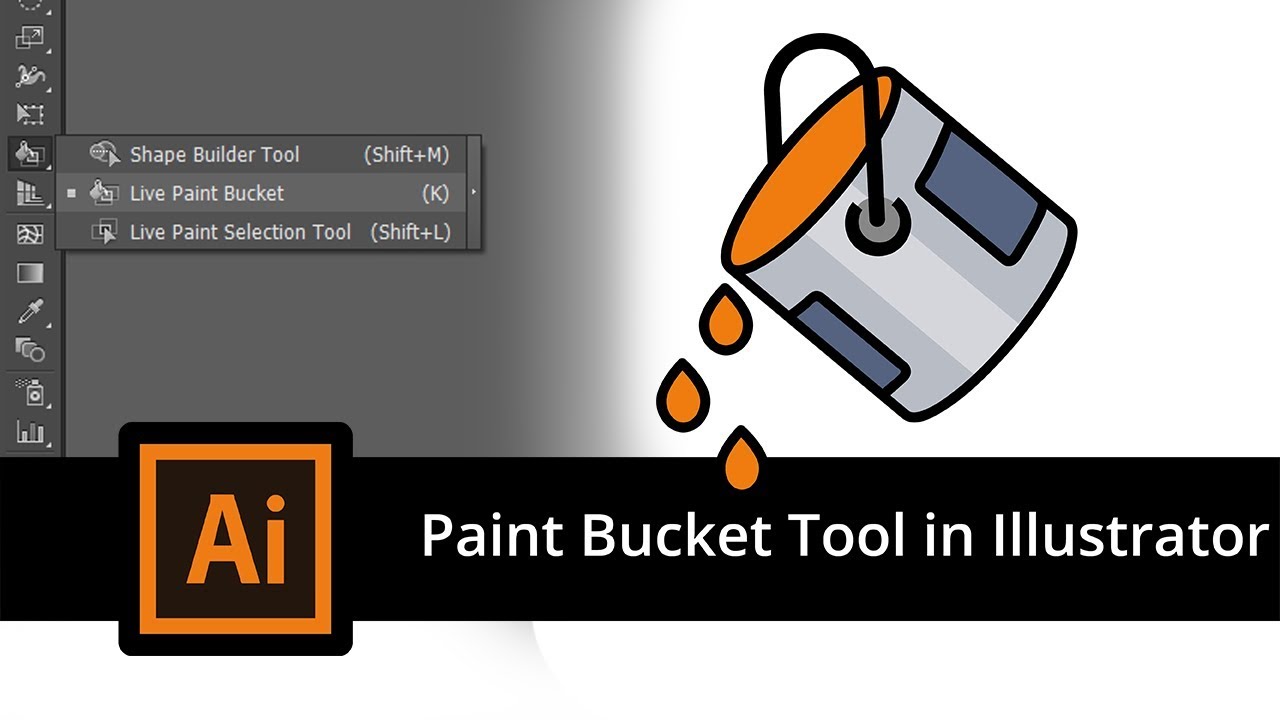
Exploring the Live Paint Bucket Tool
The Live Paint Bucket Tool in Adobe Illustrator is a dynamic and intuitive feature that revolutionizes the way you can apply color to complex illustrations. Here’s how to effectively use it:
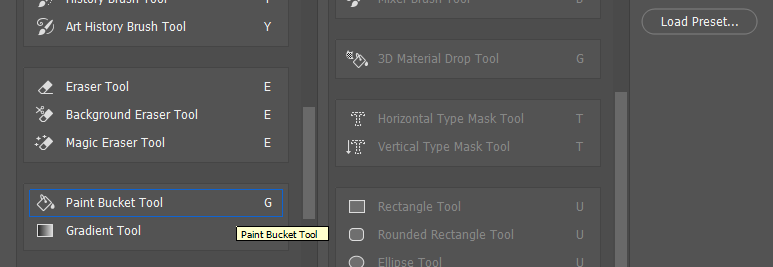
- Locating the Tool: Find the Live Paint Bucket Tool on the left toolbar, identifiable by a paint bucket icon. Press \"K\" for quick access.
- Creating Live Paint Groups: Before coloring, convert your artwork into Live Paint Groups via ‘Object > Live Paint > Make’.
- Applying Color: Select the Live Paint Bucket Tool and choose your color from the swatches. Click on your artwork\"s sections to fill them with the chosen color.
- Addressing Gaps: If you encounter gaps that hinder coloring, use ‘Object > Live Paint > Gap Options’ to find and close these gaps.
- Coloring Multiple Sections: To color several areas simultaneously, click, hold, and drag the tool across the areas before releasing.
- Gap Detection: The tool is equipped to detect and handle gap issues, letting you seamlessly fill in complex designs.
- Finalizing Your Artwork: After coloring, you can expand your work (‘Object > Expand’) to finalize the colors and separate the elements into layers.
Mastering the Live Paint Bucket Tool enhances your ability to add vibrant colors and bring your illustrations to life, especially in intricate designs.
Advanced Techniques: Filling Shapes with Images
In Adobe Illustrator, filling shapes with images can add depth and creativity to your designs. Here’s a step-by-step guide to accomplish this:
- Clipping Mask Method:
- Place your image in Illustrator (File > Place) and embed it.
- Create a shape using tools like the Pen Tool or Shape Builder.
- Ensure the shape is above the image (Arrange > Bring to Front).
- Select both the shape and image, right-click and choose \"Make Clipping Mask\" or use the shortcut Ctrl/Command + 7.
- Draw Inside Tool:
- Draw a shape using the Ellipse Tool or other shape tools.
- Select the shape and click on the \"Draw Inside\" tool.
- Place your image (File > Place or Shift + Ctrl/Command + P) and adjust it within the shape.
- Pattern Fill:
- Create your shape using the shape tool.
- Select a pattern from the \"Show Pattern Swatches\" in the swatches panel.
- Fill the shape with the selected pattern.
These techniques offer a range of creative possibilities, allowing for the combination of vector shapes and raster images in unique ways.
Adobe Illustrator - Fill Color with Paint Bucket Tool
Get creative with your home decor as you learn how to use a paint bucket to effortlessly transform any room. Watch this tutorial to gather inspiration and master the art of painting like a pro.
Basic Fill Color - Adobe Illustrator Tutorial
Calling all DIY enthusiasts! This tutorial is your go-to guide for mastering new skills and techniques. Whether you\'re a beginner or an experienced crafter, discover step-by-step instructions that will help you create beautiful masterpieces in no time. Grab your paint bucket and let\'s get started!
Working with Patterns and Swatches
Adobe Illustrator offers a rich array of options for working with patterns and swatches, enhancing the visual appeal of your designs. Here\"s how to effectively use these features:
- Understanding Pattern Fills: Patterns are swatches used to fill objects or text. Illustrator\"s Swatch menu houses various pre-made designs, and you can also import or create custom patterns.
- Adding Patterns to Shapes:
- Open the Swatches menu (Window > Swatches).
- Select the Swatch Libraries icon, choose Patterns, and pick a library.
- Click on an object and then on a pattern swatch to apply.
- Drawing with the Pen Tool: After selecting a pattern, use the Pen Tool to draw shapes that automatically fill with the chosen pattern.
- Using the Blob Brush: Select the Blob Brush (Shift + B) and a pattern swatch to draw custom shapes or strokes filled with the pattern.
- Filling Text with Patterns:
- Convert text to a vector object (Create Outlines).
- Apply a pattern swatch to the outlined text.
- Editing Pattern Fills: After applying, patterns can be scaled, rotated, or layered for different effects.
- Resizing, Repositioning, and Rotating Patterns: Use the Transform tool to adjust pattern fills on objects, ensuring only \"Transform Patterns\" is selected.
These tools and techniques provide a plethora of creative possibilities, enabling intricate pattern designs in your Illustrator projects.

Creating and Editing Custom Patterns
Adobe Illustrator offers robust tools for creating and editing custom patterns, allowing designers to add unique elements to their work. Here’s a guide to crafting your own patterns:
- Initiating Pattern Creation: Select your artwork and go to ‘Object > Pattern > Make’. This puts Illustrator in Pattern Editing Mode.
- Designing the Pattern: Use various tools and effects to design your pattern. Illustrator provides a live preview, which can be adjusted in the Pattern Options Panel.
- Applying the Pattern: Drag shapes onto your artboard and fill them with the new pattern from the swatches panel.
- Scaling Your Pattern: Right-click the filled shape, select ‘Transform > Scale’, and adjust the settings to scale only the pattern.
- Enhancing with Blending Modes: Use blending modes in the Appearance Panel (Opacity > Blending mode) to add depth to your pattern.
- Using Built-in Patterns: Illustrator also includes built-in patterns accessible via the Swatch Libraries menu.
- Saving Custom Patterns: Save your patterns through the Swatch Libraries menu for future use.
With these steps, you can create versatile and dynamic patterns, tailor-made for your specific design projects.
Applying Fills to Text and Complex Shapes
Filling text and complex shapes in Adobe Illustrator can enhance the visual appeal of your designs. Here\"s a guide to applying fills effectively:
- Using Pattern Fills: To fill text or shapes with patterns, open the Swatches menu (Window > Swatches), select a pattern, and apply it to your object. For text, convert it to a vector object (Right-click > Create Outlines) before applying the pattern fill.
- Live Paint Method: Convert objects to a Live Paint group for more flexibility in coloring faces and edges of complex shapes. This method allows individual coloring of each area enclosed by paths within the group.
- Envelope Distort with Text: Use Envelope Distort (Object > Envelope Distort > Make with Top Object) to warp text to fit a predefined shape. This method is ideal for fitting text into irregular or complex shapes.
- Text Filling with Type Tool: Draw your shape and use the Type Tool to click on the shape, automatically filling it with text. This method fills shapes with paragraph text without distorting it.
- Customizing Fill Color: Select your shape or text, then use the Fill tool in the Tools panel to apply solid colors, gradients, or patterns. Use the Color panel for more precise color adjustments.
These techniques provide various ways to apply fills to text and complex shapes, enabling you to create intricate and captivating designs in Illustrator.

_HOOK_
READ MORE:
Additional Tools for Enhanced Color Control
In Adobe Illustrator, advanced color control extends beyond the basic fill and stroke options. For more nuanced color work, consider the following tools and techniques:
- Live Paint Groups: This method allows for a more organic coloring approach, treating all objects in the group as part of the same flat surface. It\"s ideal for coloring separate areas and edges within an object.
- Stroke to Compound Path Conversion: Convert strokes to compound paths to modify their outlines. This can be used for creating varied stroke widths or dividing strokes into pieces.
- Blob Brush Tool: Useful for painting filled shapes that can merge with other shapes of the same color. The Blob Brush creates paths with a fill and no stroke, allowing for easy merging and intersection of shapes.
- Advanced Color Picker: Double-click the fill or stroke button to access the Color Picker for more precise color selection.
- Gradient Controls: Apply and adjust gradients for more complex color transitions. Gradients can be applied to both fills and strokes.
- Swatches and Patterns: Utilize the Swatches panel for quick color application and create custom patterns for unique fill options.
- Appearance Panel: Manage multiple fills, strokes, and effects on a single object for complex color and texture combinations.
These tools enhance the flexibility and creativity in color application, allowing for more sophisticated and detailed illustrations.
Unlock your creative potential in Adobe Illustrator with the versatile fill tool. This guide illuminates the path to mastering color control, enhancing your designs with precision and flair. Dive in and transform your artistic vision into reality!