Topic adobe illustrator clipping mask: Discover the power of "Adobe Illustrator Clipping Mask" to transform your designs. This guide unlocks creative techniques for captivating visuals, blending simplicity with advanced design capabilities. Elevate your Illustrator skills effortlessly!
Table of Content
- How to create a clipping mask in Adobe Illustrator?
- Understanding Clipping Masks
- Basic Steps to Create a Clipping Mask
- Using Text and Typography in Clipping Masks
- Clipping Multiple Objects
- Editing and Adjusting Clipping Masks
- Advanced Techniques: Compound Paths and Opacity Masks
- YOUTUBE: Making a Clipping Mask in Adobe Illustrator
- Troubleshooting Common Clipping Mask Issues
- Frequently Asked Questions
How to create a clipping mask in Adobe Illustrator?
Creating a clipping mask in Adobe Illustrator is a useful technique for hiding portions of an image or artwork. Follow the steps below to create a clipping mask:
- Select the object or image that you want to use as the mask.
- Copy (Ctrl+C) the object or image to the clipboard.
- Paste the object or image in front of the original (Ctrl+F) to create a duplicate.
- Position the duplicate object or image on top of the content you want to mask.
- Select both the duplicate object or image and the content that you want to mask.
- Choose \"Object\" from the menu bar, then go to \"Clipping Mask\" and select \"Make,\" or use the keyboard shortcut (Ctrl+7).
- The duplicate object or image will become a clipping mask, hiding any excess content outside of its boundaries.

READ MORE:
Understanding Clipping Masks
A clipping mask in Adobe Illustrator is a powerful tool that allows designers to control the visibility of artwork. It involves using one shape (the mask) to determine which parts of another shape or image (the subject) are visible. This non-destructive technique is essential for creating complex, layered designs without permanently altering the original artwork.
- Basic Concept: A clipping mask is created by placing a shape (the mask) over another object (the subject). The mask\"s shape dictates the visible area of the subject.
- Creating a Clipping Mask: To create a clipping mask, you need at least two layers - the masking layer and the layer with the artwork to be masked. The mask can be any vector object, including text and complex shapes.
- Applying the Mask: Once the layers are prepared, you select both the mask and the subject, then apply the mask using the \"Object > Clipping Mask > Make\" command.
- Editing and Adjusting: Clipping masks can be edited and adjusted after creation. You can move, reshape, or alter the mask or the subject without losing the masking effect.
Understanding how to use clipping masks opens up a world of creative possibilities in Illustrator, allowing for intricate designs and innovative visual effects that enhance any graphic project.
Basic Steps to Create a Clipping Mask
- Prepare Your Artwork: Begin by opening Adobe Illustrator and creating a new document. Place the artwork that you want to mask within this document.
- Select the Masking Object: Create or select the shape that you want to use as a mask. This could be any vector object like a circle, square, or even text.
- Arrange Layers: Ensure the masking object is positioned above the artwork layer. You can adjust layers by right-clicking and selecting \"Arrange\".
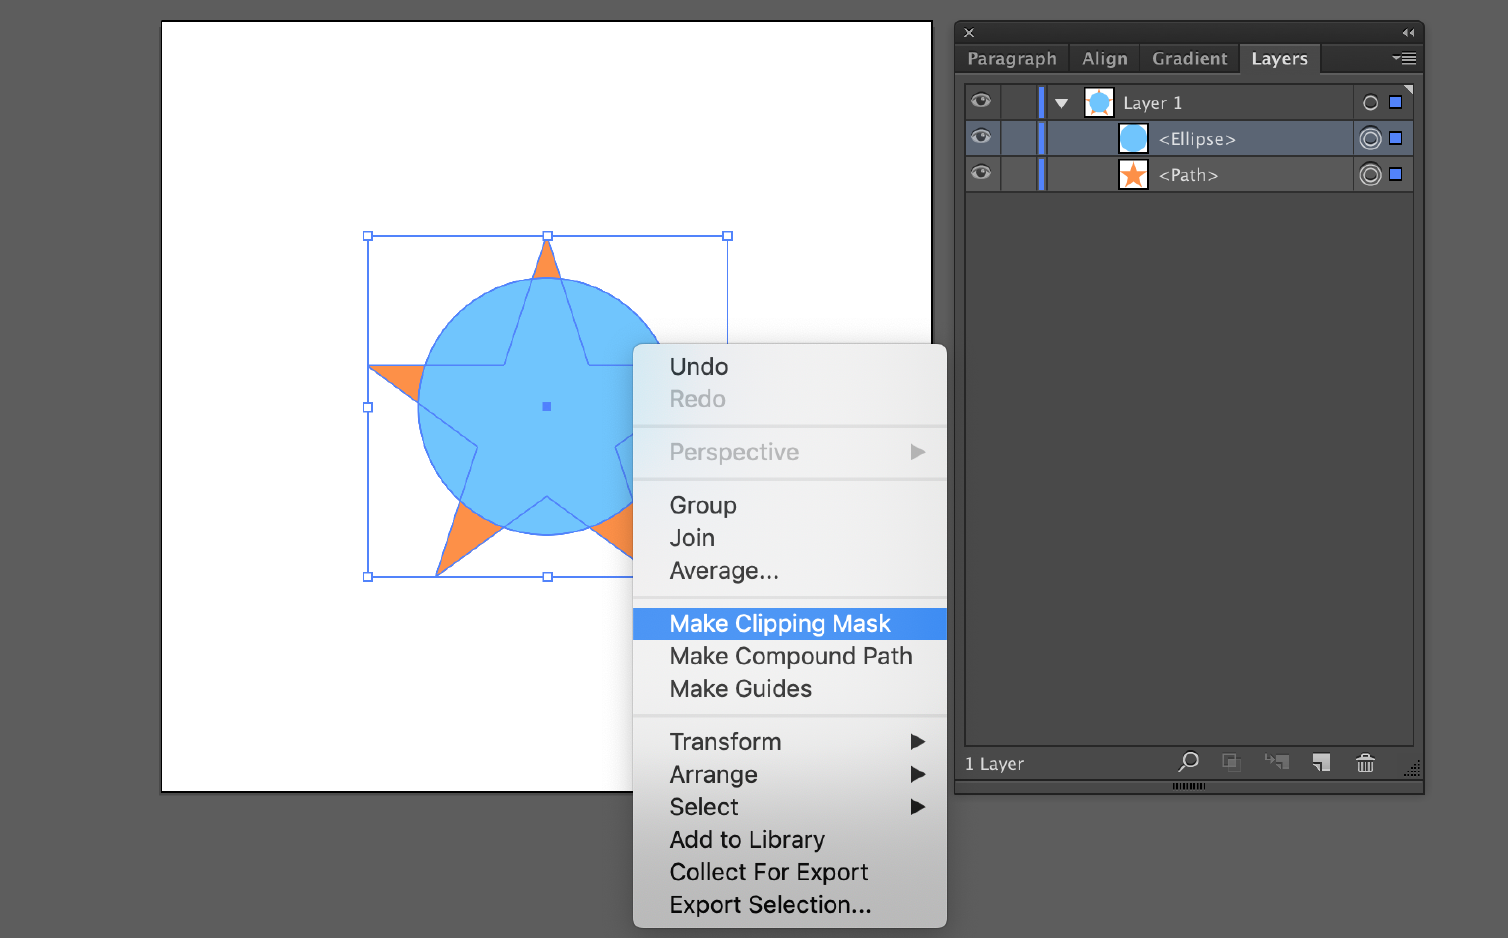
- Create the Clipping Mask: Select both the masking object and the artwork. Then go to the menu bar, choose \"Object\", select \"Clipping Mask\", and click \"Make\". Alternatively, use the shortcut Ctrl+7 (Cmd+7 for Mac).
- Adjust if Necessary: After creating the mask, you can still move, scale, and edit both the mask and the masked artwork. To edit the mask, double-click on it to enter Isolation Mode.
Following these steps will allow you to effectively use clipping masks in Adobe Illustrator, enhancing your design with sophisticated and intricate visual effects.

Using Text and Typography in Clipping Masks
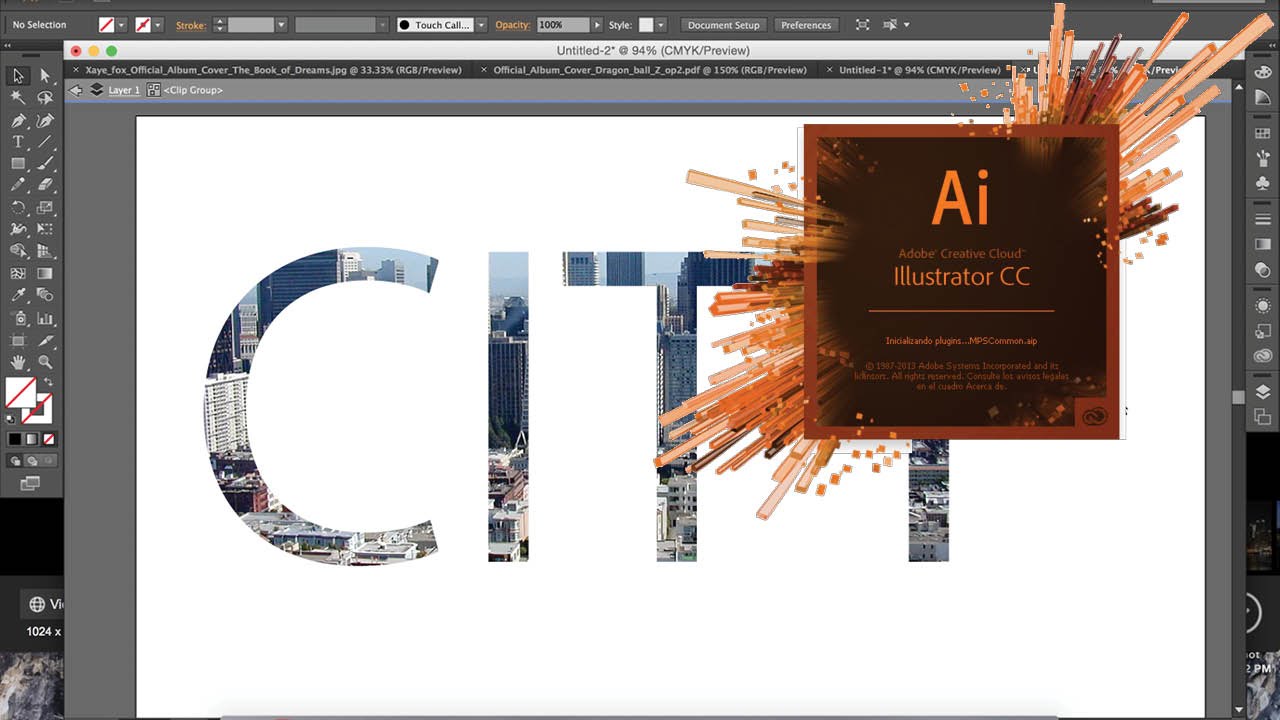
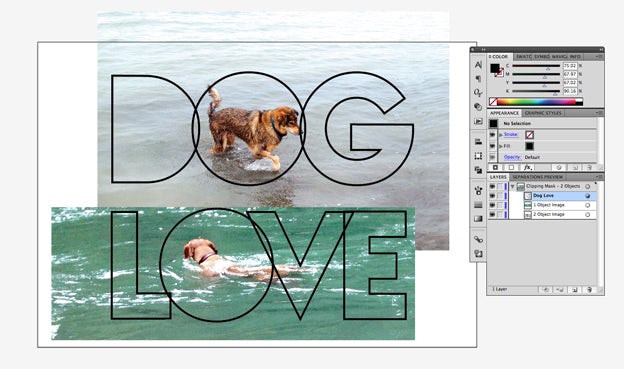
Clipping masks in Adobe Illustrator offer a unique way to create visually striking text effects and typography designs. By using text as a clipping mask, designers can infuse text with images, patterns, or intricate designs, opening up endless possibilities for creative expression.
- Prepare the Text and Artwork: Start by creating or importing the artwork that will be masked. Then, using the Type Tool, create your text. For more impactful results, choose a bold, thick font.
- Layer Arrangement: Position the text over the artwork to ensure it covers the desired areas. This step is crucial for determining what part of the artwork will show through the text.
- Create the Clipping Mask: Select both the text and the artwork. Then, navigate to \"Object\" in the menu, choose \"Clipping Mask\", and select \"Make\". The shortcut for this action is Ctrl+7 (or Command+7 on Mac).
- Adjust the Clipping Mask: After the mask is applied, you can move, scale, or rotate the text or the artwork within the clipping mask to achieve the desired effect. This can be done by entering Isolation Mode and making adjustments.
With these steps, text becomes not just a tool for communication but also an element of artistic expression, allowing designers to blend typography with various visual elements to create unique and captivating designs.
Clipping Multiple Objects
Clipping multiple objects in Adobe Illustrator is a technique that allows for the creation of intricate and layered designs. This method involves using a single mask to control the visibility of multiple objects or layers, thereby creating a composite image from several elements.
- Selecting Objects: Begin by selecting the objects you want to include in your clipping mask. You can use any combination of vector shapes, text, or images.
- Creating the Mask: Place the object you intend to use as the clipping path above the objects to be masked. This can be a shape or text that you\"ve converted to outlines.
- Applying the Mask: Select both the clipping path and the objects to be masked. Navigate to the “Object” menu, choose “Clipping Mask”, and then select “Make.”
- Editing and Adjusting: After applying the mask, you can still edit the individual elements. You can enter Isolation Mode by double-clicking on the clipping mask to make adjustments to the text or images within the mask.
This process enables designers to combine multiple elements into a single, cohesive visual statement. The flexibility of clipping masks in Illustrator makes them an essential tool for creating complex and visually stunning compositions.

_HOOK_
Editing and Adjusting Clipping Masks
Editing and adjusting clipping masks in Adobe Illustrator is a straightforward process, allowing designers to refine and modify their designs with ease. These steps ensure that your artwork remains flexible and adaptable to creative changes.
- Accessing the Clipping Mask: To begin editing, locate the clipping mask in your layers panel. The mask will usually be the topmost layer if it was the last object created.
- Entering Isolation Mode: Double-click the clipping mask to enter Isolation Mode. This mode allows you to edit the mask and the objects within it without affecting other parts of your design.
- Adjusting the Masked Objects: While in Isolation Mode, you can freely move, scale, or rotate the masked objects. To resize or reposition, simply select the object and use the standard transform tools.
- Modifying the Mask Shape: You can also alter the shape of the clipping mask itself. Select the base object of the mask and use the Direct Selection Tool to adjust its points and paths.
- Adding or Removing Elements: To add more elements to your clipping mask, simply create or move the additional objects into the clipping mask layer in the Layers Panel. To remove an element, drag it out of the clipping mask layer.
- Releasing the Clipping Mask: If you need to completely remove the mask, select it and navigate to Object > Clipping Mask > Release. This will revert the objects to their original, unmasked state.
By mastering these editing techniques, you can continually refine your designs, ensuring your artwork remains dynamic and responsive to your creative vision.

Advanced Techniques: Compound Paths and Opacity Masks
Adobe Illustrator offers advanced techniques like using compound paths and opacity masks with clipping masks to create more intricate and visually appealing designs.
- Compound Paths: Compound paths allow for the creation of complex shapes that can be used as clipping paths. To make a compound path, first create multiple shapes or paths. Then select them all and choose \"Object > Compound Path > Make\". This compound path can now be used as a clipping mask.
- Editing Compound Paths: Once a compound path is created, it can be edited like any other path. This flexibility allows for dynamic design changes even after the compound path has been used in a clipping mask.
- Opacity Masks: Opacity masks provide a way to create smooth transitions between different shapes and objects. These masks control the transparency of the clipped content, allowing for the creation of soft edges and more nuanced design elements.
- Applying Opacity Masks: To create an opacity mask, you need to have a black and white image or gradient (black hides, white reveals). Place this above the object you want to mask and then use the \"Make Opacity Mask\" option in the Transparency panel.
- Editing Opacity Masks: Opacity masks can be edited by double-clicking on the mask in the Transparency panel. This allows for adjustments to be made to the mask without affecting the underlying objects.
These advanced techniques expand the creative possibilities in Illustrator, enabling designers to explore more sophisticated and detailed designs.
Making a Clipping Mask in Adobe Illustrator
Discover the fascinating world of clipping masks and unlock new creative possibilities in your artwork. Watch this video to learn how to use clipping masks effectively and add depth to your designs.
3 Essential Illustrator Clipping Mask Uses
Unleash your creativity with Illustrator and master the art of digital design. Dive into this video tutorial to explore the powerful features of Illustrator and learn valuable techniques to enhance your design skills.
Troubleshooting Common Clipping Mask Issues
While working with clipping masks in Adobe Illustrator, users may encounter various issues. Understanding how to troubleshoot these common problems can streamline the design process and ensure successful outcomes.
- Mask Not Working: If the clipping mask is not functioning, ensure both the mask and the object to be masked are correctly selected. The masking object must be placed above the object to be masked in the Layers panel.
- Incomplete Masking: Incomplete masking can occur if the clipping path isn’t fully closed or if there are grouped objects. Ensure that the clipping path is a complete, closed shape and that all objects are properly ungrouped or grouped as needed.
- Masking Text Issues: When using text as a clipping mask, ensure the text is converted to outlines (Type > Create Outlines) for a more consistent result.
- Visibility Problems: If the masked object is not visible, check the stacking order in the Layers panel. The clipping path should be above the object being masked.
- Editing Masked Objects: If you need to edit objects within a clipping mask, enter Isolation Mode by double-clicking the mask. This allows you to edit the contents without affecting the mask.
- Releasing a Clipping Mask: To release a clipping mask, select the masked object, navigate to Object > Clipping Mask > Release. This will revert the objects to their original, unmasked state.
By understanding these troubleshooting steps, designers can effectively manage and resolve common issues encountered while using clipping masks in Adobe Illustrator.
READ MORE:
Frequently Asked Questions
- Can I apply multiple clipping masks to a single object in Illustrator? Yes, multiple clipping masks can be applied to a single object or group of objects. Each subsequent mask will be applied over the previous one, allowing for complex layering.
- How do I edit the content within a clipping mask? To edit content within a clipping mask, release the mask first (Object > Clipping Mask > Release), make your adjustments, and then reapply the mask.
- Can I use text as a clipping path in Illustrator? Yes, text can be used as a clipping path. First, convert the text to outlines (Type > Create Outlines) and then use it as a clipping path like any other shape.
- What\"s the difference between a clipping mask and a compound path in Illustrator? A clipping mask hides parts of objects within a shape without altering them (non-destructive), while a compound path combines multiple objects into a single shape, altering the original objects.
- How do I add multiple shapes to a single clipping mask? To add multiple shapes to a single clipping mask, group the shapes (Object > Group) and then create the clipping mask using the grouped objects as the content.
Mastering Adobe Illustrator\"s clipping mask unlocks endless creative possibilities, transforming your designs with intricate details and dynamic compositions. Dive into this tool to elevate your artwork, blending imagination and technique in every creation.