Topic adobe illustrator how to change background color: Discover the art of transforming your Adobe Illustrator projects by mastering the simple yet impactful technique of changing background colors. This guide will lead you through easy steps to enhance your designs, appealing to both beginners and seasoned professionals.
Table of Content
- How do I change the background color of Adobe Illustrator?
- 1. Overview of Changing Background Colors in Illustrator
- 2. Steps to Change Background Color Using Document Setup
- 3. Changing Background Color for a Single Artboard
- 4. Using Layers Panel to Change Background Color
- 5. Adjusting Background Color of User Interface
- 6. Methods to Change Background in Existing Files
- 7. Alternative Tools for Changing Background Colors
- YOUTUBE: Changing Background Color in Adobe Illustrator
- 8. Tips for Selecting Specific Colors for Background
- 9. Using Gradient Backgrounds in Illustrator
- 10. Ensuring Color Integrity and Exporting Designs
- 11. Creating Transparent Backgrounds
- 12. Keyboard Shortcuts for Efficient Workflow
- 13. FAQs and Troubleshooting
How do I change the background color of Adobe Illustrator?
To change the background color of Adobe Illustrator, you can follow these steps:
- Open Adobe Illustrator on your computer.
- Go to the \"Edit\" menu at the top of the screen.
- In the drop-down menu, select \"Preferences\".
- A new window will open with various options.
- Look for the \"Interface\" category and click on it.
- Within the \"Interface\" options, find the \"Appearance\" section.
- In the \"Appearance\" section, you should see a color swatch or box labeled \"Application Background\".
- Click on the color swatch or box to bring up the color picker window.
- Within the color picker, choose the desired color you want as the background.
- Once you have selected the color, click \"OK\" to apply the change.
- The background color of Adobe Illustrator\'s interface will now be updated to the chosen color.
By following these steps, you can easily change the background color of Adobe Illustrator to your preference.

READ MORE:
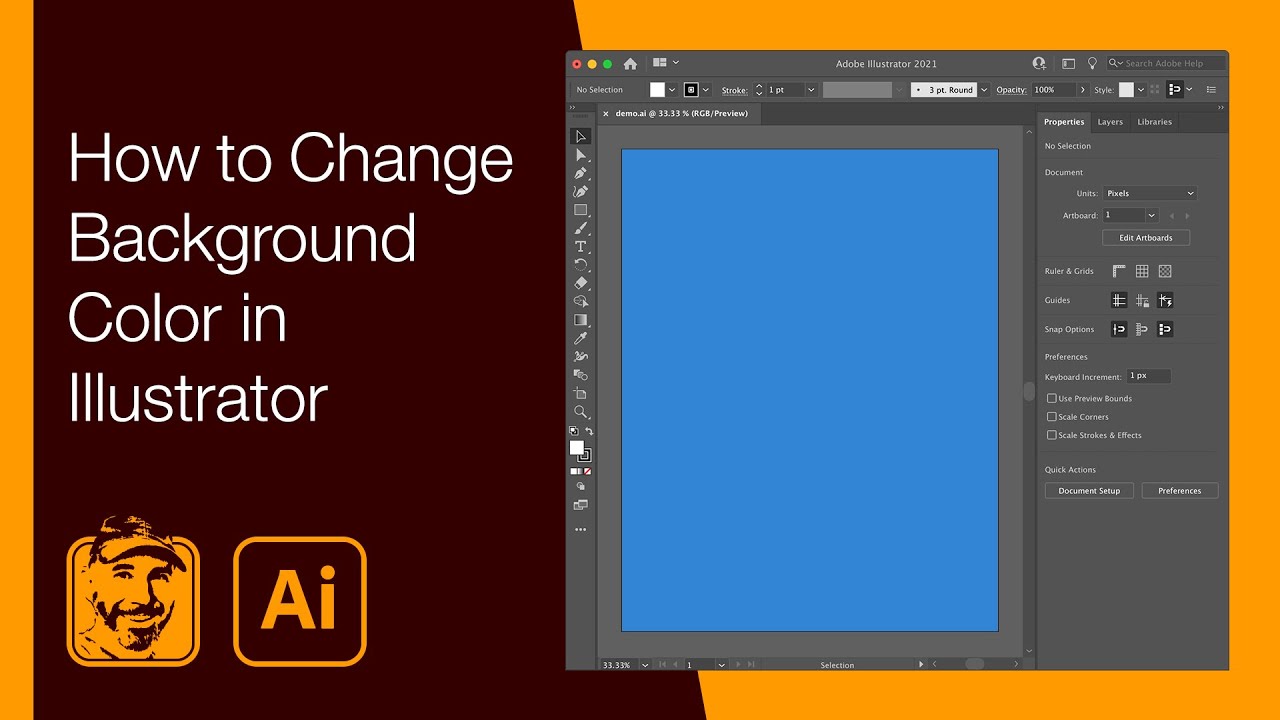
1. Overview of Changing Background Colors in Illustrator
Changing the background color in Adobe Illustrator is a versatile skill, enhancing the visual impact of your design. This process can be approached in several ways, catering to different needs and project types.
- Using Document Setup: A quick method involves the Document Setup feature. Here, you can easily change the background color by accessing the Artboard color icon in the Document Setup window and selecting your desired color.
- Rectangle Tool Method: For more control, especially when dealing with multiple artboards, using the Rectangle Tool is effective. Draw a rectangle matching the artboard size, fill it with your chosen color, and then lock it to prevent accidental shifts.
- Layers Panel Approach: Another method is to use the Layers Panel. Create a new layer, draw a rectangle, fill it with color, and lock the layer. This method is particularly useful for files with multiple layers.
- User Interface Color: You can also alter the background color of Illustrator\"s user interface, adjusting the overall workspace brightness and color to suit your preference.
- Text Background Color: Illustrator allows for the customization of text background color. This involves selecting the text, choosing the color, and adjusting opacity and stroke for desired effects.
Additionally, Illustrator offers options to add various background effects and customizations, like vignettes or borders, via the \"Effects\" tab. Remember, changing the background color in Illustrator doesn\"t affect other design elements unless specifically altered.
It\"s important to understand that the Simulate Colored Paper setting in Document Setup, while fast, does not change individual artboards and reverts to standard upon reopening the file. Also, be aware that for exporting or printing, maintaining color integrity is crucial. Select the appropriate color profile and file format based on your project\"s final destination.
2. Steps to Change Background Color Using Document Setup
- Open the Illustrator Document: Start by opening the Adobe Illustrator document where you want to change the artboard color.
- Access Document Setup: Navigate to \"File\" > \"Document Setup\", or use the shortcut Alt + Ctrl + P. This action opens the Document Setup window.
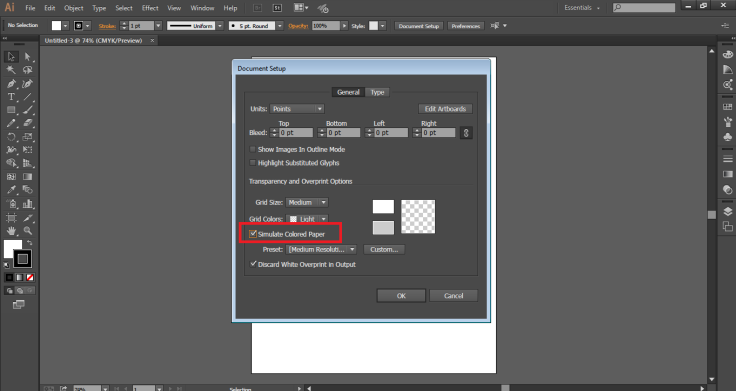
- Select Artboard Color: In the Document Setup window, click on the \"Artboard color\" icon to open the color menu.
- Choose Your Color: From the color menu, select the color you wish to apply to the artboard. After selecting the color, click \"OK\".
- Apply Simulate Colored Paper: Check the \"Simulate Colored Paper\" option and then click \"OK\" to finalize your changes.
This method will change the artboard\"s appearance in Illustrator, giving you a visual representation of how your design might look with a colored background. However, it\"s important to remember that this does not change the actual background color of the artwork upon export or printing. The background color in exported files will remain transparent unless specifically set otherwise in the export settings.

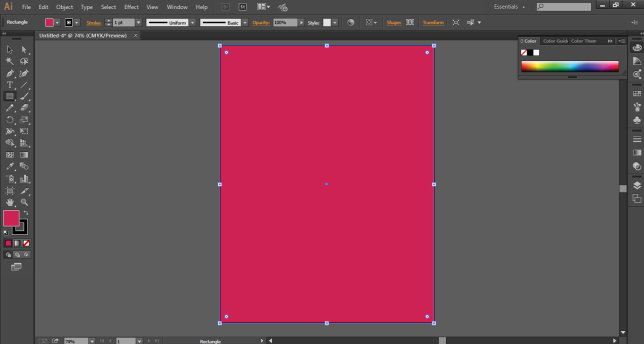
3. Changing Background Color for a Single Artboard
- Select the Artboard: Choose the specific artboard you want to alter within your Illustrator project.
- Use the Rectangle Tool: From the toolbar, select the Rectangle Tool (M).
- Draw a Rectangle: Click and drag the tool across the entire artboard, ensuring it covers all edges. This rectangle will act as your new background.
- Fill the Rectangle: With the rectangle selected, apply your desired color. Access the Fill option (X) on the left-hand Tool Bar and pick the color you want for your background.
- Lock the Rectangle Layer: To prevent any accidental edits, open the Layers panel (Window > Layers), move the rectangle layer to the bottom, and lock it by clicking the Lock icon.
By following these steps, you create a visual background layer for your artboard in Illustrator. This method is particularly useful for designs requiring differentiation between multiple artboards. Remember, this technique changes the artboard\"s appearance within Illustrator but does not modify the background color for exported or printed artworks. For such purposes, the background in exported files generally remains transparent unless otherwise specified in the export settings.

4. Using Layers Panel to Change Background Color
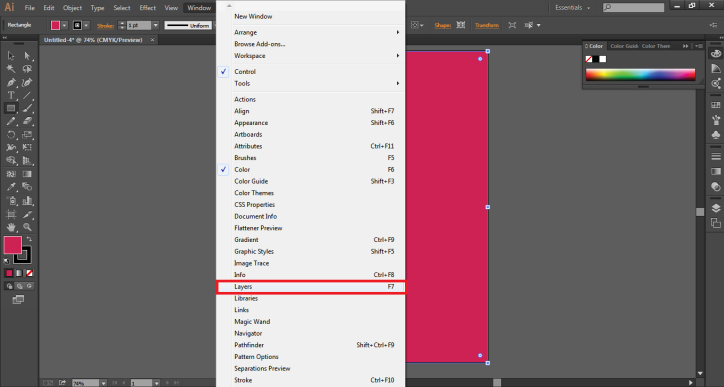
- Open the Layers Panel: Navigate to the Layers panel in Adobe Illustrator. If it\"s not visible, you can open it by going to Window > Layers, or simply press F7.
- Create a New Layer: In the Layers panel, create a new layer. This layer will be used for the background color.
- Select the Rectangle Tool: From the Illustrator toolbox, select the Rectangle Tool (M).
- Draw a Rectangle: Draw a rectangle that covers the entire artboard. This rectangle will represent your new background.
- Fill the Rectangle with Color: With the rectangle still selected, fill it with your chosen color. Use the color fill option in the toolbar to select or customize the color.
- Adjust Layer Order: Move the rectangle layer to the bottom in the Layers panel. This ensures that it stays behind all other design elements.
- Lock the Background Layer: Once the rectangle is correctly positioned and colored, lock the layer by clicking the small lock icon next to it in the Layers panel. This prevents any accidental modifications to your background.
By using the Layers Panel to change the background color in Adobe Illustrator, you gain more control over the design process. This method allows you to easily modify or replace the background without affecting other elements of your artwork.
_HOOK_
5. Adjusting Background Color of User Interface
- Access Illustrator Preferences: Begin by going to the \"Edit\" menu in Adobe Illustrator.
- Select User Interface Settings: In the drop-down menu under \"Edit\", select \"Preferences\", and then navigate to \"User Interface\".
- Choose the Interface Color: In the Preferences window, you will find options to adjust the user interface color. Illustrator typically offers different shades, allowing you to customize the look according to your preference.
- Apply and Confirm Your Selection: After selecting the desired color for the Illustrator interface, confirm your choice to apply the new color setting.
Adjusting the background color of the user interface in Adobe Illustrator can enhance your visual experience and reduce eye strain during extensive design sessions. This customization is an effective way to tailor the Illustrator environment to your personal comfort and design workflow.
6. Methods to Change Background in Existing Files
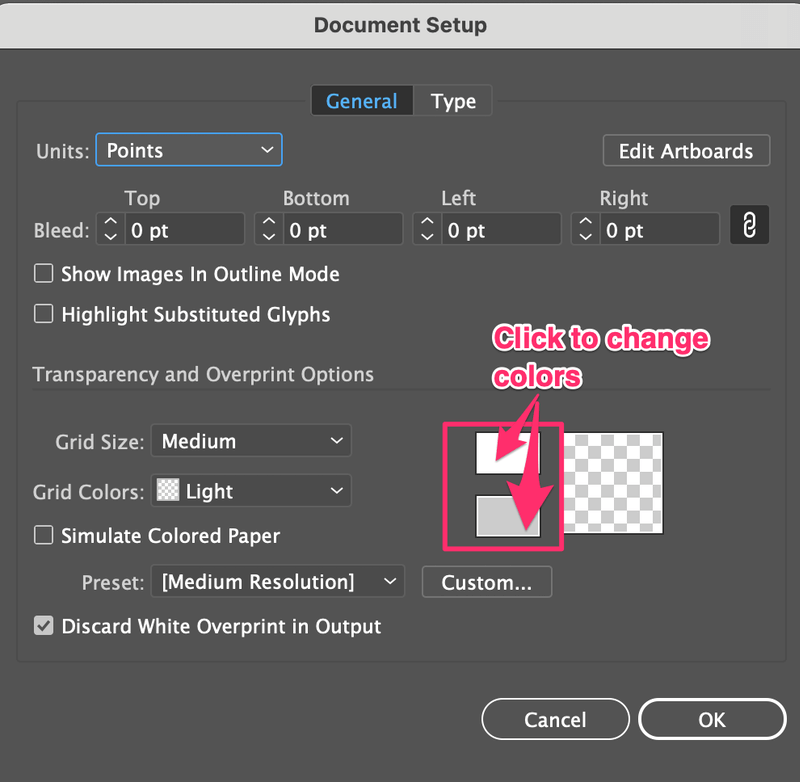
- Document Setup Method:
- Open your Illustrator document.
- Go to \"File\" > \"Document Setup\" or use Alt + Ctrl + P.
- In the \"Transparency and Overprint Options\" section, check \"Simulate Colored Paper\".
- Select a color from the color swatch that appears, then click \"OK\".
- Using the Layers Panel:
- Create a new layer in the Layers Panel.
- Draw a rectangle that covers the entire artboard using the Rectangle Tool.
- Fill the rectangle with your desired color.
- Move this layer to the bottom and lock it to avoid accidental edits.
- Save for Web (Legacy) Method:
- Open your file and go to \"File\" > \"Export\" > \"Save for Web (Legacy)\".
- In the new window, uncheck \"Transparency\" if checked.
- Choose a background color from the available options.
- Rectangle Method for Single Artboard:
- Use the Rectangle Tool to draw a rectangle over a specific artboard.
- Set its fill color and lock the layer as described above.
- Removing Background Color:
- If using \"Simulate Colored Paper\", uncheck this option to revert to standard white.
- If using the Rectangle Tool method, delete the rectangle layer or change its color to white.
These methods offer flexibility for changing the background color in existing Adobe Illustrator files. They cater to different needs, such as temporary or permanent background changes, or changes specific to certain artboards.
7. Alternative Tools for Changing Background Colors
- Custom Color Palette: Create and save custom color palettes in Adobe Illustrator for easy recall and application to project backgrounds.
- Background Effects: Utilize Illustrator\"s \"Effects\" tab to add various background effects like vignettes or borders. Customize these effects in size, color, and other parameters to suit your design needs.
- Edit Background Feature: After setting a background color, further customize it using the \"Edit Background\" feature found in the \"Layers\" window. This allows changes in color, addition of effects, or even complete removal of the background.
- Rectangle Tool Method: For specific artboard background changes, use the Rectangle Tool to draw and color a rectangle on the artboard. This method is ideal for projects with multiple artboards requiring unique backgrounds.
- Simulate Colored Paper Option: In Document Setup, use \"Simulate Colored Paper\" for quick background color changes. Note that this method does not change individual artboards and reverts upon file reopening.
- Removing Background Color: To remove the background color, uncheck \"Simulate Colored Paper\" in Document Setup or delete the rectangle layer created with the Rectangle Tool.
These alternative tools and methods provide versatility in changing and managing background colors in Illustrator, enhancing the design and presentation of your projects.
Changing Background Color in Adobe Illustrator
Explore the vibrant world of color in this captivating video! From bold and energetic hues to soft and soothing shades, immerse yourself in the beauty and power of color, and let it inspire your creative journey.
Changing Background Color in Illustrator
Unleash your imagination with the help of Adobe Illustrator! This video will introduce you to the endless possibilities of this incredible design software. Learn how to create stunning illustrations, customize artwork, and bring your artistic vision to life with ease. Join us and unlock your creative potential today!
8. Tips for Selecting Specific Colors for Background
- Understanding Color Psychology: Different colors evoke different emotions. For example, blues are calming, while reds are energizing. Consider the emotional impact of your background color in the context of your design.
- Using Color Palettes: Explore Illustrator\"s color palettes or create your own. The Color Picker tool allows you to choose from a range of colors or create custom shades.
- Adjusting Tints and Shades: Utilize the Color panel to adjust the tint or shade of a color. This can help you achieve the perfect intensity for your background.
- Experimenting with Inverse and Complementary Colors: Use Illustrator\"s Color panel to invert colors or find their complements, providing contrast and variety to your design.
- Creating Gradients: Use gradients for a more dynamic background. Blend colors using the Blend tool for intermediate shades.
- Utilizing Transparency and Overprint: Experiment with transparency settings to add depth, and use overprint to see how colors interact with each other.
- Previewing in Different Modes: Check your background color in various Illustrator modes, such as Overprint Preview and Outline Mode, to ensure versatility.
- Consider Web-Safe Colors: For digital designs, consider choosing web-safe colors to ensure consistency across different screens and devices.
These tips will help you choose the right background color in Illustrator, ensuring it complements your design and achieves the desired emotional impact.

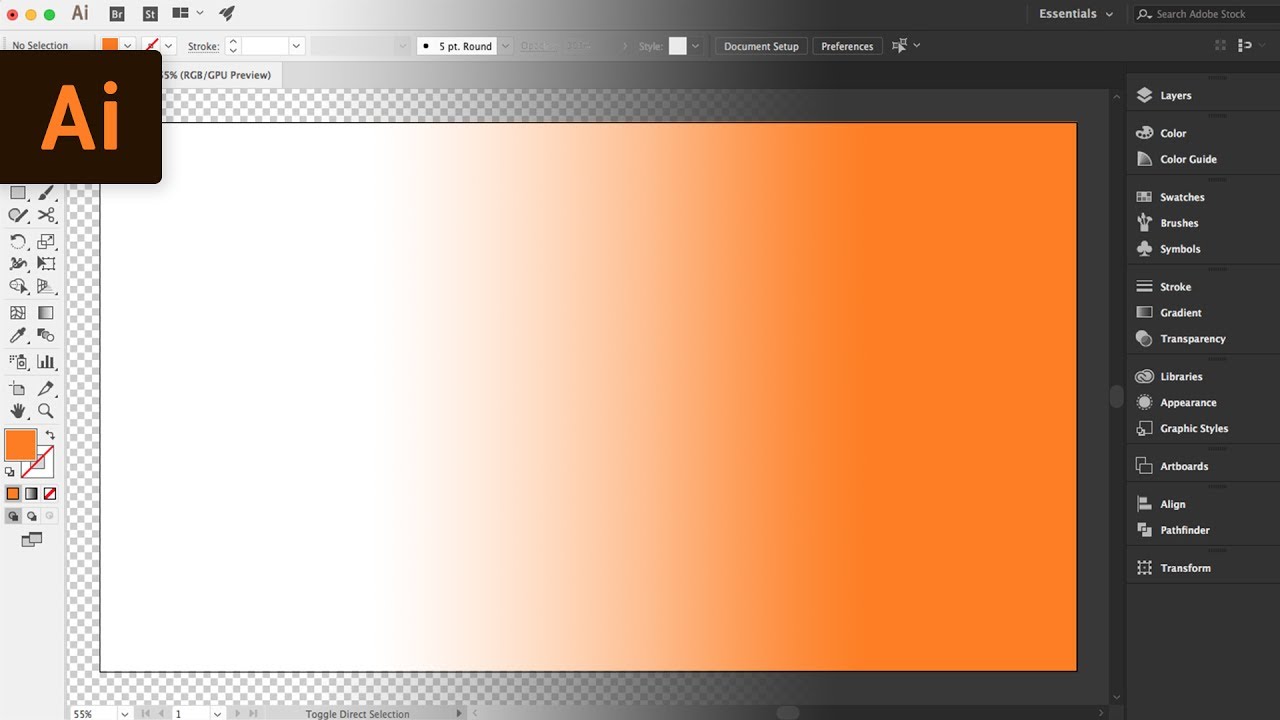
9. Using Gradient Backgrounds in Illustrator
- Open Your Illustrator Project: Start by opening the Illustrator file where you intend to apply the gradient.
- Select the Rectangle Tool: From the Illustrator toolbar, choose the Rectangle Tool (M) for creating the gradient area.
- Draw a Rectangle: Click and drag to cover the entire artboard or the specific area for the gradient background.
- Access the Gradient Panel: Go to the Gradient panel via `Window > Gradient`, or press `Ctrl/Cmd + F9`.
- Create a Custom Gradient: In the Gradient panel, add color stops on the gradient slider and select colors for each stop from the Color panel.
- Adjust Gradient Orientation: Modify the gradient\"s direction and spread by adjusting the angle and location of gradient stops.
- Lock the Gradient Layer: Once the gradient is applied, lock the layer in the Layers panel to avoid accidental edits.
- Experiment with Blending Modes: Enhance the gradient by experimenting with blending modes in the Transparency panel.
- Finalize and Save: After completing the gradient background, save your work and check it in various view modes.
Gradient backgrounds in Illustrator can add depth and visual interest to designs, offering a smooth transition between colors.
_HOOK_
10. Ensuring Color Integrity and Exporting Designs
- Choose Correct Color Mode: Determine if your project is for digital (RGB mode) or print (CMYK mode) and set your document to the appropriate color mode under `File > Document Color Mode`.
- Use Document Color Settings: Consistent color management is crucial. Adjust settings under `Edit > Color Settings` to match other applications for uniform color handling.
- Proof Colors for Print: For print projects, use `View > Proof Colors` to simulate how colors will appear when printed, considering the specific color profile of your printer.
- Check for Color Issues: Use `Window > Output > Separations Preview` to detect potential color problems like unexpected spot colors.
- Exporting Your File: Choose the right export format for your project’s purpose via `File > Export > Export As` for web formats, or `File > Save As` for print formats like Adobe PDF.
- Include Bleeds and Printer Marks: When preparing for professional printing, include necessary bleeds and printer marks in the `Document Setup` or during PDF export.
- Preview in Intended Medium: Always preview your design in its intended medium. Conduct a test print for print projects to see actual color representation.
By following these steps, you can ensure your design maintains color accuracy throughout the design process and in its final form, whether it is viewed on a screen or printed.
11. Creating Transparent Backgrounds
- Start with a New or Existing File: Open your Illustrator document. Remember, Illustrator\"s default background is transparent.
- Show Transparency Grid: To view this transparency, go to \"View\" and select \"Show Transparency Grid\" or use the shortcut `Shift + Ctrl + D`.
- Adjust Layers for Transparency: If you have used a rectangle to change the artboard color, access the Layers panel (`Window > Layers` or `F7`). Find the layer with the rectangle and delete it or change its fill to \"none\".
- Exporting Your Design: When exporting, choose formats like PNG or SVG that support transparency. Ensure no settings that might remove transparency are selected.
- Using Transparency in Designs: Apply transparency to specific objects in your design using the opacity settings in the Color or Appearance panels.
- Additional Considerations: The \"Simulate Colored Paper\" option in Document Setup does not affect actual transparency in exports. Always preview your final design to check the transparency.
Following these steps will help you create transparent backgrounds in your Adobe Illustrator projects, useful for various applications where background flexibility is crucial.
12. Keyboard Shortcuts for Efficient Workflow
- Basic Tool Selection: Selection Tool (V), Direct Selection (A), Pen Tool (P), Rectangle (M).
- Object Editing Commands: Transform Again (Cmd/Ctrl + D), Bring to Front (Shift + Cmd/Ctrl + ]), Send to Back (Shift + Cmd/Ctrl + [).
- View and Navigation: Preview (Cmd/Ctrl + Y), Zoom In/Out (Cmd/Ctrl + +/-), Fit Artboard in Window (Cmd/Ctrl + 0).
- Text Editing Shortcuts: Character settings (Cmd/Ctrl + T), Adjusting font size (Shift + Cmd/Ctrl + . or ,).
These keyboard shortcuts in Adobe Illustrator can greatly enhance your design efficiency and workflow.
READ MORE:
13. FAQs and Troubleshooting
- Basic Tool Selection: Selection Tool (V), Direct Selection (A), Pen Tool (P), Rectangle (M).
- Object Editing Commands: Transform Again (Cmd/Ctrl + D), Bring to Front (Shift + Cmd/Ctrl + ]), Send to Back (Shift + Cmd/Ctrl + [).
- View and Navigation: Preview (Cmd/Ctrl + Y), Zoom In/Out (Cmd/Ctrl + +/-), Fit Artboard in Window (Cmd/Ctrl + 0).
- Text Editing Shortcuts: Character settings (Cmd/Ctrl + T), Adjusting font size (Shift + Cmd/Ctrl + . or ,).
These keyboard shortcuts in Adobe Illustrator can greatly enhance your design efficiency and workflow.
Embrace the creative flexibility Illustrator offers by mastering the art of changing background colors. Whether for single artboards or entire projects, these techniques will elevate your designs, ensuring they stand out in both digital and print formats.