Topic clipping mask adobe illustrator: Discover the art of "Clipping Mask Adobe Illustrator" and transform your designs with this powerful tool, perfect for intricate graphics and compelling visuals.
Table of Content
- How to create a clipping mask in Adobe Illustrator?
- Understanding Clipping Masks in Adobe Illustrator
- Step-by-Step Guide: Creating a Basic Clipping Mask
- Advanced Techniques: Working with Text and Patterns
- Creating Complex Designs: Multiple Objects and Layers
- YOUTUBE: How to Make a Clipping Mask in Adobe Illustrator
- FAQs: Common Questions about Clipping Masks Answered
- Troubleshooting: Solving Common Clipping Mask Issues
- Expanding Your Skills: Learning Resources and Community Tips
- Step-by-Step Guide: Creating a Basic Clipping Mask
- Advanced Techniques: Working with Text and Patterns
- Creating Complex Designs: Multiple Objects and Layers
- FAQs: Common Questions about Clipping Masks Answered
- Troubleshooting: Solving Common Clipping Mask Issues
- Expanding Your Skills: Learning Resources and Community Tips
How to create a clipping mask in Adobe Illustrator?
To create a clipping mask in Adobe Illustrator, you can follow these steps:
- Select the object you want to be the mask and the object you want to clip.
- Go to the \"Object\" menu.
- Hover over \"Clipping Mask\" and click on \"Make\" from the dropdown menu.
This will create a clipping path from the area where the two objects overlap, and the mask object will define the visible area.
Note: If you want to create a clipping mask from multiple objects, you will need to group them before applying the clipping mask.

READ MORE:
Understanding Clipping Masks in Adobe Illustrator
A clipping mask in Adobe Illustrator is a versatile tool used to control the visibility of artwork. It involves two components: a masking object (the shape that serves as the mask) and the artwork or object being masked. The process is straightforward yet powerful, allowing designers to create intricate visuals by revealing only parts of the artwork that lie within the boundaries of the masking object.
- Creating a Basic Clipping Mask:
- Start by placing the object you intend to use as the mask above the artwork you want to mask. Then, select both items and navigate through the menu Object > Clipping Mask > Make, or use the shortcut Ctrl+7 (Cmd+7 on Mac).
- Editing the Clipping Mask:
- You can modify the shape of the clipping mask or the content within the mask. For editing the shape, select the base object, reshape it, and the clipped content will adapt. To edit the content, double-click the content object within the Layers panel, make your adjustments, and then exit the isolation mode.
- Advanced Techniques:
- Explore advanced techniques like opacity masks for transparent effects, nested clipping masks for complex designs, or use text as a clipping mask to create dynamic typography effects.
Clipping masks offer a broad range of creative possibilities, from designing posters and ads to creating unique text effects and intricate designs. With a fundamental understanding and a bit of practice, you can significantly enhance your vector artwork in Adobe Illustrator.
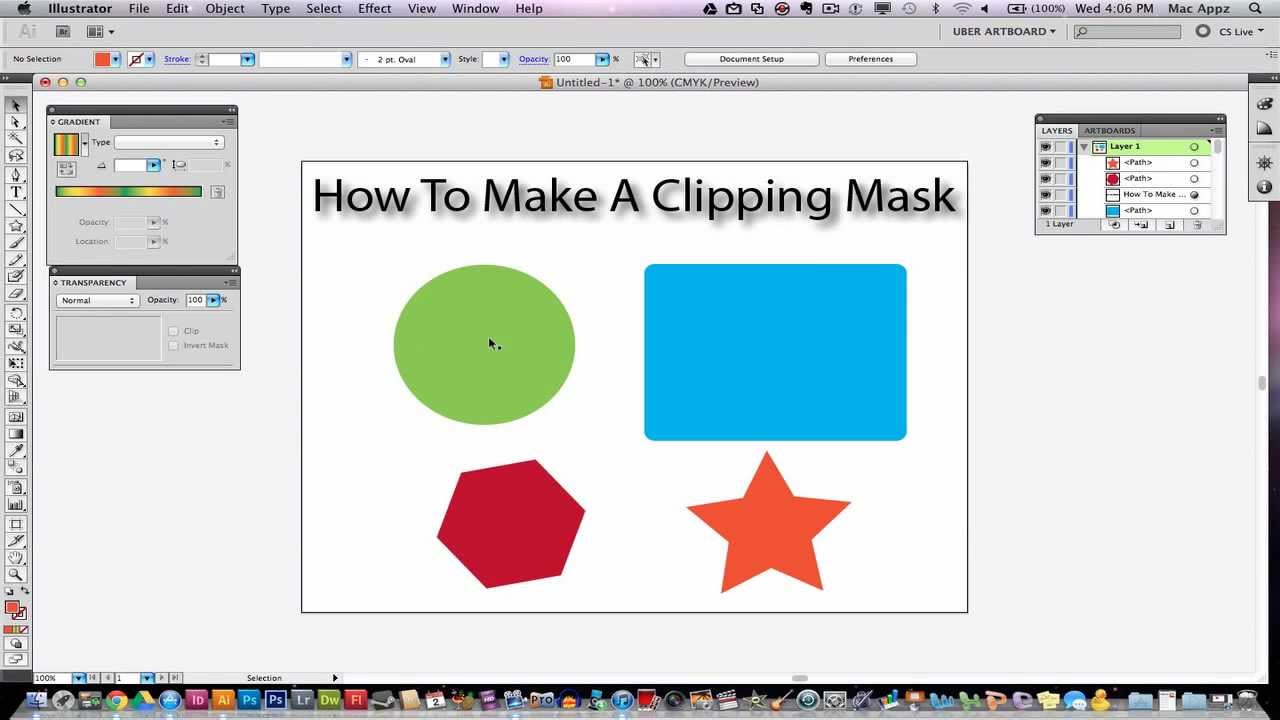
Step-by-Step Guide: Creating a Basic Clipping Mask
Clipping masks in Adobe Illustrator are a fantastic way to showcase only certain parts of your artwork, enabling you to create intricate designs and compelling visuals. Here\"s a straightforward guide to creating your first clipping mask:
- Prepare Your Objects: Start by selecting the artwork you want to mask. Ensure that the object you want to use as the mask (clipping path) is placed right above the artwork in the layer stack.
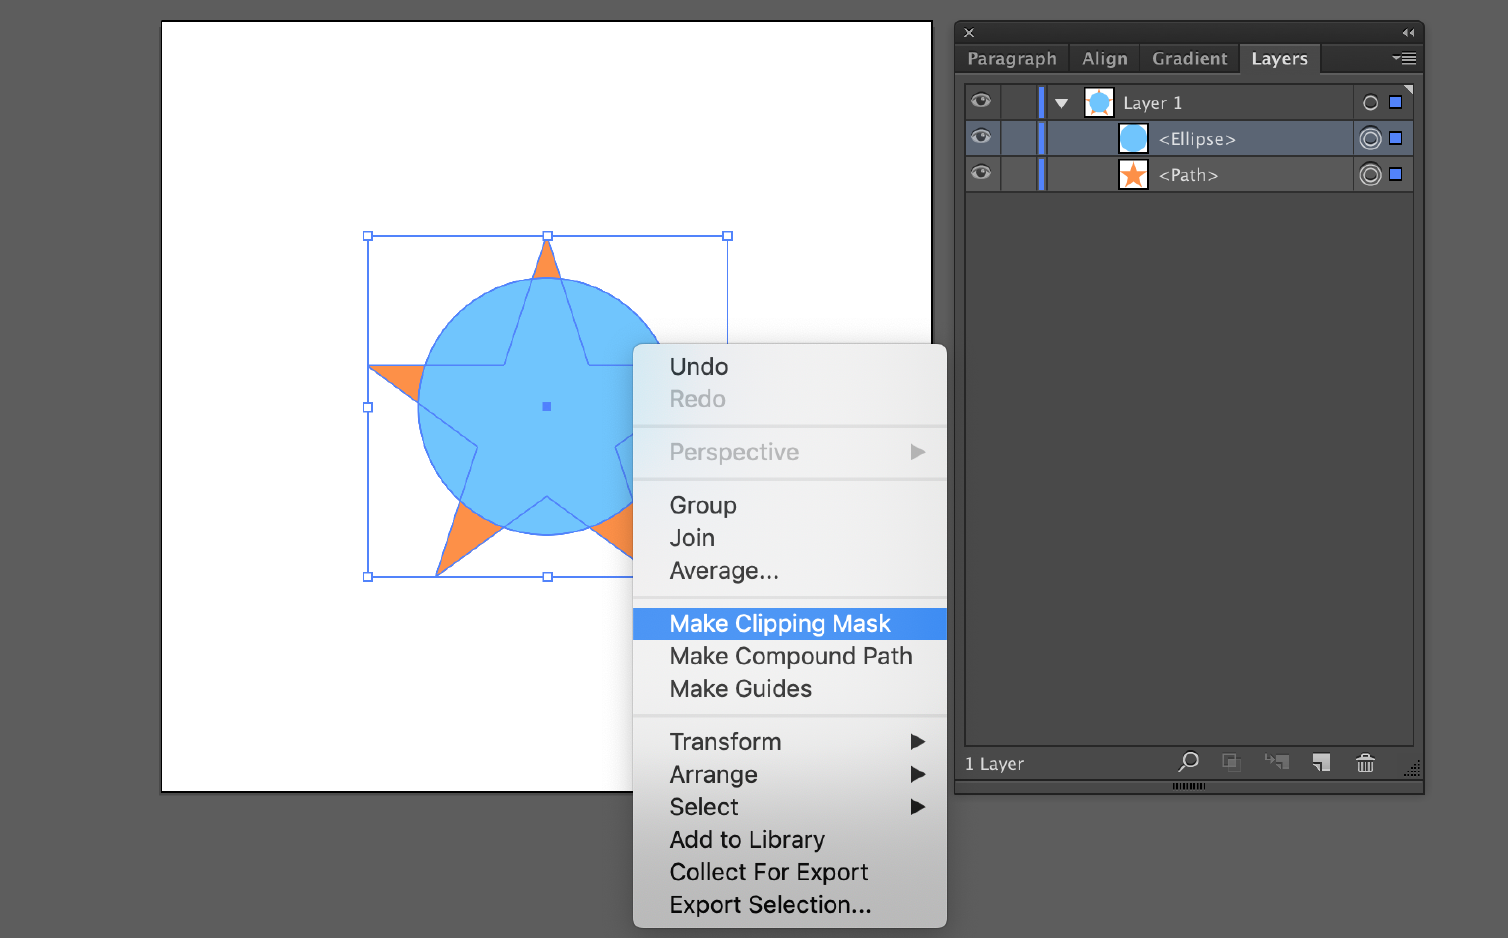
- Creating the Clipping Mask: With your objects in place, select both the clipping path and the artwork. Navigate to the “Object” menu, choose “Clipping Mask,” and then select “Make.” Alternatively, you can use the keyboard shortcut Command/Ctrl + 7.
- Adjusting the Mask: If your artwork doesn\"t look quite right, don\"t worry. Illustrator allows you to adjust the mask by editing the base object or the content within the mask. You can double-click the content object within the Layers panel to isolate and edit it.
- Adding Complexity: If you\"re feeling adventurous, try applying clipping masks to multiple objects for more complex designs or use text as your clipping path for creative typography effects.
- Releasing the Mask: Should you need to revert your artwork to its original state, simply select the masked object, go to the “Object” menu, choose “Clipping Mask,” and then select “Release.”
Clipping masks are non-destructive, meaning you can always edit or change your designs without losing any data. Dive in and explore the creative possibilities this feature offers!

Advanced Techniques: Working with Text and Patterns
Clipping masks in Adobe Illustrator offer creative ways to combine text and patterns, leading to unique and intricate designs. This guide will walk you through advanced techniques for using clipping masks with text and patterns.
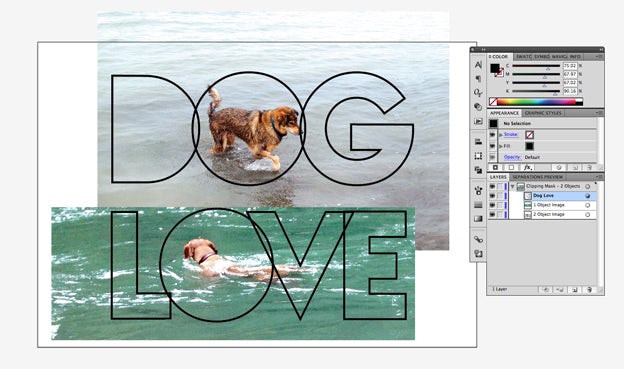
Using Text as a Clipping Mask
- Add Text: Begin by adding your desired text to the Illustrator canvas using the Text Tool (T).
- Place and Edit Image: Import an image (File > Place) that you wish to use as the pattern. Adjust its size and alignment as needed.
- Rearrange Layers: Ensure that the text layer is above the image layer in the Layers panel. Right-click on the image and select Arrange > Send to Back.
- Create Clipping Mask: Select both the text and the image, then go to Object > Clipping Mask > Make (Ctrl/Cmd+7). The image will now appear only within the text.
- Edit Clipping Mask: To edit, enter Isolation Mode by double-clicking the clipping mask. Here, you can modify the text and image independently.
Working with Patterns
Patterns can add depth and texture to your designs when used with clipping masks.
- Layer patterns with text to create visually appealing typographic designs.
- Use opacity masks along with clipping masks for creating transparent or semi-transparent effects.
- Try nested clipping masks for complex, multi-layered designs.
Advanced Clipping Mask Options
Explore these additional techniques to further enhance your designs:
- Use gradient-filled shapes as the base for your clipping masks to create dynamic backgrounds.
- Apply multiple clipping masks to a single object for intricate designs.
- Convert text to outlines and use it as a clipping path for more creative typography.
Remember, clipping masks in Illustrator are non-destructive, allowing you to edit and adjust your designs without permanently altering your original elements. Experiment with different combinations of text, patterns, and images to discover new and exciting design possibilities.
Creating Complex Designs: Multiple Objects and Layers
Creating complex designs in Adobe Illustrator using clipping masks involves layering multiple objects to create intricate and visually appealing compositions. Here’s how to achieve this:
- Select Your Objects: Start by selecting the objects you want to include in your design. This can be a combination of different shapes, text, or images.
- Arrange Layers: Position these objects in the Layers panel. Remember, the base object (the one defining the visible area) should be above the content objects.
- Create the Clipping Mask: With both base and content objects selected, go to Object > Clipping Mask > Make. Alternatively, use the shortcut Ctrl+7 (Command+7 on Mac).
- Adjust the Design: After creating the clipping mask, you can move, scale, or rotate the content objects within the mask to fine-tune your design.
- Edit the Mask and Content: To modify the clipping mask shape, select the base object and adjust as needed. To edit content, enter isolation mode by double-clicking the content object within the Layers panel.
- Advanced Techniques: Experiment with opacity masks for transparent effects or nested clipping masks for complex, layered designs. Using text as a clipping mask adds an interesting dimension to your composition.
- Troubleshooting: If you encounter issues like incomplete masking, ensure proper selection and alignment of the clipping path and objects.
- Releasing the Clipping Mask: To revert to the original objects, select the clipping mask, right-click, and choose “Release Clipping Mask”.
These steps will help you create complex designs with multiple layers and objects, allowing for endless creativity in your Illustrator projects.

_HOOK_
How to Make a Clipping Mask in Adobe Illustrator
Tutorial: In this step-by-step tutorial, you\'ll learn all the tricks and techniques to master the art of [keyword]. Whether you\'re a beginner or have some experience, this video will guide you through the process and help you achieve amazing results. Don\'t miss out on this opportunity to enhance your skills and become a pro!
Adobe Illustrator Beginner Tutorial - How To Use The Clipping Mask
Beginner: Are you a beginner looking to dip your toes into the world of [keyword]? Look no further! This video is specifically designed to cater to all the beginners out there, providing you with the most comprehensive and easy-to-follow instructions. Get ready to unlock your creativity and embark on a fantastic journey with this engaging video made just for you. Start your [keyword] adventure today!
FAQs: Common Questions about Clipping Masks Answered
Clipping masks in Adobe Illustrator are powerful tools for creative design, allowing for intricate compositions and unique visual effects. Below are some common questions and answers to help you better understand and utilize clipping masks.
- Q1: How do I release a clipping mask in Adobe Illustrator?
- A: To release a clipping mask, select the object with the mask, right-click, and choose “Release Clipping Mask” to revert your objects to their original state.
- Q2: Can I apply a gradient to a clipping mask?
- A: Directly applying a gradient to a clipping mask isn\"t possible, but you can use a gradient-filled shape as the base object for the clipping mask.
- Q3: Is it possible to create a clipping mask using text in Illustrator?
- A: Yes, you can use text as a clipping mask. Create your text, place the content object above it, and then create the clipping mask.
- Q4: What’s the difference between a clipping mask and a compound path in Illustrator?
- A: A clipping mask hides portions of objects inside a defined shape, whereas a compound path combines multiple objects into a single shape. Clipping masks are non-destructive, but compound paths alter the original objects.
- Q5: How do I add multiple shapes to a single clipping mask?
- A: To use multiple shapes as a single clipping mask, group the shapes first, and then create the clipping mask with the grouped objects as the content.
These FAQs provide insights into the versatile functionality of clipping masks in Adobe Illustrator, helping you to create visually stunning designs with ease and precision.
Troubleshooting: Solving Common Clipping Mask Issues
Working with clipping masks in Adobe Illustrator can sometimes present challenges. This section covers common issues and their solutions to help you troubleshoot effectively.
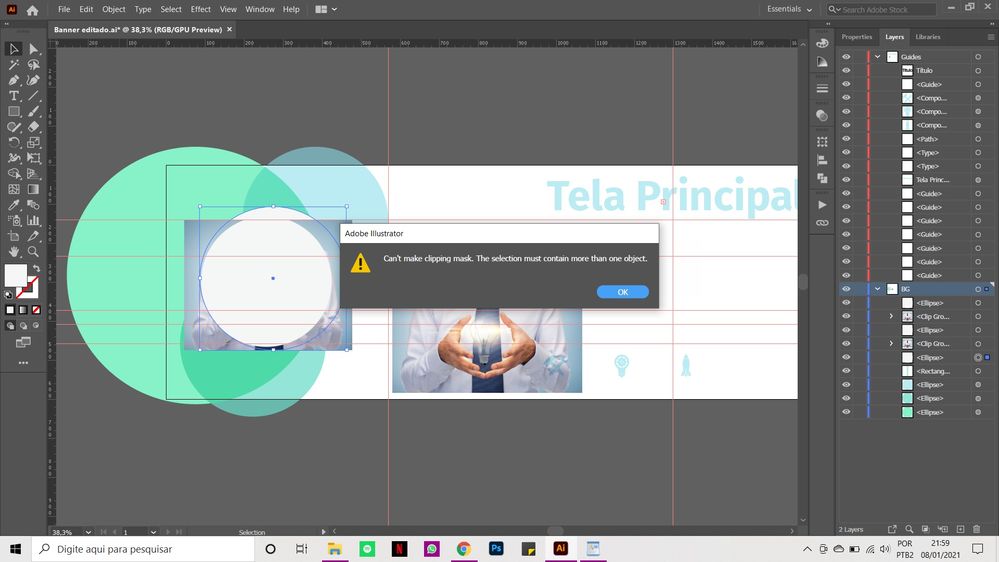
- Issue: Clipping Mask Not Working
- Solution: Ensure the object intended as the mask is above the objects to be masked in the Layers panel. For overlapping objects, use Pathfinder to unite them, then create a compound path before making the clipping mask.
- Issue: Problems with Text in Clipping Masks
- Solution: Confirm that the text is above the objects to be clipped in the Layers panel. If you have outlined the text, it might need to be ungrouped and converted into a compound path before creating the clipping mask.
- Issue: Open Path in Clipping Mask
- Solution: Ensure that the path used for the clipping mask is closed. To check, select the clipping path and view its details in Window > Document Info > Objects.
- Issue: Clipping Mask with Grouped Objects Not Working
- Solution: The top object (mask) should be a path, a compound shape, a text object, or a group of these. Remember that only vector objects can be used as clipping masks.
- Issue: Stuck in Isolation Mode
- Solution: If stuck in isolation mode while working with a clipping mask, exit by hitting the Escape key.
- Issue: Error Message \"Path used as a clipping mask must contain at least two connected anchor paths\"
- Solution: This indicates an issue with the path used as the mask. Make sure the path is correctly formed with the necessary anchor points.
Remember, practice and experimentation are key to mastering clipping masks in Adobe Illustrator.
Expanding Your Skills: Learning Resources and Community Tips

Step-by-Step Guide: Creating a Basic Clipping Mask
Advanced Techniques: Working with Text and Patterns
_HOOK_
Creating Complex Designs: Multiple Objects and Layers

FAQs: Common Questions about Clipping Masks Answered
Troubleshooting: Solving Common Clipping Mask Issues
READ MORE:
Expanding Your Skills: Learning Resources and Community Tips
Expanding your skills in Adobe Illustrator, especially in mastering clipping masks, involves exploring a variety of resources and engaging with the creative community. Here\"s a guide to help you elevate your design skills:
- Adobe\"s Official Tutorials: Start with Adobe’s own learning resources. They offer comprehensive guides and tutorials, ideal for both beginners and advanced users. Access hands-on tutorials directly in Illustrator for a seamless learning experience.
- Online Courses and Workshops: Websites like Linearity.io and Daisie.com offer detailed step-by-step guides and workshops. These can be especially helpful for learning advanced techniques like using patterns with clipping masks or applying masks to multiple objects.
- Community Forums: Engage with Illustrator communities on platforms like Adobe Community forums. Here, experienced users share insights, tips, and solutions to common problems, making it an invaluable resource for troubleshooting.
- YouTube Tutorials: YouTube is a treasure trove of tutorials covering all aspects of Illustrator. Video tutorials can provide visual and practical guidance, making complex topics more accessible.
- Books and eBooks: There are numerous books available that delve into the intricacies of Adobe Illustrator. These can serve as a valuable reference for understanding the fundamental concepts and techniques.
- Practice Projects: Practice makes perfect. Work on diverse projects to apply your skills. Experiment with different clipping mask scenarios, such as text effects, collage creations, and surreal illustrations.
- Online Design Communities: Platforms like Behance and Dribbble not only provide inspiration but also allow you to showcase your work and receive feedback from fellow designers.
By utilizing these resources and actively participating in community discussions, you can significantly enhance your proficiency in using clipping masks in Adobe Illustrator, thereby enriching your design repertoire.
Master the art of Adobe Illustrator’s clipping masks with our comprehensive guide. Explore creative possibilities, enhance your designs, and join a community of experts to elevate your digital artistry. Unleash your potential now!