Topic using adobe illustrator: Dive into the vibrant world of Adobe Illustrator, where creativity meets precision. Explore essential tips, advanced techniques, and industry secrets to transform your ideas into stunning vector masterpieces.
Table of Content
- What are some tutorials or guides for using Adobe Illustrator?
- Getting Started with Adobe Illustrator
- Understanding the Interface and Essential Tools
- Working with Objects, Paths, and the Pen Tool
- YOUTUBE: Adobe Illustrator for Beginners: Get Started in 10 Minutes
- Colors, Gradients, and Applying Special Effects
- Typography in Illustrator: Tips and Tricks
- Creating and Managing 3D Objects
- Incorporating Images and Graphics
- Using the Image Trace Tool for Raster-to-Vector Conversion
- Working with Brushes, Symbols, and Styles
- Exporting Your Artwork and Choosing the Right File Format
- Advanced Tips for Efficient Illustrator Workflows
- Automating Tasks and Troubleshooting Common Issues
What are some tutorials or guides for using Adobe Illustrator?
There are several tutorials and guides available for using Adobe Illustrator. Here are some resources you can check out:
- The Adobe Illustrator Help Center: This is the official documentation provided by Adobe. It covers a wide range of topics and features step-by-step tutorials, tips, and tricks. You can access it online or directly from the Adobe Illustrator application by clicking on \"Help\" in the menu.
- YouTube tutorials: YouTube is a great platform to find video tutorials on using Adobe Illustrator. Simply search for \"Adobe Illustrator tutorials\" or specific topics you want to learn, and you will find a variety of content created by different artists and instructors.
- Online courses: Websites like Udemy, Skillshare, and LinkedIn Learning offer comprehensive courses on Adobe Illustrator. These courses are often structured, providing detailed step-by-step instructions and exercises to practice.
- Adobe Illustrator user forums: Joining online communities and user forums dedicated to Adobe Illustrator can provide valuable insights. You can ask questions, share your work, and interact with experienced users who can guide you through specific tasks or challenges you might encounter.
Remember, practice and experimentation are key to mastering Adobe Illustrator. Don\'t hesitate to explore the software\'s features on your own and try different techniques to enhance your skills.
READ MORE:
Getting Started with Adobe Illustrator
Embark on your creative journey with Adobe Illustrator, a powerful tool for vector graphic design. This section guides you through the initial steps, ensuring a smooth start.
- Understanding the Interface: Familiarize yourself with Illustrator\"s workspace, tools, and panels to navigate efficiently.
- Creating Basic Shapes: Learn how to create and manipulate basic shapes, forming the foundation of your designs.
- Exploring Color and Gradients: Discover how to apply colors, create gradients, and experiment with swatches to bring your artwork to life.
- Mastering the Pen Tool: Gain proficiency with the Pen Tool, a versatile feature for creating complex paths and curves.
- Text and Typography: Dive into the world of typography, learning how to add, format, and style text within your designs.
- 3D Effects and Illustrations: Get an introduction to creating 3D texts and illustrations, adding depth and perspective to your artwork.
- Infographics and Data Visualization: Understand the process of creating informative and visually appealing infographics.
- Designing for Print and Web: Learn the best practices for preparing your designs for print or digital platforms, including format selection and export settings.
As you progress, remember that practice and experimentation are key to mastering Adobe Illustrator. Don\"t hesitate to explore new tools and features to enhance your creative capabilities.
Understanding the Interface and Essential Tools
Embark on your creative journey with Adobe Illustrator, a powerful tool for vector graphic design. This section guides you through the initial steps, ensuring a smooth start.
- Understanding the Interface: Familiarize yourself with Illustrator\"s workspace, tools, and panels to navigate efficiently.
- Creating Basic Shapes: Learn how to create and manipulate basic shapes, forming the foundation of your designs.
- Exploring Color and Gradients: Discover how to apply colors, create gradients, and experiment with swatches to bring your artwork to life.
- Mastering the Pen Tool: Gain proficiency with the Pen Tool, a versatile feature for creating complex paths and curves.
- Text and Typography: Dive into the world of typography, learning how to add, format, and style text within your designs.
- 3D Effects and Illustrations: Get an introduction to creating 3D texts and illustrations, adding depth and perspective to your artwork.
- Infographics and Data Visualization: Understand the process of creating informative and visually appealing infographics.
- Designing for Print and Web: Learn the best practices for preparing your designs for print or digital platforms, including format selection and export settings.
As you progress, remember that practice and experimentation are key to mastering Adobe Illustrator. Don\"t hesitate to explore new tools and features to enhance your creative capabilities.

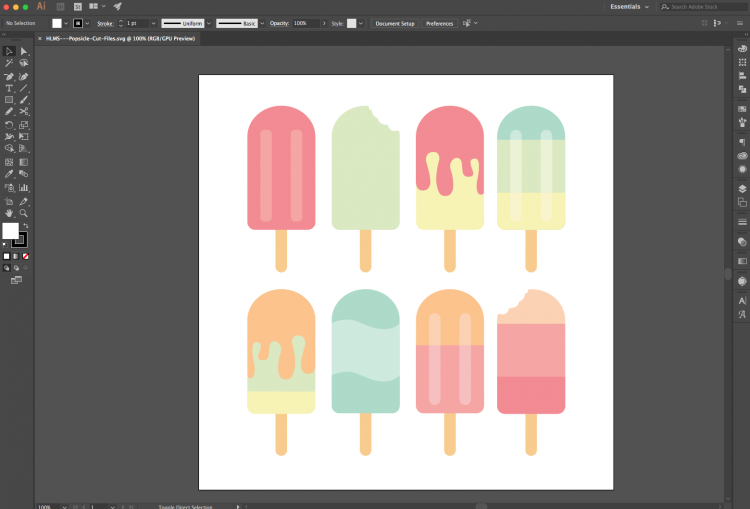
Working with Objects, Paths, and the Pen Tool
Adobe Illustrator is a powerful tool for creating and editing vector-based graphics. This section focuses on working with objects, paths, and the Pen tool, essential elements in Illustrator.
Understanding Objects and Paths
Objects in Illustrator are shapes or lines that can be manipulated to create complex designs. Paths, made up of points connected by lines, are the building blocks of these objects.
- Creating Basic Shapes: Learn how to create rectangles, circles, and other predefined shapes.
- Using the Pen Tool: Understand how to draw custom paths with the Pen tool, a versatile feature for creating precise shapes and curves.
- Editing Paths: Discover techniques for modifying existing paths, including adding, deleting, and adjusting anchor points.
Mastering the Pen Tool
The Pen tool is essential for drawing custom shapes and paths. It requires practice to master but offers unparalleled control and precision.
- Basic Pen Tool Techniques: Learn to click and drag to create straight and curved lines.
- Manipulating Anchor Points: Adjust anchor points and handles to refine the shape of your paths.
- Complex Path Creation: Develop skills for creating intricate and detailed vector shapes.
Combining and Manipulating Shapes
Illustrator offers powerful tools to combine and manipulate shapes to create complex illustrations.
- Using Pathfinder: Combine multiple shapes into one, create compound paths, or subtract one shape from another.
- Aligning and Distributing Objects: Learn how to precisely align and distribute objects within your design.
- Grouping and Layering: Organize your artwork by grouping related objects and using layers.
Practical Exercises
Practice your skills with these exercises:
- Create a custom logo using basic shapes and the Pen tool.
- Design an icon by combining and manipulating multiple paths.
- Experiment with creating complex curves and shapes using only the Pen tool.
By mastering these elements, you\"ll be well-equipped to create professional and intricate designs in Adobe Illustrator.
Adobe Illustrator for Beginners: Get Started in 10 Minutes
If you\'re an aspiring artist or a seasoned creative looking to enhance your digital illustration skills, this video is perfect for you! Join us as we delve into the world of Adobe Illustrator and uncover the tips and tricks that will elevate your designs to new heights.
Adobe Illustrator for Beginners: Free Course
Calling all beginners! If you\'ve always wanted to dip your toes into the world of graphic design but didn\'t know where to start, this video is your ultimate guide. We\'ll walk you through the basics of Adobe Illustrator, providing easy-to-follow steps and valuable insights to kickstart your creative journey.
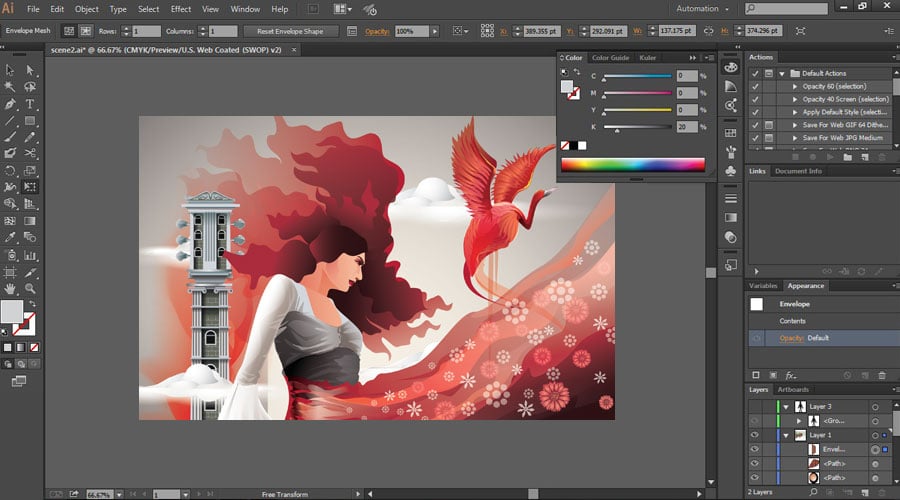
Colors, Gradients, and Applying Special Effects
Adobe Illustrator offers an extensive range of options for working with colors, gradients, and special effects to enhance your vector artwork. This section will guide you through these features.
Working with Colors
Understanding color theory and how to apply colors in Illustrator is crucial for creating visually appealing designs.
- Color Panels: Learn to use the Color panel to select and apply colors to your artwork.
- Swatches: Discover how to create, save, and apply swatches for consistent color usage.
- Color Harmonies: Explore how to use color harmonies to create a balanced and cohesive color scheme.
Creating and Applying Gradients
Gradients add depth and dimension to your illustrations. Illustrator provides tools for creating smooth color transitions.
- Gradient Types: Understand the different types of gradients - linear, radial, and freeform.
- Gradient Tool: Learn to use the Gradient tool for applying and modifying gradients on your objects.
- Gradient Mesh: Explore advanced techniques using the Gradient Mesh tool for detailed color blending.
Applying Special Effects
Illustrator\"s effects allow you to add depth, texture, and character to your designs.
- Effect Menu: Learn about various effects available in Illustrator such as drop shadows, blurs, and textures.
- Stylize: Discover how to stylize your artwork using effects like glows and feathering.
- Appearance Panel: Understand how to use the Appearance panel to apply multiple effects to a single object.
Practical Tips
Experiment with colors and effects to master these features:
- Create a logo with a gradient effect.
- Design an illustration using a complex gradient mesh.
- Apply special effects to text for a unique typographic design.
Mastering these elements will take your Illustrator projects to the next level, making them more dynamic and engaging.
:quality(75))
_HOOK_
Typography in Illustrator: Tips and Tricks
Adobe Illustrator offers robust typography tools that can transform your text into compelling visual elements. This section provides tips and tricks to leverage Illustrator\"s typography capabilities effectively.
Understanding Typography in Illustrator
Typography in Illustrator involves more than just choosing fonts; it\"s about creating harmony and conveying the right message through text.
- Font Selection: Learn how to choose fonts that complement your design and message.
- Character and Paragraph Styles: Discover how to use these styles for consistent and efficient text formatting.
- Text Effects: Explore creative text effects like warping text and using text as a container for images.
Working with Text Tools
Illustrator provides various tools to create and manipulate text in your designs.
- Type Tool: Master the Type Tool for basic text editing and layout.
- Path Type: Learn how to place text along a path for creative and dynamic layouts.
- Text on a Shape: Experiment with wrapping text around shapes for interesting design effects.
Advanced Typography Techniques
Take your typography skills to the next level with advanced techniques in Illustrator.
- Kerning and Tracking: Understand the nuances of adjusting the space between characters and words for readability and aesthetic appeal.
- Creating Outlines from Text: Convert text into editable vectors for more creative freedom.
- Using Glyphs: Access a wide range of characters and symbols to add visual interest to your text.
Practical Typography Projects
Apply your typography skills in practical projects to reinforce learning.
- Design a logo incorporating text and graphics.
- Create a typographic poster using different fonts and effects.
- Experiment with artistic text for a book cover design.
With these tips and techniques, you can elevate the role of text in your Illustrator designs, making them more engaging and effective.

Creating and Managing 3D Objects
Adobe Illustrator provides tools for creating and managing 3D objects, allowing designers to add depth and perspective to their artwork. This section explores how to effectively use 3D tools in Illustrator.
Introduction to 3D in Illustrator
Understanding the basics of 3D in Illustrator is key to creating realistic and visually appealing 3D artwork.
- 3D Effects: Learn about various 3D effects available in Illustrator such as Extrude & Bevel, Revolve, and Rotate.
- Lighting and Shading: Discover how to manipulate lighting and shading to enhance the 3D appearance of objects.
- Mapping Artwork: Understand how to map 2D artwork onto 3D objects for more complex designs.
Creating 3D Objects
Learn the steps to create basic 3D objects in Illustrator.
- Starting with Basic Shapes: Use basic shapes as a starting point for creating 3D objects.
- Applying 3D Effects: Transform these shapes into 3D objects using Illustrator’s 3D effects.
- Customizing the Appearance: Adjust depth, perspective, and rotation to achieve the desired 3D look.
Advanced 3D Techniques
Explore more advanced techniques for creating sophisticated 3D designs.
- Complex Shapes: Learn how to create complex 3D shapes by combining multiple objects and effects.
- 3D Text: Create eye-catching 3D text for logos, titles, and more.
- Rendering and Exporting: Understand how to render and export your 3D artwork for various uses.
Practical Applications
Put your 3D skills to the test with these practical applications:
- Design a 3D logo using text and geometric shapes.
- Create a mockup of a product package with realistic 3D effects.
- Experiment with abstract 3D art for a poster or digital artwork.
By mastering these 3D tools in Illustrator, you can add a new dimension to your design work, making it more dynamic and engaging.
Incorporating Images and Graphics
Adobe Illustrator is not just for creating vector art; it\"s also powerful for incorporating images and graphics into your designs. This section covers the best practices and techniques for effectively using images and graphics in Illustrator.
Importing and Placing Images
Learn how to bring external images into your Illustrator projects.
- File Formats: Understand which image formats are compatible with Illustrator.
- Placing Images: Learn the steps to import and place images into your Illustrator canvas.
- Linking vs Embedding: Know the difference between linking and embedding images and when to use each method.
Manipulating Images
Once your images are in Illustrator, discover how to manipulate them to fit your design needs.
- Resizing and Cropping: Adjust the size of your images and crop them within Illustrator.
- Image Trace: Convert raster images to vector with the Image Trace feature for further editing.
- Masking: Use clipping masks to hide parts of images or to fit them into shapes.
Working with Graphics
Integrate graphics like icons and shapes seamlessly into your designs.
- Creating Graphics: Learn to create simple vector shapes and icons within Illustrator.
- Combining Graphics and Text: Combine text and graphics for effective communication in designs.
- Layering: Effectively use layers to organize and manage different elements in your design.
Exporting Your Design
Finally, learn how to export your design with images and graphics for various uses.
- Export Formats: Choose the right format based on where your design will be used, like web, print, etc.
- Resolution and Quality: Ensure your images and graphics maintain their quality in the final output.
By mastering these techniques, you can enhance your Illustrator projects with images and graphics, creating more dynamic and engaging designs.

Using the Image Trace Tool for Raster-to-Vector Conversion
The Image Trace tool in Adobe Illustrator is a powerful feature that allows you to convert raster images (like JPEGs and PNGs) into editable vector graphics. This section will guide you through the process of using Image Trace to transform your images.
Understanding Image Trace
Before using Image Trace, it\"s important to understand what it does and how it can benefit your workflow.
- What is Image Trace: Learn about the Image Trace feature and how it converts raster images into vector paths.
- Benefits of Vector Graphics: Understand why converting to vector graphics can be beneficial for scaling and editing.
Preparing Your Image for Tracing
Preparation is key to getting the best results from Image Trace.
- Choosing the Right Image: Select images that are suitable for tracing, considering factors like resolution and complexity.
- Image Adjustments: Make any necessary adjustments to your image before tracing, such as contrast or brightness, to enhance the tracing result.
Using the Image Trace Tool
Step-by-step instructions on how to use the Image Trace tool effectively.
- Accessing Image Trace: Find out where to locate the Image Trace feature in Illustrator\"s interface.
- Tracing Presets: Explore different tracing presets and how to select the best one for your image.
- Adjusting Trace Settings: Learn how to adjust settings like Paths, Corners, and Noise to refine your trace.
- Converting to Paths: Understand how to convert the traced image into editable vector paths.
Finalizing and Editing Your Vector Image
Once your image is traced, it\"s time to finalize and make any edits.
- Expanding the Trace: Learn how to expand your trace into individual paths and shapes.
- Editing and Refining: Discover how to edit the resulting vector paths to perfect your image.
By mastering the Image Trace tool, you can efficiently convert raster images into versatile vector graphics, opening up new possibilities in your Illustrator projects.
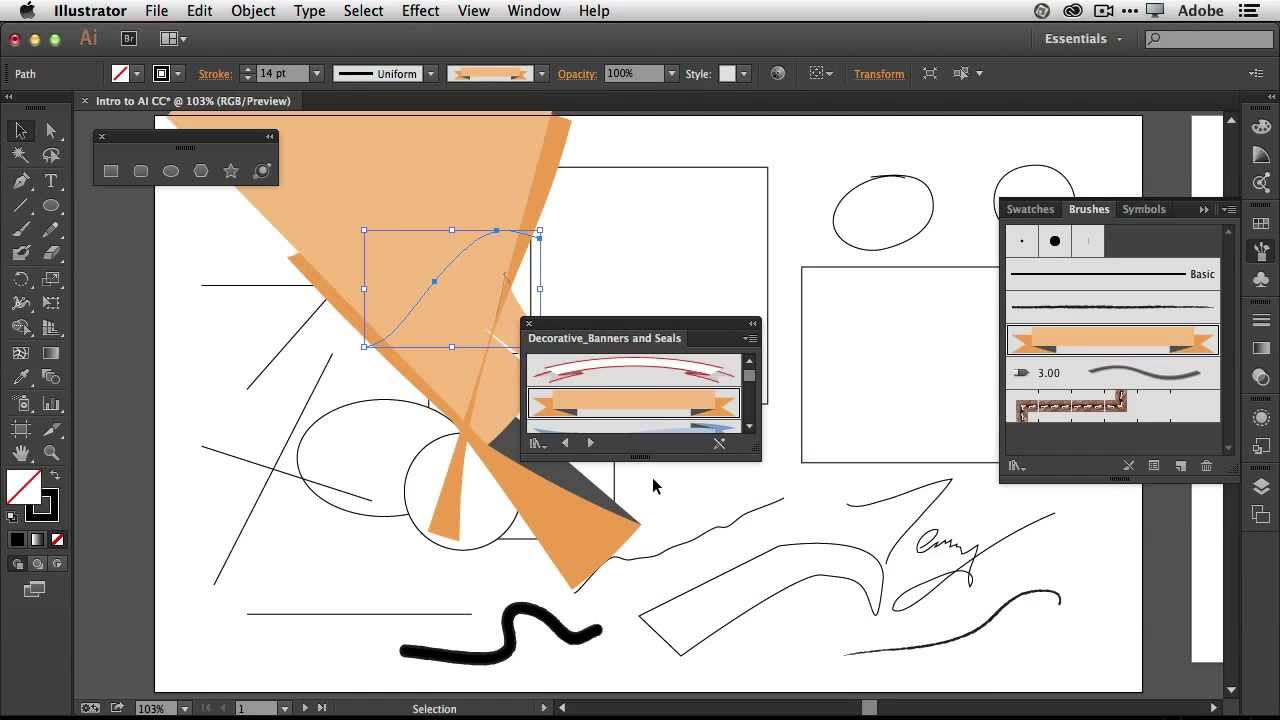
Working with Brushes, Symbols, and Styles
Adobe Illustrator provides a versatile set of tools for working with brushes, symbols, and styles. These tools are essential for creating detailed and efficient designs. This section will guide you through their effective use.
Utilizing Brushes
Brushes in Illustrator are powerful for creating strokes with various effects.
- Types of Brushes: Explore different types of brushes available, including Art, Pattern, and Bristle brushes.
- Creating Custom Brushes: Learn how to create your own brushes for unique effects in your artwork.
- Applying Brushes: Understand how to apply brushes to paths and shapes effectively.
Implementing Symbols
Symbols in Illustrator are reusable elements that save time and maintain consistency.
- Using Symbols: Discover how to use and edit symbols from the Symbols Library.
- Creating Symbols: Learn the steps to create your own symbols for repeated use in projects.
- Symbol Sprayer Tool: Utilize the Symbol Sprayer tool for creative and random placement of symbols.
Applying Styles
Styles are sets of attributes that you can quickly apply to your artwork.
- Graphic Styles: Learn how to save and apply graphic styles to streamline your workflow.
- Editing Styles: Find out how to modify existing styles to fit your design needs.
- Using Style Libraries: Explore Illustrator’s built-in style libraries for instant effects.
Mastering these tools in Illustrator will greatly enhance the efficiency and creativity of your design work.
_HOOK_
Exporting Your Artwork and Choosing the Right File Format
Choosing the correct file format is crucial when exporting your artwork from Adobe Illustrator. Each format serves different purposes and is suitable for various mediums. This section will guide you through the process of exporting your artwork and selecting the right file format.
Understanding File Formats
There are several file formats available in Illustrator, each with its specific use.
- Vector Formats (AI, SVG): Best for retaining the quality of vector graphics.
- Raster Formats (JPEG, PNG): Suitable for web graphics where detailed illustration is less critical.
- PDF: Versatile format, ideal for both print and digital mediums.
- EPS: Commonly used for high-resolution printing.
Steps to Export Artwork
Exporting artwork from Illustrator is a straightforward process.
- Choose \"File\" > \"Export\" and select \"Export As\" to choose your desired format.
- Set the options for the format, such as quality and resolution, especially for raster formats.
- Use \"Save for Web\" for optimized web graphics, where you can preview file sizes and adjust accordingly.
Tips for Exporting
- Consider the End Use: Choose a format based on where the artwork will be displayed - digital or print.
- Keep the Original File: Always keep a copy of the original AI file for future edits.
- Check for Quality Loss: After exporting, check your artwork to ensure no quality is lost in the process.
By understanding these formats and following these steps, you can effectively export your Illustrator artwork for any use.
Advanced Tips for Efficient Illustrator Workflows
Enhancing your workflow in Adobe Illustrator can significantly improve your productivity and creative output. This section delves into advanced tips and techniques to streamline your design process.
Customizing Workspaces
Personalizing your workspace can greatly improve efficiency.
- Create Custom Workspaces: Tailor your workspace by arranging panels and tools according to your workflow.
- Keyboard Shortcuts: Utilize and customize keyboard shortcuts to speed up common tasks.
- Tool Presets: Save your frequently used tool settings for easy access.
Effective Layer Management
Layers are crucial for managing complex designs.
- Organizing Layers: Keep your layers well-organized and named for easier navigation and editing.
- Using Layer Groups: Group related layers to reduce clutter and improve organization.
- Locking and Hiding Layers: Lock or hide layers to prevent accidental edits and streamline your view.
Using Symbols and Libraries
Symbols and libraries can save time when working with repetitive elements.
- Creating and Using Symbols: Create symbols for frequently used graphics to ensure consistency and save time.
- Libraries: Utilize Illustrator’s library feature to store and reuse assets across different projects.
Efficient Use of Effects and Styles
Apply effects and styles for quick and consistent design elements.
- Graphic Styles: Use graphic styles to apply consistent formatting to different objects quickly.
- Appearance Panel: Leverage the Appearance panel to apply multiple effects to a single object.
Automating Tasks
Automation can significantly speed up repetitive tasks.
- Actions: Create actions for tasks you perform frequently to save time.
- Scripts: Use Illustrator scripts to automate complex or custom tasks.
By implementing these advanced techniques, you can enhance your Illustrator workflow, leading to more efficient and creative design processes.
READ MORE:
Automating Tasks and Troubleshooting Common Issues
Adobe Illustrator offers several features to automate tasks and streamline your workflow. Additionally, knowing how to troubleshoot common issues can save time and frustration. This section covers both these aspects to enhance your Illustrator experience.
Automating Tasks in Illustrator
Automating repetitive tasks can significantly boost your productivity.
- Actions: Use Actions to record and replay a series of steps in Illustrator.
- Scripts: Learn how to use and create scripts for complex tasks that can\"t be achieved with Actions.
- Data-Driven Graphics: Utilize variables to automate the creation of graphics like charts and diagrams based on external data.
Troubleshooting Common Issues
Encountering issues in Illustrator is common, but many can be resolved with simple steps.
- Performance Issues: Learn how to optimize Illustrator’s performance, especially with large files.
- Crash Recovery: Understand Illustrator’s crash recovery features to restore lost work.
- Font and Printing Issues: Get tips on resolving common font errors and printing issues.
Advanced Tools and Features
Maximize your use of Illustrator\"s advanced tools for efficiency.
- Asset Export: Use the Asset Export panel for exporting multiple assets quickly and in different formats.
- CC Libraries: Learn how to use Creative Cloud Libraries for easy access to assets across different Adobe applications.
By mastering these automation techniques and troubleshooting common issues, you can ensure a smoother and more efficient workflow in Adobe Illustrator.
Embark on your creative journey with Adobe Illustrator, mastering powerful tools and techniques to bring your artistic vision to life. Stay ahead and make your mark in the design world, with this comprehensive guide as your essential companion.