Topic jpg to adobe illustrator: Discover the art of converting JPG to Adobe Illustrator, a journey that enhances your designs and transforms your creative workflow efficiently.
Table of Content
- How to convert a JPG file to Adobe Illustrator?
- Understanding JPG and AI Formats
- Methods to Convert JPG to AI
- Using Online JPG to AI Converters
- Converting with Adobe Illustrator
- Editing Vectorized AI Files
- Benefits of Converting JPG to AI
- YOUTUBE: Convert JPG Image to Vector in Illustrator 2020
- Common Issues and Solutions
- Tips for High-Quality Conversions
- Advanced Techniques and Tools
- Conclusion: Maximizing Efficiency in Conversion
How to convert a JPG file to Adobe Illustrator?
Converting a JPG file to Adobe Illustrator is straightforward and can be done using various methods. Here is one commonly used method using Adobe Illustrator itself:
- Open Adobe Illustrator on your computer.
- Go to the \"File\" menu and select \"Open\".
- In the file explorer window that appears, locate and select the JPG file you want to convert.
- Click the \"Open\" button.
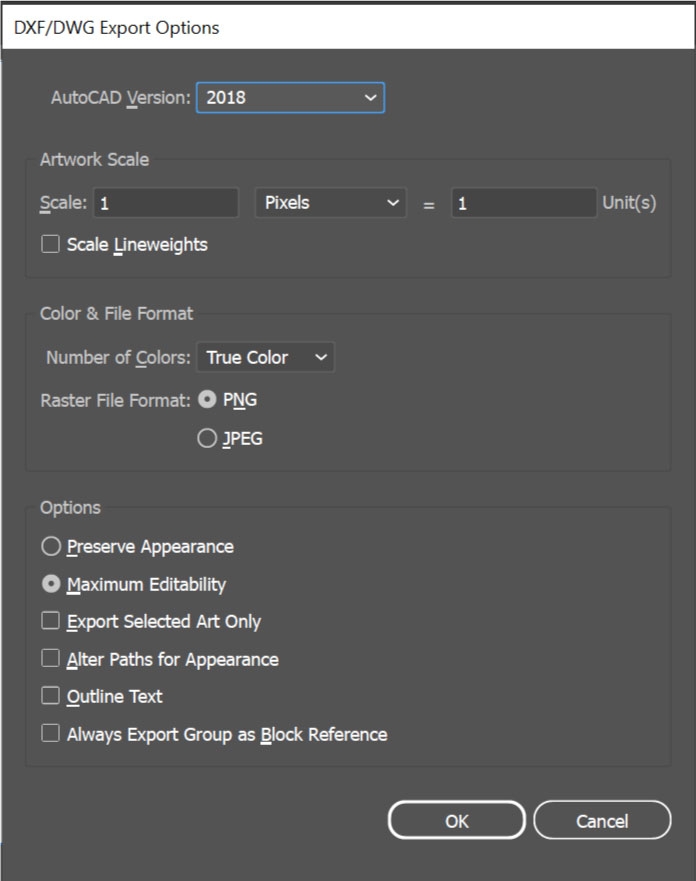
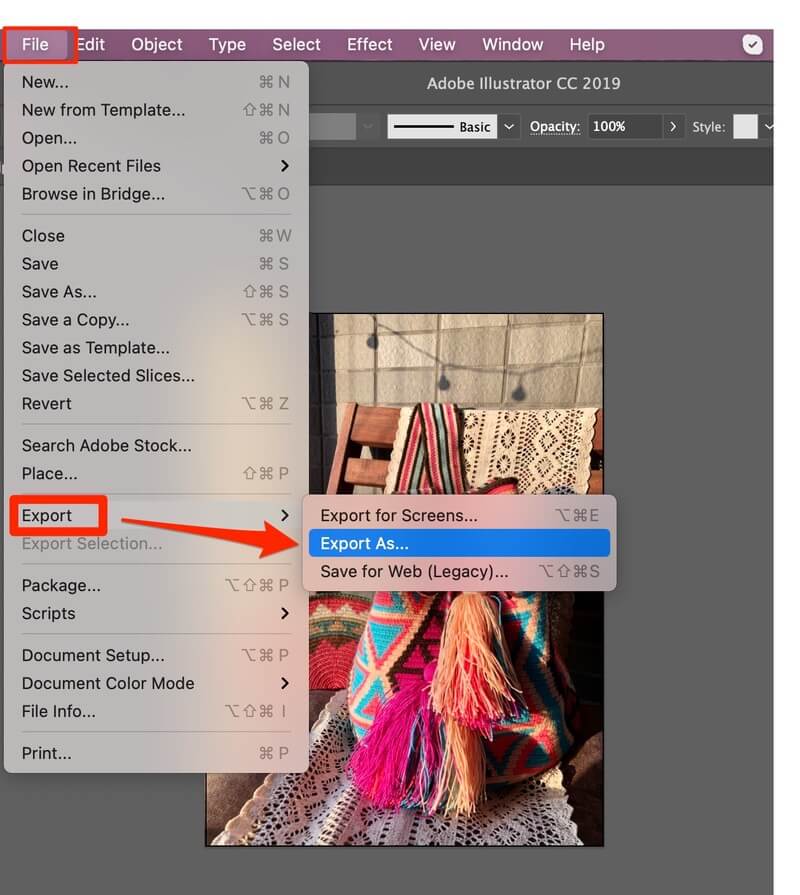
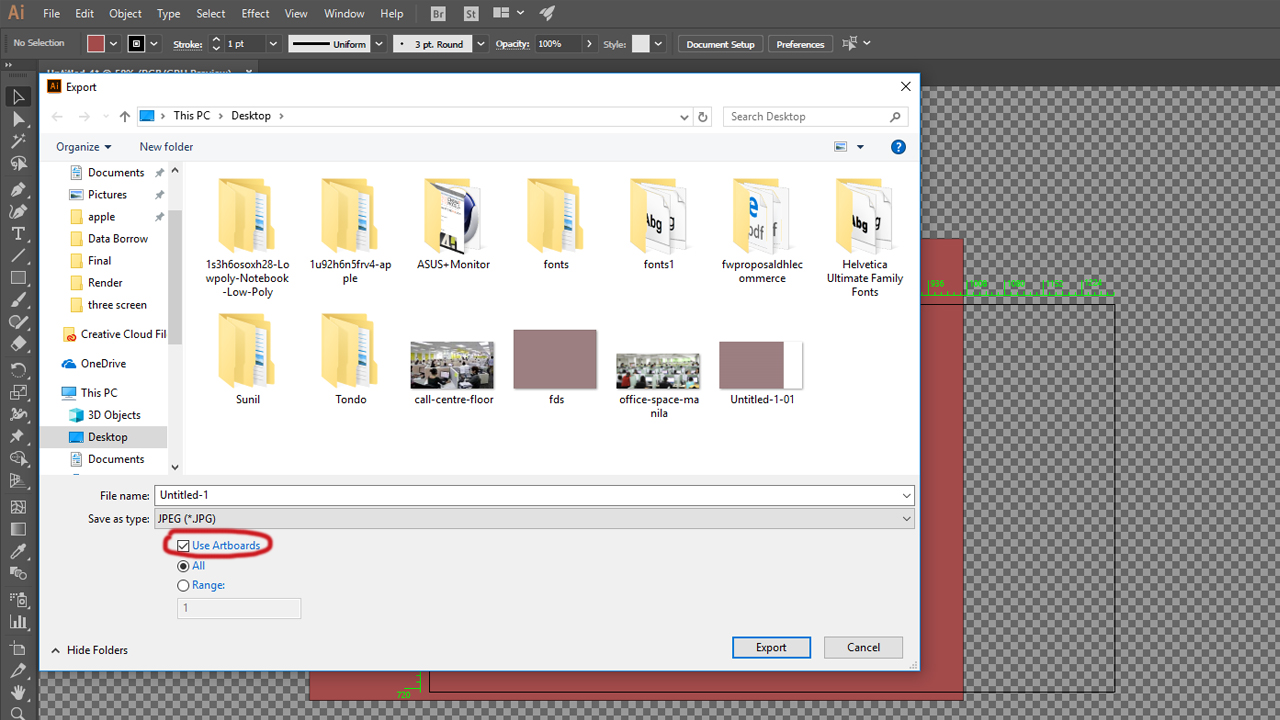
- Once the JPG file is opened in Adobe Illustrator, go to the \"File\" menu again and choose \"Save As\".
- In the \"Save As\" dialog box, choose a file format for the converted file. Adobe Illustrator supports various vector formats, such as AI, EPS, and PDF.
- Specify a destination folder and a name for the converted file.
- Click the \"Save\" button to start the conversion process.
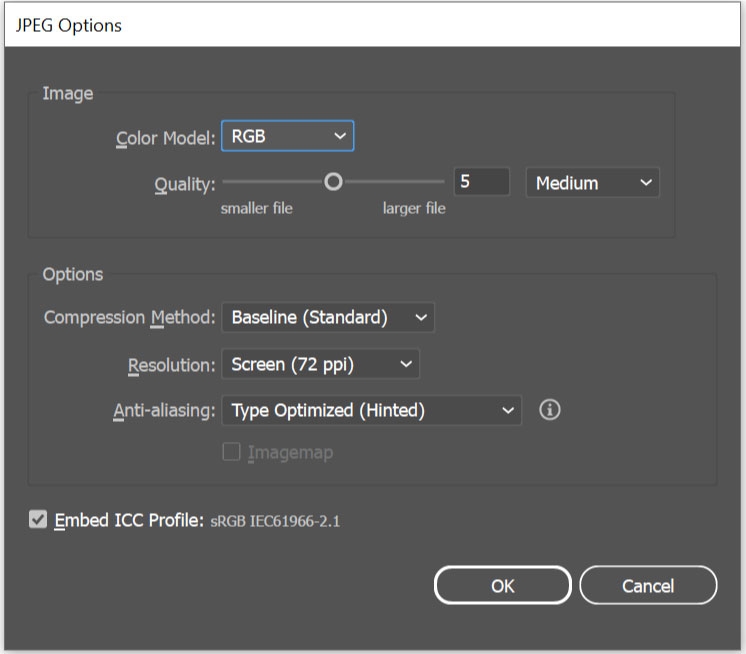
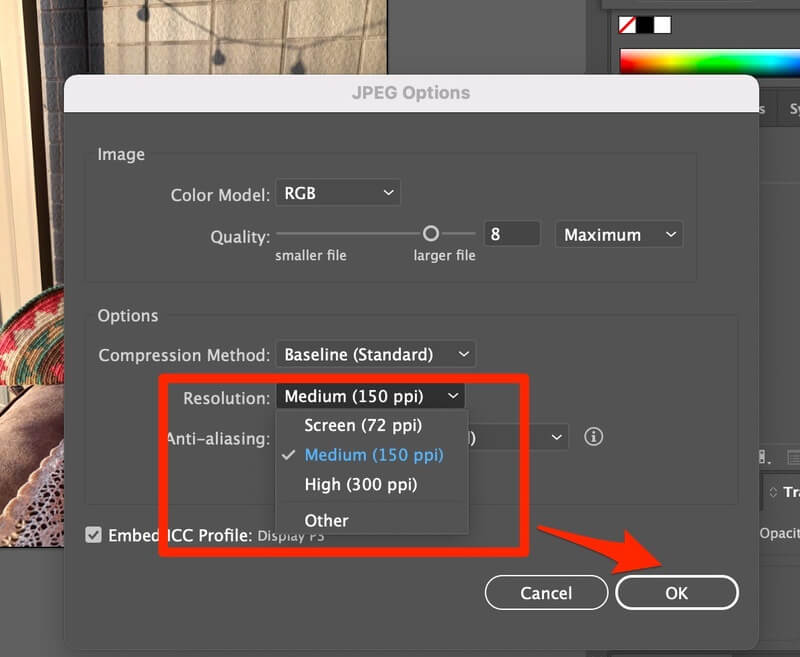
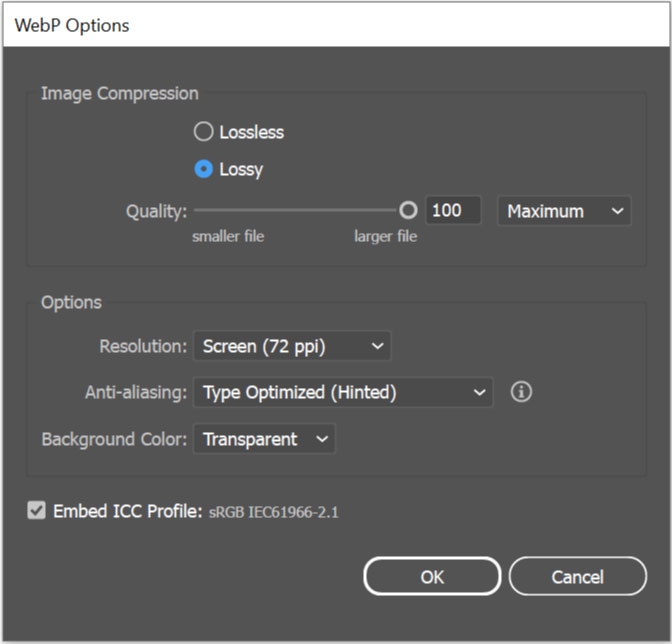
- A dialog box may appear, asking for further saving options. Adjust the settings if needed and click \"OK\".
- Wait for Adobe Illustrator to process the file and save it in the chosen format.
- Once the conversion is complete, you will have an Adobe Illustrator compatible file that you can open and edit in the software.
Remember to keep a backup of your original JPG file in case you need it later. Additionally, some online tools and third-party software also offer JPG to AI conversion options if you prefer alternative methods.
READ MORE:
Understanding JPG and AI Formats
JPG (Joint Photographic Experts Group) is a widely used compressed image format ideal for digital photography and web graphics. It uses lossy compression, reducing file size at the cost of some quality. Adobe Illustrator Artwork (AI), on the other hand, is a vector format used by Adobe Illustrator. Vector graphics are resolution-independent and can be scaled infinitely without loss of quality, making AI files perfect for logos, illustrations, and detailed designs.
- JPG is best for photographs and images with gradients.
- AI is ideal for line art, illustrations, and complex shapes.
- Converting JPG to AI involves vectorizing the image, turning pixels into scalable geometric shapes.
- Understanding these formats helps in choosing the right tool for conversion and ensuring the quality of your graphics.

Methods to Convert JPG to AI
Converting a JPG image to the Adobe Illustrator (AI) format involves several methods, each suited for different needs and skill levels. Below are the most common methods:
- Online Converters:
- Utilize online platforms like Convertio or AnyConv. Simply upload your JPG file, select AI as the output format, and download the converted file. This method is user-friendly and doesn\"t require software installation.
- Adobe Illustrator\"s Image Trace:
- Open your JPG file in Adobe Illustrator, and use the Image Trace feature to convert the image into a vector graphic. This method provides a high level of control over the conversion process and is ideal for detailed editing.
- Third-party Software:
- Programs like Aiseesoft or Media.io offer dedicated tools for converting images. These might offer more advanced features and settings compared to online converters.
- Manual Tracing:
- For utmost precision, manually trace your JPG in Adobe Illustrator using the Pen Tool. This is time-consuming but allows for maximum customization and detail.
Choose the method that best fits your project\"s needs, considering factors like the complexity of the image, desired control over the final product, and available resources.
Using Online JPG to AI Converters
Online JPG to AI converters offer a convenient and quick way to convert your images without the need for software installation. Here\"s how you can use these services:
- Select a Reliable Converter: Choose an online converter like Convertio, AnyConv, or ImageToStl, ensuring it supports JPG to AI conversion.
- Upload Your JPG File: Most converters allow you to upload files from your computer, cloud storage, or via a URL.
- Choose the Output Format: Select AI as the target format for the conversion.
- Begin the Conversion: Start the conversion process and wait for the tool to convert your JPG to an AI file.
- Download the AI File: Once converted, download the AI file to your device. Some services might offer additional features like editing or batch conversions.
Using online converters is best for quick, uncomplicated conversions, especially when software like Adobe Illustrator is not available.

Converting with Adobe Illustrator
Adobe Illustrator offers a powerful set of tools for converting JPG images into AI format, providing high-quality vector graphics. Here\"s how to perform the conversion:
- Open Adobe Illustrator:
- Launch the application and create a new document or open an existing one where you want to incorporate the converted image.
- Place Your JPG Image:
- Go to File > Place, and select the JPG image you wish to convert. This will place the image onto your canvas.
- Use the Image Trace Tool:
- With the image selected, navigate to Window > Image Trace. This will open the Image Trace panel, offering various presets and options for tracing.
- Adjust Trace Settings:
- Choose a preset that best fits your image type (e.g., High Fidelity Photo, Black and White Logo). You can fine-tune the conversion by adjusting the sliders for Paths, Corners, and Noise.
- Convert and Expand:
- After setting the trace options, click \"Trace\". Then, with the image still selected, go to Object > Expand. This will convert the trace into actual vector paths.
- Finalize and Save:
- Make any final adjustments to the paths using the Direct Selection Tool. Once satisfied, save your document as an AI file by going to File > Save As and choosing the AI format.
This method is ideal for achieving high-quality, editable vector graphics from your JPG images, leveraging the robust features of Adobe Illustrator.
_HOOK_
Editing Vectorized AI Files
Once a JPG image is converted into a vector AI format, editing can be a nuanced process, leveraging the powerful features of Adobe Illustrator. Here are steps and tips to effectively edit your vectorized AI files:
- Understand the Layers:
- AI files are structured in layers, making it easy to isolate different parts of your image for detailed editing. Familiarize yourself with the Layers panel to efficiently navigate through your artwork.
- Use the Direct Selection Tool:
- This tool allows you to select and manipulate individual points and paths. Use it to adjust the shape, size, and position of vector elements.
- Adjust Colors and Gradients:
- The Color and Gradient panels are your go-to tools for modifying the hues and transitions in your vector graphic. Experiment with different palettes to achieve the desired look.
- Add or Modify Text:
- Integrate text into your vector graphic by using the Type Tool. Fonts, sizes, and styles can be adjusted to complement your design.
- Apply Effects and Filters:
- Adobe Illustrator offers a variety of effects and filters. Explore options like drop shadows, blurs, or artistic filters to add depth and texture to your vectorized image.
- Save Your Edited File:
- Once you\"re satisfied with your edits, save your file. Remember to save a copy in the AI format to preserve the editability of the vector graphics for future adjustments.
Editing vectorized AI files is a creative and iterative process. Take your time to explore the vast array of tools and features offered by Adobe Illustrator to fully realize your artistic vision.
Benefits of Converting JPG to AI
Converting a JPG image to the Adobe Illustrator (AI) format comes with a multitude of benefits, significantly enhancing your design and editing capabilities:
- Scalability: AI files are vector-based, allowing for infinite scaling without loss of quality, perfect for resizing graphics for different mediums without pixelation.
- Editability: Vector graphics in AI format can be extensively edited, manipulated, and customized, providing greater creative freedom compared to the pixel-based JPG format.
- File Size: AI files can be more compact than high-resolution JPGs, making them easier to store and share, especially when dealing with complex graphics.
- Print Quality: AI graphics maintain their quality at any size, ideal for print materials like banners, posters, and brochures that require crisp, clear images.
- Layering and Transparency: AI format supports layering and transparency, allowing for intricate designs with multiple elements and effects, which is a limitation in the JPG format.
- Versatility: AI files are widely supported and can be easily converted to other formats, making them versatile for various applications and platforms.
These benefits make converting JPG images to AI an attractive option for professionals aiming to produce high-quality, versatile, and scalable graphics.
Convert JPG Image to Vector in Illustrator 2020
\"Discover the secret to increasing your website\'s conversion rate with our step-by-step guide! Watch our video tutorial and learn the proven strategies that will boost your online sales and bring in more satisfied customers.\"
Convert PNG or JPG to Vector - Adobe Illustrator Tutorial
\"Looking to master a new skill or enhance your existing knowledge? Our detailed tutorial video will guide you through each step, providing clear explanations and practical examples. Start learning today and become an expert in no time!\"
Common Issues and Solutions
Converting JPG images to Adobe Illustrator (AI) format can sometimes present challenges. Here are some common issues and their solutions:
- Issue: Image Quality Loss During Conversion
- Solution: Use high-quality JPG images and ensure the conversion settings in your chosen method maintain the integrity of the original image as much as possible.
- Issue: Inaccurate Color Representation
- Solution: Calibrate your monitor and ensure color profiles match across devices. Utilize Adobe Illustrator’s color management settings to adjust and correct colors post-conversion.
- Issue: Large File Size After Conversion
- Solution: Vector graphics can sometimes increase in file size. Optimize the AI file by removing unnecessary points, simplifying paths, and using layering efficiently.
- Issue: Difficulty in Editing Converted Paths
- Solution: Use Adobe Illustrator’s simplification tools to reduce the complexity of paths. Manually adjust anchor points and paths for precise editing.
- Issue: Conversion Software Not Working
- Solution: Ensure the software or online service is up-to-date. Try alternative methods or services if persistent problems occur.
Understanding and anticipating these issues will lead to a smoother conversion process and a higher quality final product.
Tips for High-Quality Conversions
Converting JPG images to AI format requires attention to detail to ensure the highest quality outcome. Here are some tips for achieving the best results:
- Start with High-Quality Images: The quality of the original JPG will significantly impact the final result. Ensure your JPG is of the highest quality possible before conversion.
- Choose the Right Conversion Tool: Select a conversion method or tool that suits your specific needs. Adobe Illustrator\"s Image Trace offers precision, while online converters are more convenient for quick tasks.
- Adjust Conversion Settings: Whether you\"re using an online tool or software like Adobe Illustrator, fine-tune the conversion settings. Adjust thresholds, paths, and other parameters to capture the details of your JPG accurately.
- Refine with Manual Editing: After conversion, use Adobe Illustrator to manually refine the vector graphic. Adjust paths, edit shapes, and clean up any artifacts to enhance the visual quality.
- Preserve Color Integrity: Ensure that the colors in your vectorized AI file match the original JPG. This may involve color correction or adjustments within your graphic editing software.
- Test Scalability: Vector graphics are scalable. Test your new AI file at different sizes to ensure it maintains quality and clarity.
Following these tips will help you achieve a high-quality AI file from your JPG image, ensuring clarity, accuracy, and scalability in your vector graphics.
Advanced Techniques and Tools
For those looking to push the boundaries of converting JPG to Adobe Illustrator, advanced techniques and tools can significantly enhance the precision and quality of the conversion. Here are some sophisticated strategies:
- Advanced Tracing with the Pen Tool:
- For intricate images, manually tracing with the Pen Tool in Adobe Illustrator offers unparalleled precision. This method allows for meticulous control over every curve and line.
- Optimizing with Image Trace:
- Use the Image Trace function in Illustrator with custom settings. Experiment with the threshold, paths, corners, and noise filters to fine-tune the conversion from raster to vector.
- Gradient Mesh Tool:
- The Gradient Mesh Tool can add depth and realism to vectorized images. It\"s particularly useful for creating complex, photorealistic gradients and subtle color shifts in your vector artwork.
- Utilizing Clipping Masks:
- After conversion, use Clipping Masks in Illustrator to hide unwanted parts of the vectorized image, allowing for cleaner and more focused artwork.
- Applying Filters and Effects:
- Adobe Illustrator offers a range of filters and effects that can be applied to vectorized images, enabling creative enhancements like distortions, textures, and stylized strokes.
Embracing these advanced techniques and tools can elevate your JPG to Adobe Illustrator conversions, providing professional-grade results that stand out.
_HOOK_
READ MORE:
Conclusion: Maximizing Efficiency in Conversion
Converting JPG images to Adobe Illustrator AI format is more than a mere technical process; it\"s an opportunity to enhance your artwork and optimize your workflow. To maximize efficiency and quality in your conversions:
- Choose the right method for your specific needs, whether it\"s a quick online conversion or a detailed manual vectorization in Adobe Illustrator.
- Invest time in learning the advanced features of your chosen tools. Mastery of these can significantly improve the quality and speed of your conversions.
- Focus on the details. Attention to aspects like color accuracy, vector paths, and file optimization can make a big difference in the final output.
- Stay updated with the latest software updates and conversion techniques to ensure you\"re using the best possible methods.
Incorporating these practices into your conversion process will ensure that your transition from JPG to AI is not just about changing file formats, but about elevating the quality and efficiency of your creative work.
Converting JPG images to Adobe Illustrator AI format is more than a mere technical process; it\"s an opportunity to enhance your artwork and optimize your workflow. To maximize efficiency and quality in your conversions:
Incorporating these practices into your conversion process will ensure that your transition from JPG to AI is not just about changing file formats, but about elevating the quality and efficiency of your creative work.