Topic adobe illustrator pen tool: Unlock the full potential of Adobe Illustrator with our guide to mastering the Pen Tool, the cornerstone for creating precise, scalable vector graphics and intricate designs with ease and efficiency.
Table of Content
- How to use the Adobe Illustrator Pen Tool?
- Understanding the Basics of the Pen Tool
- Creating Straight Lines and Simple Shapes
- Mastering Curved Paths and Complex Shapes
- YOUTUBE: Illustrator Tutorials - Pen Tool Beginner\'s Guide
- Editing Paths: Adding, Deleting, and Adjusting Anchor Points
- Using Shortcuts and Efficiency Tips
- Advanced Techniques: Compound Paths and Clipping Masks
- Common Mistakes and How to Avoid Them
- Practice Exercises to Enhance Skills
- Additional Resources and Tutorials
How to use the Adobe Illustrator Pen Tool?
The Adobe Illustrator Pen Tool is a powerful tool used for creating and editing vector paths in Adobe Illustrator. It allows you to draw precise and smooth curves and shapes. Here is a step-by-step guide on how to use the Pen Tool in Adobe Illustrator:
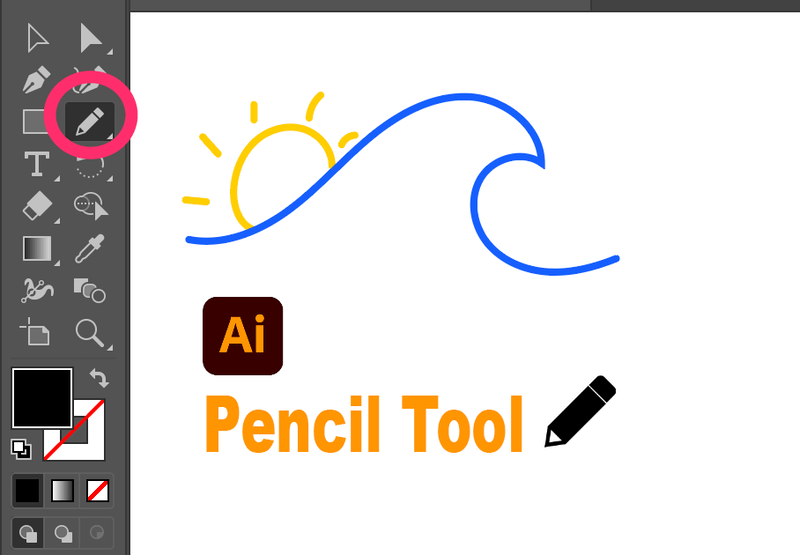
- Select the Pen Tool from the toolbar or press the \"P\" key on your keyboard to activate it.
- Click anywhere on the artboard to create the first anchor point.
- Click and drag to create a handle extending from the anchor point. This handle controls the direction and curvature of the path.
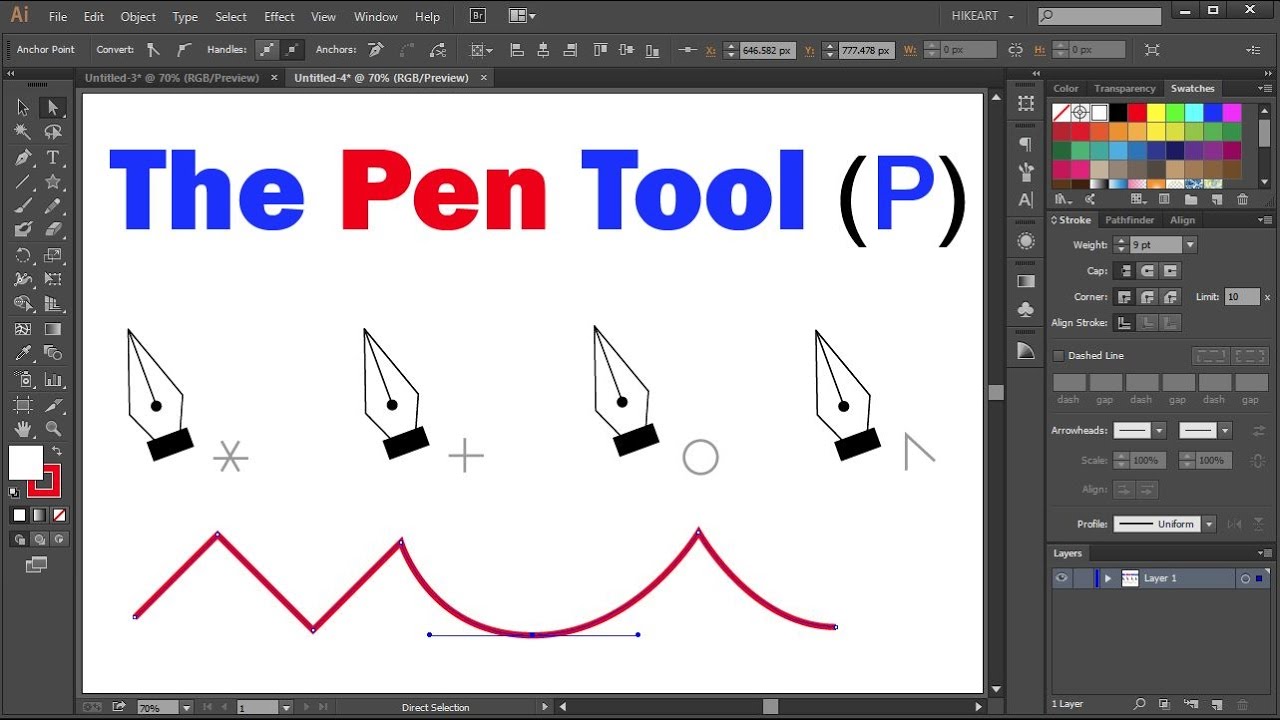
- Release the mouse button to set the handle position and create a straight line segment.
- To create a curve, click and drag to create a handle on the next anchor point. The length and angle of the handle determine the curvature of the curve.
- Release the mouse button to set the handle position and create a curved segment.
- To continue the path, click on the next location where you want to create an anchor point.
- Repeat steps 3 to 6 to create smooth curves and straight segments.
- To close the path and create a shape, click on the starting anchor point. The cursor will change to a small circle indicating closure.
- To edit an existing path, select the Direct Selection Tool (white arrow) from the toolbar and click on the anchor points or handles to adjust their position.
The Pen Tool allows you to create complex shapes and paths by combining straight lines and curves. Practice and experimentation are key to mastering this versatile tool in Adobe Illustrator.
READ MORE:
Understanding the Basics of the Pen Tool
The Pen Tool in Adobe Illustrator is a powerful feature designed for creating complex shapes and paths with precision. It\"s essential for vector artwork, allowing designers to craft everything from simple lines to intricate illustrations.
- Activation: Access the Pen Tool by selecting it from the toolbar or pressing the \"P\" key.
- Creating Anchor Points: Click anywhere on the canvas to create the start and end points of your path.
- Drawing Straight Lines: Click and release to create straight segments between anchor points.
- Drawing Curved Lines: Click, hold, and drag to create curves. Adjust the handles to modify the curve\"s shape and direction.
To master the Pen Tool, understanding anchor points and how they control the shape of paths and curves is crucial. Anchor points can be either corner points for sharp transitions or smooth points for graceful curves.
- Select the Pen Tool and click on your artboard to place the first anchor point.
- Move to another location, click again to create a second anchor point, and a straight path will form.
- To create a curve, click and drag. Direction lines appear, allowing you to adjust the curve\"s slope.
- Close the path by clicking on the initial anchor point, completing the shape.
Editing paths is straightforward with the Pen Tool. You can add or remove anchor points to adjust the shape, or use the Direct Selection Tool (A) to manipulate existing points for finer control over your design.
With practice, the Pen Tool becomes an indispensable part of the Illustrator toolkit, giving you the flexibility to create detailed, custom vector graphics and designs.

Creating Straight Lines and Simple Shapes
The Pen tool in Adobe Illustrator is a versatile tool that allows you to create precise straight lines and simple shapes with ease. Mastering the use of the Pen tool is essential for anyone looking to design graphics, logos, or any vector-based artwork. This guide will walk you through the steps to create straight lines and simple shapes using the Pen tool.
Creating Straight Lines
- Select the Pen tool from the toolbar or press the shortcut key P on your keyboard.
- Click once on the artboard to set the first anchor point. You will not see a line yet until you set the second point.
- Move your cursor to where you want the line to end and click again to set the second anchor point. A straight line will be created between the two points.
- To create a series of connected straight lines, continue clicking on the artboard. Each click will set a new anchor point connected by a straight line to the previous point.
- Press the Esc key to deselect the current path and start a new one.
Creating Simple Shapes
With the Pen tool, you can also create simple geometric shapes such as rectangles, triangles, and polygons.
- To create a simple shape, start by selecting the Pen tool.
- Click on the artboard to set the first anchor point.
- Move to the next corner of your shape and click to set another anchor point. Continue this process until you have outlined the entire shape.
- To close the shape, click on the first anchor point you made. You should see a small circle next to the pen cursor, indicating that clicking will close the shape.
Tips for Precision and Efficiency
- Shift Key: Hold down the Shift key while drawing to constrain your lines to 45°, 90°, or 180° angles, making it easier to create perfectly horizontal or vertical lines.
- Alt/Option Key: After clicking to set an anchor point, hold down the Alt (Windows) or Option (Mac) key and click again on the same point to convert it into a corner point, allowing for sharp transitions in your shapes.
- Direct Selection Tool: Use the Direct Selection tool (shortcut key A) to adjust the position of anchor points or to modify the curvature of lines after they have been drawn.
With practice, the Pen tool can become one of the most powerful tools in your Illustrator toolkit, allowing for the creation of complex artwork from the most basic lines and shapes.
Mastering Curved Paths and Complex Shapes
Creating curved paths and complex shapes with the Pen tool in Adobe Illustrator is a fundamental skill for graphic designers and illustrators. This section delves into the techniques and tips needed to master this versatile tool for generating dynamic and intricate vector artwork.
Creating Curved Paths
- Select the Pen tool or press P on your keyboard to activate it.
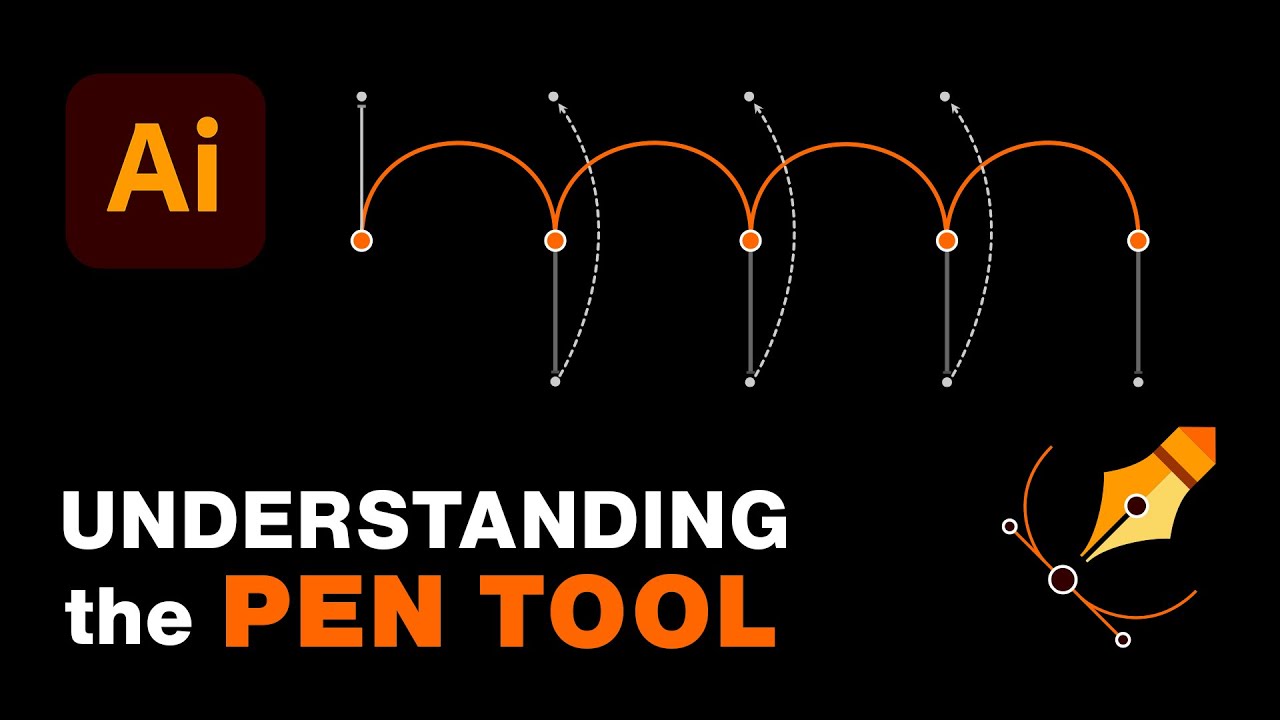
- Click on the artboard to set the first anchor point. Instead of releasing the mouse button, drag to create direction handles that will determine the curvature of the line.
- Move your cursor to where you want the curve to end, and click and drag again. The direction you drag in will shape the curve between the two anchor points.
- To create a smooth, continuous curve, keep adding points by clicking and dragging. Illustrator will automatically adjust the curve based on the direction and length of your drag.
- If you want to change the direction of the curve sharply, click on the last anchor point to remove its direction handles before continuing.
Building Complex Shapes
Complex shapes are built by combining multiple curves and lines, requiring careful planning and manipulation of anchor points and handles.
- Begin with a basic shape using the Pen tool, setting anchor points at key corners or curves.
- Use the Convert Point tool (found by holding down the Pen tool) to adjust anchor points from straight to curved, allowing for more intricate designs.
- Close complex shapes by clicking on the initial anchor point. If your shape ends with a curve, ensure you adjust the direction handles to maintain the flow of the curve.
Editing and Refining Paths
- Direct Selection Tool: Use the Direct Selection Tool (A) to adjust the position of anchor points and handles, refining the shape and curves.
- Adding Anchor Points: To add more detail or adjust the curve, use the Add Anchor Point tool (+) to insert new points without altering the existing path.
- Deleting Anchor Points: Simplify paths by removing unnecessary points with the Delete Anchor Point tool (-), which can help in creating smoother curves.
- Adjusting Curves: To modify a curve, drag the direction handles at anchor points. Holding the Shift key can help maintain handle alignment for smoother transitions.
Mastering curved paths and complex shapes with the Pen tool takes practice and patience. Experiment with different techniques and utilize Illustrator\"s versatile toolset to refine your designs. As you become more comfortable with these concepts, you\"ll be able to create intricate and detailed artwork that captures your creative vision.

Illustrator Tutorials - Pen Tool Beginner\'s Guide
Discover the secrets of creating stunning digital art with these captivating Illustrator tutorials. Unleash your creativity as you learn the tips and tricks of this powerful software, and watch your designs come to life!
How to Use the Pen Tool in Adobe Illustrator
Become a master of precision and control with this comprehensive Pen Tool guide. Watch as your sketches transform into flawless digital illustrations, as you harness the full potential of this versatile tool. Enhance your skills and unleash your artistic potential today!
Editing Paths: Adding, Deleting, and Adjusting Anchor Points
Editing paths by adding, deleting, and adjusting anchor points is crucial for fine-tuning your artwork in Adobe Illustrator. This capability allows designers to refine shapes and paths to match their vision precisely. Here\"s how to effectively manipulate anchor points to edit paths within your vector illustrations.
Adding Anchor Points
- Select the Add Anchor Point Tool from the toolbar or simply use the Pen tool and hover over the path where you wish to add a point. The cursor will change to indicate that you can add an anchor point.
- Click on the path where you need more precision or wish to alter the shape. A new anchor point will be added without affecting the shape of the path.
- Use the Direct Selection tool (A) to adjust the new anchor point\"s position or handle directions for curve adjustments.
Deleting Anchor Points
- To remove an anchor point, select the Delete Anchor Point Tool or use the Pen tool and hover over the anchor point you wish to remove. The cursor will display a minus sign (-).
- Click on the anchor point to remove it. Illustrator will automatically adjust the path to maintain its shape as much as possible.
- After deletion, you may need to adjust neighboring points to refine the path\"s shape further.
Adjusting Anchor Points
- Use the Direct Selection Tool (A) to select an anchor point you wish to adjust. Click and drag the point to a new position.
- To modify the curve, drag the direction handles that appear when an anchor point is selected. Moving these handles changes the curvature between points.
- For more precise control over the curve, hold down the Alt (Windows) or Option (Mac) key while dragging a direction handle to move it independently of its counterpart.
Tips for Efficient Path Editing
- Toggle between tools: Quickly switch between the Pen tool and Direct Selection tool by holding the Ctrl (Windows) or Command (Mac) key. This allows for efficient editing without constantly moving to the toolbar.
- Use keyboard shortcuts: Learn the keyboard shortcuts for adding (+), deleting (-), and converting (Shift+C) anchor points to speed up your workflow.
- Adjust handle length and angle for smoother curves: For smoother transitions between curved and straight segments, pay attention to the length and angle of direction handles.
By mastering the addition, deletion, and adjustment of anchor points, you can significantly enhance the precision and quality of your vector illustrations in Adobe Illustrator.
_HOOK_
Using Shortcuts and Efficiency Tips
Maximizing efficiency while using the Pen tool in Adobe Illustrator can significantly streamline your design process, allowing for quicker edits and less time spent on tedious tasks. Here are some essential shortcuts and tips that can help enhance your workflow and make using the Pen tool a more intuitive experience.
Key Pen Tool Shortcuts
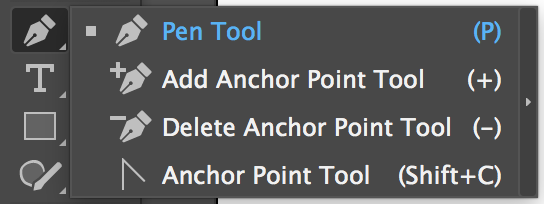
- P: Activate the Pen tool.
- + (Plus Sign): Add anchor points.
- - (Minus Sign): Delete anchor points.
- Shift+C: Convert anchor points from corner to smooth or vice versa.
- Alt (Windows) / Option (Mac): Temporarily access the Convert Point tool when the Pen tool is selected to adjust handles independently.
- Ctrl (Windows) / Command (Mac): Temporarily switch to the Selection tool to move items or select anchor points.
Efficiency Tips for Using the Pen Tool
- Constrain angles: Hold down the Shift key while drawing lines or creating anchor points to constrain angles to 45° increments. This is particularly useful for drawing straight lines or perfect diagonals.
- Close paths efficiently: When completing a shape, hover over the initial anchor point until you see a small circle next to the Pen tool cursor, indicating that clicking will close the path.
- Direct Selection tool: Use the Direct Selection tool (A) to quickly adjust the position of anchor points and handles after they have been placed, without needing to switch back to the Pen tool.
- Use the spacebar: While dragging to create a new anchor point or handle, hold the spacebar to reposition the point before finalizing its placement. This allows for precise adjustments without needing to move the point after it\"s been created.
Additional Tips
- Layer management: Use layers to separate different elements of your design. This makes it easier to select and edit specific parts without affecting others.
- Save frequently used shapes: If you find yourself creating certain shapes or paths often, save them as symbols or use the “Copy” and “Paste in Front/Back” commands to duplicate and reuse them efficiently.
- Customize your workspace: Tailor your Illustrator workspace to suit your needs. Arrange panels and toolbars in a way that optimizes your workflow and keeps essential tools accessible.
By incorporating these shortcuts and efficiency tips into your routine, you can significantly reduce the time and effort required to create and edit paths with the Pen tool in Adobe Illustrator, allowing you to focus more on the creative aspects of your designs.
Advanced Techniques: Compound Paths and Clipping Masks
Once you have mastered the basics of the Pen tool in Adobe Illustrator, you can elevate your designs by incorporating compound paths and clipping masks. These advanced techniques offer greater control over complex vector shapes and allow for more sophisticated compositions. Understanding how to effectively use these tools can significantly enhance the quality and intricacy of your artwork.
Creating Compound Paths
- Select two or more shapes that you want to combine into a single compound path. You can create these shapes using the Pen tool or any other shape tool.
- With the shapes selected, go to the Object menu, choose Compound Path, and then select Make. You can also use the shortcut Ctrl+8 (Windows) or Cmd+8 (Mac).
- The selected shapes will now act as a single object. This is particularly useful for creating complex shapes with overlapping areas or for cutting out parts of a shape using another shape.
Utilizing Clipping Masks
- Create the shape that you want to use as the mask. This shape will define the visible area of the artwork beneath it.
- Place the masking shape above the artwork you want to clip. The artwork can be a single object, a group, or multiple objects.
- Select both the masking shape and the artwork beneath it. Then, go to the Object menu, choose Clipping Mask, and select Make or use the shortcut Ctrl+7 (Windows) or Cmd+7 (Mac).
- The artwork will now only be visible within the boundaries of the masking shape. You can double-click on the clipping group to edit the contents or the mask itself.
Tips for Working with Compound Paths and Clipping Masks
- Keep your layers organized: When working with complex designs, keeping your artwork organized in layers can help manage compound paths and clipping masks more efficiently.
- Edit paths individually: Even after creating a compound path, you can still edit individual paths within it using the Direct Selection tool (A).
- Release to modify: You can release a compound path or clipping mask at any time to revert to the original, separate objects for further editing. Go to Object > Compound Path > Release or Object > Clipping Mask > Release.
- Use shapes strategically: For clipping masks, use simple shapes for the mask for easier editing and adjustments later on.
Mastering compound paths and clipping masks can significantly expand your creative possibilities in Adobe Illustrator, allowing for more dynamic and complex vector illustrations.
Common Mistakes and How to Avoid Them
When working with the Pen tool in Adobe Illustrator, certain common mistakes can hinder the efficiency and quality of your designs. Recognizing and avoiding these pitfalls can significantly improve your workflow and the final outcome of your artwork. Here are some frequently encountered errors and tips on how to sidestep them.
Overusing Anchor Points
- Mistake: Adding too many anchor points to a path, making it difficult to edit and resulting in a jagged appearance.
- Solution: Use the minimum number of anchor points necessary for the desired shape. Remember, less is often more for smoother paths and easier adjustments.
Ignoring Keyboard Shortcuts
- Mistake: Not utilizing keyboard shortcuts, which slows down the design process significantly.
- Solution: Familiarize yourself with Pen tool shortcuts such as P for activating the Pen tool, + to add anchor points, and - to delete them. These shortcuts can greatly speed up your workflow.
Improper Use of Handles
- Mistake: Dragging control handles too far or in the wrong direction, leading to incorrect curves.
- Solution: When creating curves, gently drag the handles and adjust their direction and length for the desired curvature. Use the Alt (Windows) / Option (Mac) key to adjust handles independently for more control.
Not Adjusting Anchor Points
- Mistake: Failing to adjust anchor points after placing them, resulting in less precise shapes.
- Solution: After laying down anchor points, use the Direct Selection tool (A) to fine-tune their position and the curve handles to achieve the exact shape you need.
Forgetting to Save Frequently
- Mistake: Not saving work frequently, risking significant loss of progress in case of software or hardware failure.
- Solution: Develop a habit of saving your work regularly. Utilize Illustrator’s auto-save feature to help mitigate the risk of data loss.
Ignoring Pathfinder Panel
- Mistake: Overlooking the Pathfinder panel for combining shapes in more complex designs.
- Solution: Use the Pathfinder panel to easily combine, subtract, intersect, or exclude overlapping shapes, streamlining the process of creating complex vector graphics.
By being mindful of these common mistakes and applying the suggested solutions, you can enhance your proficiency with the Pen tool in Adobe Illustrator, leading to more polished and professional designs.
Practice Exercises to Enhance Skills
Improving your skills with the Pen tool in Adobe Illustrator requires practice and experimentation. Here are some targeted exercises designed to help you become more proficient and confident in creating various types of paths and shapes. These exercises will challenge you to use the Pen tool in different ways, enhancing your overall ability to create with Adobe Illustrator.
Basic Lines and Shapes
- Lines to Shapes: Start by drawing straight lines of various lengths and angles. Practice using the Shift key to constrain your lines to 45° and 90° angles. Then, progress to creating basic geometric shapes like triangles, rectangles, and pentagons, focusing on making clean, closed paths.
- Curve Practice: Draw a series of curves, starting with simple arcs. Practice creating S-curves and spirals by adding anchor points and adjusting the direction handles. Aim for smooth transitions between curves.
Tracing Artwork
- Trace a Photograph: Place a photograph in your Illustrator document and lock the layer. Use the Pen tool on a new layer to trace the major outlines of the photo. Focus on capturing the essence of the shapes with as few points as possible.
- Logo Recreation: Choose a simple logo and try to recreate it using only the Pen tool. This exercise will help you understand how to decompose complex shapes into simpler parts.
Creating Complex Shapes
- Compound Shapes: Create a design that involves overlapping shapes. Use the Pathfinder tool to unite, subtract, intersect, or exclude these shapes, focusing on the use of the Pen tool to make adjustments and refine the shapes.
- Clipping Masks: Design an artwork that incorporates a clipping mask. Use the Pen tool to create the mask shape, and then apply it to an underlying pattern or image. This will help you practice managing layers and complex compositions.
Typography and Custom Paths
- Custom Typography: Use the Pen tool to create a custom letter or word. Focus on the flow and balance of the lines and curves, experimenting with different weights and styles.
- Path Along a Shape: Draw a complex shape and then use the Pen tool to create a path that follows its contours. Try to mimic the shape\"s curvature and angles, enhancing your control and precision with the tool.
These exercises are designed to build your skills progressively, from mastering basic lines and shapes to tackling more complex design challenges. Regular practice and exploration of the Pen tool’s capabilities will enable you to create intricate and polished vector artwork in Adobe Illustrator.

READ MORE:
Additional Resources and Tutorials
Enhancing your skills with the Adobe Illustrator Pen tool can be an exciting journey, filled with endless creative possibilities. To further aid in your learning and development, here are some recommended resources and tutorials that cover various aspects of using the Pen tool effectively. These resources range from beginner-friendly introductions to advanced techniques, ensuring there\"s something valuable for users of all skill levels.
- Adobe\"s Official Tutorials: Adobe offers a comprehensive set of tutorials on their official website, specifically designed for Illustrator users. These tutorials cover everything from the basics of the Pen tool to more advanced vector illustration techniques.
- YouTube Channels: YouTube is a treasure trove of instructional content, with numerous channels dedicated to Illustrator tutorials. Look for channels that offer step-by-step guides on using the Pen tool, with real-world project examples.
- Online Learning Platforms: Websites like Udemy, Skillshare, and LinkedIn Learning provide in-depth courses on Adobe Illustrator. These platforms offer structured learning paths ranging from beginner to advanced levels, including specific courses focused on mastering the Pen tool.
- Design Blogs and Forums: Many design blogs and forums feature tutorials, tips, and tricks for Illustrator users. These can be great places to find inspiration, learn new techniques, and connect with other designers who can share their experiences and advice.
- Practice Files and Projects: Look for websites that offer downloadable Illustrator project files. Practicing with these files can help you understand how professional designers utilize the Pen tool and other Illustrator features in their work.
Remember, the key to mastering the Pen tool in Adobe Illustrator is practice and persistence. Supplementing your practice with these resources can provide new insights and techniques, helping you become more proficient and creative in your vector illustration projects.
Unlock the full potential of your creative endeavors with the Adobe Illustrator Pen tool, a gateway to mastering vector art. Dive into our comprehensive guide to elevate your designs, streamline your workflow, and bring your artistic visions to life.
_HOOK_