Topic adobe illustrator fill tool: Embark on a creative journey with the Adobe Illustrator Fill Tool, your gateway to vibrant visuals and intricate designs, tailored for artists and designers alike.
Table of Content
- How to apply a fill color in Adobe Illustrator using the fill tool?
- Fundamentals of the Fill Tool
- Accessing Fill & Stroke Options
- Color Selection & Application
- Working with the Live Paint Bucket Tool
- Advanced Techniques: Pathfinder Panel & Artwork Expansion
- Gradient and Pattern Fills
- YOUTUBE: Adobe Illustrator: How to Fill Color with the Paint Bucket Tool
- Keyboard Shortcuts for Efficiency
- Customizing the Illustrator Workspace for Filling Tasks
- Utilizing Layers and Artboards for Organized Coloring
- Creating and Managing Documents for Filling Operations
How to apply a fill color in Adobe Illustrator using the fill tool?
To apply a fill color in Adobe Illustrator using the fill tool, follow these steps:
- Select the object you want to apply the fill color to using either the Selection tool (black arrow) or the Direct Selection tool (white arrow).
- In the Tools panel, locate the Fill box.
- Click on the Fill box.
- This will open the Color panel, where you can choose the desired fill color.
- From the Color panel, you can select a color swatch or use the sliders to create a custom color.
- Once you\'ve chosen the desired fill color, it will be applied to the selected object.
READ MORE:
Fundamentals of the Fill Tool
The Adobe Illustrator Fill Tool is an essential feature for graphic artists, providing a versatile means to apply color and texture to your artwork. Grasping its fundamentals is key to elevating your designs.
- Accessing the Fill Tool: Easily found in the Tools panel, the Fill Tool icon resembles a solid square, representing the color inside a shape or path.
- Activating Fill: Select your object, then click the Fill icon or use the shortcut ‘X’ to bring the Fill options to the forefront, enabling color application.
- Color Selection: Choose from a spectrum of colors or input specific RGB or CMYK values in the Color Panel to get the exact shade you desire.
- Applying Gradients and Patterns: Beyond solid colors, explore gradients and pattern fills to add depth and texture to your artwork.
- Removing Fill: To remove a fill, locate the white square with a red line through it beneath the Fill tool, ensuring flexibility in your design process.
Mastering these fundamentals will set the foundation for you to further explore the creative possibilities that the Adobe Illustrator Fill Tool offers.
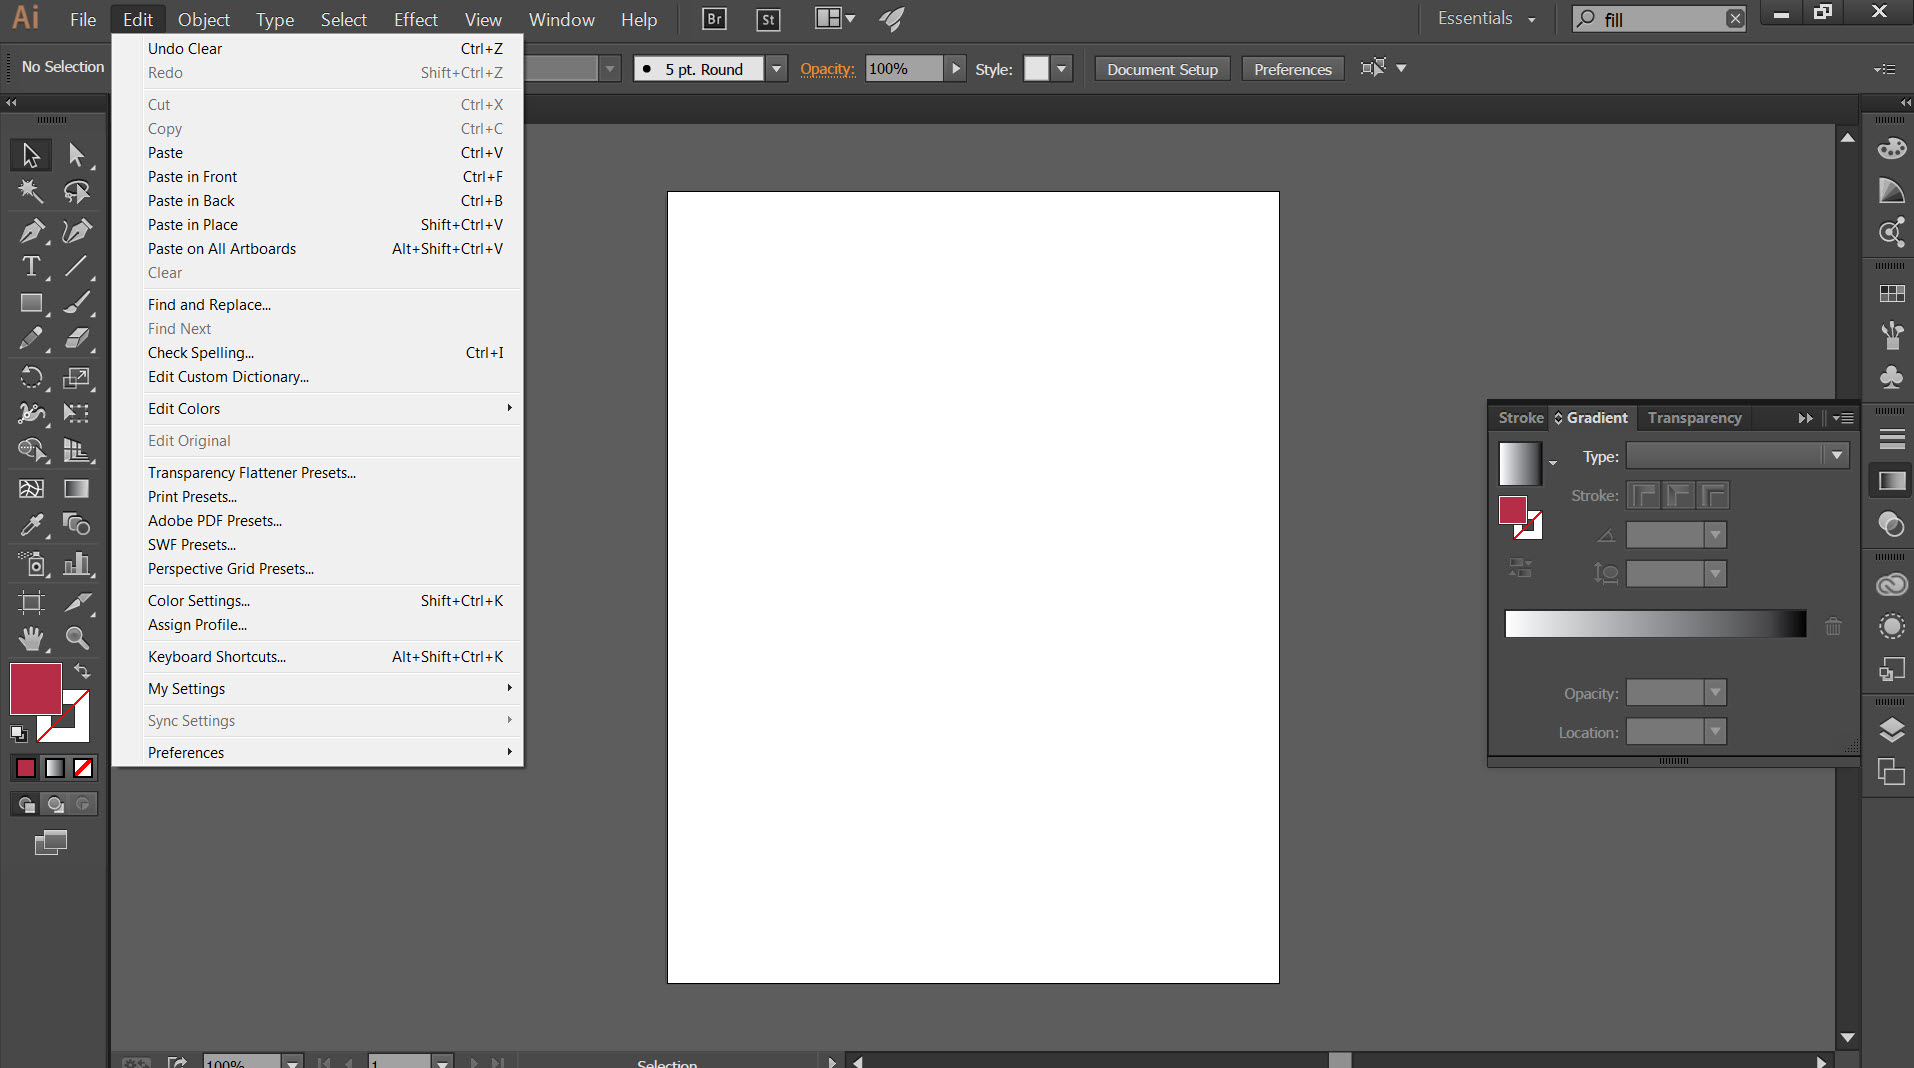
Accessing Fill & Stroke Options
Understanding how to navigate and utilize the Fill and Stroke options in Adobe Illustrator is crucial for effectively applying colors and styles to your artwork. This section guides you through the process of accessing and using these fundamental features.
- Selecting Objects: Use the Selection Tool (shortcut \"V\") or the Direct Selection Tool (shortcut \"A\") to choose the object you want to modify.
- Accessing Fill Options: Click on the Fill box in the Tools panel to activate the Fill options. You can also use the shortcut \"X\" to toggle between Fill and Stroke functions.
- Choosing Colors: After activating the Fill option, select your desired color from the Color Panel. You can also use the Swatches Panel for preset colors or the Gradient Panel for gradient fills.
- Adjusting Stroke: Similar to the Fill options, click the Stroke box to modify the outline of your shape. Adjust stroke width, style, and color to enhance your design.
- Advanced Options: For more detailed adjustments, explore the Stroke Panel (\"Window > Stroke\") to access options like cap type, corner type, and dash settings.
By familiarizing yourself with these steps, you can effectively apply and manipulate fills and strokes, adding depth and character to your Illustrator projects.

Color Selection & Application
Selecting and applying color with precision is an art in itself within Adobe Illustrator. This section elucidates the nuanced process of choosing the right hues and applying them to your designs effectively.
- Opening the Color Panel: Start by selecting your object and then click on the Fill box. This action will open the Color Panel, offering a spectrum of color choices.
- Choosing Colors: Pick a color directly from the panel or enter specific RGB, CMYK, or Hex values for precision. This ensures consistency, especially for brand-specific palettes.
- Using Swatches: For ease and efficiency, utilize the Swatches Panel. Save your frequently used or brand-specific colors here for quick access.
- Applying Gradients: For a more dynamic fill, select the Gradient tool. You can customize the gradient by adjusting color stops, angle, and type (linear or radial).
- Experimenting with Patterns: Don’t limit yourself to solid colors and gradients. Explore pattern fills for textured and complex designs. You can create your own or use preset patterns.
- Live Paint Feature: For complex illustrations with overlapping paths, the Live Paint feature allows for easy color application, transforming your artwork into a fillable object.
With these steps, you\"ll be able to harness the full potential of Illustrator\"s color capabilities, bringing vibrancy and depth to your creative projects.
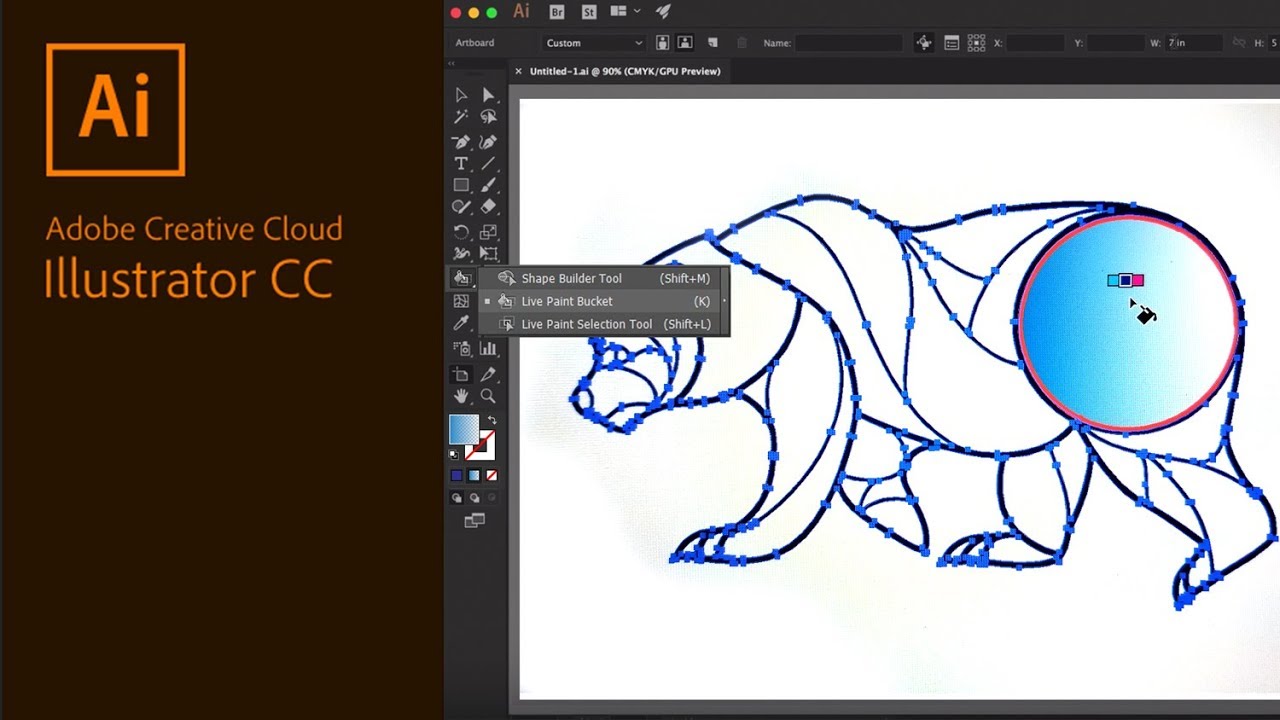
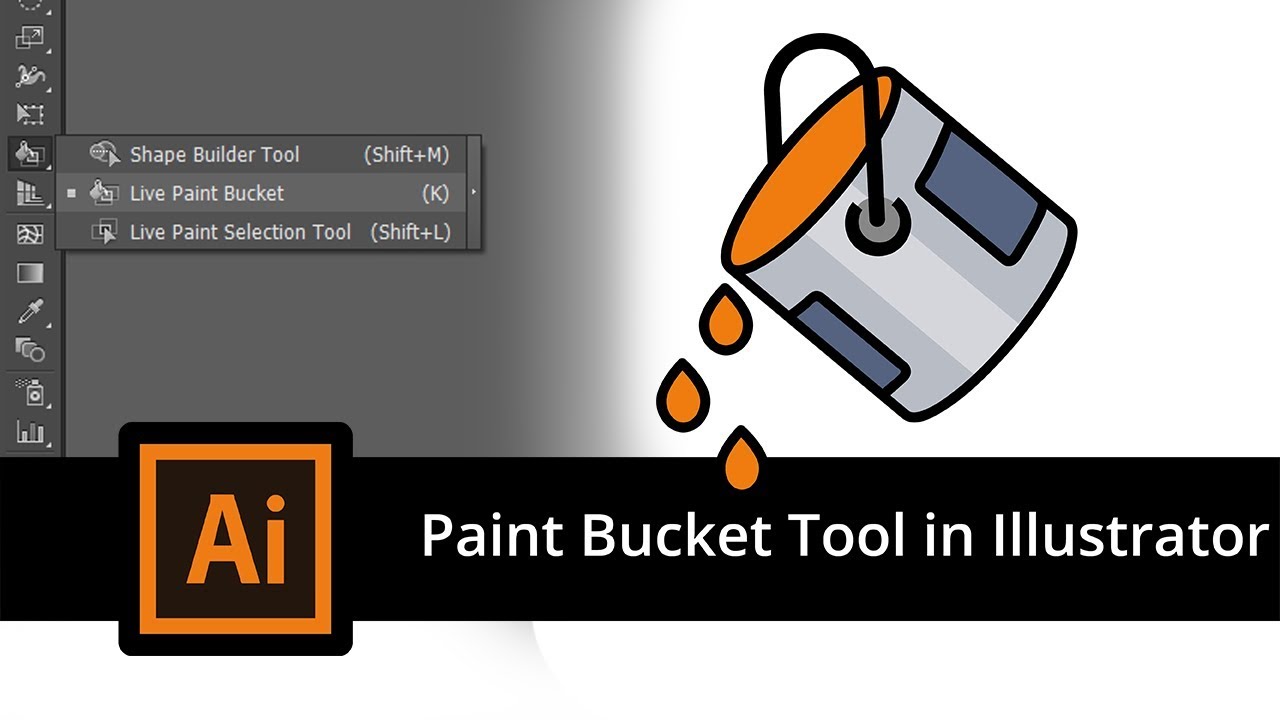
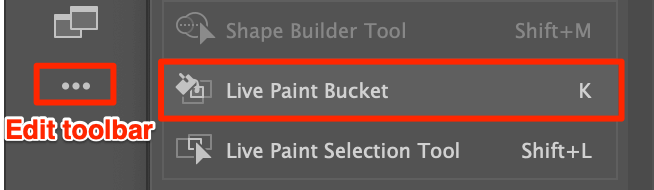
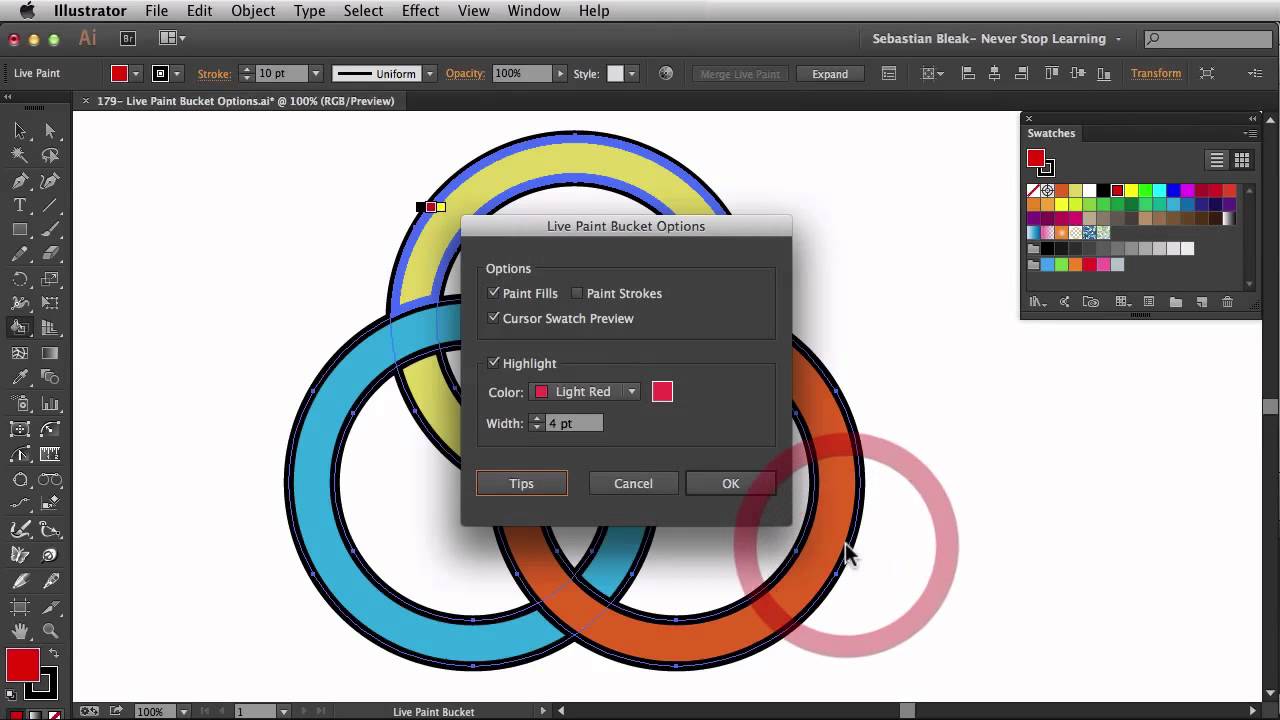
Working with the Live Paint Bucket Tool
The Live Paint Bucket Tool in Adobe Illustrator transforms your vector artwork, making the coloring process intuitive and efficient. This section delves into the tool\"s functionality and guides you through the process of using it effectively.
- Setting Up Your Workspace: Before beginning, ensure that the Swatches, Control, and Layers Panels are open. These panels provide essential functions such as color selection and object management.
- Creating a Live Paint Group: Select the paths or shapes you want to color using the Selection Tool. Convert these into a Live Paint Group by navigating to Object > Live Paint > Make.
- Selecting and Applying Colors: With the Live Paint Bucket Tool activated (shortcut \"K\"), hover over your artwork and click to fill shapes with the chosen color. Colors can be selected from the Swatches Panel or the Color Panel, providing a wide range of options.
- Managing Gaps in Artwork: Should you encounter gaps that prevent proper coloring, the Gap Options Dialog (Object > Live Paint > Gap Options) offers tools to detect and manage these gaps, ensuring a smooth coloring experience.
- Advanced Coloring Techniques: For detailed coloring, the Live Paint Selection Tool allows for editing individual paths within a Live Paint Group, providing flexibility in coloring and stroke attribute adjustments.
- Finalizing Your Artwork: After coloring, you can make further adjustments to stroke lines and anchor points, ensuring that every aspect of your artwork meets your creative vision.
Mastering the Live Paint Bucket Tool opens up a world of possibilities, allowing you to bring your vector artwork to life with ease and precision.

_HOOK_
Advanced Techniques: Pathfinder Panel & Artwork Expansion
The Pathfinder Panel in Adobe Illustrator is a powerful toolset for combining and manipulating shapes to create complex graphics. Understanding how to use these tools effectively can significantly enhance your design workflow.
- Understanding the Pathfinder Panel: Located under Window > Pathfinder, this panel offers a suite of options to merge, subtract, intersect, and divide shapes in various creative ways.
- Utilizing Shape Modes: The panel presents four Shape Modes – Unite, Minus Front, Intersect, and Exclude – each providing a unique way of combining objects and creating new shapes from the selected or overlapping areas.
- Exploring Pathfinder Effects: Besides Shape Modes, the panel also houses six Pathfinder effects, including Divide, Trim, Merge, Crop, Outline, and Minus Back. These effects offer advanced control over how shapes interact and merge with each other.
- Artwork Expansion: After using Pathfinder tools, it\"s often necessary to \"Expand\" the artwork. This process converts the shape into a standard object, allowing for further editing and manipulation. You can find this option under Object > Expand.
- Mastering Compound Shapes: Compound shapes offer a flexible way to combine shapes, allowing you to edit or rearrange the contributing shapes even after combining them. This is especially useful for complex designs where flexibility is key.
By mastering these advanced techniques, you can push the boundaries of vector graphics, creating intricate and unique designs with ease and precision.

Gradient and Pattern Fills
Adobe Illustrator\"s Gradient and Pattern fills are powerful tools that can add depth, texture, and complexity to your designs. This section explores the nuances of these features, guiding you through the creation and application of both gradients and patterns.
- Exploring Gradient Types: Illustrator offers Linear, Radial, and Freeform gradients. Linear gradients blend colors in a straight line, Radial gradients focus on a circular pattern, and Freeform gradients allow for a natural blend within a shape.
- Using the Gradient Tool and Panel: The Gradient tool lets you apply and modify gradients directly on your artwork, with real-time visual feedback. The Gradient panel provides comprehensive controls for color stops, angle, opacity, and more, offering fine-tuned control over your gradient fills.
- Creating and Saving Custom Gradients: Illustrator allows the creation of custom gradients. You can adjust color stops and transitions in the Gradient panel and save these custom gradients to your Swatches panel for future use.
- Applying and Modifying Pattern Fills: Patterns add texture and depth to your designs. You can apply preset patterns or create your own in Illustrator. The Pattern Options window lets you name, tile, and edit your patterns comprehensively. Once saved, your custom patterns can be applied to objects and modified whenever necessary.
Mastering these tools will allow you to enrich your illustrations with intricate backgrounds, realistic textures, and visually appealing color transitions, enhancing the overall impact of your designs.
Adobe Illustrator: How to Fill Color with the Paint Bucket Tool
The paint bucket tool is an incredible feature that can instantly transform your designs! Watch our video to learn how to efficiently fill large areas with the perfect shade and create stunning digital masterpieces.
How to Fill a Shape in Illustrator
Discover the magic of shape filling with our easy-to-follow tutorial! This video will show you how to effortlessly add vibrant colors to your shapes, giving your designs a polished and professional look. Don\'t miss out on this essential design skill!
Keyboard Shortcuts for Efficiency
Optimizing your workflow in Adobe Illustrator is crucial for productivity, and mastering keyboard shortcuts is a key component of this. These shortcuts enable you to perform actions quickly, saving time and effort. Here\"s a comprehensive guide to some of the most useful keyboard shortcuts in Adobe Illustrator.
- Basic Operations: Utilize commands like Undo (Ctrl + Z), Redo (Shift + Ctrl + Z), Cut (Ctrl + X), Copy (Ctrl + C), and Paste (Ctrl + V) to manage your artwork efficiently.
- Tool Selection: Swiftly switch between tools using shortcuts like V for the Selection Tool, P for the Pen Tool, and G for the Gradient Tool, enabling a seamless design process.
- Object and View Management: Manage your objects and workspace effectively with shortcuts like Ctrl + 2 to lock an object, Ctrl + R to show or hide rulers, and Ctrl + 0 to fit artboard in the window, ensuring a smooth design experience.
- Fill and Stroke Adjustments: Quickly adjust fills and strokes using shortcuts like D for default fill/stroke, X to swap fill/stroke, and / to apply none, streamlining the styling process of your objects.
Integrating these shortcuts into your daily routine will significantly enhance your speed and efficiency, allowing you more time to focus on the creative aspects of your designs.
Customizing the Illustrator Workspace for Filling Tasks
Setting up an efficient workspace in Adobe Illustrator tailored for filling tasks can significantly streamline your design process. Here are steps to optimize your workspace for these specific tasks:
- Adjusting the Workspace Layout: Customize your workspace by organizing document windows and panels according to your preference. You can easily rearrange, dock, or undock document windows and panels to create an environment that supports your workflow efficiently.
- Managing Panels: Keep your workspace organized and accessible by adding, removing, or moving panels as needed. Tailor your workspace further by stacking floating panels, and collapse or expand panel icons to save space and reduce clutter.
- Color Management: Customize default brand swatches by replacing the default swatches with your brand colors. This allows for quick access to frequently used colors, saving time and maintaining consistency across your projects.
- Typography Customization: Set up your preferred typefaces as defaults to avoid the repetitive task of changing fonts. Create and utilize character styles for commonly used text settings, like headlines and subheads, to maintain consistency and speed up the text formatting process.
- Workspace Preferences: Fine-tune your workspace by adjusting units and organizing panels like layers, artboards, swatches, and others that are essential for your filling tasks. Eliminate unnecessary panels to create a clean and efficient workspace.
- Utilizing Adobe Creative Cloud Libraries: Leverage Adobe CC Libraries to save and quickly access assets like color swatches, brushes, character/paragraph styles, photos, logos, and more across Adobe programs. This integration facilitates easy asset management and ensures consistency across different projects.
By customizing your workspace, you not only create a more efficient environment but also ensure that your tools and settings are aligned with your specific workflow needs, thereby enhancing your overall productivity in Adobe Illustrator.
Utilizing Layers and Artboards for Organized Coloring
Effectively organizing your artwork in Adobe Illustrator using layers and artboards is crucial for maintaining a streamlined workflow, especially when dealing with complex coloring tasks. This section provides insights and steps for leveraging these features for efficient coloring and organization.
- About Layers: Think of layers as transparent folders containing your artwork. Organizing your artwork into layers allows for better management of complex designs, ensuring that smaller items don\"t get hidden under larger ones. You can also create sublayers within these folders for even more organization.
- Layers Panel Overview: The Layers panel is your central hub for managing your artwork\"s layers. You can list, organize, and edit your objects in a document efficiently using this panel. Each layer is assigned a unique color for easy identification, and you can customize these colors based on your preferences.
- Organizing Artwork: Proper organization of your artwork is vital, especially if you plan to export to other applications like After Effects. It\"s recommended to move each set of objects into its own generically-named sublayer. This approach not only keeps your work organized but also prepares it for exporting whenever needed.
- Utilizing Artboards: While layers are document-wide, it\"s essential to be mindful when using different artboards. If you decide to use different artboards for organization, create a top-level layer for each artboard and switch to that layer when working on it. This method prevents one layer from containing objects on every artboard, thus maintaining an organized workspace.
By strategically utilizing layers and artboards, you can enhance your efficiency in Illustrator, keeping your designs organized and ready for any complex coloring tasks or application exports.
_HOOK_
READ MORE:
Creating and Managing Documents for Filling Operations
Effectively creating and managing documents in Adobe Illustrator is crucial for a streamlined filling operation. Here are some guidelines to ensure your documents are well-organized and optimized for your work:
- Setting Up Your Document: Start by considering the end goal of your design. Choose the appropriate document profile, considering factors like the number of artboards needed, spacing, size, orientation, and color mode. This foresight ensures that your document aligns with your project\"s requirements from the start.
- Workspace Customization: Tailor your workspace by arranging tool panels and saving these layouts. This customization allows you to access your most used tools efficiently and can be particularly helpful when dealing with filling operations.
- Layer Management: Organize your artwork using layers. This will not only make your workflow more efficient but also ensure that your document is easy to navigate and edit. Properly naming and structuring layers can save you a significant amount of time, especially in complex projects.
- Preparing for Printing: If your project involves printing, understand the basic principles and how your printer\"s resolution or monitor calibration can affect the output. Utilize Illustrator\"s Print dialog box to guide you through the printing process, ensuring that your artwork prints as intended.
- Exporting Artwork: When preparing files for professional printing, it\"s crucial to list the pieces you need, create a separate document for each, and organize them properly. Pay attention to details like crop marks, safety margins, and continuous communication with your printer to ensure the final product meets your expectations.
By following these steps, you can create and manage your Illustrator documents more effectively, making your filling operations smoother and more efficient.
Unleash your creative potential and refine your designs with the Adobe Illustrator Fill Tool. Transform your artwork with ease, efficiency, and precision, paving the way to stunning visual narratives.