Topic tutorial uv mapping blender: Embark on a journey through "Tutorial UV Mapping Blender," a comprehensive guide designed to elevate your 3D modeling skills. Learn the secrets of expert texture mapping, from basic techniques to advanced strategies, in this essential tutorial.
Table of Content
- What are the basic steps for UV mapping in Blender?
- Understanding UV Mapping in Blender
- Creating and Marking Seams for Efficient UV Mapping
- Different UV Unwrapping Methods in Blender
- Utilizing Blender\"s UV Mapping Tools and Features
- Advanced Techniques: Lightmap Pack, Project from View, and More
- Practical Projects and Real-World Applications of UV Mapping
- YOUTUBE: UV Unwrapping Explained for Beginners | Blender Tutorial
- Common Problems in UV Mapping and How to Solve Them
- Optimizing UV Maps for Texture Application
- Exporting UV Layouts for External Texturing Workflows
- Additional Resources and Tutorials for Mastering UV Mapping
What are the basic steps for UV mapping in Blender?
UV mapping is the process of projecting a 2D texture onto a 3D object in order to create realistic textures and materials in Blender. Here are the basic steps for UV mapping in Blender:
- Step 1: Select the object you want to map
- Step 2: Switch to Edit Mode
- Step 3: Select the faces you want to map
- Step 4: Mark the seams
- Step 5: Unwrap the object
- Step 6: Adjust and arrange the UV islands
- Step 7: Export or apply the texture
These steps will give you a general idea of the UV mapping process, but each step may require more detailed explanations and specific actions depending on your specific project and requirements. It is recommended to follow a detailed tutorial or guide for more in-depth instructions.
READ MORE:
Understanding UV Mapping in Blender
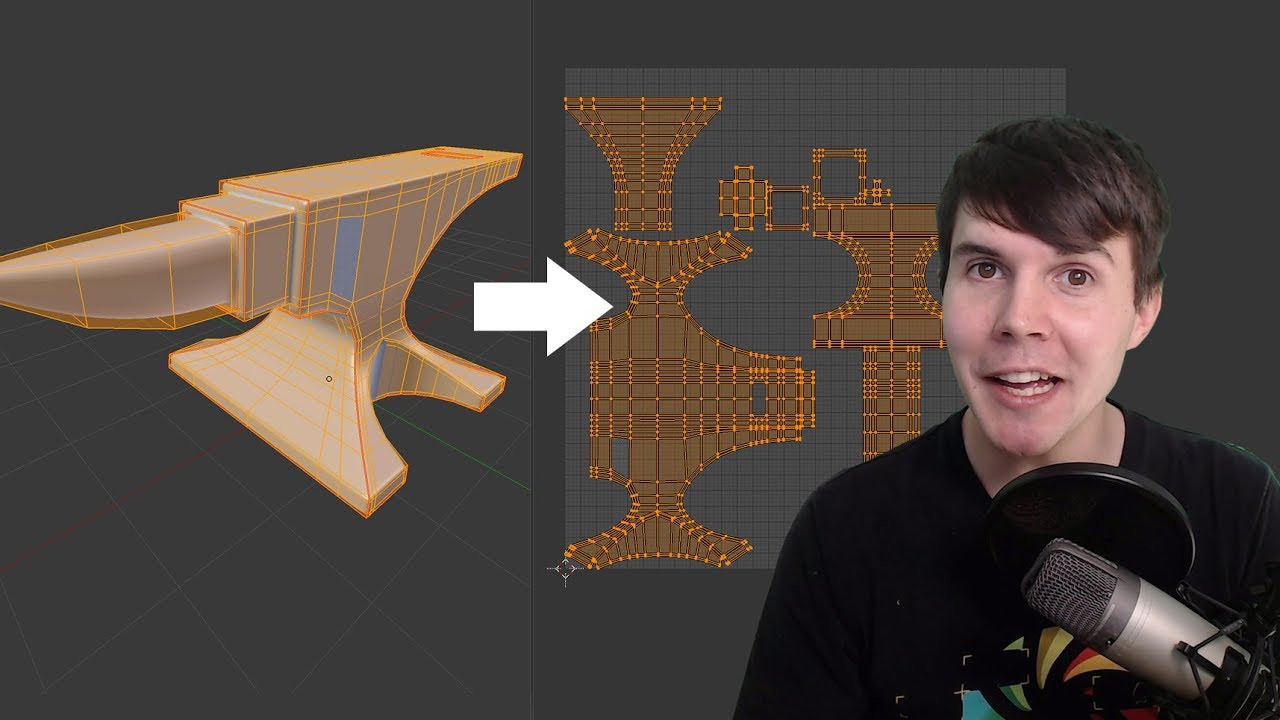
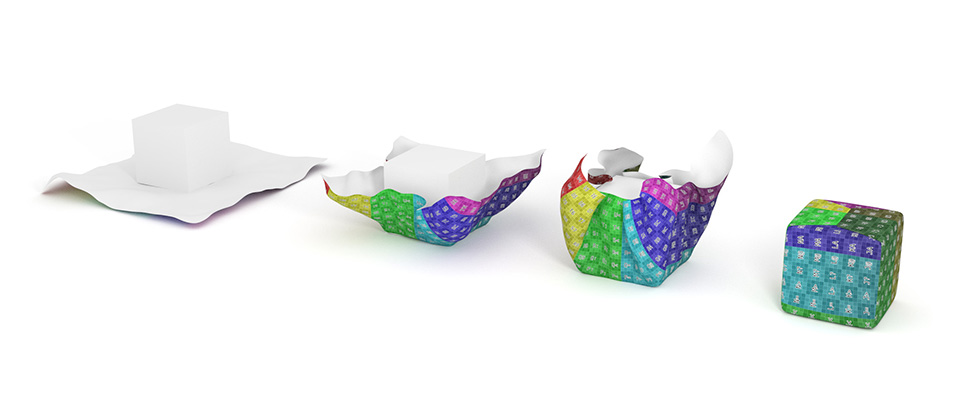
UV Mapping in Blender is a crucial technique for accurately applying textures to 3D models. It involves unwrapping the model\"s surface and laying it out flat to create a two-dimensional representation, known as a UV map. This process allows for precise texturing, as each vertex in the 3D space is mapped to a coordinate on the texture image.
- Introduction to UV Mapping: Begin by understanding what UV maps are and why they\"re essential for 3D texturing. UV coordinates (U for horizontal and V for vertical) represent how textures wrap around your model.
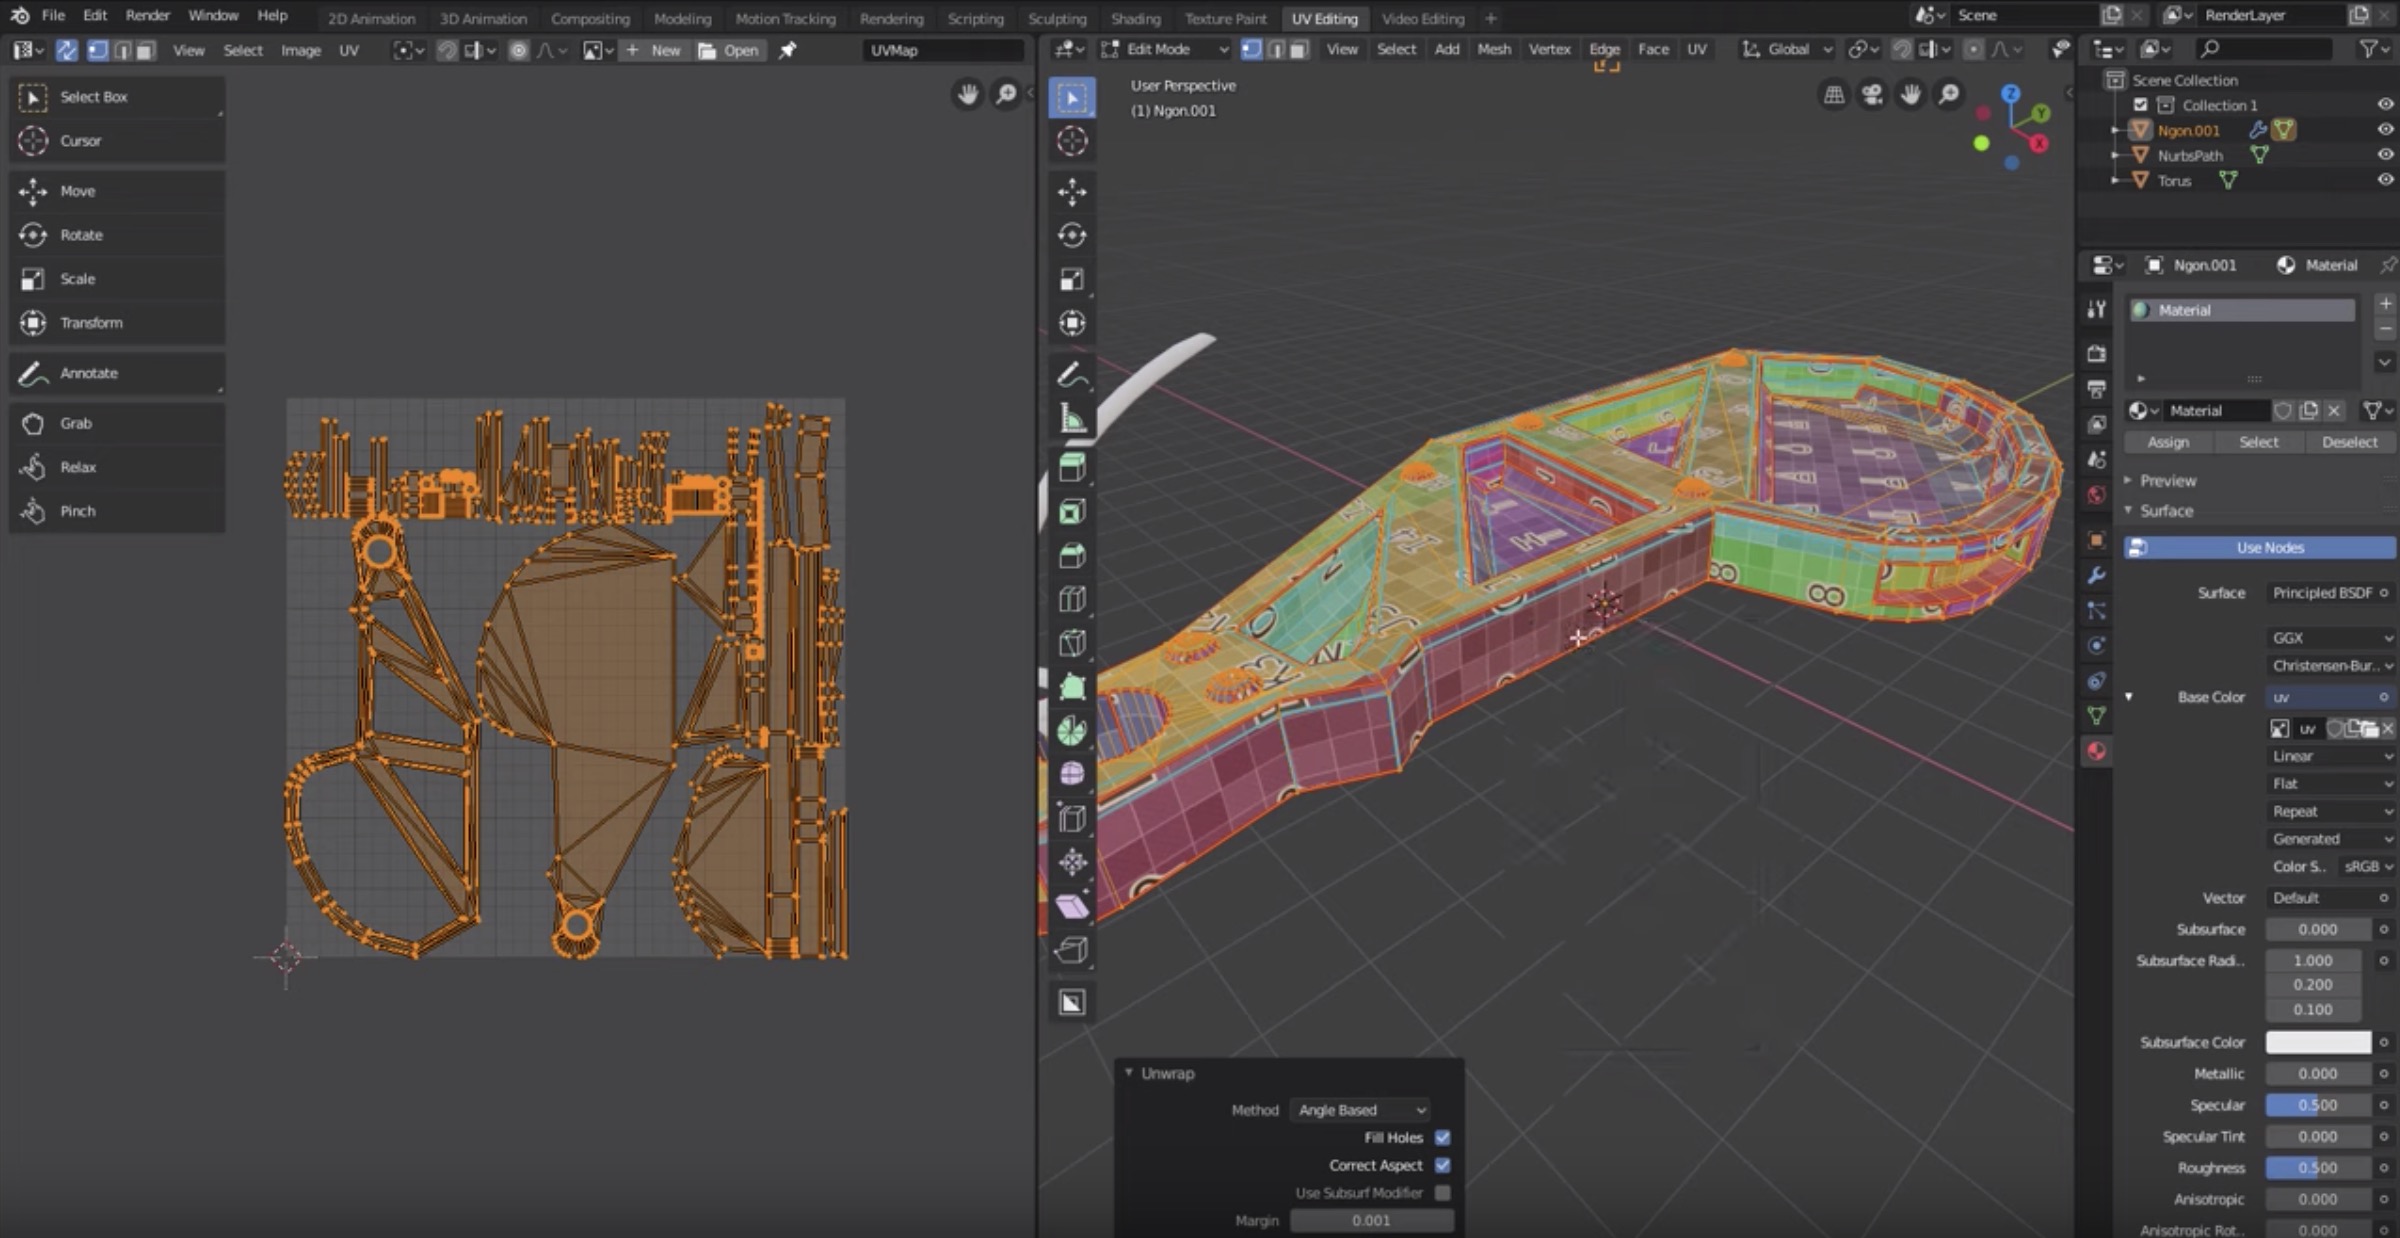
- Accessing UV Mapping Tools: In Blender, UV mapping tools are found in the UV Editing workspace, which provides a dual view for 3D models and their UV layout.
- Marking Seams: Identify and mark the seams of your model. Seams are edges where the model is \"cut\" to lay flat. Proper seam placement is critical for minimizing distortion in the texture.
- Unwrapping the Model: With seams marked, select your model and unwrap it by pressing U. Choose from various unwrapping methods like Smart UV Project or Unwrap to best suit your model\"s geometry.
- Adjusting the UV Map: After unwrapping, adjust the UV layout in the UV Editor to optimize texture placement. This might involve moving, scaling, or rotating UV islands.
- Applying Textures: Once satisfied with the UV map, textures can be applied to the model using the Shader Editor. Connect image textures to the material\"s Base Color input for visible results.
Understanding UV mapping is fundamental for creating realistic textures in Blender. By following these steps, you can achieve detailed and accurate texturing that brings your 3D models to life.

Creating and Marking Seams for Efficient UV Mapping
Creating and marking seams is a fundamental step in UV mapping within Blender, essential for achieving efficient and accurate texture mapping on your 3D models. This process involves selecting edges of the model where cuts should be made to lay the model\"s surface flat in the UV space.
- Select Your Model: Start by selecting your model in Edit Mode. You can switch to Edit Mode by pressing Tab.
- Identify Seam Locations: Analyze your model\"s geometry to determine where seams should be placed. Ideal seam locations are typically along the edges of the model where there is a natural transition or less visibility.
- Marking Seams: To mark a seam, select the edges where you want the seam to be, then press Ctrl+E to open the Edge Menu, and choose \"Mark Seam\". The selected edges will turn red, indicating they are marked as seams.
- Unwrapping the Model: With your seams marked, select all by pressing A, then press U and select \"Unwrap\". Blender will use the seams you\"ve marked to lay the model out flat in the UV Editor.
- Adjusting Seams for Optimal Unwrapping: After the initial unwrap, you may need to adjust your seams based on the UV layout\"s appearance. This might involve adding, removing, or moving seams and then unwrapping again to get a better result.
Efficiently marking seams ensures that your UV map accurately represents the 3D model\"s surface, minimizing texture stretching and making the texturing process more manageable. With practice, you\"ll develop an eye for optimal seam placement, significantly improving your UV mapping workflow.
Different UV Unwrapping Methods in Blender
Blender offers several UV unwrapping methods to efficiently map 2D textures onto 3D models. Each method has its own use case, depending on the complexity and specific needs of the model.
- Smart UV Project: This method automatically unwraps the mesh without the need for predefined seams. It\"s quick and useful for objects where precise texture control isn\"t necessary.
- Unwrap: The standard unwrap method requires manually marking seams along the mesh. Blender then unfolds the mesh along these seams into a 2D UV map. This method offers more control for detailed texturing.
- Lightmap Pack: Designed for creating lightmaps, this method unwraps the mesh so that no two faces overlap. It\"s ideal for baking light and shadow information into textures.
- Project from View: Unwraps the mesh based on the current view in the 3D viewport. This is particularly useful for mapping flat textures onto flat surfaces.
- Follow Active Quads: Ideal for objects with geometric patterns, this method unwraps the mesh based on a selected active quad, attempting to maintain even spacing and alignment.
- Cube Projection: This method projects the UV map from a cube surrounding the mesh, suitable for objects that are roughly cubic in shape.
- Sphere Projection: Similar to Cube Projection but for spherical objects, wrapping the texture around the model as if it were inside a sphere.
- Cylinder Projection: Best for cylindrical objects, this method projects the UV map cylindrically around the axis of the model.
Choosing the right UV unwrapping method is crucial for achieving the desired texture effects on your 3D models. Experimenting with these different methods will help you understand their advantages and limitations, enabling you to optimize your texturing workflow in Blender.

Utilizing Blender\"s UV Mapping Tools and Features
Blender\"s suite of UV mapping tools and features are designed to offer artists and designers comprehensive control over how textures are applied to 3D models. Understanding and utilizing these tools can significantly enhance your texturing workflow. Here\"s an overview of key tools and features available in Blender for UV mapping:
- UV Editor: The UV Editor is the primary workspace for editing UV maps. It allows for the visualization and manipulation of UV layouts, where you can move, scale, and rotate UV islands to fit the texture space efficiently.
- Seams: Marking seams is a fundamental aspect of UV unwrapping in Blender. Seams define the edges where the mesh will be split when unwrapped. This control is crucial for creating logical and easy-to-texture UV layouts.
- UV Unwrap: Once seams are marked, the UV Unwrap function can be used to project the 3D mesh onto a 2D plane. Blender offers several unwrapping methods, including Smart UV Project, Unwrap, and Project from View, each suited for different types of geometry.
- Live Unwrap: When enabled, live unwrap automatically adjusts the UV layout as you move or sew UV edges or vertices, providing real-time feedback on your adjustments.
- Pin and Unpin: Pinned vertices in the UV Editor remain fixed while the rest of the UV map is adjusted. This feature is handy for maintaining parts of the UV layout while making changes elsewhere.
- UV Sculpt: This tool allows for sculpting the UV layout with tools similar to Blender\"s sculpting mode, enabling fine adjustments to the UV map for optimal texture alignment.
- UV Pack Islands: Efficiently packs the UV islands into the available space, minimizing wasted texture space. This tool is essential for getting the most out of your textures.
- Align and Straighten: These tools are used to align and straighten UV edges or islands, which is particularly useful for organizing and optimizing UV maps.
- Export UV Layout: For external texturing workflows, Blender allows you to export the UV layout as an image file, which can then be used in texture painting applications.
Mastering these tools and features is key to creating efficient and high-quality UV maps in Blender. With practice, you can leverage Blender\"s UV mapping capabilities to achieve precise texture mapping and bring your 3D models to life.

_HOOK_
Advanced Techniques: Lightmap Pack, Project from View, and More
For artists looking to push the boundaries of UV mapping in Blender, several advanced techniques can provide superior control and efficiency in texture mapping. These methods cater to specific needs, such as creating lightmaps for game assets or aligning textures perfectly with your model’s geometry. Here’s a deep dive into some of these advanced techniques:
- Lightmap Pack: The Lightmap Pack method is specially designed for creating UV layouts that are optimized for lightmapping — a technique used in game development to bake lighting information into textures. This method ensures that UV islands are spaced to prevent light bleeding and are efficiently packed to make the most of the texture space.
- Project from View: Project from View allows you to unwrap a mesh based on your current viewport angle. This is particularly useful for creating textures that align perfectly with the camera’s perspective, such as creating backgrounds or textures that match a specific viewpoint.
- UV Sculpting: UV Sculpting enables you to tweak UV maps with a more hands-on approach, similar to sculpting a 3D model. This is useful for adjusting the flow and distribution of UV islands, ensuring textures conform smoothly to complex shapes.
- Seamless Textures: Creating seamless textures is essential for environments and objects where the texture needs to repeat without visible seams. Blender’s UV tools can be used to adjust edges and islands to ensure that textures tile seamlessly across surfaces.
- Texel Density: Maintaining consistent texel density across your UV map is crucial for ensuring textures appear uniform in detail and scale across different parts of the model. Blender’s UV tools allow you to visualize and adjust texel density, making it easier to achieve a consistent texture look.
- Custom UV Layouts for Animation: For characters or objects that will be animated, you can create custom UV layouts that minimize distortion during movement. This involves strategic placement of seams and careful unwrapping to ensure that textures deform naturally with the animation.
- Multi-Object UV Editing: Blender allows you to edit the UVs of multiple objects simultaneously, a powerful feature for scenes or assets that share texture space. This streamlines the texturing process for complex scenes or game levels.
These advanced techniques in Blender’s UV mapping toolkit enable a higher degree of precision and efficiency, allowing for more complex and detailed texturing projects. Mastering these methods will significantly enhance your ability to create realistic, high-quality textures for a variety of applications.

Practical Projects and Real-World Applications of UV Mapping
UV mapping is a critical process in the 3D modeling and animation pipeline, enabling artists to apply detailed textures to their models for a more realistic or stylized look. The application of UV mapping extends across various industries, from film and game development to architectural visualization and product design. Here are some practical projects and real-world applications that showcase the importance and versatility of UV mapping:
- Game Asset Creation: One of the primary uses of UV mapping is in the creation of assets for video games. UV maps ensure that textures such as colors, patterns, and details accurately wrap around complex 3D models, from characters to environmental elements, enhancing the visual quality of the game.
- Film and Animation: In the film industry, UV mapping is used to texture characters, props, and sets, contributing to the visual storytelling by adding realism or artistic styles. Detailed UV maps are essential for close-up shots where textures need to hold up to scrutiny.
- Architectural Visualization: UV mapping allows architects and designers to apply realistic textures to 3D models of buildings and interiors. This technique is crucial for creating lifelike visualizations that accurately represent materials like brick, wood, and stone.
- Product Design: For product designers, UV mapping is used to apply branding elements, such as logos and patterns, to 3D models of products. This is essential for visualizing how the final product will look and for creating marketing materials.
- Fashion and Apparel: In fashion design, UV mapping enables designers to apply intricate patterns and textures to their clothing models, providing a realistic representation of how different fabrics and designs will look on a garment.
- Educational Content: UV mapping is also used in the creation of educational materials, such as interactive 3D models of historical artifacts, anatomical models for medical training, or scientific visualizations that require textured surfaces to convey information effectively.
These practical projects highlight the importance of UV mapping in bringing 3D models to life across different fields. By mastering UV mapping techniques, artists and designers can create more immersive, realistic, and visually appealing digital content.

UV Unwrapping Explained for Beginners | Blender Tutorial
Interested in delving into the fascinating world of machine learning? This beginner\'s guide video will provide you with a solid foundation and ignite your curiosity to explore the endless possibilities of this cutting-edge technology.
Common Problems in UV Mapping and How to Solve Them
UV mapping can sometimes be a challenging task, even for experienced 3D artists. However, understanding common issues and knowing how to address them can make the process smoother and more efficient. Here are some typical problems encountered during UV mapping and strategies to solve them:
- Stretching: Texture stretching occurs when UV islands are not proportionally scaled to the model\"s geometry. To fix stretching, ensure that UV islands accurately represent the model\"s surface area. Use Blender\"s UV tools, such as the \"Minimize Stretch\" option in the UV Editor, to make adjustments.
- Seams Visibility: Visible seams can disrupt the appearance of a texture. To minimize seam visibility, place seams in less noticeable areas or where natural seams occur in the object. Additionally, use texture painting tools to blend the seams with the surrounding texture.
- Overlapping UVs: Overlapping UV islands can cause textures to display incorrectly. To avoid overlaps, use the \"Pack Islands\" feature to efficiently arrange UV islands within the UV space. Ensure adequate padding between islands to prevent baking and lightmap issues.
- Uneven Texel Density: Inconsistent texel density can make some textures appear blurry while others are sharp. To achieve uniform texel density, use Blender\"s \"Texel Density\" tools to measure and adjust the density across all UV islands, ensuring consistent texture quality.
- Difficulty Unwrapping Complex Models: Complex models with intricate details can be challenging to unwrap. Break down the model into simpler parts, strategically place seams to facilitate unwrapping, and use projection unwrapping for hard-to-map areas.
- Texture Baking Issues: Problems with texture baking, such as black spots or incomplete textures, often result from poor UV layout or overlapping faces. Ensure that your UV map is clean, with no overlapping islands, and increase the margin in the baking settings to prevent these issues.
Addressing these common issues requires a combination of strategic planning, familiarity with Blender\"s UV mapping tools, and practice. By regularly refining your UV mapping techniques, you can enhance the quality of your 3D projects and streamline your workflow.
Optimizing UV Maps for Texture Application
Optimizing UV maps is crucial for achieving the best visual results and performance in 3D projects. Well-optimized UV maps ensure that textures appear correctly on the model and are efficient in terms of texture memory usage. Here are strategies to optimize your UV maps for texture application:
- Maximize UV Space: Utilize as much of the UV space as possible to get the highest resolution and detail from your textures. Arrange and scale UV islands efficiently, leaving minimal space between them, while avoiding overlap.
- Maintain Uniform Texel Density: Ensure that the texel density is consistent across different parts of the model to avoid areas where the texture appears blurry or overly sharp. Use Blender\"s Texel Density Checker to help maintain uniformity.
- Minimize Texture Seams: Place seams in areas where they are least noticeable, such as hidden edges or where natural seams occur in the model. This reduces the visual impact of texture seams on the final model.
- Optimize for Texture Baking: When baking textures, such as normal maps or ambient occlusion, ensure your UV layout minimizes distortion and overlapping. This improves the quality of the baked textures and their application on the model.
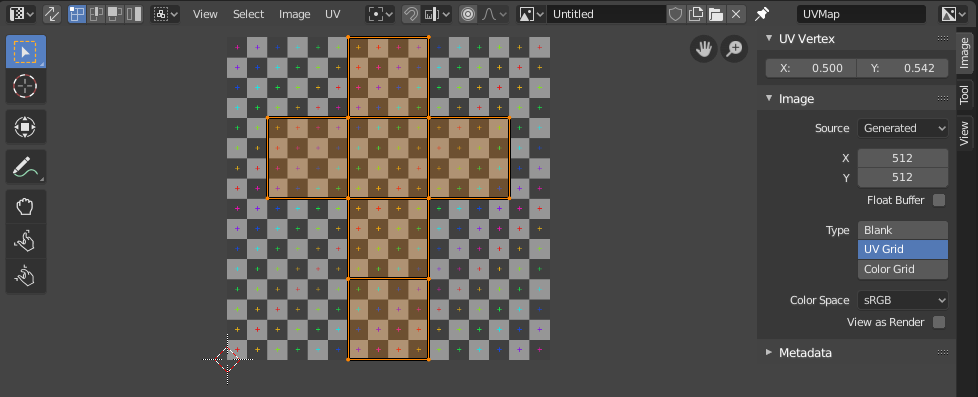
- Use UV Grids for Testing: Apply a UV grid texture to your model during the UV mapping process. This helps identify issues like stretching or compression, allowing you to adjust the UV map for optimal texture display.
- Consider the End Use: Tailor your UV mapping approach based on how the model will be used. For example, models for real-time applications like games may require more optimization to balance detail and performance.
- Employ UV Packing Tools: Use Blender\"s UV packing tools to automatically arrange UV islands efficiently within the UV space. This saves time and ensures that you\"re making the most out of the available texture resolution.
By following these optimization strategies, you can create UV maps that not only enhance the visual quality of your textures but also contribute to the overall efficiency and performance of your 3D projects.
Exporting UV Layouts for External Texturing Workflows
Exporting UV layouts is an essential step in many texturing workflows, especially when textures are painted or edited in external software. Blender provides tools to export UV maps efficiently, allowing for seamless integration with other applications like Adobe Photoshop or Substance Painter. Here\"s how to export UV layouts for external texturing workflows:
- Finalize the UV Map: Before exporting, ensure your UV map is fully unwrapped and optimized. Check for any stretching or overlapping islands and adjust as necessary.
- Open the UV Editor: Go to the UV Editing workspace in Blender. This workspace provides a clear view of your UV layout.
- Select All UV Islands: In the UV Editor, make sure you have selected all UV islands. You can do this by pressing \"A\" in the UV Editor window.
- Export the UV Layout: With all UV islands selected, go to the UV menu and choose \"Export UV Layout\". A dialog box will appear, allowing you to choose the export location, file name, and format. PNG is a commonly used format due to its support for transparency and compression options.
- Set Export Options: Specify the size of the UV layout image. A higher resolution will provide more detail for texturing but may require more memory. Ensure \"All UVs\" is selected, and adjust the \"Fill Opacity\" to define how solid the UV faces appear on the exported layout.
- Import into External Software: Once exported, you can open the UV layout image in your chosen texturing software. Use it as a guide to paint or edit your textures, ensuring they align perfectly with your 3D model\"s UV map.
- Apply Textures in Blender: After editing your textures externally, import them back into Blender and apply them to your model. Ensure the textures align with the UV layout for the best results.
Exporting UV layouts bridges the gap between Blender and external texturing tools, allowing artists to leverage the strengths of multiple software packages. This process is integral to creating high-quality, detailed textures for your 3D models.

_HOOK_
READ MORE:
Additional Resources and Tutorials for Mastering UV Mapping
To further enhance your UV mapping skills in Blender, a variety of resources and tutorials are available that cover everything from the basics to more advanced techniques. Whether you prefer video tutorials, written guides, or interactive lessons, there\"s something out there for every learning style. Here are some valuable resources for mastering UV mapping:
- Blender Official Documentation: The Blender Manual offers comprehensive guides on UV mapping, detailing every tool and feature available in Blender. It\"s an excellent starting point for understanding the fundamentals.
- Blender Guru Tutorials: Blender Guru provides high-quality video tutorials on a wide range of topics, including UV mapping. These tutorials are well-explained and suitable for both beginners and experienced users.
- CG Cookie: CG Cookie offers extensive courses on Blender, including specific classes on UV mapping. While some content is behind a paywall, the quality of instruction and depth of topics covered make it a worthwhile investment.
- YouTube Channels: There are numerous YouTube channels dedicated to Blender tutorials. Channels like Blender Diplom and Darrin Lile offer tutorials that cover UV mapping techniques, tips, and tricks.
- Blender Artists Community: The Blender Artists forum is a vibrant community where users share knowledge, ask questions, and provide feedback on 3D projects. It\"s a great place to seek advice on UV mapping challenges.
- Books on Blender: Several books have been published on Blender that include sections on UV mapping. These can be a valuable resource for those who prefer learning from written material.
- Online Courses: Platforms like Udemy, Coursera, and LinkedIn Learning offer courses on Blender that include modules on UV mapping. These courses often provide a structured learning path from beginner to advanced levels.
By exploring these resources, practicing regularly, and engaging with the Blender community, you can significantly improve your UV mapping skills and apply them to a wide range of 3D projects.
Embark on a journey to master UV mapping in Blender and unlock the full potential of your 3D projects. With the right techniques and resources, you can transform your textures and elevate your models to new heights of realism and creativity.