Topic how to convert revit to autocad: Discover the essential steps for converting Revit to AutoCAD efficiently. This guide provides valuable insights to ensure a smooth transition, catering to both beginners and seasoned professionals in the architectural and engineering fields.
Table of Content
- How can I convert a Revit file to AutoCAD?
- Understanding the Conversion Process
- Steps to Export Revit Views and Sheets to DWG
- Navigating the DWG/DXF Export Options
- Advanced Exporting Techniques for AutoCAD Architecture
- Using Third-Party Tools for Enhanced Conversion
- Managing Exported File Settings and Customization
- YOUTUBE: Exporting Revit to AutoCAD DWG Tutorial
- Ensuring Quality and Accuracy in the Conversion
How can I convert a Revit file to AutoCAD?
To convert a Revit file to AutoCAD, you have several options:
- Direct Export:
- Open your Revit model in Revit software.
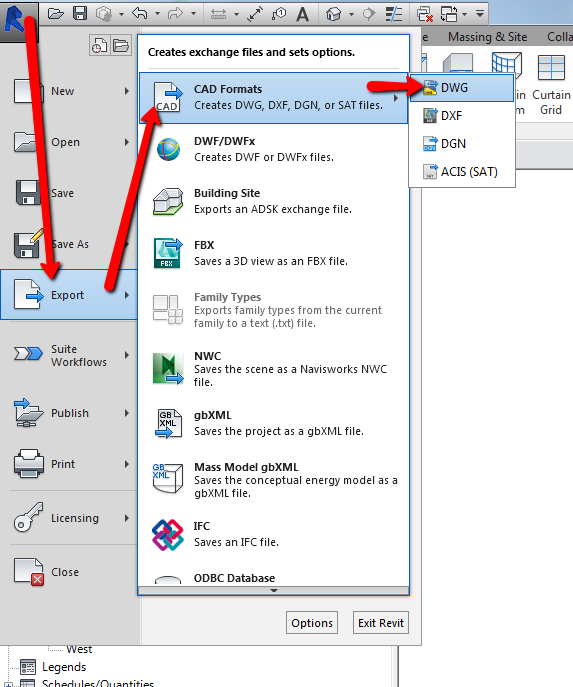
- Go to the \"File\" menu and select \"Export\" and then \"CAD Formats\".
- In the export dialog box, choose the desired export format (e.g. DWG) and set the appropriate options.
- Click \"OK\" to start the export process.
- Save the exported file to your desired location.
- Using Autodesk Desktop App:
- Open the Autodesk Desktop App on your computer.
- Search for the \"Revit to AutoCAD Exporter\" plugin and install it.
- Once installed, open your Revit model in Revit software.
- Go to the \"Add-ins\" tab and click on the \"Revit to AutoCAD Exporter\" plugin.
- Follow the prompts and select the desired export options.
- Click \"Export\" to start the export process.
- Save the exported file to your desired location.
- Using third-party software:
- Search for \"Revit to AutoCAD converter\" or similar software online.
- Download and install the software on your computer.
- Launch the software and open your Revit file within it.
- Follow the software\'s instructions to convert the file to AutoCAD format.
- Save the converted AutoCAD file to your desired location.
Choose the method that suits your needs and preferences. Remember to review the exported AutoCAD file to ensure the correct conversion and maintain the necessary project data.
READ MORE:
Understanding the Conversion Process
Converting Revit models to AutoCAD involves a series of steps to ensure that the detailed design data in Revit is accurately translated into the AutoCAD environment. This process is crucial for professionals who need to leverage the strengths of both platforms in their design workflows. Here\"s a step-by-step guide to understand and execute this conversion:
- Prepare Your Revit Model: Simplify your model by removing unnecessary details that might not be needed in AutoCAD. This includes optimizing the model for export by cleaning up the project browser and consolidating elements.
- Choose the Correct Export Option: In Revit, go to the File menu, select Export, and then choose CAD Formats. You will have options to export as DWG, DXF, or other formats suitable for AutoCAD.
- Select Export Setup: Within the export options, select an export setup that matches your needs. You can customize export settings to control how Revit views, sheets, and elements are translated into AutoCAD layers, colors, and line types.
- Export Views and Sheets: Decide whether you need to export the entire model, specific views, or sheets. This choice will affect how your design is represented in AutoCAD.
- Review and Adjust the Exported Files: Once the files are exported, open them in AutoCAD to review the accuracy of the conversion. You might need to adjust layer assignments, line weights, or other properties to ensure the drawing meets your standards.
Understanding this process and preparing both your Revit model and the AutoCAD environment for the conversion will ensure a smoother transition between the two software platforms.
Steps to Export Revit Views and Sheets to DWG
Exporting Revit views and sheets to DWG format is a pivotal task for professionals seeking to utilize their detailed models within AutoCAD. This process allows for seamless integration and collaboration across different platforms. Follow these detailed steps to ensure a smooth and efficient export:
- Open Your Revit Project: Begin by opening the Revit project containing the views and sheets you wish to export.
- Prepare the Views/Sheets for Export: Ensure that the views and sheets you plan to export are set up correctly. This may involve adjusting visibility settings, view scales, and annotations to ensure they are optimized for DWG format.
- Go to the Export Menu: Navigate to the \"File\" menu, select \"Export\", and then choose \"CAD Formats\" followed by \"DWG\".
- Select Views/Sheets for Export: In the export dialog, you will have the option to select specific views and sheets for export. You can choose individual views/sheets or select multiple items using the shift or control key.
- Configure Export Settings: Configure the DWG export settings according to your needs. This includes selecting the DWG version, defining layer standards, and choosing line weights. Revit allows you to customize these settings to ensure compatibility with your AutoCAD requirements.
- Execute the Export: Once you\"ve configured all settings, proceed with the export. Revit will convert the selected views and sheets into DWG files, preserving the layout and details for use in AutoCAD.
- Review the Exported DWG Files: After exporting, it\"s important to open and review the DWG files in AutoCAD. Check for any discrepancies in the representation of elements, layers, and annotations, and make any necessary adjustments.
By following these steps, you can ensure that your Revit views and sheets are accurately exported to DWG format, facilitating a smooth workflow transition between Revit and AutoCAD.
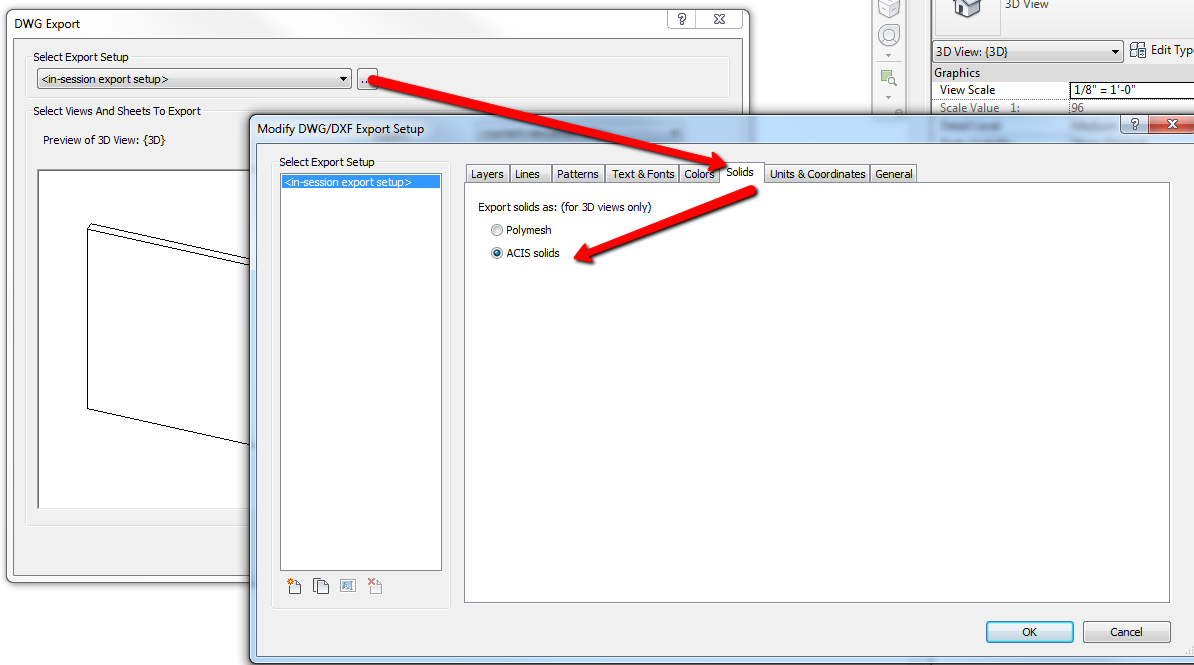
Navigating the DWG/DXF Export Options
Understanding the DWG/DXF export options in Revit is essential for professionals looking to tailor their project exports to specific AutoCAD requirements. These options provide control over how Revit elements are mapped to AutoCAD layers, colors, and linetypes. Here’s a breakdown of the key settings and how to effectively use them:
- Access Export Settings: From Revit, go to File > Export > CAD Formats > DWG or DXF. This will open the Export CAD Formats dialog box.
- Choose the Export Setup: Select an export setup from the list. Revit includes default setups, but you can create custom setups to meet specific project needs.
- Modify Export Setup: Click the \"Modify Export Setup\" button to adjust layer mappings, linetypes, and colors. This is crucial for ensuring that your Revit elements are represented accurately in AutoCAD.
- Layer Mapping: Use the Layer Mapping tab to define how Revit categories are assigned to AutoCAD layers. You can map multiple Revit categories to a single AutoCAD layer or separate them as needed.
- Linetype Mapping: In the Linetypes tab, specify how Revit linetypes correspond to AutoCAD linetypes, ensuring consistency in line representation.
- Colors: The Colors tab allows you to set how Revit color settings translate into AutoCAD colors. You can maintain original colors or apply a standardized color scheme.
- Export Views and Sheets: After configuring the settings, return to the main export dialog. Select the views and sheets you wish to export, then proceed with the export.
- Review and Adjust in AutoCAD: Once the export is complete, open the DWG/DXF files in AutoCAD to verify that the settings have been applied correctly. Make adjustments as necessary to align with your project standards.
Navigating these options effectively ensures that the exported files from Revit to AutoCAD meet the precise requirements of your project, facilitating a seamless workflow between different software platforms.

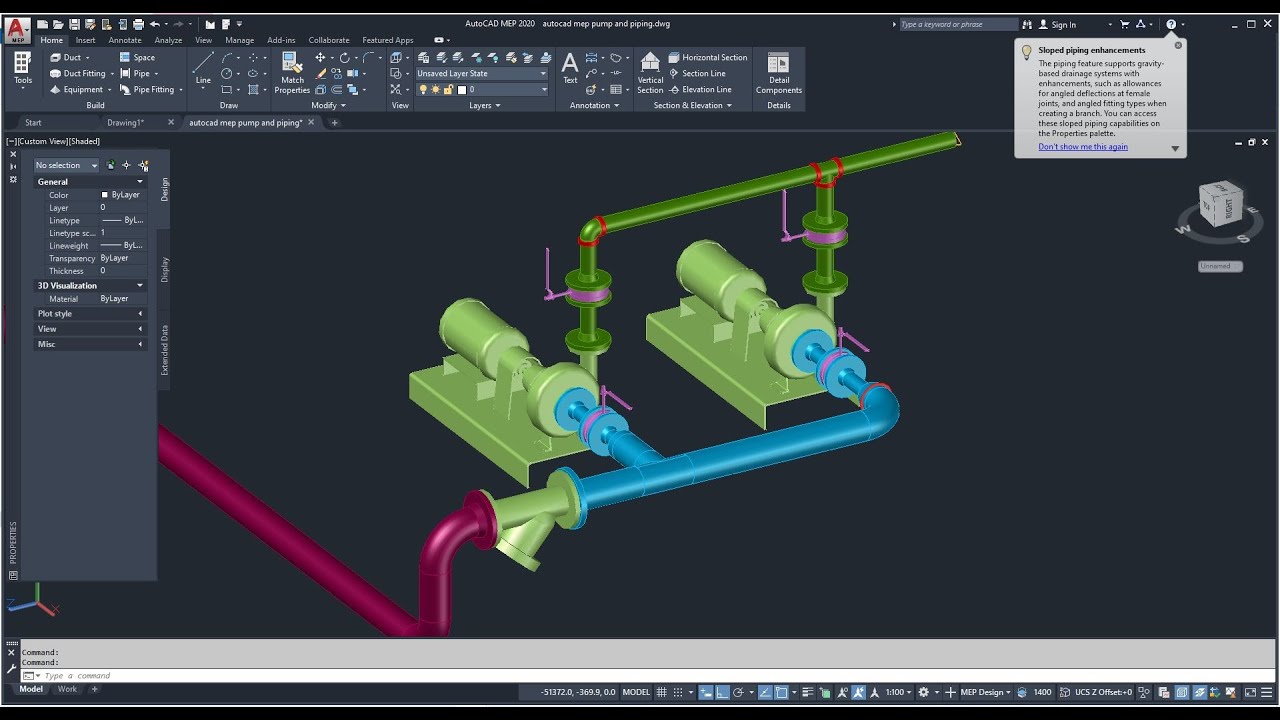
Advanced Exporting Techniques for AutoCAD Architecture
For professionals working within AutoCAD Architecture, leveraging advanced exporting techniques from Revit can significantly enhance the quality and efficiency of your CAD drawings. These methods go beyond basic exporting, focusing on optimizing the Revit model for architectural detailing in AutoCAD. Follow these advanced steps to elevate your project exports:
- Utilize Linked Models: For complex projects, link external Revit models into your main model to keep your project organized and manageable. When exporting, you can choose to export these linked models as separate DWG files or as part of the main file.
- Custom Element Export: Use the “Export Parts” feature to break down complex Revit elements into simpler parts for more detailed control over how elements are exported and represented in AutoCAD.
- Layer Standards: Establish custom layer standards in Revit that align with your AutoCAD architecture standards. This ensures that the exported DWG files automatically conform to your architectural layering conventions.
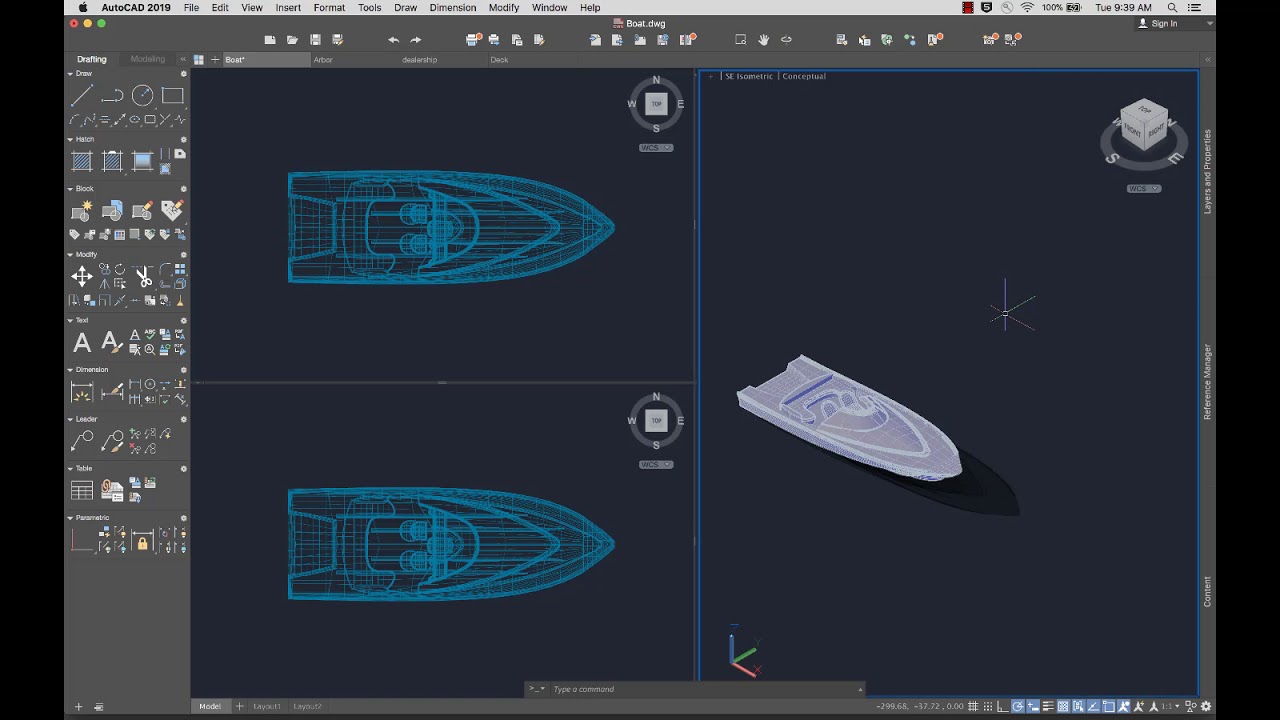
- Exporting 3D Models: For architectural visualization or detailed construction documentation, export your Revit model as a 3D DWG file. This allows for intricate architectural elements to be accurately represented in AutoCAD.
- Use of Solids: When exporting to DWG, consider exporting Revit families and elements as solid geometries. This can be particularly useful for complex components, ensuring they are imported into AutoCAD as precise 3D objects.
- Post-Export Scripting: After exporting, use AutoCAD’s scripting capabilities to automatically apply additional settings or adjustments, optimizing the DWG files for architectural use.
- Data Extraction: Utilize data extraction tools in AutoCAD to further analyze and manipulate data from the exported Revit models, enhancing the architectural detailing process.
By implementing these advanced exporting techniques, architects and designers can ensure that their Revit to AutoCAD workflow is not only seamless but also maximizes the potential of their design data for architectural excellence.
_HOOK_
Using Third-Party Tools for Enhanced Conversion
For professionals seeking to streamline the conversion process from Revit to AutoCAD, leveraging third-party tools can offer enhanced capabilities and efficiency. These tools are designed to simplify the conversion, offering features that go beyond the standard export options available in Revit. Explore the following steps to utilize third-party tools effectively:
- Research and Select a Tool: Start by researching third-party tools that specialize in converting Revit files to AutoCAD. Look for tools that offer features meeting your specific project needs, such as batch processing or advanced layer mapping.
- Check Compatibility: Ensure that the tool you choose is compatible with the versions of Revit and AutoCAD you are using. Compatibility is key to a smooth conversion process.
- Understand the Features: Familiarize yourself with the tool’s features. Some tools offer direct conversion capabilities, while others may provide additional functionalities such as element filtering, attribute mapping, and more detailed control over the export settings.
- Prepare Your Revit Model: Before using the third-party tool, prepare your Revit model by cleaning up unnecessary elements and optimizing the file for export. This can help in reducing conversion times and improving the accuracy of the output.
- Run the Conversion: Follow the specific instructions provided by the third-party tool to convert your Revit file to DWG or DXF format. This may involve importing your Revit file into the tool, configuring the export settings, and executing the conversion.
- Quality Assurance: After conversion, open the resulting DWG or DXF files in AutoCAD to review the quality and accuracy of the conversion. Check for any issues with layers, elements, or annotations and make adjustments as necessary.
- Feedback and Optimization: If possible, provide feedback to the tool developers to help improve future versions. Additionally, use the experience to optimize your workflow for future projects.
Utilizing third-party tools for converting Revit to AutoCAD can significantly enhance the conversion process, providing a more efficient and customizable approach to meet the diverse needs of design professionals.

Managing Exported File Settings and Customization
Effectively managing and customizing exported file settings is crucial for maximizing the utility and compatibility of DWG or DXF files created from Revit models in AutoCAD. Tailoring these settings ensures that the exported files align with project standards and requirements. Follow these steps to manage and customize your exported file settings efficiently:
- Understand Default Settings: Familiarize yourself with the default export settings in Revit. Knowing what each setting controls will help you make informed adjustments to better match your AutoCAD needs.
- Custom Layer Mapping: Customize layer mappings to organize your Revit elements into appropriate AutoCAD layers. This helps in maintaining clarity and organization within your AutoCAD drawings.
- Adjust Linetype and Color: Modify linetype and color settings to ensure that the visual aspects of your design translate properly from Revit to AutoCAD. Consistency in these elements is key for maintaining design intent.
- Manage Export Templates: Create and manage export templates if you\"re working on multiple projects with similar requirements. Templates can save time and ensure consistency across exports.
- Use Export Setup Dialog: Utilize the Export Setup dialog in Revit to make precise adjustments to how your models are exported. This includes settings for fills, text, and dimensions.
- Post-Export Adjustments in AutoCAD: After exporting, open your files in AutoCAD for further customization. Use AutoCAD\"s tools to fine-tune layers, styles, and other settings to fit your project\"s specific needs.
- Automate Repetitive Tasks: For repetitive tasks, consider using AutoCAD\"s scripting capabilities to automate adjustments. This can significantly reduce manual work and increase efficiency.
By effectively managing and customizing your export settings, you can ensure a smooth transition of Revit models to AutoCAD, facilitating better collaboration and project execution.

Exporting Revit to AutoCAD DWG Tutorial
In this informative tutorial video, you will learn step-by-step instructions to master a skill that will make your life easier and more efficient. Get ready to acquire new knowledge and unlock your potential!
How to Export Revit Sheet Drawings into AutoCAD | Revit to AutoCAD Details Transfer Process
Dive into this fascinating video that unravels the intricate process behind creating something astonishing. Witness the beauty and dedication that goes into each step, and be amazed by the end result. Join us on this captivating journey!
READ MORE:
Ensuring Quality and Accuracy in the Conversion
Ensuring the quality and accuracy of converted files from Revit to AutoCAD is paramount for the integrity of architectural and engineering projects. A precise conversion process not only saves time but also maintains the fidelity of the original design. Follow these strategies to ensure high quality and accurate conversions:
- Review Export Settings: Before exporting, double-check your export settings in Revit. Correct settings are crucial for ensuring that elements are accurately represented in AutoCAD.
- Use High-Quality Templates: Apply high-quality templates for layer, color, and linetype settings that match your project standards. Consistency across templates ensures a uniform conversion process.
- Check for Compatibility Issues: Be aware of potential compatibility issues between Revit and AutoCAD, especially with complex elements or custom families. Test conversions to identify and resolve issues early in the process.
- Validate Elements Post-Conversion: After converting, carefully review the DWG files in AutoCAD. Pay special attention to the accuracy of elements, dimensions, and annotations to ensure they match the original design intent.
- Adjust for Scale and Units: Ensure that the scale and units are correctly set before exporting. Misalignments in scale or unit discrepancies can lead to significant inaccuracies in the converted files.
- Utilize Quality Control Checklists: Implement quality control checklists to systematically review and verify each aspect of the converted files. This helps in identifying and correcting errors efficiently.
- Leverage Third-Party Quality Assurance Tools: Consider using third-party tools designed for quality assurance in CAD conversions. These tools can offer additional checks for accuracy and consistency.
By adopting these measures, you can significantly enhance the quality and accuracy of your Revit to AutoCAD conversions, ensuring that the final DWG files are a true and reliable representation of your original designs.
Ensuring the quality and accuracy of converted files from Revit to AutoCAD is paramount for the integrity of architectural and engineering projects. A precise conversion process not only saves time but also maintains the fidelity of the original design. Follow these strategies to ensure high quality and accurate conversions:
By adopting these measures, you can significantly enhance the quality and accuracy of your Revit to AutoCAD conversions, ensuring that the final DWG files are a true and reliable representation of your original designs.