Topic autocad autodesk tutorial: Unlock your creative potential with our comprehensive AutoCAD Autodesk tutorial, designed for both beginners and advanced users to enhance their design skills and bring ideas to life.
Table of Content
- What are some tutorials available for AutoCAD Autodesk?
- Getting Started with AutoCAD
- Understanding the AutoCAD Interface
- Basic Drawing & Editing Commands
- Creating Your First Drawing
- Learning to Use Drawing Tools
- Mastering Precision Drawing Techniques
- YOUTUBE: AutoCAD Basic Tutorial for Beginners - Part 1
- Organizing Objects with Layers and Properties
- Advanced Drawing Techniques
- Introduction to 3D Modeling
- Rendering and Presenting Your Designs
- Tips and Tricks for Efficient Use of AutoCAD
What are some tutorials available for AutoCAD Autodesk?
There are several tutorials available for AutoCAD Autodesk. Here are some options:
- Autodesk\'s official AutoCAD learning resources: This website provides a comprehensive collection of tutorials, videos, documentation, and learning paths to help you get started with AutoCAD Autodesk.
- YouTube tutorials: Many experienced AutoCAD users and trainers have created tutorials on YouTube. You can find step-by-step video guides covering various topics in AutoCAD Autodesk.
- GCFLearnFree.org: This website offers free AutoCAD tutorials for beginners. You can learn basic drawing and editing techniques, as well as how to work with layers, blocks, and dimensions.
- CADTutor: CADTutor is an online community where you can find tutorials, articles, and forums related to AutoCAD Autodesk. It covers both basic and advanced topics.
These resources should provide you with a solid foundation and help you improve your skills in using AutoCAD Autodesk.
READ MORE:
Getting Started with AutoCAD
Welcome to the exciting world of AutoCAD! This section will guide you through the basics to get you up and running with AutoCAD. Whether you\"re a complete beginner or looking to refresh your skills, these steps will lay the foundation for your journey in creating detailed 2D and 3D designs.
- Download and Install AutoCAD: Start by downloading the latest version of AutoCAD from Autodesk\"s official website. Follow the installation instructions to set up the software on your computer.
- Explore the AutoCAD Interface: Familiarize yourself with the AutoCAD workspace and user interface. Learn about the Ribbon, Toolbars, Command Line, and the various panels that will help you navigate and access AutoCAD\"s wide range of features.
- Set Up Your Drawing Environment: Configure the drawing settings to suit your project needs. This includes setting the units, drawing limits, and applying appropriate drawing scales.
- Basic Drawing Commands: Learn the basic drawing commands like LINE, CIRCLE, RECTANGLE, and POLYGON to start creating simple shapes and designs.
- Using Modify Commands: Get to know the modify commands such as MOVE, COPY, ROTATE, and SCALE to edit your drawings effectively.
- Practice with Simple Projects: Apply what you\"ve learned by working on simple drawing projects. This could be anything from drafting a small room layout to creating a basic mechanical part.
- Save and Manage Your Work: Learn how to save your drawings and manage your files efficiently to ensure your work is organized and easily accessible for future editing or viewing.
Remember, practice is key to becoming proficient in AutoCAD. Take your time exploring these features and commands, and don\"t hesitate to experiment with your designs. Happy drafting!

Understanding the AutoCAD Interface
The AutoCAD interface is your gateway to creating and editing your designs. This section will help you become familiar with the main components of the interface, ensuring you can navigate and use AutoCAD efficiently.
- Ribbon: The Ribbon contains multiple tabs, each hosting a collection of tools and commands grouped by functionality. Spend time exploring tabs like Home, Insert, Annotate, and others to discover the wide range of available tools.
- Command Line: Located at the bottom of the screen, the Command Line is where you can type commands directly, receive feedback from AutoCAD, or select from recent commands. It\"s a powerful feature that enables precise control over the software.
- Tool Palettes: Tool Palettes offer quick access to frequently used tools, blocks, and commands. You can customize palettes to suit your workflow and enhance your productivity.
- Model and Layout Tabs: These tabs allow you to switch between the model space, where you create your design, and layout spaces, where you prepare your design for printing or publication.
- Status Bar: The Status Bar at the bottom of the interface provides quick access to tools that affect your drawing environment, such as grid display, snap mode, and others. It\"s essential for managing the settings that impact your drafting precision.
- Navigation Bar and ViewCube: For 3D modeling, the Navigation Bar and ViewCube help you control the perspective of your model, making it easier to view it from different angles and elevations.
By understanding and customizing the AutoCAD interface to your preferences, you can streamline your workflow and focus more on the creative aspects of your projects. Explore each component to discover how it can contribute to your design process.
Basic Drawing & Editing Commands
Mastering the basic drawing and editing commands in AutoCAD is essential for creating precise and professional designs. This section covers the fundamental commands that every user should know to start drafting effectively.
- LINE: The LINE command allows you to draw straight lines between two points. Simply select the LINE tool, click to specify the start point, and click again to define the end point.
- CIRCLE: Use the CIRCLE command to draw circles by specifying the center point and radius. There are several ways to define a circle, including diameter and two-point methods.
- RECTANGLE: The RECTANGLE command creates rectangles by specifying two diagonal corners. Additional options allow you to create squares or rectangles with rounded corners.
- POLYGON: With the POLYGON command, you can draw regular polygons by specifying the number of sides and either the radius or the inscribed circle diameter.
- ARC: The ARC command is used to draw arcs by defining three points: the start point, the end point, and a point on the arc path.
- ERASE: Remove unwanted objects from your drawing with the ERASE command. Select the objects you wish to delete and press Enter to remove them.
- MOVE: To reposition objects, use the MOVE command. Select the objects, then specify the base point and the destination point.
- COPY: The COPY command allows you to duplicate objects. After selecting the objects to copy, specify the base point and then the point where the copy should be placed.
- ROTATE: Rotate objects around a base point using the ROTATE command. Select the objects, the base point, and then enter the rotation angle.
- SCALE: Adjust the size of objects with the SCALE command. Select the objects, specify the base point, and then enter a scale factor.
These basic commands form the foundation of your AutoCAD skills, enabling you to create and modify simple drawings. Practice using these commands to become more efficient and effective in your design work.

Creating Your First Drawing
Embarking on your first AutoCAD drawing is a momentous step in your design journey. This guide will walk you through the process of creating a basic drawing, ensuring you understand the essential steps and techniques.
- Open AutoCAD and Start a New Drawing: Launch AutoCAD, select \"Start Drawing\" to open a new blank drawing file.
- Set Up Your Drawing Environment: Before you begin drawing, adjust your settings. Set the units to match your project requirements and choose an appropriate drawing scale.
- Use Basic Drawing Commands: Start with simple shapes to get comfortable. Use commands like LINE, CIRCLE, and RECTANGLE to draw basic geometric forms.
- Applying Precision Tools: Learn to use tools like object snap (OSNAP) and grids to draw with precision. These tools help ensure accuracy in your drawings.
- Modify Your Drawing: Experiment with modify commands such as MOVE, COPY, ROTATE, and SCALE to adjust your shapes and layout.
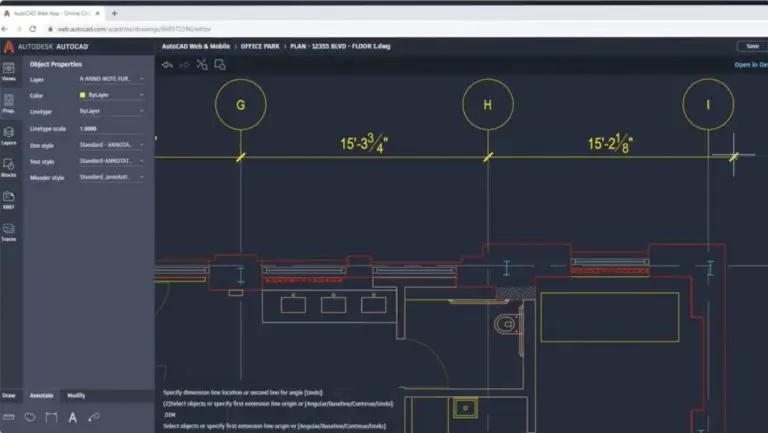
- Adding Text and Dimensions: Use the TEXT command to add labels or notes to your drawing. Add dimensions to your shapes with the DIMENSION command to provide scale and context.
- Layers and Properties: Organize your drawing by assigning elements to layers. Adjust properties like color, line type, and line weight for visual clarity and organization.
- Save Your Work: Regularly save your drawing by clicking on the save icon or using the SAVEAS command to avoid losing progress.
- Practice and Experiment: The best way to learn is by doing. Continue to practice by creating different types of drawings, experimenting with new commands, and exploring AutoCAD’s features.
Creating your first drawing in AutoCAD is just the beginning. With practice and exploration, you\"ll develop the skills to tackle more complex projects and bring your creative visions to life.

_HOOK_
Learning to Use Drawing Tools
AutoCAD offers a vast array of drawing tools that can significantly enhance your design capabilities. This section will introduce you to these tools, helping you understand their functions and how to use them effectively in your projects.
- Line Tool: The backbone of most AutoCAD drawings, the Line tool is used to create straight segments. Practice drawing lines by specifying start and end points, and explore using Ortho mode for perfectly horizontal or vertical lines.
- Circle Tool: Circles are fundamental in design drawings. Learn to draw circles by specifying the center point and radius. Experiment with different methods to create circles, such as using two points or the diameter.
- Rectangle Tool: Quickly create rectangles and squares. Understand how to specify corner points and discover options to create rectangles with chamfered or rounded corners.
- Polyline Tool: Polylines are versatile for creating connected lines and arcs. Master drawing polylines and editing their vertices to shape your designs accurately.
- Trim and Extend: These editing tools are essential for refining your drawings. Learn to trim excess parts of objects or extend them to meet other objects.
- Offset Tool: The Offset tool is invaluable for creating parallel lines or duplicating shapes at a specified distance. Use it for tasks like creating concentric circles or parallel lines.
- Dimensioning Tools: Accurate dimensions are crucial in technical drawings. Familiarize yourself with AutoCAD\"s dimensioning tools to annotate your drawings with precise measurements.
- Hatch Tool: Add patterns or fills to areas in your drawings with the Hatch tool. Learn to use it for representing materials, sections, or to simply enhance the visual appearance of your designs.
- Layers: Managing layers effectively can organize your drawing and make it easier to edit. Practice creating layers for different elements of your drawings and learn to switch between them.
As you become more familiar with these drawing tools, you\"ll find that your efficiency and the quality of your designs improve. Take the time to explore each tool and practice using them in various combinations to achieve the best results in your drawings.

Mastering Precision Drawing Techniques
Precision is critical in creating accurate and professional AutoCAD drawings. This section delves into techniques and tools designed to enhance the precision of your work, ensuring every element is exactly where it needs to be.
- Object Snaps (OSNAP): Object snaps are indispensable for achieving precision. Learn to use them to snap your cursor to exact points on objects, such as endpoints, midpoints, and centers.
- Grids and Snap: Activating the grid provides a visual reference for drawing, while snap restricts cursor movement to defined intervals. Use these features to align objects precisely.
- Ortho Mode: Ortho mode constrains your drawing to horizontal and vertical lines. It\"s perfect for drafting structures or objects with strict alignment requirements.
- Polar Tracking: Polar tracking guides your cursor along specified angles, aiding in maintaining consistency in angled lines. Adjust settings to suit the angles you frequently work with.
- Dimensioning: Apply dimensions accurately to detail the size and relationship between objects. Understanding dimensioning tools and how to use them correctly is crucial for clear, communicative drawings.
- Layers for Precision: Utilize layers to separate different elements of your drawing, making it easier to edit specific parts without affecting others. Assign colors, line types, and other properties to layers for better organization.
- Dynamic Blocks: Dynamic blocks contain flexibility and intelligence that standard blocks do not. Use them to create complex objects that can be adjusted as needed without redrawing.
- Parametric Constraints: These constraints define geometric and dimensional relationships between objects. Learn to use parametric constraints to maintain consistency and enforce standards in your drawings.
By mastering these precision drawing techniques, you\"ll be able to create AutoCAD drawings that are not only accurate but also clear and effective in communicating your design intent. Practice regularly to integrate these techniques seamlessly into your workflow.
AutoCAD Basic Tutorial for Beginners - Part 1
Beginners: \"Unlock your artistic potential with our video designed specifically for beginners! Gain confidence, explore basic techniques, and discover the joy of creating beautiful artwork. Join us and embark on an exciting journey towards becoming a skilled artist!\"
AutoCAD 2022 2D Sketching Tutorial for Beginners in 13 Minutes
Sketching: \"Calling all art enthusiasts! Explore the captivating world of sketching through our engaging video. From capturing intricate details to unleashing your creativity, this video is a must-watch for anyone seeking to refine their sketching skills. Embrace the art of sketching and let your imagination run wild!\"
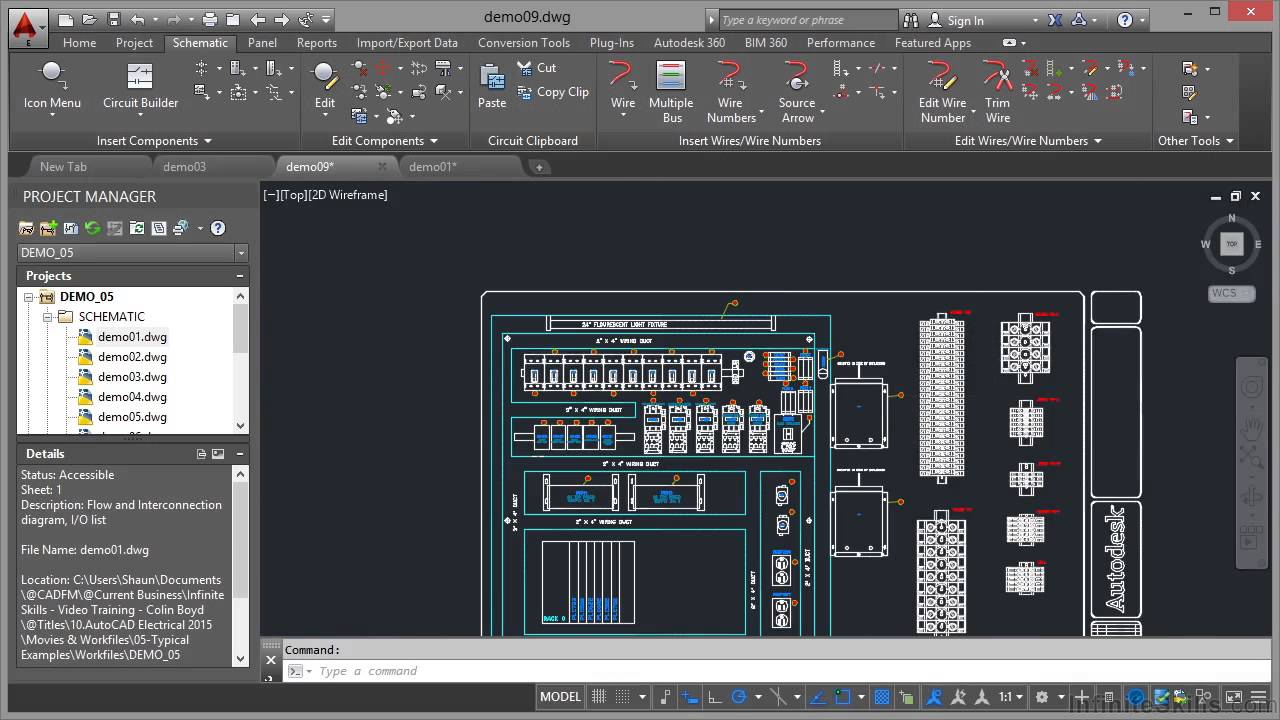
Organizing Objects with Layers and Properties
Effective organization of objects using layers and properties in AutoCAD not only streamlines the design process but also enhances clarity and collaboration. This section covers strategies for utilizing layers and properties to manage complex drawings efficiently.
- Understanding Layers: Layers are like transparent overlays on which you can place different elements of your drawing. Each layer can have its own color, line type, and line weight. Use layers to separate different types of information, such as electrical plans, plumbing, and architectural details.
- Creating and Managing Layers: Learn how to create new layers and assign objects to them. Practice turning layers on and off to view different aspects of your design without altering the layout.
- Using Layer Properties: Adjusting the properties of layers allows you to control the visibility, color, and line types of objects on each layer. This is crucial for distinguishing between different elements in your drawings.
- Layer States: Save and restore layer states to quickly switch between different views of your drawing. This is especially useful when working on complex projects or when needing to present specific aspects of your design.
- Organizing with Layer Groups: Group related layers together for easier management. This helps in applying changes to multiple layers simultaneously, saving time and effort.
- Property Filters: Use property filters to organize your layers more efficiently. Filters allow you to display only the layers that meet certain criteria, making it easier to work with large numbers of layers.
- Layer Transparency: Adjusting the transparency of layers can help in creating more understandable drawings, allowing for the overlay of information without overwhelming the viewer.
Mastering the use of layers and properties in AutoCAD will significantly improve your ability to manage detailed and complex drawings. It ensures that your designs are organized, easily navigable, and prepared for any modifications or updates.
Advanced Drawing Techniques
As you become more comfortable with the basics of AutoCAD, it\"s time to explore advanced drawing techniques that can further enhance the quality and efficiency of your designs. This section introduces you to some powerful tools and methods used by experienced AutoCAD users.
- Using Splines for Complex Curves: Splines allow for the creation of smooth, curved lines that can be adjusted to fit precise contours. Learn how to control spline curvature for intricate designs.
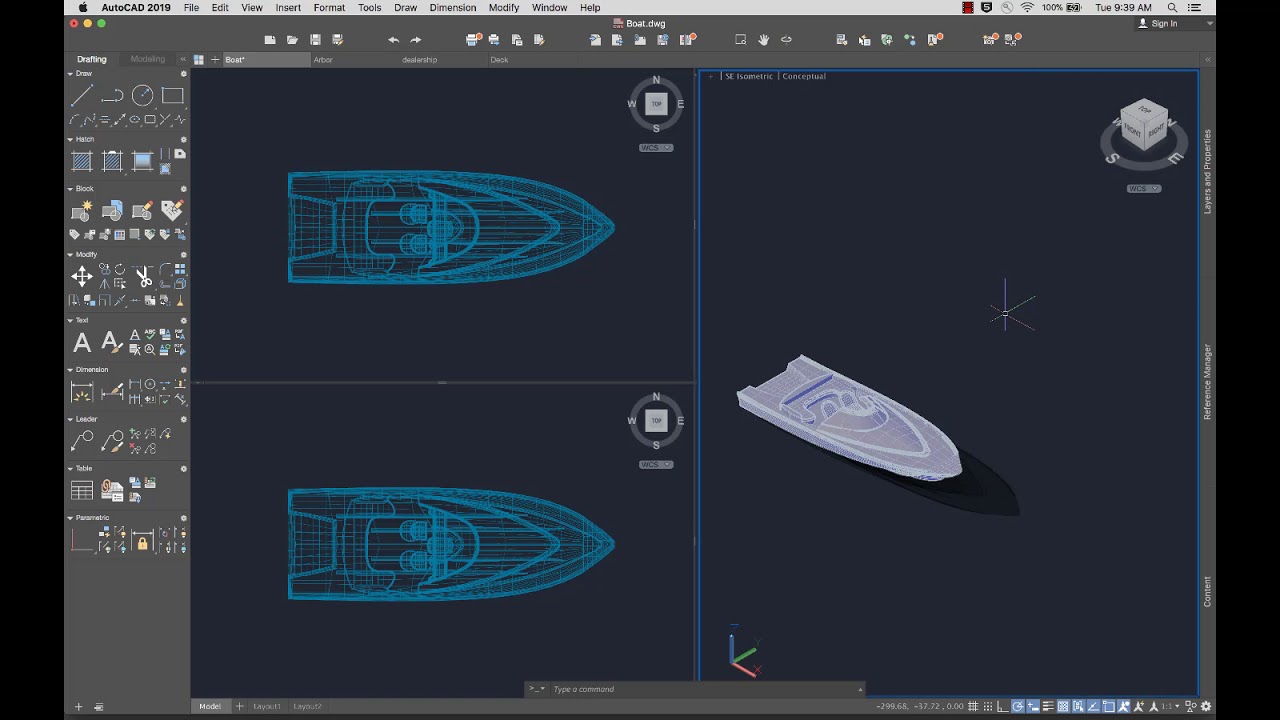
- 3D Modeling and Visualization: Move beyond 2D drafting into 3D modeling. Understand the basics of creating 3D objects, applying materials, and rendering scenes for realistic presentations.
- Creating and Editing Blocks: Blocks are reusable drawing components. Master creating, inserting, and editing blocks to save time on repetitive tasks and maintain consistency across your drawings.
- Dynamic Blocks for Enhanced Flexibility: Dynamic blocks contain parameters and actions that allow for on-the-fly adjustments. Dive into creating dynamic blocks to streamline modifications and variations of standard elements.
- Layer Management for Complex Projects: Advanced layer management techniques, including layer filters and layer states, can simplify working with complex drawings that involve numerous layers.
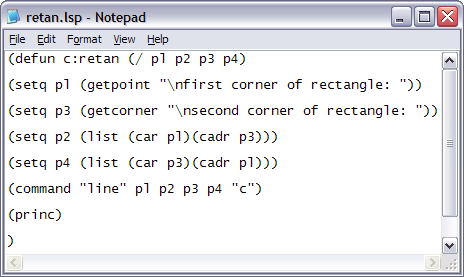
- Customization with AutoLISP: AutoLISP allows for the customization of AutoCAD to automate repetitive tasks or create new functions tailored to your needs. Explore the basics of writing simple AutoLISP scripts.
- Parametric Constraints for Design Flexibility: Utilize parametric constraints to define the geometric and dimensional relationships of drawing elements, making it easy to adjust designs while maintaining consistency.
- Advanced Text and Annotation Techniques: Enhance your drawings with advanced text and annotation features, including fields, tables, and multi-leaders, to convey information more effectively.
By mastering these advanced techniques, you will unlock new possibilities in your designs and improve your ability to tackle complex projects with confidence. Remember, continuous learning and practice are key to advancing your skills in AutoCAD.

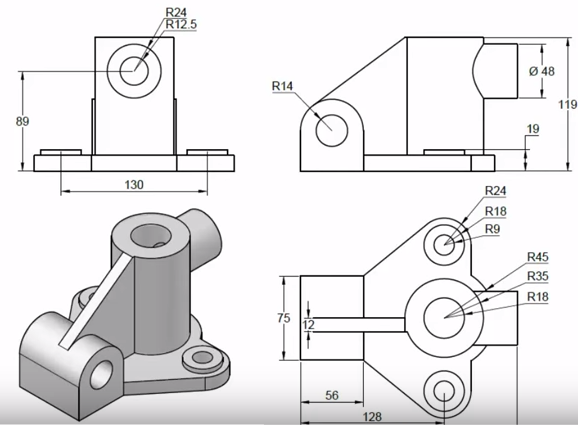
Introduction to 3D Modeling
3D modeling in AutoCAD elevates your designs from flat drawings to realistic simulations, opening up a world of creative possibilities. This section guides you through the fundamentals of starting with 3D modeling in AutoCAD, ensuring a solid foundation for your 3D design projects.
- Understanding 3D Workspaces: Begin by exploring the 3D modeling workspace in AutoCAD, which offers tools specifically designed for 3D work. Learn how to navigate and customize the workspace to suit your needs.
- Creating Simple 3D Objects: Start your 3D modeling journey by creating basic 3D shapes such as boxes, spheres, cylinders, and cones. Understand how to specify dimensions and place these objects in 3D space.
- Modifying 3D Objects: Learn how to modify 3D objects using commands like EXTRUDE, REVOLVE, and SWEEP. These tools allow you to transform 2D shapes into 3D forms and adjust their shapes and sizes.
- Using Viewing Commands: Master the viewing commands to rotate, zoom, and pan around your 3D model. Understanding how to view your model from different angles is crucial for effective 3D modeling.
- Applying Materials and Textures: Give your 3D models a realistic appearance by applying materials and textures. Explore how to access and apply different materials, adjusting their properties to achieve the desired look.
- Lighting and Rendering: Learn the basics of setting up lights and rendering your 3D models. Rendering transforms your model into a realistic image, highlighting the effects of materials and lighting.
- Exporting and Sharing 3D Models: Once your model is complete, explore options for exporting and sharing your 3D designs. Understanding the file formats and platforms for sharing will enhance collaboration and presentation of your work.
Embarking on 3D modeling in AutoCAD can seem daunting, but with patience and practice, you\"ll find it an incredibly rewarding addition to your design skills. Start with simple projects to build your confidence and gradually tackle more complex designs as you become more comfortable with the tools and techniques.

_HOOK_
Rendering and Presenting Your Designs
Rendering transforms your 3D models into images that look realistic and can convey your design intent to clients and stakeholders. This section covers how to effectively render and present your AutoCAD designs, enhancing their visual appeal and comprehensibility.
- Understanding Rendering Tools: Familiarize yourself with AutoCAD\"s rendering tools. Learn about the rendering process, including setting up the environment, choosing materials, and applying lighting effects to achieve realistic results.
- Applying Materials and Textures: Materials and textures add realism to your designs. Explore how to select and apply the right materials to your 3D models, adjusting properties like glossiness and transparency as needed.
- Setting Up Lights: Proper lighting is crucial in rendering. Understand how to use different types of lights in AutoCAD, such as point lights, spotlights, and ambient light, to highlight your design\"s features and create depth.
- Using Cameras for Views: Cameras in AutoCAD help frame your design from the best angles. Learn to place and adjust cameras to capture the perspectives that best showcase your work.
- Rendering the Scene: Dive into the rendering settings to control the quality and resolution of your final image. Experiment with different settings to find the right balance between rendering time and image quality.
- Post-Processing and Editing: After rendering, you may need to adjust the image further. Learn basic post-processing techniques to enhance the final presentation, such as adjusting brightness, contrast, and adding annotations.
- Presenting Your Designs: Finally, explore options for presenting your rendered images. Whether through printed materials, digital slideshows, or online platforms, choose the method that best suits your audience and context.
Effective rendering and presentation can significantly impact how your designs are perceived. By mastering these skills, you ensure that your work is not only technically proficient but also visually compelling and communicative.

READ MORE:
Tips and Tricks for Efficient Use of AutoCAD
Maximizing efficiency in AutoCAD not only saves time but also enhances the quality of your work. This section is dedicated to sharing practical tips and tricks that can streamline your design process and boost your productivity.
- Customize Your Workspace: Tailor the AutoCAD interface to fit your workflow. Customize toolbars, command aliases, and palette locations to access frequently used tools more quickly.
- Use Keyboard Shortcuts: Keyboard shortcuts can significantly speed up your work. Familiarize yourself with common shortcuts, and consider creating custom ones for commands you use often.
- Master Command Line: The command line is a powerful tool for speeding up tasks. Learn to use command options and aliases to execute commands more efficiently.
- Apply Object Snaps: Object snaps are essential for precision drawing. Use them to automatically align cursor movements and actions to specific points on existing objects.
- Utilize Quick Access Toolbar: Place your most-used commands on the Quick Access Toolbar for easy access. This can save you time from navigating through tabs and menus.
- Make Use of Blocks and Dynamic Blocks: Blocks save time by allowing you to reuse and quickly insert common elements into your drawings. Dynamic blocks offer even more flexibility with adjustable parameters.
- Organize with Layers: Efficient layer management helps keep your drawings organized and makes it easier to edit specific elements without affecting the whole drawing.
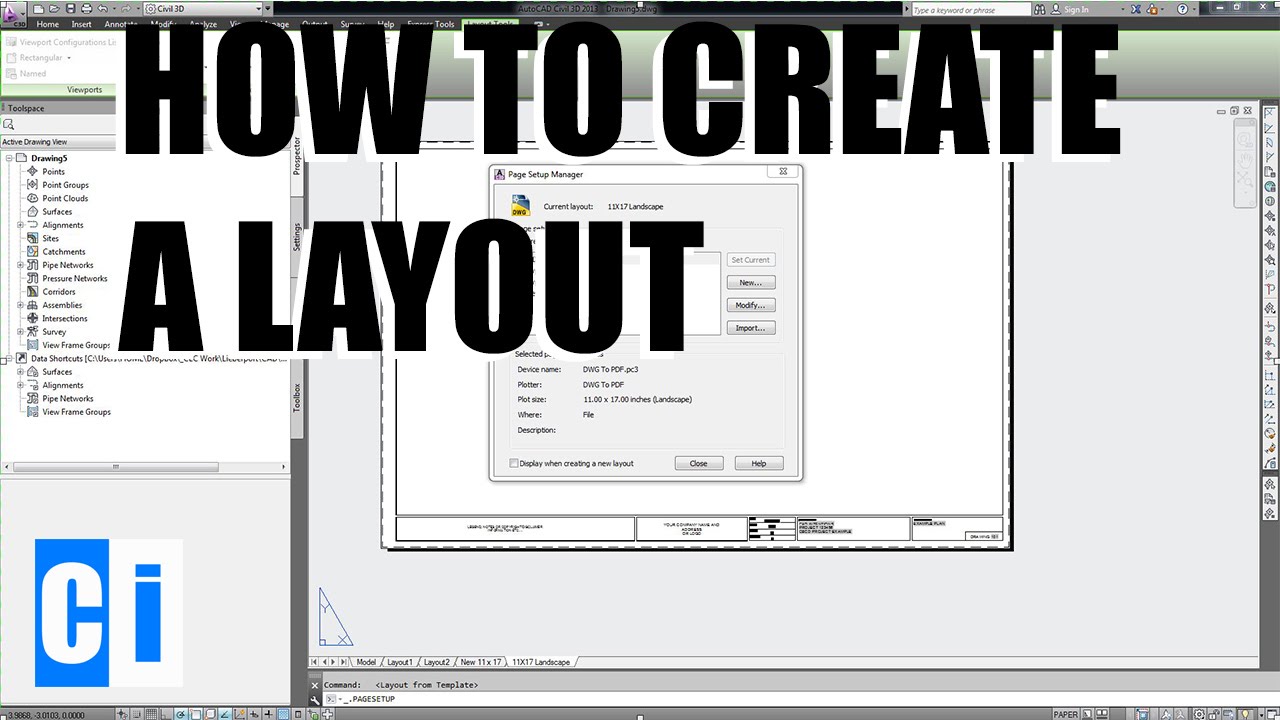
- Leverage Layouts and Viewports: Use layouts and viewports to prepare your drawings for printing. This allows you to present your work in a professional format, with multiple views and scales in a single print.
- Regularly Update Templates: Save time on new projects by creating and updating templates with your preferred settings, layers, and objects ready to use.
- Stay Updated with New Features: AutoCAD is continually updated with new features and improvements. Stay informed and explore these updates to enhance your capabilities and efficiency.
By incorporating these tips and tricks into your daily use of AutoCAD, you can work more effectively, reducing time on routine tasks and focusing more on the creative aspects of your designs.
Embark on your AutoCAD journey with confidence, armed with these tutorials that transform beginners into skilled designers. Discover the endless possibilities of design, and let your creativity flourish with each project you undertake.