Topic autocad tutorials autodesk: Embark on a journey to master AutoCAD with our Autodesk tutorials, designed to equip you with the skills needed for excellence in design and drafting.
Table of Content
- Can I find AutoCAD tutorials on the Autodesk website?
- Getting Started with AutoCAD
- Essential Commands for 2D Drawings
- Creating and Organizing 2D Objects
- Modifying 2D Objects and Advanced Editing Techniques
- Creating Text, Dimensions, and Layouts
- Introduction to 3D Modeling
- YOUTUBE: AutoCAD Basic Tutorial for Beginners
- Advanced 3D Modeling and Surfacing
- Customizing AutoCAD for Efficiency
- Understanding AutoCAD Layers and Properties
- Practical Tips for Effective Design in AutoCAD
- AutoCAD Certification and Professional Development
Can I find AutoCAD tutorials on the Autodesk website?
Yes, you can find AutoCAD tutorials on the Autodesk website.
- Go to the Autodesk website (www.autodesk.com).
- Hover over the \"Products\" tab in the navigation menu.
- From the dropdown menu, click on \"AutoCAD\".
- On the AutoCAD product page, scroll down and look for the \"Learn\" section.
- In the \"Learn\" section, you will find various resources for AutoCAD tutorials and learning materials.
- Click on the \"Tutorials\" link to access the AutoCAD tutorials.
- In the tutorials section, you will find a range of topics and guides to help you learn AutoCAD.
- Select the tutorial that you are interested in and click on it to open.
- Follow the instructions and steps provided in the tutorial to learn and practice AutoCAD.
- Repeat the process for other tutorials if you want to explore more topics or improve your skills.
READ MORE:
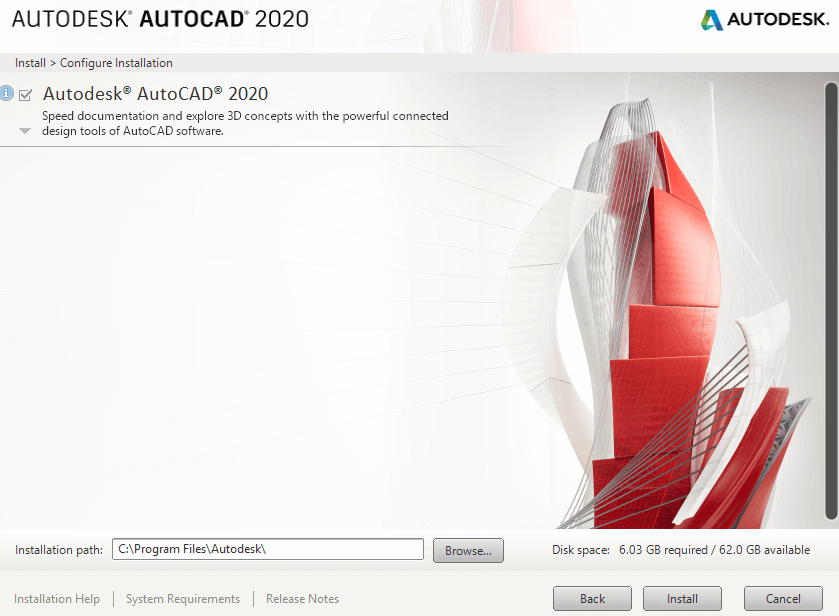
Getting Started with AutoCAD
Welcome to the world of AutoCAD by Autodesk, the premier CAD software that transforms design ideas into reality. Whether you\"re a beginner or looking to refresh your skills, this guide will lay the foundation for mastering AutoCAD\"s powerful features.
- Understanding the AutoCAD Interface: Familiarize yourself with the user interface, including the ribbon, toolbars, command line, and drawing area. Learning the layout will help you navigate and utilize AutoCAD more efficiently.
- Setting Up a New Drawing: Learn how to start a new drawing, set drawing units, and understand the importance of precision. A good setup is crucial for creating accurate designs.
- Basic Drawing Commands: Discover the essential drawing commands like LINE, CIRCLE, RECTANGLE, and POLYLINE. These commands form the backbone of most AutoCAD projects.
- Manipulating Objects: Master the selection methods and modify tools such as MOVE, COPY, ROTATE, and SCALE to edit your designs.
- Layers and Properties: Understand how to use layers to organize your drawing. Learn to control object properties like color, line type, and line weight for better clarity and management.
- Creating Text and Dimensions: Add annotations to your drawings with TEXT and DIMENSION commands. Annotations are key to communicating design intentions.
- Saving and Opening Drawings: Get into the habit of saving your work frequently. Learn the different file formats AutoCAD supports and how to open existing drawings.
By following these steps, you\"ll be well on your way to creating detailed and accurate designs with AutoCAD. Remember, practice is essential, so keep experimenting and exploring the vast capabilities of AutoCAD.

Essential Commands for 2D Drawings
Welcome to the world of AutoCAD by Autodesk, the premier CAD software that transforms design ideas into reality. Whether you\"re a beginner or looking to refresh your skills, this guide will lay the foundation for mastering AutoCAD\"s powerful features.
- Understanding the AutoCAD Interface: Familiarize yourself with the user interface, including the ribbon, toolbars, command line, and drawing area. Learning the layout will help you navigate and utilize AutoCAD more efficiently.
- Setting Up a New Drawing: Learn how to start a new drawing, set drawing units, and understand the importance of precision. A good setup is crucial for creating accurate designs.
- Basic Drawing Commands: Discover the essential drawing commands like LINE, CIRCLE, RECTANGLE, and POLYLINE. These commands form the backbone of most AutoCAD projects.
- Manipulating Objects: Master the selection methods and modify tools such as MOVE, COPY, ROTATE, and SCALE to edit your designs.
- Layers and Properties: Understand how to use layers to organize your drawing. Learn to control object properties like color, line type, and line weight for better clarity and management.
- Creating Text and Dimensions: Add annotations to your drawings with TEXT and DIMENSION commands. Annotations are key to communicating design intentions.
- Saving and Opening Drawings: Get into the habit of saving your work frequently. Learn the different file formats AutoCAD supports and how to open existing drawings.
By following these steps, you\"ll be well on your way to creating detailed and accurate designs with AutoCAD. Remember, practice is essential, so keep experimenting and exploring the vast capabilities of AutoCAD.
Creating and Organizing 2D Objects
Creating and organizing 2D objects in AutoCAD is a fundamental skill for any drafter or designer. This section covers the basics of drawing and organizing 2D objects, including the use of layers, basic drawing commands, and selection techniques.
- Starting with Basic Shapes: Begin by using commands like LINE, POLYLINE, CIRCLE, RECTANGLE, and ARC to create basic geometric shapes. These commands can be accessed from the Draw panel on the Ribbon or by typing the command name in the command line.
- Utilizing Object Snaps: To ensure precision in your drawings, use object snaps (osnaps) by pressing the F3 key or by enabling them from the status bar. Osnaps allow you to snap to specific points on objects, such as endpoints, midpoints, and centers.
- Layer Management: Organize your drawing by assigning objects to layers. Each layer can have its own color, line type, and other properties. Use the LAYER command to open the Layer Properties Manager, where you can create, modify, and assign layers.
- Drawing with Precision: Use the ORTHO mode for horizontal and vertical lines, and the POLAR tracking for angled lines. Activate these modes from the status bar or by pressing F8 for ORTHO and F10 for POLAR.
- Editing Objects: Modify existing objects with commands like MOVE, COPY, ROTATE, SCALE, TRIM, and EXTEND. These tools allow you to alter the shape and position of objects to fit your design needs.
- Selection Techniques: Master selection techniques for efficiency. Use window selection to select objects within a rectangular area, crossing selection to select objects touched by an imaginary rectangle, or single selection by clicking on an object.
- Using Blocks: For repetitive objects, create blocks using the BLOCK command. Blocks can be inserted multiple times in your drawing, reducing file size and making global changes easier.
- Organizing with Groups: Group related objects using the GROUP command for easier manipulation and to maintain their association while editing.
Practicing these techniques will improve your efficiency in creating and managing 2D drawings in AutoCAD. Remember, mastering layer management and object organization is key to a structured and manageable drawing.

Modifying 2D Objects and Advanced Editing Techniques
Modifying 2D objects and employing advanced editing techniques in AutoCAD can significantly enhance the efficiency and precision of your design work. This section delves into the essential tools and strategies for editing 2D objects, enabling you to refine your drawings to meet exact specifications.
- Using the Modify Panel: Familiarize yourself with the Modify panel on the Ribbon, which offers a range of commands like MOVE, COPY, ROTATE, SCALE, and MIRROR. These commands are crucial for altering the position, size, and orientation of objects.
- Trimming and Extending: The TRIM and EXTEND commands allow you to modify the lengths of objects based on their intersection with other objects. These tools are invaluable for adjusting boundaries and aligning elements in your design.
- Offsetting Objects: Use the OFFSET command to create parallel copies of lines, polylines, circles, arcs, or other shapes at a specified distance. This is particularly useful for creating concentric shapes or parallel lines.
- Fillet and Chamfer: Apply the FILLET command to create rounded corners and the CHAMFER command for beveled corners. These commands enhance the aesthetic and functional aspects of your design, allowing for smoother transitions between objects.
- Array Commands: Utilize ARRAY, ARRAYPOLAR, and ARRAYPATH commands to create multiple copies of objects in a rectangular, polar, or path arrangement. Arrays can dramatically speed up the creation of repetitive elements.
- Layer Management for Editing: Efficiently manage layers when editing objects to ensure that modifications are made on the correct layer, maintaining the organization and clarity of the drawing.
- Advanced Selection Techniques: Beyond basic selection tools, use advanced techniques like SELECTSIMILAR to select objects with similar properties, or QUICKSELECT for filtering objects based on criteria like color, layer, or line type.
- Using Grips for Quick Edits: Grips (small squares displayed on selected objects) can be used for quick modifications such as moving, rotating, or scaling. Understanding how to manipulate grips can significantly speed up the editing process.
- Revision Clouds and Markup: The REVCLOUD command creates revision clouds around areas of your drawing needing attention, while markup tools can be used for notes and comments, facilitating clear communication in collaborative projects.
Mastering these advanced editing techniques will enable you to refine your 2D drawings with greater control and precision, ensuring that your designs meet both aesthetic and functional requirements efficiently.

_HOOK_
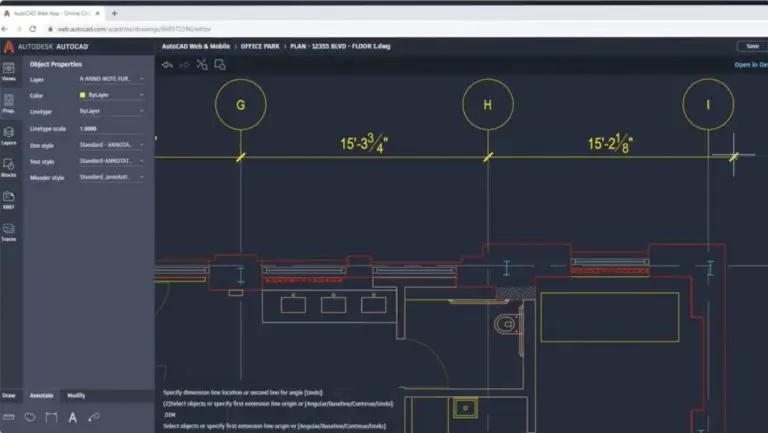
Creating Text, Dimensions, and Layouts
Creating text, adding dimensions, and designing layouts are critical steps in producing detailed and understandable AutoCAD drawings. This section covers the essential techniques and tools for incorporating text, dimensions, and effective layout management into your designs.
- Adding Text to Drawings: Use the DTEXT or MTEXT commands to add single-line or multi-line text. The MTEXT editor provides more formatting options, such as font type, size, and alignment. Text is crucial for notes, labels, and other annotations within your drawing.
- Dimensioning: AutoCAD offers a variety of dimensioning tools that automatically measure and display the distances, angles, diameters, and radii of objects. Use the DIMLINEAR, DIMANGULAR, DIMRADIUS, and DIMDIAMETER commands to create precise dimensions. Customize dimension styles through the Dimension Style Manager to ensure consistency in your drawing.
- Creating Layouts: Layouts represent the sheets that will be printed. Use the Layout tabs at the bottom of the screen to switch between model space and layout space. In layout space, you can create title blocks, frame the viewport(s), and arrange the presentation of your design for printing.
- Setting Up Viewports: Within layouts, use the VIEWPORTS command to create rectangular or polygonal viewports that display different parts of your model space. This allows for detailed views or different scale representations of your design on the same sheet.
- Managing Layers for Layouts: Layers can be turned on or off in each viewport independently, allowing you to control which elements are visible in each view. This layer management is essential for clear and focused presentation of different aspects of your project.
- Customizing Text Styles and Dimension Styles: Before adding text and dimensions, it\"s advisable to create and customize your text and dimension styles. This ensures that your annotations and measurements are consistent in appearance throughout your drawing.
- Using Fields in Text: Fields are dynamic text elements that can automatically update information within text strings, such as dates, dimension values, and other data linked to your drawing. Use fields to make your annotations smarter and more connected to your design.
- Annotation Scaling: Annotation scaling allows text, dimensions, and other annotations to be automatically scaled to match the scale of the viewport they are displayed in. This feature ensures that your annotations are legible at all scales.
By mastering these techniques, you can enhance the clarity, precision, and professionalism of your AutoCAD drawings, ensuring that they effectively communicate your design intentions.

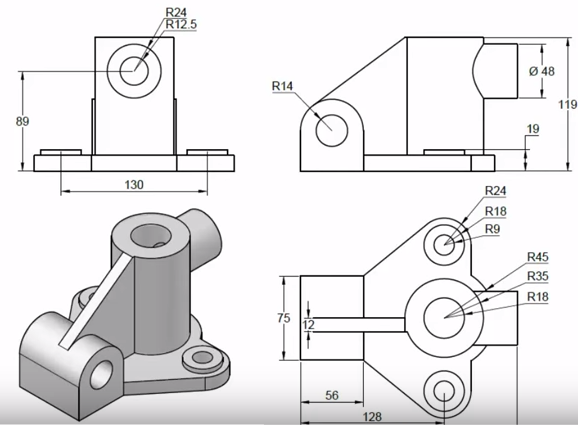
Introduction to 3D Modeling
3D modeling in AutoCAD is a powerful tool that allows designers to create realistic simulations and visualizations of their projects. This section introduces the fundamentals of 3D modeling, including the creation of basic 3D objects, the use of solid modeling commands, and the manipulation of 3D objects.
- Understanding 3D Workspaces: Switch to a 3D workspace in AutoCAD by selecting it from the workspace switcher. This changes the interface to display tools and commands relevant to 3D modeling.
- Creating Basic 3D Shapes: Start with simple 3D shapes such as boxes, spheres, cylinders, cones, and toruses. These can be created using commands like BOX, SPHERE, CYLINDER, CONE, and TORUS. Each shape requires specific parameters like dimensions and placement to be specified.
- Using Solid Modeling Tools: Solid modeling tools allow for the creation of complex 3D forms. Use commands such as EXTRUDE to extend 2D shapes into 3D forms, REVOLVE to create symmetrical 3D objects by revolving 2D shapes around an axis, and SWEEP to extend a 2D shape along a specified path.
- Modifying 3D Objects: Learn to modify 3D objects with commands like UNION, SUBTRACT, and INTERSECT to combine or remove parts of 3D objects. FILLET and CHAMFER can be used to smooth edges and corners of 3D models.
- Working with Surfaces: In addition to solid modeling, AutoCAD provides tools for creating and editing complex surfaces. Use the SURFEXTEND, SURFTRIM, and SURFFILLET commands for surface creation and modification.
- 3D Navigation: Navigate through your 3D model using tools like 3DORBIT, VIEWCUBE, and STEERINGWHEELS. These tools allow you to rotate, zoom, and pan around your model to view it from different angles.
- Visual Styles and Rendering: Apply visual styles to your 3D model to enhance its appearance. Styles can include wireframe, shaded, hidden, and realistic. Use rendering tools to create photorealistic images of your model, applying materials, lighting, and backgrounds.
- Exporting 3D Models: Once your 3D model is complete, it can be exported in various formats for 3D printing, presentation, or further processing in other software.
This introduction to 3D modeling with AutoCAD lays the foundation for creating detailed, accurate, and visually impressive 3D models that can bring your designs to life.
AutoCAD Basic Tutorial for Beginners
Tutorial: Learn step-by-step with this engaging tutorial video that will make you a pro in no time! Get ready to acquire new skills and gain confidence in the subject matter - watch now and take your knowledge to the next level!
AutoCAD Complete Tutorial for Beginners
AutoCAD: Dive into the fascinating world of AutoCAD and discover the endless possibilities it offers! Unleash your creativity and enhance your design skills with this captivating video that will leave you feeling inspired and motivated. Don\'t miss out on the opportunity to expand your horizons - click play now!
Advanced 3D Modeling and Surfacing
Advanced 3D modeling and surfacing techniques in AutoCAD enable designers to create more complex and detailed models. This section explores the tools and methods for enhancing your 3D models, focusing on advanced solid modeling, surface creation, and refinement processes.
- Complex Solid Modeling: Explore advanced solid modeling commands such as LOFT, which creates 3D objects by lofting between shapes, and SWEEP, which extrudes a shape along a path. These tools allow for the creation of intricate 3D models with more complex geometries.
- Advanced Surface Modeling: Surface modeling techniques offer greater control over the aesthetics and topology of your models. Use commands like NETWORKSURFACE to create a surface from intersecting curves and BLEND to smoothly transition between surfaces.
- Editing 3D Solids and Surfaces: Gain proficiency in editing tools such as PRESSPULL for dynamically modifying 3D models, and SCULPT to combine or subtract overlapping solids into a single solid. These tools provide flexibility in shaping and customizing your models.
- 3D Mesh Modeling: Mesh modeling is useful for creating organic shapes. Utilize the MESH commands to create and edit mesh objects, offering versatility in creating more free-form designs.
- Converting Objects: Convert between different object types (solids, surfaces, and meshes) to utilize various modeling techniques on a single model. This conversion capability allows for a more comprehensive approach to 3D modeling.
- Advanced Texturing and Materials: Apply textures and materials to your 3D models to achieve realistic finishes. AutoCAD\"s material library offers a wide range of textures, or you can import custom materials to closely match your design intentions.
- Lighting and Rendering Techniques: Enhance your 3D models with sophisticated lighting setups and rendering techniques. Experiment with different light sources and settings to highlight the features of your model and produce high-quality visuals.
- 3D Printing Preparation: Prepare your 3D model for printing by checking for solid integrity, ensuring watertight meshes, and setting the appropriate scale. AutoCAD\"s tools can help identify and fix issues before exporting the model for 3D printing.
By mastering advanced 3D modeling and surfacing techniques in AutoCAD, you can push the boundaries of your design capabilities, creating highly detailed and complex models that stand out both visually and functionally.

Customizing AutoCAD for Efficiency
Customizing AutoCAD to suit your specific workflow can significantly enhance productivity and efficiency. This section provides insights into tailoring the AutoCAD environment, including interface adjustments, command aliases, tool palettes, and macros for automating repetitive tasks.
- Interface Customization: Tailor the AutoCAD interface to your preferences by customizing the Ribbon, toolbars, and workspaces. Use the CUI (Customize User Interface) command to add, remove, or rearrange tools and commands for easier access.
- Command Aliases: Speed up your workflow by creating aliases for frequently used commands. Edit the acad.pgp file to define short, memorable command aliases, reducing the need for typing long command names.
- Tool Palettes: Organize your most-used blocks, hatches, and commands on tool palettes for quick access. Tool palettes can be customized for specific projects or tasks, streamlining your drawing process.
- Custom Commands and Macros: Automate repetitive tasks by writing custom commands and macros using AutoCAD\"s scripting language, AutoLISP. Create simple scripts to automate tasks like layer management, object placement, and dimensioning.
- Template Creation: Save time on new projects by creating custom templates with predefined settings such as layer names, styles, and drawing scales. Templates ensure consistency across your projects and reduce setup time for new drawings.
- Dynamic Blocks: Create and use dynamic blocks that include parameters and actions for common objects. Dynamic blocks can simplify the drawing process by reducing the number of blocks needed and allowing for easy adjustments.
- Layer States: Manage complex drawings by saving and restoring layer states. Layer states can save the visibility, color, and linetype settings of layers, making it easy to switch between different views of your drawing.
- Quick Access Toolbar: Add your most frequently used commands to the Quick Access Toolbar for one-click access. This can significantly speed up your workflow by reducing the clicks needed to execute commands.
By customizing AutoCAD to fit your working style and project needs, you can achieve a more efficient and personalized drafting experience, allowing for quicker project completion and improved quality of work.

Understanding AutoCAD Layers and Properties
Understanding and effectively managing layers and properties in AutoCAD is crucial for organizing complex drawings and maintaining clarity. This section explores the essentials of working with layers, including creating, modifying, and utilizing layer properties to enhance your drafting workflow.
- Introduction to Layers: Layers in AutoCAD are akin to transparent overlays. By assigning objects to different layers, you can control their visibility, color, linetype, and other properties collectively, without altering the objects individually.
- Creating and Managing Layers: Use the LAYER command to open the Layer Properties Manager, where you can create new layers, rename existing ones, and modify layer properties. Organizing layers effectively is key to managing the different elements of your drawing.
- Layer Properties: Each layer can have specific properties such as color, linetype, and lineweight. Setting these properties helps in distinguishing different types of information in a drawing, such as electrical, plumbing, or structural details.
- Using Layer States: Layer states allow you to save and restore the visibility and properties of layers at different stages of your work. This is particularly useful for presenting different aspects of your project or focusing on specific elements during the design process.
- Layer 0 and Defpoints: Understand the special purpose of Layer 0 and the Defpoints layer. Objects on Layer 0 take on the properties of the current layer when blocked, and objects on the Defpoints layer are not plotted, useful for construction lines or reference points.
- Layer Filters: Use layer filters to organize layers into manageable groups. This is especially helpful in large drawings with many layers, allowing you to quickly find and select specific layers.
- Freezing and Locking Layers: Freezing layers turns them off and removes them from the drawing\"s memory, improving performance. Locking layers prevents modification of the objects on those layers, ensuring that important data remains unchanged.
- Layer Transparency: Adjusting the transparency of layers can enhance the readability of overlapping elements, allowing for a clearer understanding of how different parts of the drawing interact.
Mastering layer management and understanding the properties associated with each layer are fundamental skills for anyone using AutoCAD. Efficient layer management not only helps in organizing and controlling the visibility of different elements in a drawing but also plays a critical role in collaborative environments and complex project workflows.

_HOOK_
Practical Tips for Effective Design in AutoCAD
Designing effectively in AutoCAD requires a blend of technical skill, creativity, and efficiency. This section offers practical tips to enhance your design process, improve accuracy, and save time. Whether you\"re a beginner or an experienced user, these strategies can elevate your AutoCAD projects.
- Utilize Layers Wisely: Organize your design by assigning elements to appropriate layers. This facilitates easy editing and visibility control, making your design process more manageable and your drawings clearer.
- Master Keyboard Shortcuts: Learn and use AutoCAD\"s keyboard shortcuts for common commands. This can dramatically reduce your design time and increase productivity.
- Keep Drawings Clean: Regularly purge unused elements from your drawings. This reduces file size, improves performance, and keeps your workspace organized.
- Use Blocks and Dynamic Blocks: Blocks can streamline your design process, especially for repetitive elements. Dynamic blocks with parameters and actions add flexibility, reducing the number of blocks needed.
- Apply the Correct Scale: Ensure that your drawings are always created at the correct scale, particularly when it comes to printing or exporting. This avoids unnecessary adjustments and errors in the final stages of your project.
- Employ External References: Use external references (Xrefs) for large projects to keep file sizes down and improve collaboration among team members. Xrefs allow you to reference other drawings without adding them directly to your working file.
- Customize Your Workspace: Tailor the AutoCAD interface to fit your workflow. Custom toolbars, ribbons, and command aliases can make your work faster and more intuitive.
- Use Data Extraction Wisely: Extract data from objects in your drawings for use in tables or external files. This is particularly useful for creating bills of materials, schedules, or specifications directly from your drawings.
- Implement Annotation Scaling: Use annotation scaling to keep texts, dimensions, and other annotations readable at different drawing scales. This ensures clarity and consistency across multiple views and layouts.
- Regularly Back Up Your Work: Set up AutoCAD to automatically save backups and use incremental save features to protect against data loss. Regular backups can be a lifesaver in case of hardware failure or software issues.
By integrating these practical tips into your AutoCAD workflow, you can create more efficient, accurate, and professional designs. Each tip helps to optimize various aspects of the design process, from initial drafting to final presentation.

READ MORE:
AutoCAD Certification and Professional Development
Obtaining AutoCAD certification is a significant step in validating your skills and advancing your career in design and drafting. This section guides you through the process of certification and highlights the importance of continuous professional development in staying ahead in the field.
- Understanding AutoCAD Certification: AutoCAD certification is provided by Autodesk and recognizes professionals for their expertise in using AutoCAD software. There are different levels of certification, including the AutoCAD Certified User and AutoCAD Certified Professional.
- Preparing for Certification: Preparation involves in-depth study and practice. Autodesk offers official training guides and courses, both online and in-person, to help candidates prepare. Additionally, practicing with the software and working through real-world projects can solidify your understanding and skills.
- Exam Details: The certification exam tests your knowledge of AutoCAD’s core functions and features, as well as your ability to solve complex workflow and design challenges. Familiarize yourself with the exam format, content areas, and practice tests available through Autodesk’s website.
- Benefits of Certification: Being certified can enhance your resume, improve your job prospects, and lead to higher earning potential. It also demonstrates your commitment to professional growth and mastery of industry-standard software.
- Continuing Education: Technology and software capabilities evolve rapidly, making continuous learning essential. Autodesk provides various resources for ongoing education, including webinars, tutorials, and community forums, where professionals can learn new features and best practices.
- Joining Professional Networks: Engaging with professional networks and communities, such as the Autodesk User Group International (AUGI), can provide valuable opportunities for learning, networking, and career development.
- Maintaining Certification: Autodesk certifications are valid for a specific period. Staying updated with software changes and renewing your certification as required ensures that your skills remain current and relevant.
- Exploring Specializations: Beyond general AutoCAD certification, consider specializing in specific industries such as architecture, engineering, or manufacturing. Specialized knowledge and skills can open doors to advanced roles and opportunities.
AutoCAD certification and professional development are crucial for anyone looking to advance in the fields of design, engineering, and architecture. Investing in your skills not only boosts your career prospects but also contributes to your personal growth and the quality of your work.
Obtaining AutoCAD certification is a significant step in validating your skills and advancing your career in design and drafting. This section guides you through the process of certification and highlights the importance of continuous professional development in staying ahead in the field.
AutoCAD certification and professional development are crucial for anyone looking to advance in the fields of design, engineering, and architecture. Investing in your skills not only boosts your career prospects but also contributes to your personal growth and the quality of your work.