Topic autocad tutorial mac: Welcome to our comprehensive AutoCAD tutorial for Mac, designed to equip you with the skills needed to create stunning designs and precise drafts effortlessly.
Table of Content
- What are some recommended AutoCAD tutorials for Mac users?
- 1. Getting Started with AutoCAD for Mac
- 2. Interface Overview and Navigation Tips
- 3. Basic Drawing and Editing Commands
- 4. Working with Layers and Properties
- YOUTUBE: Learn AutoCAD in 30 minutes! Basic Knowledge Macbook
- 5. Creating Simple 2D Geometries
- 6. Advanced Drawing Techniques
- 7. Using Text and Dimensions in Your Drawing
- 8. Block Creation and Management
- 9. Introduction to 3D Modeling
- 10. Rendering and Presenting Your Designs
- 11. Customizing the AutoCAD for Mac Workspace
- 12. Tips for Efficient Workflow and Best Practices
- 13. Troubleshooting Common Issues
- 14. Additional Resources and Where to Find Help
What are some recommended AutoCAD tutorials for Mac users?
When it comes to learning AutoCAD on a Mac, there are several tutorials available that can help you get started. Here are some recommended AutoCAD tutorials for Mac users:
- AutoCAD for Mac Overview by Autodesk: Autodesk, the company behind AutoCAD, provides a comprehensive overview of AutoCAD for Mac on their official website. This resource can help you understand the basics of the software and its features.
- AutoCAD 2017 Essential Training by Lynda.com: Lynda.com offers a detailed video tutorial series specifically designed for AutoCAD 2017 on Mac. This course covers essential commands and techniques for creating 2D drawings in AutoCAD.
- AutoCAD Quick Guide by Tutorials Point: Tutorials Point provides a quick guide on AutoCAD, which includes step-by-step instructions and illustrations. Although not specific to Mac, the guide covers the basics and can be useful for Mac users as well.
These resources can help you get started with AutoCAD on your Mac and develop a solid foundation in using the software. Remember, practice and experimentation are key to mastering AutoCAD, so don\'t hesitate to explore and try different commands and features!
READ MORE:
1. Getting Started with AutoCAD for Mac
Beginning your journey with AutoCAD on Mac involves a few key steps to ensure you are set up for success. Follow these guidelines to start designing and drafting with AutoCAD on your Mac:
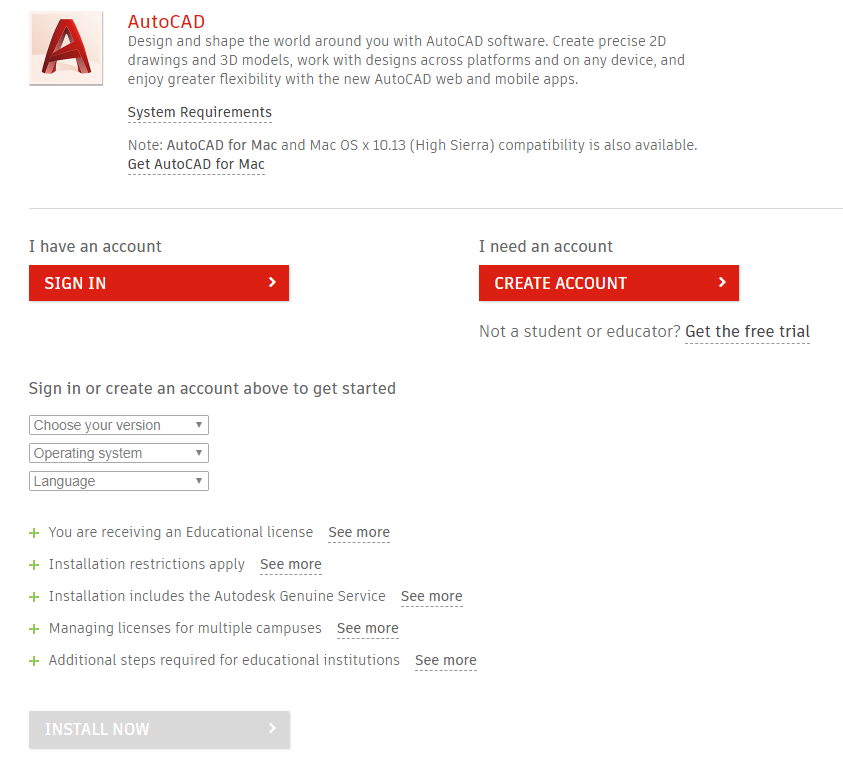
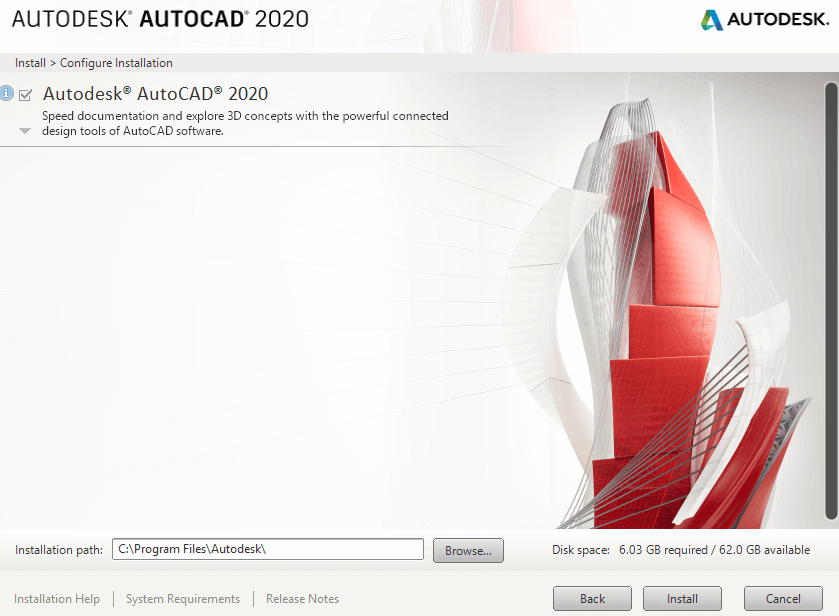
- Download and Install AutoCAD for Mac: Visit the Autodesk official website, select the AutoCAD version suited for Mac, and follow the installation instructions.
- Explore the User Interface: Familiarize yourself with the AutoCAD workspace, including the tool sets, command line, and drawing area to navigate through the software efficiently.
- Set Up Your Drawing Environment: Configure the drawing units, limits, and other settings appropriate to your project to ensure precision in your work.
- Learn Basic Commands: Start with basic commands like LINE, CIRCLE, RECTANGLE, and MOVE to begin creating simple designs. Practice using these commands to understand their functions.
- Practice with Simple Projects: Apply what you\"ve learned by working on simple drawing projects. This will help you become comfortable with the software\"s tools and features.
- Utilize AutoCAD\"s Help Resources: Take advantage of AutoCAD\"s extensive help documentation and tutorials within the software to answer any questions that arise as you learn.
By following these steps, you\"ll be well on your way to mastering AutoCAD on your Mac, ready to tackle more complex designs and projects with confidence.
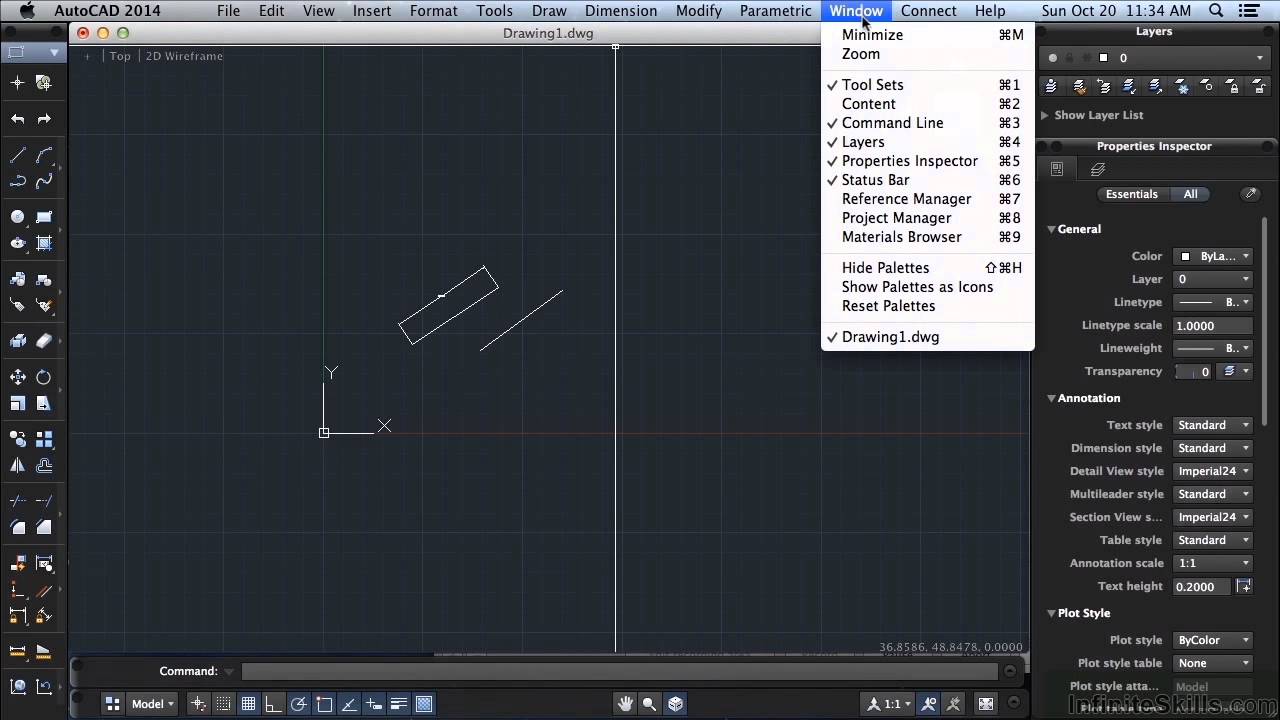
2. Interface Overview and Navigation Tips
Understanding the AutoCAD interface on Mac is crucial for efficient design and drafting. This section provides an overview of the interface elements and essential navigation tips to enhance your productivity:
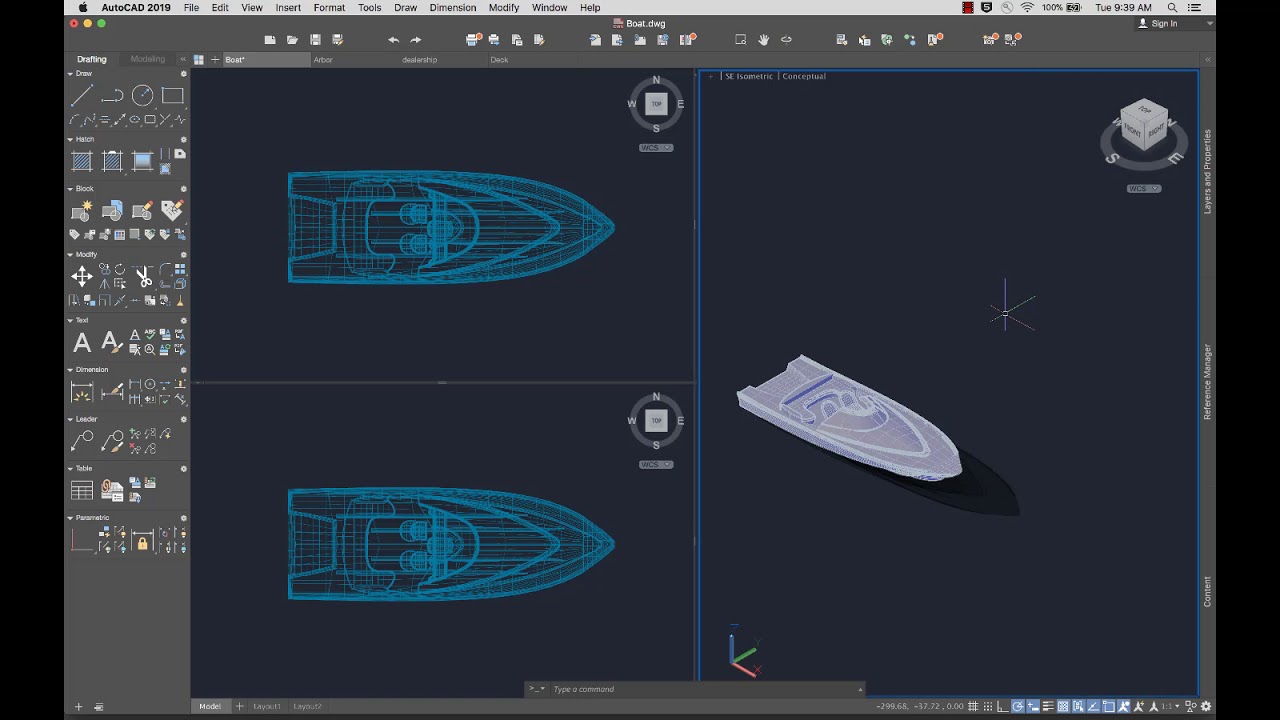
- Workspace: The AutoCAD for Mac interface includes the drawing area, toolbars, command line, and palettes. Customize your workspace to fit your workflow and project needs.
- Tool Sets: Access a variety of tools for drawing, modifying, and annotating your designs directly from the tool sets. You can customize tool sets for easy access to frequently used commands.
- Command Line: Use the command line to enter commands, view prompts, and access command history. It\"s a powerful tool for experienced users to work efficiently.
- Palettes: Utilize palettes like Properties, Layers, and Blocks to manage and modify different aspects of your drawings easily.
- Navigation Tools: Master navigation tools such as Zoom, Pan, and Orbit to move around your drawing effortlessly. Learning keyboard shortcuts for these tools can significantly speed up your workflow.
Navigation Tips:
- Zoom: Use the scroll wheel on your mouse or the Zoom command to get a closer view of your work or to see the overall drawing.
- Pan: Hold the space bar and drag your mouse to move the view of your drawing.
- ViewCube: Use the ViewCube for 3D drawings to quickly switch between standard and isometric views.
- Layouts and Model Space: Toggle between model space and layouts to work on your design and prepare it for printing.
- Customize Your Interface: Tailor the interface according to your preferences by customizing the tool sets and workspace for a more personalized experience.
By familiarizing yourself with the AutoCAD for Mac interface and these navigation tips, you\"ll be able to move through your drawings more efficiently, making your design process smoother and more productive.
3. Basic Drawing and Editing Commands
Mastering basic drawing and editing commands in AutoCAD for Mac is essential for creating precise and detailed designs. This section covers fundamental commands to get you started:
- LINE: Create straight lines by specifying start and end points. Useful for outlining shapes and structures.
- POLYLINE: Draw connected lines and arcs as a single object, allowing for easier manipulation and editing.
- CIRCLE: Generate perfect circles by defining the center point and radius. Essential for circular features in designs.
- RECTANGLE: Quickly create rectangles by specifying corner points or dimensions. A basic shape for layout and design.
- ARC: Create arc segments by defining the center, start, end points, or radius. Useful for curved edges and details.
Editing Commands:
- MOVE: Select and move objects to a new location within your drawing for precise placement.
- COPY: Duplicate selected objects, allowing for repetitive elements in your design without redrawing.
- ROTATE: Rotate objects around a base point to align them correctly within your design.
- TRIM: Remove parts of objects to intersect or meet precisely with other elements in your design.
- EXTEND: Lengthen objects to meet the edges of another object, ensuring continuity in lines and boundaries.
Combining these basic commands can significantly enhance your design process, enabling you to create complex drawings with ease. Practice using these commands to become familiar with their functionality and to streamline your workflow in AutoCAD for Mac.
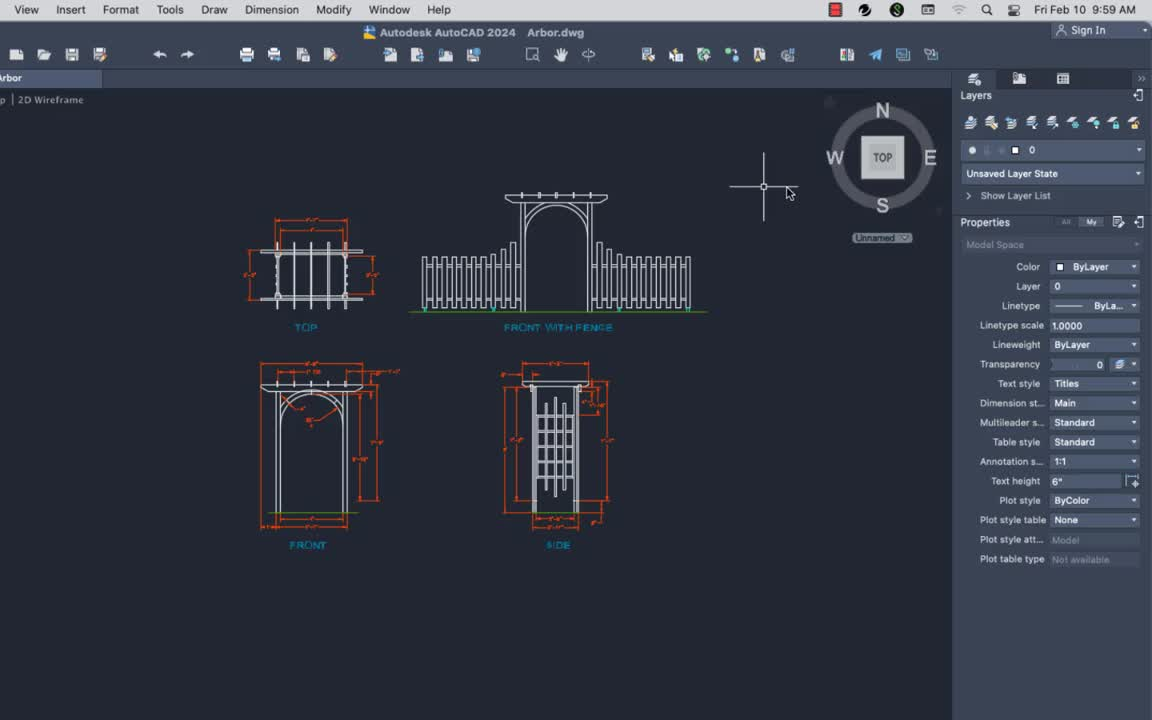
4. Working with Layers and Properties
Layers and properties in AutoCAD for Mac serve as fundamental tools for organizing and managing your drawings. Understanding how to effectively use layers and adjust properties can greatly enhance the clarity and efficiency of your work.
- Understanding Layers: Layers allow you to segregate different elements of your drawing, such as electrical layouts, plumbing, and architectural details, enabling you to hide or show these elements as needed.
- Creating and Managing Layers: Learn how to create new layers, assign colors, line types, and line weights to them, making your drawings more readable and easier to edit.
- Layer Properties Manager: Use the Layer Properties Manager to modify layer settings, such as making a layer printable or non-printable, locking or unlocking layers, and changing their transparency.
- Assigning Objects to Layers: Assign drawing objects to appropriate layers as you create them, which will help in maintaining an organized drawing environment.
- Utilizing Layer States: Save and restore layer states to quickly switch between different views of your drawing, making it easier to work on complex projects with many layers.
Properties Management:
- Adjusting Object Properties: Learn how to select objects and modify their properties, such as color, line type, and line weight, to emphasize different aspects of your design.
- Using the Properties Palette: The Properties palette is a powerful tool that allows you to view and edit the properties of selected objects, enabling quick adjustments without navigating through menus.
- Match Properties: Use the Match Properties command to quickly apply the properties of one object to another, ensuring consistency throughout your drawing.
By mastering the use of layers and properties in AutoCAD for Mac, you can create more structured and navigable drawings, streamline your workflow, and enhance collaboration with team members.
_HOOK_
Learn AutoCAD in 30 minutes! Basic Knowledge Macbook
\"Looking for quick and easy ways to master AutoCAD? Don\'t miss our detailed tutorial video that provides step-by-step instructions and expert tips to help you become an AutoCAD pro in no time. Start creating your own stunning designs today!\"
Learn AutoCAD in 30 minutes! Basic Knowledge Macbook
\"Looking for quick and easy ways to master AutoCAD? Don\'t miss our detailed tutorial video that provides step-by-step instructions and expert tips to help you become an AutoCAD pro in no time. Start creating your own stunning designs today!\"
5. Creating Simple 2D Geometries
Creating simple 2D geometries is a foundational skill in AutoCAD for Mac. This section will guide you through the process of drawing basic shapes and forms, which are the building blocks for more complex designs.
- Lines and Polylines: Use the LINE command to draw straight lines, and the PLINE command for continuous lines and shapes. Experiment with creating rectangles and squares by connecting lines.
- Circles and Arcs: The CIRCLE command allows you to draw perfect circles by specifying the center point and radius. Use the ARC command to create arc segments by defining three points: the start, center, and end.
- Rectangles and Polygons: Utilize the RECTANGLE command to quickly draw rectangles by specifying diagonal corners. The POLYGON command lets you create equilateral polygons by entering the number of sides and a radius.
- Ellipses: Create ellipses with the ELLIPSE command by specifying the center, endpoint of one axis, and endpoint of the other axis. This is useful for more complex geometric shapes.
- Editing Geometries: Learn to modify these geometries with commands like TRIM, EXTEND, FILLET, and CHAMFER to refine your shapes and connect different elements smoothly.
Practice these commands by creating simple drawings. Start with individual shapes and gradually combine them to form more complex designs. Understanding and applying these basic 2D geometry commands will significantly improve your efficiency and precision in AutoCAD for Mac.
6. Advanced Drawing Techniques
Once you\"re comfortable with basic drawing commands in AutoCAD for Mac, it\"s time to elevate your skills with advanced drawing techniques. These methods will enable you to create more complex and detailed designs efficiently.
- Using Construction Lines and Rays: Construction lines (xlines) and rays help you create accurate reference lines that extend infinitely. They are essential for aligning objects and creating complex geometries.
- Creating and Editing Splines: Splines are smooth curves that pass through or near specified points. Use the SPLINE command for creating curved shapes that require precision and smooth transitions.
- Working with Polylines: Advanced editing of polylines, including joining, editing vertices, and applying width, can create complex shapes and patterns. Use the PEDIT command to modify polylines.
- Utilizing Hatch Patterns: Hatch patterns can add texture or signify material types in your drawings. Explore the HATCH command to apply patterns within specified boundaries.
- Using Layers Effectively: Advanced layer management, including freezing, locking, and color coding, helps organize complex drawings. Utilize layer states to save and restore layer configurations for different views.
- Implementing Blocks and Attributes: Blocks allow you to create reusable symbols or components. Attributes within blocks can hold variable data, such as part numbers or specifications, streamlining the annotation and documentation process.
- Advanced Text and Dimensioning Techniques: Explore advanced text styles and dimensioning tools for clear communication and documentation within your drawings. Custom dimension styles and multiline text formatting are crucial for professional drawings.
- Creating Dynamic Blocks and Parametric Constraints: Dynamic blocks with adjustable parameters and constraints offer flexibility in design modifications. Parametric constraints help maintain relationships between objects as your design changes.
Mastering these advanced techniques in AutoCAD for Mac will significantly enhance your ability to tackle complex projects and improve your design workflows. Dedicate time to practice each technique and incorporate them into your projects for greater efficiency and creativity.

7. Using Text and Dimensions in Your Drawing
Text and dimensions are critical elements in AutoCAD for Mac, providing clarity and necessary details to your drawings. This section guides you on how to effectively incorporate text and dimensions into your designs.
- Adding Text to Your Drawings: Use the TEXT or DTEXT command to place single-line text, and the MTEXT command for multiline text. Customize text styles through the Text Style Manager, adjusting font, size, and properties to suit your drawing’s needs.
- Dimensioning Your Designs: AutoCAD for Mac offers various dimensioning tools such as linear, radial, angular, and ordinate dimensions. Use the DIMSTYLE command to create custom dimension styles that reflect the standards and readability required for your project.
- Using Leaders and Annotations: Leaders with annotations can direct attention to specific parts of your drawing, providing explanations or notes. The QLEADER command allows you to draw leaders and add text annotations efficiently.
- Applying Tables: Tables can organize data and information within your drawings. Use the TABLE command to insert and format tables, making it easier to include schedules, legends, or any tabulated information.
- Managing Text and Dimension Properties: Adjust properties such as color, layer, and scale to ensure that your text and dimensions are clearly visible and consistent throughout your drawing. Remember to use layers dedicated to text and dimensions for better organization.
Effective use of text and dimensions not only enhances the professionalism of your drawings but also ensures that they are easy to understand and follow. Practice using these tools to become proficient in annotating and dimensioning your AutoCAD projects on Mac.
8. Block Creation and Management
Blocks are a fundamental aspect of AutoCAD for Mac, allowing you to create reusable symbols and components, enhancing efficiency and consistency across your drawings. This section covers how to create, manage, and utilize blocks effectively.
- Creating Blocks: Use the BLOCK command to define a block. Select the objects you wish to include, specify a base point, and give your block a name. Consider what elements make sense to group together as a block for repeated use.
- Inserting Blocks: With the INSERT command, you can place instances of your blocks into your drawings. You can also scale and rotate blocks upon insertion to fit your design needs.
- Editing Blocks: To modify a block, use the REFEDIT command to open the block editor. Make necessary changes and save them to update all instances of the block within your drawing automatically.
- Managing Block Libraries: Organize your blocks into libraries for easy access and sharing among projects. AutoCAD for Mac allows you to import blocks from other drawings or external files, expanding your library.
- Using Dynamic Blocks: Dynamic blocks include parameters and constraints that allow for adjustments to a block\"s shape, size, or configuration. Learning to create and use dynamic blocks can significantly increase your drawing flexibility and reduce the number of blocks you need to manage.
Efficient block creation and management can dramatically improve your workflow, making it easier to maintain consistency across multiple drawings while saving time. As you become more familiar with blocks, explore advanced features to leverage their full potential in your AutoCAD for Mac projects.

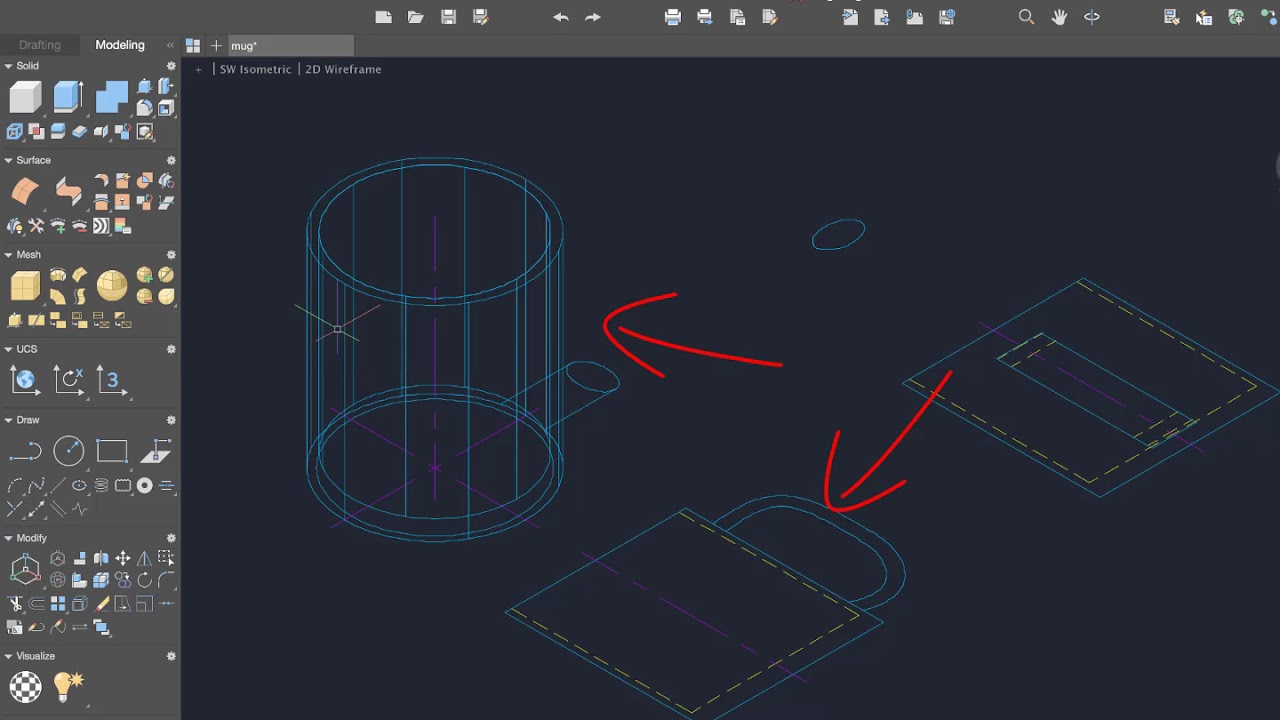
9. Introduction to 3D Modeling
Transitioning from 2D drafting to 3D modeling in AutoCAD for Mac opens up a new dimension of design possibilities. This section introduces the basics of 3D modeling, helping you start creating three-dimensional objects and spaces.
- Understanding the 3D Workspace: Switch to the 3D modeling workspace to access tools specifically designed for 3D work. Familiarize yourself with the interface and navigation tools like Orbit, Pan, and Zoom in a 3D context.
- Creating Basic 3D Shapes: Start with simple 3D shapes such as boxes, spheres, cylinders, cones, and pyramids using the commands BOX, SPHERE, CYLINDER, CONE, and PYRAMID respectively. These basic forms are the building blocks of more complex 3D models.
- Modifying 3D Objects: Learn to modify 3D objects using commands like EXTRUDE, to extend a 2D shape into a 3D form; REVOLVE, to create symmetrical 3D objects; and PRESSPULL, to dynamically modify 3D shapes.
- Using Boolean Operations: Understand how to use Boolean operations (UNION, SUBTRACT, and INTERSECT) to combine or subtract 3D bodies, creating complex shapes from simple ones.
- Navigating in 3D: Master the ViewCube and SteeringWheels for intuitive 3D navigation, allowing you to examine your models from every angle.
- Introduction to Surface Modeling: Explore surface modeling to create complex and curved 3D surfaces that cannot be achieved with solid modeling alone.
- Rendering and Visualizing Your Model: Apply materials, lighting, and backgrounds to your 3D models for rendering, giving a realistic appearance and preparing your design for presentations or export.
Beginning your journey into 3D modeling with AutoCAD for Mac will enhance your design capabilities. Practice these fundamental concepts to build a solid foundation in 3D design and visualization.

_HOOK_
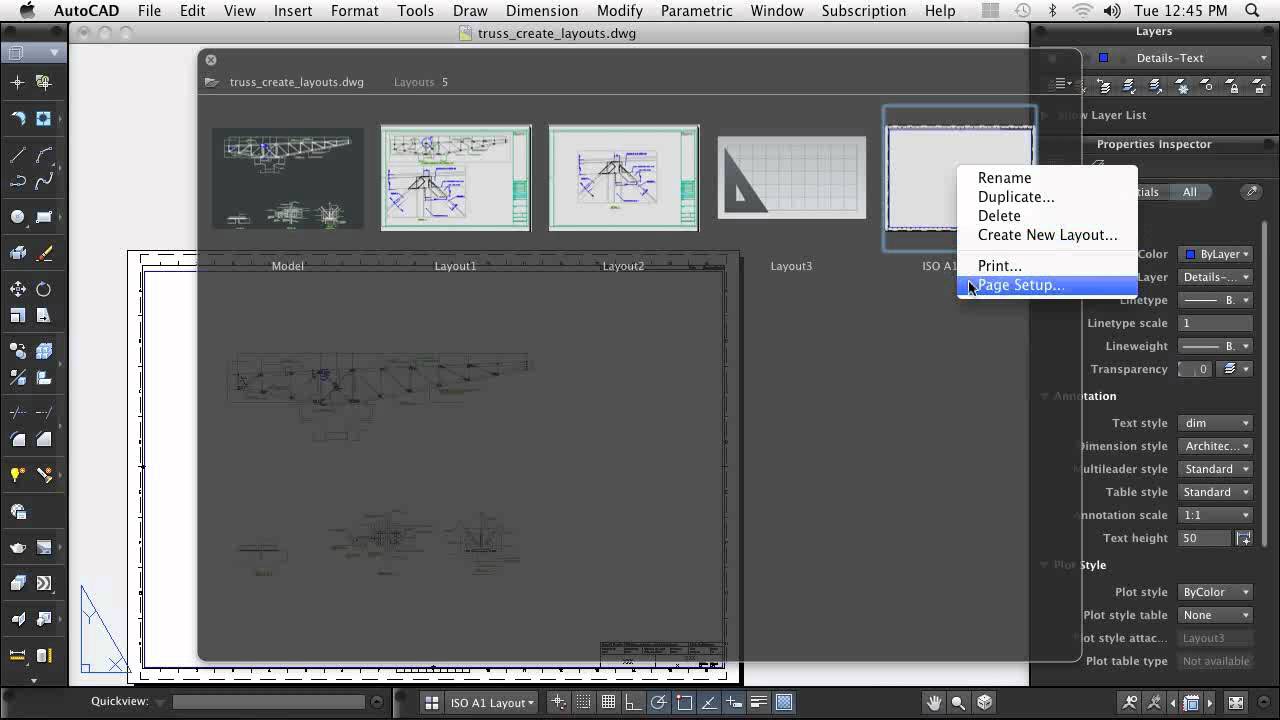
10. Rendering and Presenting Your Designs
Rendering and presenting your designs effectively is crucial for communicating your ideas clearly and professionally. In AutoCAD for Mac, several tools and techniques can help enhance your presentations:
- Preparing Your Model for Rendering: Before rendering, ensure your model is complete, with all necessary details and textures applied. Check the scale and orientation to make sure they are accurate.
- Applying Materials and Textures: Use the Materials Browser to apply different materials and textures to your model, giving it a realistic appearance. Experiment with various materials to achieve the desired look and feel.
- Setting Up Lighting: Proper lighting is essential for a high-quality render. Adjust light sources in your model to highlight the best features of your design and create the right atmosphere.
- Using the Render Command: With your model prepared, use the RENDER command to process your design into a high-quality image. Adjust rendering settings to balance between quality and rendering time.
- Exporting and Sharing Your Design: Once rendered, export your design to various formats for sharing or presentation. Consider using PDFs for easy sharing or exporting images for presentations and marketing materials.
- Creating Layouts and Viewports: For technical presentations, use layouts and viewports in AutoCAD to create professional sheets that can include multiple views of your model, annotations, and dimensions.
- Presenting Your Design: When presenting, tailor your approach to your audience. Highlight key features and the design process, and be prepared to answer questions regarding your design choices and methods.
By following these steps and utilizing AutoCAD for Mac\"s rendering and presentation tools, you can create compelling and visually appealing presentations that effectively communicate the value and details of your designs.
11. Customizing the AutoCAD for Mac Workspace
Customizing your AutoCAD for Mac workspace can significantly improve your productivity by tailoring the environment to your specific needs and workflow. Follow these steps to create a workspace that suits your design process:
- Adjusting the Interface: Explore the AutoCAD preferences to adjust the interface settings, such as the color scheme, cursor size, and display options to make your workspace comfortable for long hours of work.
- Customizing Toolbars and Ribbons: Modify toolbars and ribbons to include commands you frequently use. You can add, remove, or rearrange tools to streamline your workflow and access necessary tools quickly.
- Setting Up Command Aliases: Create custom command aliases for commands you frequently use to speed up your design process. Command aliases allow you to execute commands quickly through the keyboard.
- Using Workspaces: AutoCAD for Mac allows you to save customized workspaces. You can switch between different workspaces depending on the task at hand, such as drafting, modeling, or rendering.
- Managing Palettes: Organize and customize the palettes you use often, such as the Properties palette or the Tool Sets palette, for easy access to tools and properties relevant to your current project.
- Keyboard Shortcuts: Customize keyboard shortcuts to speed up common actions and commands. Having personalized shortcuts can make a significant difference in your productivity and efficiency.
- Creating Template Files: Save time on new projects by creating template files with pre-set layers, styles, and settings according to your preferences and requirements.
By customizing the AutoCAD for Mac workspace to fit your unique style and project needs, you can enhance your efficiency, reduce repetitive tasks, and create a more enjoyable drafting or modeling experience.
12. Tips for Efficient Workflow and Best Practices
Adopting efficient workflows and best practices in AutoCAD for Mac not only enhances your productivity but also ensures the quality and accuracy of your designs. Consider these tips to optimize your AutoCAD usage:
- Layer Management: Organize your drawings with layers. This helps in managing visibility and simplifies modifications without affecting other elements of your design.
- Regular Saving and Backups: Cultivate the habit of saving your work frequently. Additionally, set up AutoCAD to automatically save backups to prevent data loss.
- Use of Blocks and References: Implement blocks for repetitive elements and use external references for large projects to keep your files manageable and reduce file size.
- Custom Command Aliases: Create custom command aliases for the commands you use the most. This reduces the need for typing and speeds up your design process.
- Keyboard Shortcuts: Memorize and use keyboard shortcuts for common actions to save time. Customize shortcuts for your most-used commands.
- Template Use: Develop templates with pre-defined settings for layers, styles, and layouts to maintain consistency across your projects and start new projects quickly.
- Effective Use of Palettes: Arrange and dock palettes that you frequently use in a way that they are easily accessible but do not clutter your workspace.
- Regular Cleanup: Use the PURGE command regularly to remove unused elements and clean your drawings, which helps in reducing file size and improving performance.
- Continuous Learning: Stay updated with new features and tools introduced in AutoCAD for Mac. Continuous learning can uncover new ways to improve your workflow.
- Peer Review and Collaboration: Collaborate with peers for reviews. Getting feedback can help identify issues early and improve the overall quality of your work.
Implementing these tips can significantly contribute to a more efficient and productive design process in AutoCAD for Mac. Adapt these practices to fit your workflow and project requirements for optimal results.
13. Troubleshooting Common Issues
While working with AutoCAD for Mac, users may encounter various issues that can hinder their workflow. This section outlines solutions to some common problems, helping you maintain a smooth design process.
- Software Crashes or Freezes: Ensure your Mac meets AutoCAD\"s system requirements. Regularly update AutoCAD and macOS to the latest versions to fix bugs and improve stability.
- Files Not Opening: Check if the file is being used in another program. If corruption is suspected, use the RECOVER command to repair the drawing file.
- Slow Performance: Reduce the file size by purging unused objects with the PURGE command. Also, consider working with simpler visual styles and turning off unnecessary layers.
- Printing Issues: Verify printer settings and ensure that the printer driver is up to date. Use the PLOT command to manage plot settings effectively.
- Toolbars or Palettes Missing: Reset your workspace to the default setting or use the WORKSPACE command to switch to a different workspace that includes the missing tools.
- Difficulty in Snapping to Objects: Check SNAP and GRID settings or adjust the OSNAP settings to ensure you\"re snapping to the desired points.
- Problems with Scaling or Units: Verify the drawing\"s scale and units in the drawing settings. Ensure that the scale matches across all layouts and views.
- Error Messages During Operations: Document the exact error message and consult AutoCAD’s help documentation or forums. Often, the solution involves a simple setting adjustment or software update.
Encountering issues can be frustrating, but with the right approach, most problems are solvable. Always back up your work regularly to prevent data loss and consult AutoCAD resources or the user community for assistance with complex issues.
READ MORE:
14. Additional Resources and Where to Find Help
Learning AutoCAD for Mac is an ongoing process, and accessing the right resources can significantly enhance your understanding and efficiency. Below are valuable resources for further learning and assistance:
- AutoCAD Help Documentation: Autodesk provides comprehensive help documentation for AutoCAD for Mac, covering every tool and feature in detail.
- Online Forums and Communities: Autodesk forums, Reddit, and other CAD-related communities are excellent places to seek advice, share experiences, and find solutions to common issues.
- Tutorial Websites and YouTube Channels: Numerous websites and YouTube channels offer free tutorials ranging from beginner to advanced levels, providing visual and practical learning experiences.
- Books and eBooks: There are many books and eBooks available that cover AutoCAD for Mac in depth, including tutorials, tips, and best practices for all skill levels.
- Official Autodesk Training and Certification: Consider enrolling in Autodesk\"s official training courses and certification programs to improve your skills and validate your knowledge.
- Local User Groups: Joining a local AutoCAD user group can provide networking opportunities, peer support, and insights into how others in your area are using AutoCAD for Mac.
- Technical Support: For technical issues, Autodesk’s support team can provide direct assistance. Ensure you have an active subscription or maintenance plan to access support services.
Utilizing these resources can provide you with a wealth of knowledge and support, helping you to overcome challenges and become proficient in AutoCAD for Mac.
Embark on your AutoCAD for Mac journey with confidence, utilizing our comprehensive tutorials to unlock your creative potential and transform your design ideas into reality.
_HOOK_