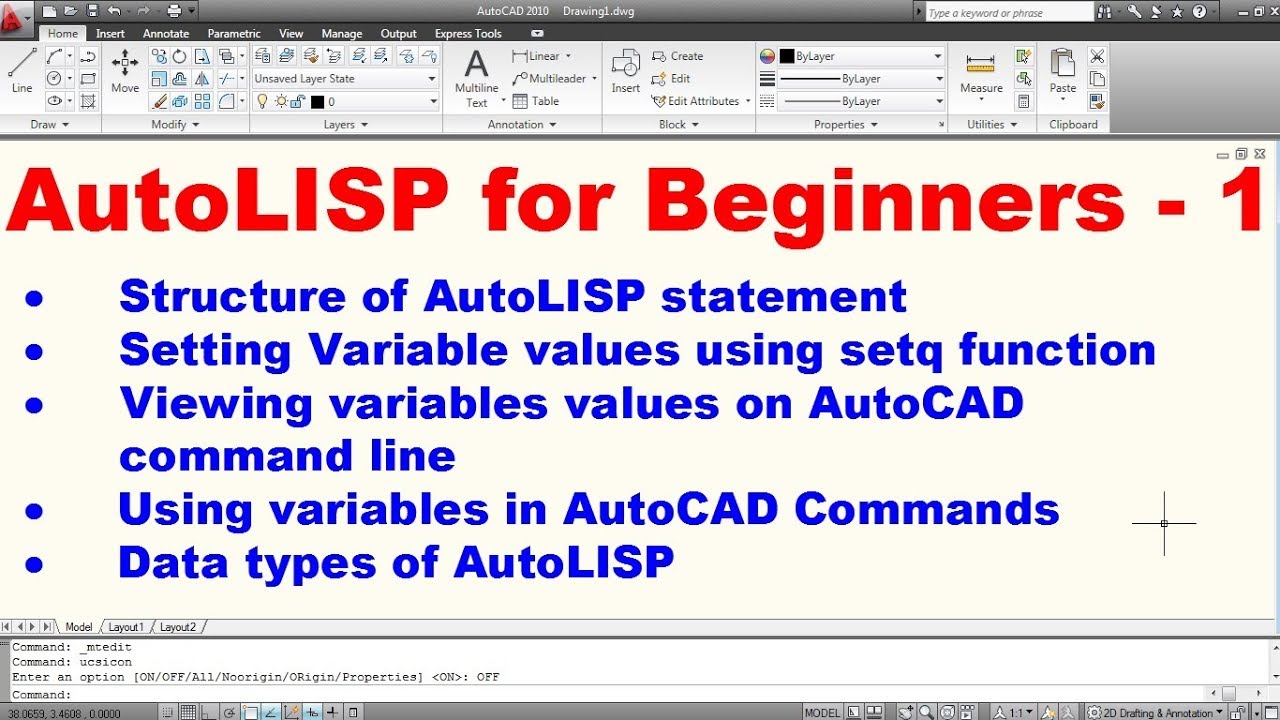
Topic lisp autocad tutorial: Embark on a journey through our LISP AutoCAD tutorial, where intricate design meets efficiency, unlocking the full potential of your AutoCAD projects.
Table of Content
- What are the AutoLISP commands for working with expressions in AutoCAD?
- Understanding AutoLISP Syntax and Basic Commands
- YOUTUBE: AutoLISP for AutoCAD LT 2024
- AutoLISP Expressions and Data Types
- Navigating AutoLISP Functions and Control Structures
- Automating Tasks with AutoLISP
- Working with Strings, Files, and System Variables in AutoLISP
- Integrating AutoCAD Commands into AutoLISP Programs
- Error Handling and Debugging in AutoLISP
- Advanced Topics: From Visual LISP Editor to Visual Studio Code
- Case Studies and Practical Applications of AutoLISP in AutoCAD
What are the AutoLISP commands for working with expressions in AutoCAD?
The AutoLISP commands for working with expressions in AutoCAD are:
- ! - This command is used to evaluate an AutoLISP expression at the AutoCAD command prompt. For example, to evaluate the expression stored in the variable dRadius, you would enter
!dRadiusat the command prompt. - set - This command is used to assign a value to a variable. For example, to assign the value 10 to the variable dRadius, you would enter
(set \'dRadius 10). - setq - This command is similar to the set command, but allows you to assign values to multiple variables at once. For example, to assign the values 10, 20, and 30 to the variables a, b, and c respectively, you would enter
(setq a 10 b 20 c 30). - defun - This command is used to define a new AutoLISP function. For example, to define a function called myFunction that takes two arguments and returns their sum, you would enter:
| Command | Usage |
|---|---|
| defun | (defun myFunction (a b) (+ a b)) |
These are some of the basic AutoLISP commands for working with expressions in AutoCAD. Learning and using AutoLISP can greatly enhance your efficiency and productivity in AutoCAD.
READ MORE:
Understanding AutoLISP Syntax and Basic Commands
AutoLISP is a programming language designed for extending and customizing the functionality of AutoCAD. It is specifically tailored for automating and streamlining repetitive tasks in the AutoCAD environment. Understanding the syntax and basic commands of AutoLISP is crucial for anyone looking to enhance their AutoCAD productivity.
Basic Syntax
The AutoLISP syntax is simple and consists of expressions enclosed in parentheses. Each expression can contain operators, variables, and functions. The basic form of an AutoLISP expression looks like this:
(function argument1 argument2 ... argumentN)
This structure is fundamental to writing AutoLISP programs, where a function is called with its required arguments.
Variables
Variables in AutoLISP are defined using the setq function, which stands for \"set quote\". Variables can store numbers, strings, lists, or even other functions. Here is an example of defining a variable:
(setq myVariable 100)
This line of code assigns the value 100 to the variable myVariable.
Basic Commands
- setq - Assigns a value to a variable.
- princ - Prints a string or value to the AutoCAD command line.
- prompt - Displays a message to the user on the command line.
- getint - Prompts the user to input an integer.
- getreal - Prompts the user for a real number.
- getstring - Asks the user to input a string.
Creating Simple Programs
To create a simple AutoLISP program, you can combine these commands and variables into expressions. For instance, to ask for a user\"s name and greet them, you could write:
(setq userName (getstring \"
Enter your name: \"))
(princ (strcat \"
Hello, \" userName \"!\"))
Comments
Comments in AutoLISP are denoted by a semicolon (;). Any text following a semicolon in a line is ignored by the interpreter. Comments are crucial for documenting your code and making it easier to understand.
; This is a comment
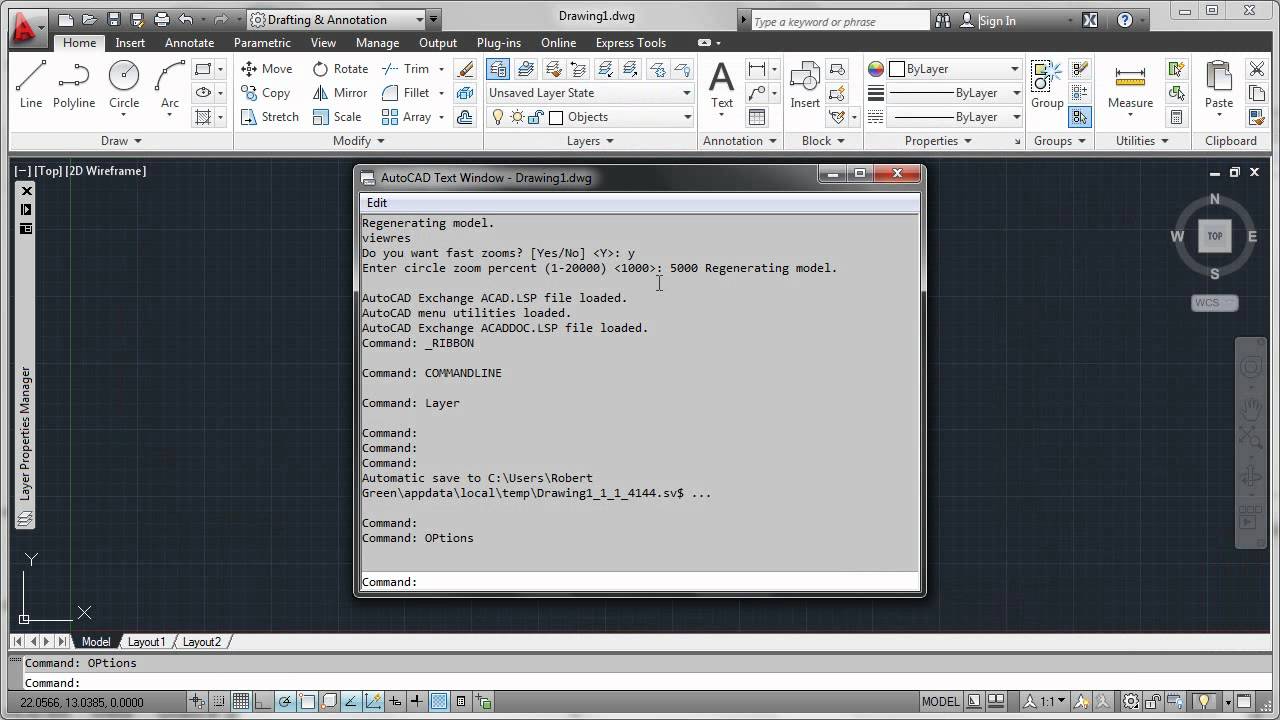
Loading and Executing Programs
AutoLISP programs are typically stored in files with an .lsp extension. To load and execute an AutoLISP file in AutoCAD, use the load command followed by the file name:
(load \"myProgram.lsp\")
Once loaded, you can call any defined functions within the file directly from the AutoCAD command line.
Mastering these basics will empower you to start exploring more complex functions and control structures in AutoLISP, leading to more efficient and automated workflows in AutoCAD.
AutoLISP for AutoCAD LT 2024
AutoLISP: Discover the power of AutoLISP and unlock endless possibilities in AutoCAD! Dive into this informative video and learn how to level up your design skills with this incredible programming language.
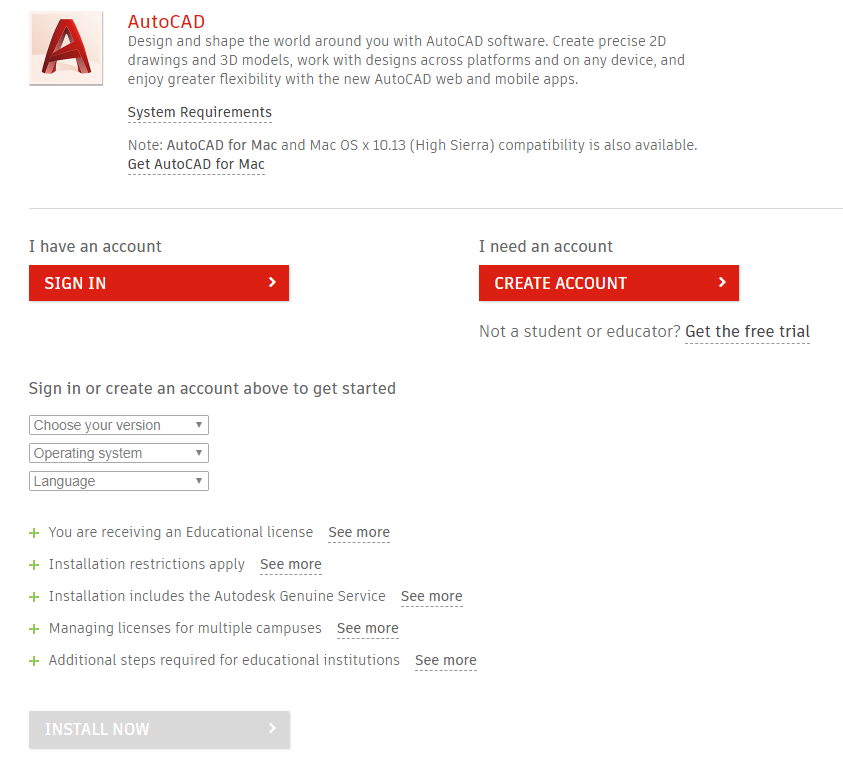
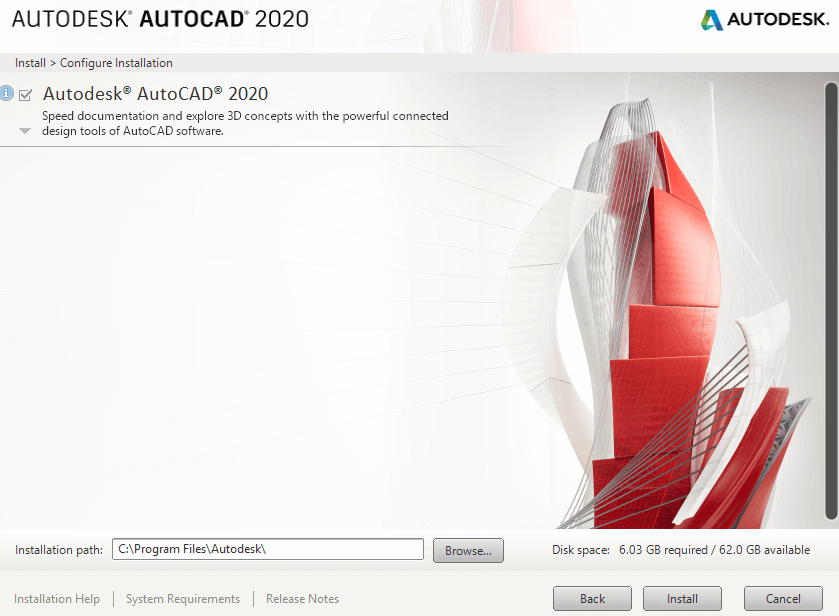
Installing Lisp Commands in AutoCAD
Installing: Ready to learn how to install software like a pro? This step-by-step video tutorial will guide you through the installation process, ensuring a smooth and hassle-free experience. Don\'t miss out on this must-watch video!
AutoLISP Expressions and Data Types
AutoLISP offers a variety of expressions and data types that allow for complex and nuanced programming within the AutoCAD environment. Understanding these elements is key to effectively automating tasks and customizing AutoCAD to suit your specific needs.
Expressions
Expressions in AutoLISP are constructs that are evaluated by the interpreter to return a value. These can include arithmetic operations, function calls, or any combination of operators, variables, and values. Expressions are always enclosed in parentheses, following the Lisp programming tradition.
Data Types
AutoLISP supports several data types, each with its own set of characteristics and uses:
- Integers - Whole numbers, positive or negative.
- Reals - Floating-point numbers representing real values.
- Strings - Sequences of characters enclosed in double quotes.
- Lists - Ordered collections of elements, which can be of mixed types, enclosed in parentheses.
- Symbols - Names that represent variables or functions.
Working with Lists
Lists are a fundamental data type in AutoLISP, used to group related items together. They can be manipulated using a variety of functions:
- car - Returns the first element of a list.
- cdr - Returns a list minus its first element.
- cons - Constructs a new list by adding an element to the beginning of another list.
- list - Creates a list out of its arguments.
Type Checking
To ensure your AutoLISP code behaves as expected, you may need to check the type of a given value. AutoLISP provides several functions for this purpose:
- type - Returns a symbol indicating the type of its argument.
- listp - Checks if an argument is a list.
- numberp - Determines if an argument is a number.
Converting Between Data Types
Conversion functions allow you to change data from one type to another, enabling more flexible data manipulation:
- itoa - Converts an integer to a string.
- atoi - Converts a string to an integer.
- rtos - Converts a real number to a string, with formatting options for precision and format.
By mastering AutoLISP expressions and understanding the various data types available, you can begin to write more complex and powerful scripts to automate and extend AutoCAD\"s capabilities. This knowledge forms the foundation for exploring more advanced AutoLISP programming concepts and techniques.
Navigating AutoLISP Functions and Control Structures
Functions and control structures are core components of AutoLISP programming, allowing for the creation of dynamic and responsive scripts. This section explores how to effectively use these elements to control the flow of your AutoCAD automation scripts.
Functions
Functions are the building blocks of AutoLISP programs, encapsulating reusable code blocks. They are defined using the defun keyword, followed by the function name and a list of parameters. Here is a simple example:
(defun myFunction (arg1 arg2)
(+ arg1 arg2)
)
This function, named myFunction, takes two arguments and returns their sum.
Control Structures
Control structures manage the flow of your program, allowing for conditional execution and loops. The most commonly used control structures in AutoLISP include:
- if - Executes a block of code if a specified condition is true.
- cond - A more flexible conditional statement that allows for multiple conditions and actions.
- while - Repeatedly executes a block of code as long as a specified condition remains true.
- repeat - Executes a block of code a specified number of times.
Using the if Statement
The if statement evaluates a condition and executes a block of code if the condition is true. An optional else part can execute alternative code if the condition is false:
(if (> x 10)
(princ \"x is greater than 10.\")
(princ \"x is not greater than 10.\")
)
Implementing Loops
Loops are used to repeat actions. The while loop continues as long as its condition is true, and the repeat loop executes a specific number of times:
(while (< x 5)
(setq x (+ x 1))
)
(repeat 5
(princ \"This will print five times.\")
)
Defining and Calling Functions
To define a function that uses control structures, you can combine the defun keyword with conditional statements and loops. Here\"s a function that prints numbers from 1 to a given number:
(defun printNumbers (n)
(setq i 1)
(while (<= i n)
(princ i)
(setq i (+ i 1))
)
)
By understanding and utilizing functions and control structures, you can write efficient and powerful AutoLISP scripts to automate a wide range of tasks in AutoCAD, from simple operations to complex workflows.
Automating Tasks with AutoLISP
AutoLISP offers a powerful platform for automating repetitive tasks in AutoCAD, enhancing productivity and accuracy. By leveraging AutoLISP scripts, users can automate complex sequences of commands, from drawing and editing to data management. This section guides you through the process of creating AutoLISP scripts to automate your tasks in AutoCAD.
Identifying Tasks for Automation
Start by identifying repetitive or time-consuming tasks that you often perform in AutoCAD. These could range from drawing a specific type of object, modifying layer properties, to generating reports or exporting data. Common tasks for automation include:
- Creating standard drawing elements
- Updating block attributes
- Modifying layer settings
- Batch processing of drawings
Writing Your First Script
To automate tasks with AutoLISP, you write scripts that issue commands just as you would manually in AutoCAD. Here\"s a simple example to draw a line:
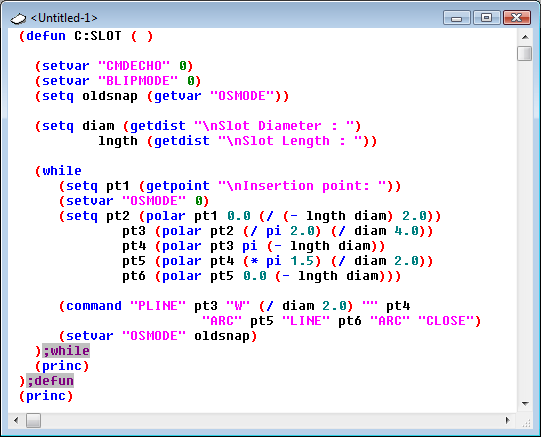
(defun c:DrawLine ()
(command \"LINE\" \"0,0\" \"100,100\" \"\")
)
This script defines a new command, DrawLine, which draws a line from the coordinates (0,0) to (100,100).
Accessing and Modifying Drawing Elements
AutoLISP provides functions to access and modify drawing elements, or entities. To modify an entity, you first select it, then change its properties. For example, to change the color of a line:
(defun c:ChangeLineColor ()
(setq ent (car (entsel \"
Select line: \")))
(setq entData (entget ent))
(setq entData (subst (cons 62 1) (assoc 62 entData) entData))
(entmod entData)
(princ)
)
This script changes the selected line\"s color to red (color code 1).
Looping and Conditional Statements
Use looping and conditional statements to handle multiple entities or to apply logic. For example, to change the color of multiple lines:
(defun c:ChangeMultipleLinesColor ()
(setq done nil)
(while (not done)
(setq ent (car (entsel \"
Select line or press Enter to finish: \")))
(if ent
(progn
(setq entData (entget ent))
(setq entData (subst (cons 62 1) (assoc 62 entData) entData))
(entmod entData)
)
(setq done t)
)
)
(princ)
)
Integrating with AutoCAD Commands
AutoLISP scripts can call any AutoCAD command using the command function. This allows scripts to perform virtually any action that a user can manually. Here\"s an example that combines drawing and editing commands:
(defun c:DrawAndModify ()
(command \"CIRCLE\" \"50,50\" \"25\")
(command \"OFFSET\" \"5\" \"Last\" \"\" \"Exit\")
)
By mastering the basics of AutoLISP, you can start to automate a wide range of tasks in AutoCAD, significantly improving your workflow and productivity. Remember, the key to successful automation is understanding the tasks you perform regularly and how they can be translated into AutoLISP code.
_HOOK_
Working with Strings, Files, and System Variables in AutoLISP
AutoLISP provides a rich set of functions for manipulating strings, managing files, and interacting with AutoCAD system variables. These capabilities are essential for creating scripts that can handle data input/output, customize the AutoCAD environment, and interact with the user. This section will guide you through the basics of working with strings, files, and system variables in AutoLISP.
String Manipulation
Strings in AutoLISP can be created, concatenated, and manipulated using various functions:
- strcat - Concatenates two or more strings.
- strlen - Returns the length of a string.
- substr - Extracts a substring from a string.
- strcase - Converts a string to uppercase or lowercase.
Example of concatenating strings:
(setq fullName (strcat firstName \" \" lastName))
File Handling
AutoLISP allows you to read from and write to files, enabling data storage and retrieval:
- open - Opens a file for reading or writing.
- close - Closes an open file.
- read-line - Reads a line from a file.
- write-line - Writes a line to a file.
Example of writing to a file:
(setq myFile (open \"myData.txt\" \"w\"))
(write-line \"Hello, AutoLISP!\" myFile)
(close myFile)
Accessing System Variables
System variables control various aspects of AutoCAD\"s behavior and environment. AutoLISP scripts can get and set the values of these variables:
- getvar - Retrieves the value of a system variable.
- setvar - Sets the value of a system variable.
Example of setting a system variable:
(setvar \"CLAYER\" \"0\")
This command sets the current layer to layer 0.
User Interaction
Interacting with the user is often necessary, whether it\"s for inputting data or providing feedback. Functions like getstring for input and princ for output are used to communicate with the user:
(setq userName (getstring \"
Enter your name: \"))
(princ (strcat \"Welcome, \" userName \"!
\"))
By understanding and using these functions, you can enhance your AutoLISP scripts to perform a wide range of tasks, from simple string manipulations and file operations to complex interactions with the AutoCAD environment and its users.
Integrating AutoCAD Commands into AutoLISP Programs
One of the most powerful features of AutoLISP is its ability to integrate directly with AutoCAD commands, allowing for automation of almost any task within the AutoCAD environment. This capability enables script developers to create custom functions that harness the full power of AutoCAD\"s native commands, enhancing productivity and efficiency. This section will guide you through the process of incorporating AutoCAD commands into your AutoLISP programs.
Using the Command Function
The command function is the primary means of executing AutoCAD commands from within an AutoLISP script. It simulates the typing of commands into the command line, including specifying options and coordinates. Here\"s a basic structure:
(command \"COMMAND_NAME\" \"Option1\" \"Option2\" ...)
Arguments passed to the command function are similar to what you would manually enter in the AutoCAD command line.
Example: Drawing a Line
To draw a line from point (0,0) to point (100,100) using AutoLISP:
(command \"LINE\" \"0,0\" \"100,100\" \"\")
This script calls the LINE command and specifies the start and end points, with an empty string to denote the end of the command.
Handling User Inputs
Many AutoCAD commands require user inputs such as selecting objects or specifying points. AutoLISP can automate these inputs using the command function:
(command \"ERASE\" (ssget \"X\" \"((0 . \"LINE\"))))
This command erases all lines in the drawing by selecting them programmatically using ssget with a selection filter.
Combining AutoCAD Commands with AutoLISP Logic
You can combine AutoCAD commands with AutoLISP\"s programming logic for more complex operations. For example, to draw multiple lines based on user-specified coordinates:
(defun c:DrawMultipleLines ()
(repeat 5
(setq startPoint (getpoint \"
Specify start point: \"))
(setq endPoint (getpoint \"
Specify end point: \"))
(command \"LINE\" startPoint endPoint \"\")
)
)
This function prompts the user to specify start and end points for five lines, drawing each line sequentially.
Using AutoLISP Variables with Commands
AutoLISP variables can be passed to AutoCAD commands within the command function, allowing dynamic command execution based on script logic or user inputs:
(setq layerName \"MyLayer\")
(command \"LAYER\" \"S\" layerName \"\")
This script sets the current layer to a layer named MyLayer, demonstrating how AutoLISP variables can be integrated with command options.
Integrating AutoCAD commands into AutoLISP programs opens up a vast array of possibilities for automating tasks, customizing workflows, and extending the functionality of AutoCAD. By mastering this technique, you can significantly enhance your productivity and the capabilities of your AutoCAD projects.

Error Handling and Debugging in AutoLISP
Effective error handling and debugging are essential skills for developing robust AutoLISP applications. AutoLISP provides several tools and techniques for identifying, diagnosing, and resolving errors in your scripts. This section offers a comprehensive guide to managing errors and debugging AutoLISP programs, ensuring they run smoothly and efficiently.
Understanding Error Types
Errors in AutoLISP can broadly be categorized into syntax errors, runtime errors, and logical errors. Syntax errors occur when the code does not follow the correct structure or syntax of the language. Runtime errors happen during the execution of the script, often due to invalid operations or data types. Logical errors are the hardest to detect as the script runs without crashing but produces incorrect results.
Using the Error Function
The error function can be used to handle errors gracefully. It allows you to display a custom error message and terminate the current operation without crashing AutoCAD. Implementing an error handler can help in identifying where and why an error occurred.
(defun myErrorHandler (errorMsg)
(princ \"
Error: \")
(princ errorMsg)
(princ)
)
Debugging Techniques
Debugging in AutoLISP involves several strategies to identify and fix issues:
- Using princ and alert for Output: These functions can display values and messages, helping to trace the flow of execution and inspect variable contents.
- Commenting Code: Temporarily commenting out parts of the code can help isolate the section causing the error.
- Step-by-Step Execution: Running your code step by step, either manually or using a debugger tool, can help identify where things go wrong.
Visual LISP Editor
The Visual LISP Editor, included with AutoCAD, provides advanced debugging tools, such as breakpoints, variable watches, and step execution. These tools allow for a more sophisticated approach to debugging, letting you pause execution at specific points and examine the state of your program in detail.
Handling Common Errors
Common errors in AutoLISP programming include accessing undefined variables, performing invalid operations on data types, and incorrect use of functions. Here are some tips for handling these errors:
- Ensure all variables are correctly initialized before use.
- Check data types before performing operations, using functions like type or listp.
- Read function documentation carefully to understand required arguments and return values.
Best Practices for Error-Free Programming
To minimize errors in your AutoLISP scripts, adopt the following best practices:
- Use meaningful variable names to improve code readability.
- Break down complex functions into smaller, manageable pieces.
- Regularly test your code with different inputs and scenarios.
By incorporating these error handling and debugging techniques into your development process, you can create more reliable and maintainable AutoLISP applications. Remember, effective debugging is an iterative process that requires patience and practice to master.
Advanced Topics: From Visual LISP Editor to Visual Studio Code
Moving beyond basic AutoLISP development, advanced topics include leveraging modern IDEs like Visual Studio Code (VS Code) for AutoLISP programming. This transition involves understanding the capabilities of these environments, setting them up for AutoLISP, and using their advanced features to improve your development workflow. This section explores how to elevate your AutoLISP programming from the Visual LISP Editor to VS Code, highlighting tools, extensions, and practices that enhance productivity and code quality.
Setting Up Visual Studio Code for AutoLISP
Visual Studio Code is a powerful, extensible IDE that can support AutoLISP development through extensions and configuration. To begin, ensure you have VS Code installed, then follow these steps:
- Install the AutoLISP Extension: Search for an AutoLISP extension in the VS Code Marketplace and install it. This extension provides syntax highlighting, code snippets, and command execution capabilities.
- Configure Your Environment: Set up your workspace to point to your AutoLISP files and AutoCAD application directory. This might involve editing your workspace settings to include AutoLISP-specific paths and configurations.
Advanced Editing Features
VS Code offers a wide range of editing features that can enhance your programming experience:
- Syntax Highlighting and IntelliSense: Makes it easier to read code and understand its structure at a glance. IntelliSense provides code completions based on variable types, function definitions, and more.
- Code Snippets: Quickly insert common code patterns and structures, speeding up development.
- Git Integration: Manage your source code versions and collaborate with others directly from the IDE.
Debugging and Error Checking
VS Code\"s debugging tools are more advanced than those in traditional LISP editors. Setting up debugging for AutoLISP involves:
- Configuring launch.json: Define your debugging environment, specifying paths to AutoCAD and your LISP files.
- Using Breakpoints: Identify and pause execution at critical points in your code to inspect variables and flow.
- Viewing Call Stacks and Variables: Get detailed insights into your program\"s execution and state at any given moment.
Best Practices for AutoLISP Development in VS Code
To make the most of VS Code for AutoLISP development, consider the following best practices:
- Regularly Update Extensions: Keep your AutoLISP extension and VS Code updated to benefit from the latest features and bug fixes.
- Use Version Control: Leverage Git for version control to track changes, experiment with new ideas, and collaborate more effectively.
- Customize Your Workspace: Tailor your VS Code environment with themes, settings, and extensions that suit your workflow.
Transitioning to Visual Studio Code for AutoLISP development not only provides a modern and efficient programming environment but also introduces advanced tools and practices that can significantly improve your coding efficiency and project quality. Embracing these advanced topics will prepare you for tackling complex AutoLISP projects with greater ease and confidence.

READ MORE:
Case Studies and Practical Applications of AutoLISP in AutoCAD
AutoLISP, with its powerful and flexible scripting capabilities, has been instrumental in automating tasks, customizing functionalities, and enhancing productivity in AutoCAD. This section explores real-world case studies and practical applications that demonstrate the impact of AutoLISP across various industries and projects. Through these examples, you\"ll see how AutoLISP can solve complex problems, streamline workflows, and bring creative solutions to life in the AutoCAD environment.
Automating Repetitive Drawing Tasks
In architectural design, repetitive tasks such as drawing doors, windows, and other standard elements can consume significant time. An architectural firm developed a series of AutoLISP scripts to automate these tasks, significantly reducing the manual effort required and ensuring consistency across all drawings. The scripts enabled architects to insert predefined blocks with a single command, adjust dimensions automatically based on room sizes, and generate lists of materials and components for project estimations.
Customizing Drawing Standards Compliance
An engineering company created an AutoLISP program to enforce drawing standards across their projects. The program automatically checks drawings for compliance with predefined standards, such as layer naming conventions, text styles, and dimension settings. Whenever a deviation is detected, the script either corrects the issue automatically or alerts the user to make the necessary adjustments. This application ensured consistency and quality, while saving time on manual reviews and corrections.
Streamlining Data Exchange between AutoCAD and Other Applications
A civil engineering project required frequent exchange of data between AutoCAD and GIS (Geographical Information Systems) software. An AutoLISP script was developed to automate the export and import processes, transforming data into the correct formats and ensuring seamless integration between the two applications. This automation facilitated more efficient updates and revisions, reducing errors and improving the overall workflow between different software tools.
Enhancing Custom Functionality for Specific Industries
In the field of telecommunications, a specialized AutoLISP application was developed to automate the layout of network infrastructure within AutoCAD. This application allowed for the rapid design and modification of network components, calculation of optimal routes for cables, and generation of comprehensive reports detailing the network design. By leveraging AutoLISP, the company was able to offer a highly customized tool that met the unique needs of telecommunications projects.
Facilitating Collaborative Design and Review Processes
A construction company implemented an AutoLISP solution to streamline the collaborative design and review process. The script facilitated the automatic generation of PDFs from CAD drawings, the compilation of comments and revisions from various stakeholders, and the integration of feedback into the AutoCAD environment. This not only sped up the review cycles but also improved the accuracy and efficiency of the collaborative design process.
These case studies illustrate the versatility and power of AutoLISP in addressing specific challenges and enhancing productivity in AutoCAD-based projects. By customizing AutoLISP scripts to meet the unique needs of their projects, professionals across various disciplines can automate tasks, enforce standards, and introduce new levels of efficiency and innovation into their workflows.
Explore the transformative power of AutoLISP in AutoCAD through our comprehensive tutorials, where innovation meets efficiency. Unlock new potentials in your projects, from automation to customization, and elevate your design process to new heights.
_HOOK_