Topic autocad tutorial 3d: Dive into the world of 3D design with our AutoCAD Tutorial 3D, where you"ll master the skills to bring your ideas to life and create stunning 3D models.
Table of Content
- What are some recommended AutoCAD 3D modeling tutorials and exercises available on YouTube?
- Getting Started with AutoCAD 3D
- Understanding the AutoCAD Interface
- Basic 3D Modeling Concepts
- Creating Simple 3D Models
- Advanced 3D Modeling Techniques
- 3D Editing and Manipulation
- YOUTUBE: AutoCAD 2018 3D Tutorial for Beginners
- Working with Views and Viewports in 3D
- Rendering and Visualizing 3D Models
- Exporting and Printing 3D Designs
- Tips and Tricks for Efficient 3D Design
- Resources for Further Learning
What are some recommended AutoCAD 3D modeling tutorials and exercises available on YouTube?
Here are some recommended AutoCAD 3D modeling tutorials and exercises available on YouTube:
- Autocad in 3D - tutorials and exercises: This YouTube playlist offers a comprehensive set of videos for learning AutoCAD 3D. It covers various topics and provides practical exercises to enhance your skills.
- AutoCAD 3D Practice Tutorial: This tutorial demonstrates how to use AutoCAD for 3D modeling. It provides step-by-step instructions and enables you to practice modeling in just 15 minutes.
- AutoCAD 3D House Modeling Tutorial - 1: This video tutorial focuses on creating a 3D house model in AutoCAD. It covers essential commands and techniques used in architectural modeling.
- AutoCAD 3D Loft Command Tutorial Complete: This tutorial specifically explains the Loft command in AutoCAD 3D. It demonstrates how to create complex shapes using lofting techniques.
By following these tutorials and exercises, you can gain a strong foundation in AutoCAD 3D modeling and improve your skills in creating 3D designs and models.
READ MORE:
Getting Started with AutoCAD 3D
Welcome to the beginning of your journey in 3D modeling with AutoCAD. This section will guide you through the initial steps to familiarize yourself with the 3D environment, setting up your workspace for 3D design, and navigating the basic tools necessary for creating 3D models. Let\"s embark on this exciting adventure to unlock the full potential of your creativity with AutoCAD 3D.
- Launching AutoCAD and Setting Up the 3D Workspace: Open AutoCAD, then switch to the 3D modeling workspace via the workspace switcher in the status bar to access 3D tools and palettes.
- Understanding the Coordinate System: Get familiar with the XYZ coordinate system used in 3D modeling to understand how objects are positioned in 3D space.
- Navigating the 3D View: Learn to use the view cube and steering wheels for rotating, zooming, and panning your view to better visualize and work on your 3D model.
- Basic 3D Modeling Tools: Start exploring basic 3D modeling tools such as extrude, revolve, and loft to create simple 3D shapes and forms.
- Creating Your First 3D Model: Follow a simple tutorial to create your first 3D model, applying the tools and concepts you\"ve learned.
By following these steps, you\"ll be well on your way to mastering the art of 3D design in AutoCAD. Remember, practice is key to becoming proficient, so don\"t hesitate to experiment with different tools and techniques as you learn.

Understanding the AutoCAD Interface
Mastering AutoCAD for 3D design begins with a solid understanding of its interface. This section will guide you through the key components of the AutoCAD interface, helping you to navigate and use the software efficiently for your 3D projects.
- Ribbon: The ribbon at the top contains all the tools and commands organized in tabs and panels. For 3D work, the \"Modeling\" tab is where you\"ll find tools specifically for 3D modeling.
- Command Line: Located at the bottom, the command line is where you can type commands directly, offering a fast way to access tools and settings.
- ViewCube: The ViewCube in the top-right corner allows for easy 3D view manipulation, enabling you to quickly switch between standard and custom views.
- Navigation Bar: The navigation bar offers tools for panning, zooming, and orbiting your view, essential for examining your 3D models from different angles.
- Workspace Switcher: Use the workspace switcher to change between different workspaces tailored to various tasks, including a dedicated 3D modeling workspace.
- Tool Palettes: Tool palettes provide quick access to commonly used tools and commands. You can customize these palettes to suit your workflow.
- Properties Palette: The properties palette displays information about the selected object or objects, allowing you to modify their properties quickly.
Getting comfortable with the AutoCAD interface is a crucial step in becoming proficient in 3D modeling. Spend time exploring and customizing the interface to enhance your productivity and streamline your design process.
Basic 3D Modeling Concepts
Entering the realm of 3D modeling in AutoCAD requires an understanding of some fundamental concepts that form the foundation of all 3D design work. This section covers the core ideas you need to grasp before you start creating your own 3D models.
- Primitives: Primitives are the basic building blocks of 3D modeling, including cubes, spheres, cylinders, cones, and more. Understanding how to manipulate these shapes is essential for creating more complex models.
- Extrusion: Extrusion is a process that takes a 2D shape and extends it into the third dimension, creating a 3D object with depth. It\"s a fundamental technique for building 3D models from 2D sketches.
- Revolve: Revolving a 2D shape around an axis generates a 3D object. This method is perfect for creating symmetrical objects, like wheels or vases.
- Boolean Operations: Boolean operations, including union, subtract, and intersect, allow you to combine or remove parts of objects to form new shapes. These operations are crucial for creating complex geometries.
- Modification Tools: Learning to use modification tools such as move, rotate, scale, and mirror is key to editing and refining your 3D models.
- Meshes vs. Solids: Understand the difference between mesh models, which are made up of interconnected vertices, edges, and faces, and solid models, which provide a more realistic representation of 3D objects.
- Surface Modeling: Surface modeling involves creating complex surfaces and shapes. It\"s used when precision and control over the model\"s contours are required.
By familiarizing yourself with these basic concepts, you\"ll be better prepared to tackle more advanced 3D modeling challenges in AutoCAD, opening up a world of design possibilities.
Creating Simple 3D Models
Starting your 3D modeling journey with AutoCAD can be exhilarating as you bring your ideas to life. This section is designed to help beginners create their first simple 3D models, providing a solid foundation to build upon.
- Choose a Simple Project: Begin with a straightforward project, such as a simple geometric shape or a basic architectural element like a wall or column.
- Set Up Your Workspace: Ensure your workspace is set to 3D Basics or 3D Modeling to access the necessary tools for 3D design.
- Draw a 2D Sketch: Start by drawing a 2D sketch of your object. Use commands like LINE, RECTANGLE, or CIRCLE to define the base shape.
- Extrude to Create Depth: Use the EXTRUDE command to add depth to your 2D sketch, turning it into a 3D object. Select your 2D shape and specify the extrusion height.
- Modify and Refine: Utilize modification tools like MOVE, ROTATE, and SCALE to adjust your 3D model. The FILLET and CHAMFER commands can be used to smooth edges and corners.
- Add Details: As you become more comfortable, start adding details to your model using more advanced tools and commands to enhance realism and complexity.
- Save and Review: Regularly save your work and review your model from different angles and views to ensure accuracy and completeness.
By following these steps, you\"ll gain confidence in your ability to create basic 3D models in AutoCAD. Remember, practice is crucial, so keep experimenting with different shapes and techniques to improve your skills.
_HOOK_
Advanced 3D Modeling Techniques
Once you\"re comfortable with the basics of 3D modeling in AutoCAD, you\"re ready to explore more complex and powerful techniques. These advanced methods will enable you to create intricate and detailed models, pushing the boundaries of your designs.
- Solid Editing Tools: Delve into solid editing tools like UNION, SUBTRACT, INTERSECT, and SLICE to manipulate and refine your 3D models with precision.
- Surface Modeling: Explore surface modeling techniques to create complex surfaces and organic shapes. Use commands like NETWORK, SWEEP, LOFT, and BLEND to achieve smooth and sophisticated designs.
- Working with Meshes: Learn to edit and refine mesh models using MESHSMOOTH, MESHCAP, and other mesh editing commands for models that require intricate detailing.
- 3D Scanning and Importing: Incorporate 3D scanning technologies to import real-world objects into AutoCAD, providing a base for complex modeling projects.
- Parametric Constraints: Use parametric constraints to control and maintain relationships between different geometric elements in your model, ensuring accuracy and consistency.
- Custom Materials and Textures: Apply custom materials and textures to your models for realistic renderings, enhancing the visual appeal and depth of your designs.
- Advanced Rendering Techniques: Master advanced rendering techniques to produce high-quality visualizations of your 3D models, showcasing them in their best light.
- Scripting and Automation: Automate repetitive tasks and create custom scripts to streamline your workflow and increase efficiency in your modeling process.
By mastering these advanced techniques, you\"ll be able to tackle more complex projects, bringing your most ambitious 3D designs to life with AutoCAD.
3D Editing and Manipulation
Editing and manipulating 3D models in AutoCAD is a critical skill that allows you to refine and perfect your designs. This section introduces key techniques and tools for effective 3D editing and manipulation, ensuring your models meet your exact specifications.
- Grips Editing: Use grips to quickly move, rotate, and scale objects in 3D space. Grips provide an intuitive way to adjust the position and size of your models.
- Solid Editing Commands: Explore solid editing commands like PRESSPULL to modify 3D solids directly, allowing for dynamic adjustments to faces, edges, and vertices.
- Boolean Operations: Apply Boolean operations to combine or subtract solid objects, creating complex shapes and forms from simpler ones.
- Section Planes: Use section planes to cut through 3D models, providing a view inside your designs to examine and modify internal features.
- 3D Array: Duplicate objects in a pattern using the 3D ARRAY command. This tool is essential for creating repeated elements in your design efficiently.
- Aligning Objects: Align 3D objects precisely with the ALIGN command, ensuring they are positioned correctly relative to other elements in your model.
- Trim and Extend: Use the TRIM and EXTEND commands to modify the boundaries of 3D objects, refining their shape and ensuring they interact with other elements as intended.
- Layer Management: Organize your 3D models using layers to separate different elements of your design, making it easier to edit and manipulate specific parts without affecting the whole.
Mastering these editing and manipulation techniques will enhance your ability to adjust and perfect your 3D models, giving you greater control over the final outcome of your designs in AutoCAD.
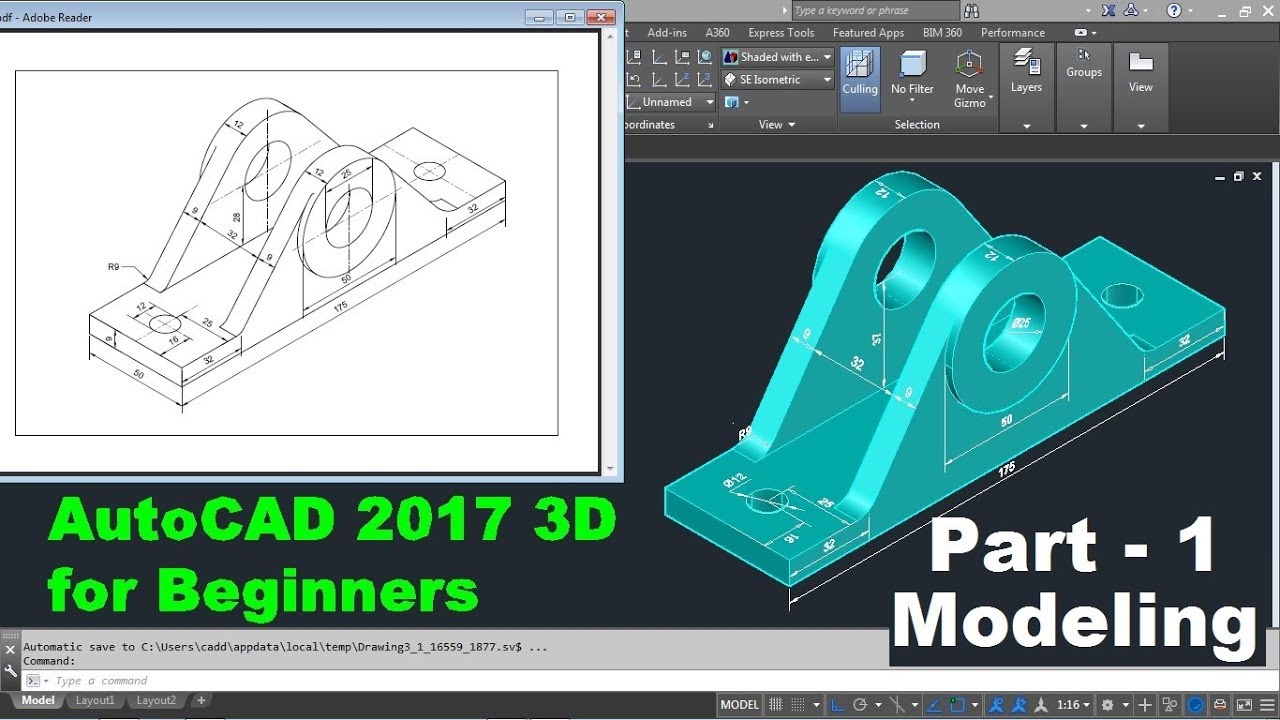
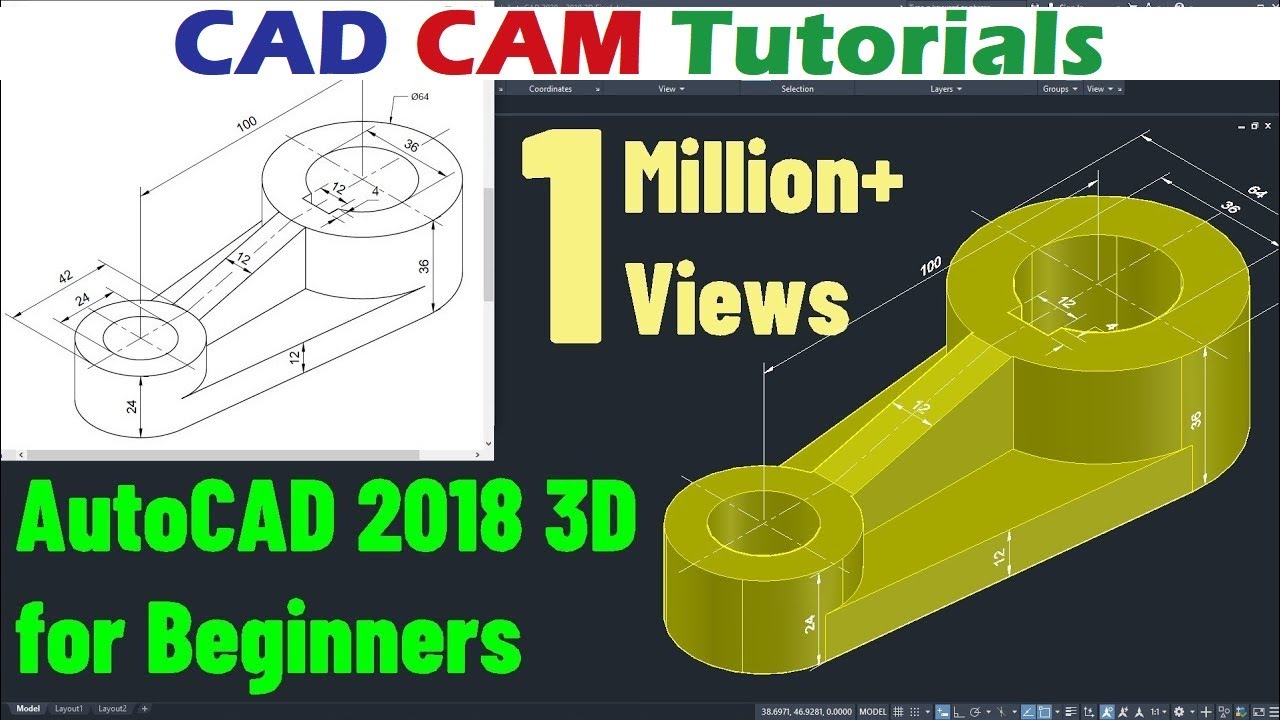
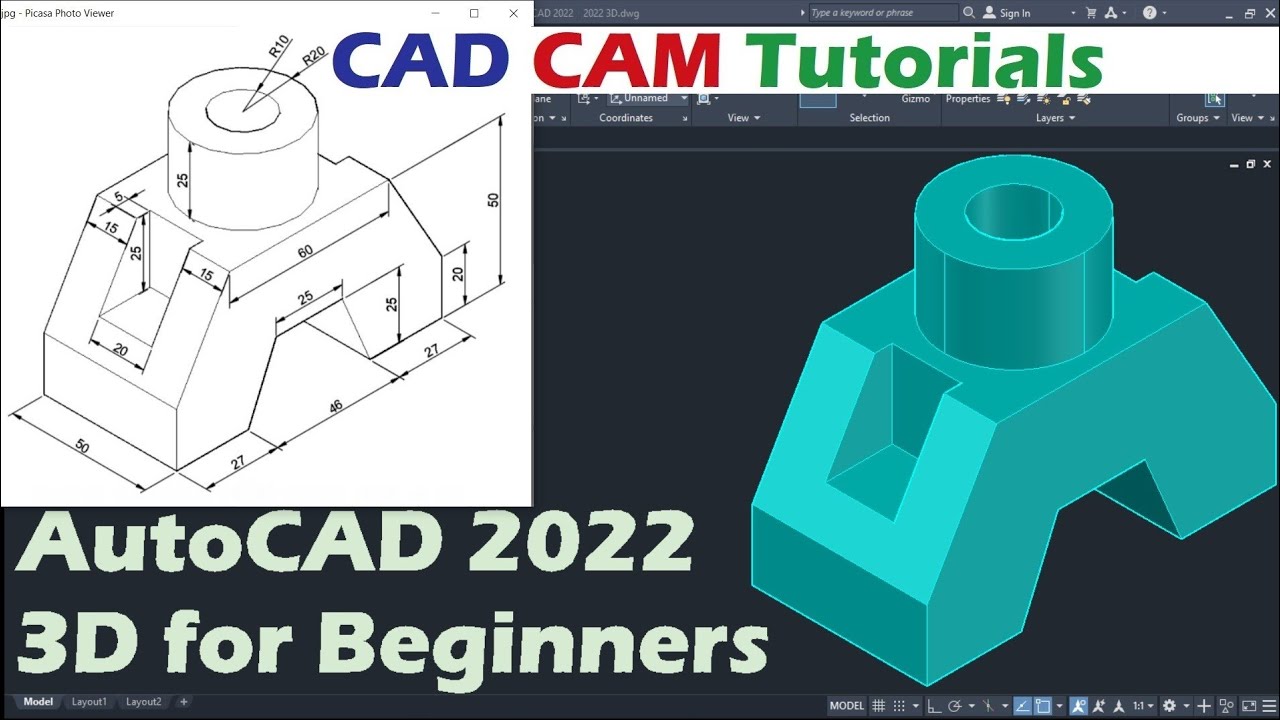
AutoCAD 2018 3D Tutorial for Beginners
Tutorial: This easy-to-follow tutorial will guide you step-by-step through the process, making it perfect for beginners or anyone looking to enhance their skills. Watch this video now and start creating amazing projects!
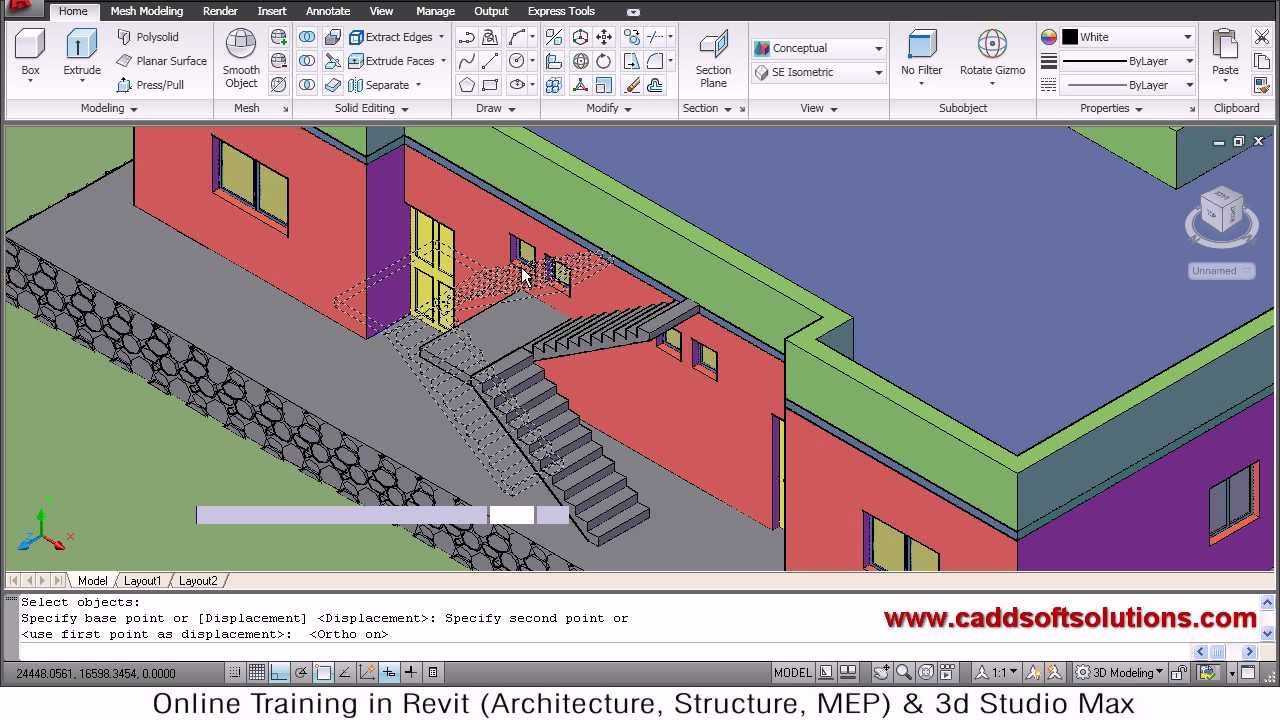
AutoCAD 3D Beginner Series: Part 1
Beginner: New to this topic? No worries! This beginner-friendly video is tailored just for you. It covers all the basics, providing a solid foundation for you to build upon. Don\'t miss out on this opportunity to learn and grow!
Working with Views and Viewports in 3D
Mastering views and viewports is essential for efficient 3D design in AutoCAD. This section guides you through the process of creating, managing, and utilizing views and viewports to enhance your 3D modeling workflow.
- Understanding Viewports in 3D
- Viewports are windows that display different views of your model. In 3D, they enable you to see your design from various perspectives simultaneously. Start by activating the 3D modeling workspace, then navigate to the View tab and select Viewports to configure them according to your needs.
- Creating Custom Viewports
- To customize your workspace, you can create multiple viewports. Simply go to the View tab, choose Viewport Configuration, and select New Viewports. You can arrange them horizontally, vertically, or in a grid to view your model from multiple angles at once.
- Managing Views
- AutoCAD allows you to save specific views to quickly return to them later. After setting your desired view, use the VIEW command to open the View Manager, where you can save, rename, or delete views. This feature is particularly useful for complex models where you frequently switch between different perspectives.
- Navigating in 3D Views
- Use the navigation tools such as Orbit, Zoom, and Pan to explore your 3D models from various angles. The Navigation Bar and the ViewCube are invaluable tools for this, allowing for smooth transitions between views.
- Setting Up Cameras
- For detailed visualization, setting up cameras within your 3D space can simulate real-world perspectives. Access this feature through the CAMERA command, where you can place and aim cameras to capture specific views of your model.
- Utilizing the ViewCube
- The ViewCube is a user-friendly tool located in the top-right corner of the workspace. It allows for easy rotation of your model to any angle. Clicking on the faces, edges, or corners of the cube will snap the view to predefined orientations, facilitating quick adjustments.
- Customizing Viewport Configurations
- For intricate projects, customize viewport configurations to suit your workflow. This can be done by adjusting the number and arrangement of viewports, which can be tailored to highlight different aspects of your model or to compare different design options side by side.
- Rendering Views
- Once your views are set up, rendering them can provide a realistic representation of your model. Use the Render command to apply materials, lighting, and environmental effects, bringing your 3D models to life.
By effectively managing views and viewports, you can significantly enhance your productivity and the quality of your 3D designs in AutoCAD.
Rendering and Visualizing 3D Models
Rendering and visualizing your 3D models in AutoCAD transforms them from simple wireframes or solid models into lifelike representations, providing a powerful way to communicate your design ideas. This section covers the essential steps and tips for effectively rendering and visualizing 3D models in AutoCAD.
- Preparing Your Model for Rendering
- Before rendering, ensure your model is fully prepared. This includes applying materials, setting up lighting, and adjusting the model\"s environment settings. Use the Materials Browser to apply textures and finishes to your model, and the Lights panel to simulate realistic lighting conditions.
- Choosing the Right Rendering Environment
- Select an appropriate rendering environment that matches the context of your design. AutoCAD offers various preset environments that simulate different lighting conditions, from indoor to outdoor, daylight to nighttime. You can access these settings from the Render Environment and Exposure panel.
- Setting Up Cameras
- Cameras play a crucial role in rendering, as they define the perspective from which your model will be viewed. Position cameras strategically to highlight specific features of your model or to capture it from the most advantageous angles. Use the CAMERA command to place and aim your cameras.
- Applying Materials and Textures
- Materials and textures add realism to your 3D models. Apply materials that closely match the real-world surfaces you\"re trying to replicate. You can customize textures, adjust their scale, and modify their orientation to achieve the desired effect.
- Lighting Your Model
- Lighting is essential for creating depth and dimension in your renders. Experiment with different light sources, such as point lights, spotlights, and directional lights, to illuminate your model effectively. Adjust the intensity and color of lights to simulate various times of day or artificial lighting conditions.
- Using the Render Command
- Once your model is prepared, use the RENDER command to start the rendering process. AutoCAD will process the scene and produce a rendered image based on your settings. You can adjust the rendering quality and resolution to balance between rendering speed and image quality.
- Post-Processing and Final Touches
- After rendering, you may need to perform some post-processing to enhance your image. This can include adjusting brightness and contrast, cropping the image, or adding text annotations. Use image editing software to refine your render and prepare it for presentation or publication.
- Exploring Advanced Visualization Techniques
- For more advanced visualization, explore techniques such as panoramic views, walkthrough animations, or exporting your model to a visualization software. These methods provide dynamic ways to present and explore your designs.
By following these steps, you can produce high-quality renders that effectively communicate the visual and functional aspects of your 3D models in AutoCAD.
Exporting and Printing 3D Designs
Exporting and printing your 3D designs from AutoCAD enables you to share your work with clients, colleagues, and for physical model creation. This section outlines the process for preparing your 3D models for export and printing, ensuring high-quality outputs for various applications.
- Choosing the Right File Format for Export
- Depending on your needs, AutoCAD supports several file formats for exporting 3D designs. For 3D printing, STL and OBJ formats are commonly used. For sharing models with other CAD software, consider DWG or DXF formats. Use the EXPORT command and select the appropriate format for your project.
- Preparing Your Model for 3D Printing
- Before exporting for 3D printing, ensure your model is solid and watertight, with no open edges or non-manifold geometry. Use the CHECK command to identify and fix potential issues. Simplify complex models to reduce printing time and material usage.
- Adjusting Export Settings
- When exporting your design, adjust settings such as scale, unit of measurement, and tolerance to ensure your model exports correctly. This is crucial for 3D printing, where accuracy is vital. Access these settings in the export options dialog box.
- Printing 2D Views of 3D Models
- For documentation or presentation purposes, you may need to print 2D views of your 3D models. Use the LAYOUT command to create paper spaces, set up viewports, and adjust view scales to prepare your model for printing on paper or PDF.
- Configuring Print Settings
- When printing, configure your print settings for the best results. This includes selecting the right printer or plotter, paper size, scale, and print quality. Use the PLOT command to access the Plot dialog box where you can make these adjustments.
- Using External Services for 3D Printing
- If you don\"t have access to a 3D printer, consider using external 3D printing services. Upload your exported file to the service\"s platform, choose your material and finish, and they will print and ship the physical model to you.
- Sharing Your 3D Models
- For collaboration or showcasing your designs online, you may share your exported files directly with others or upload them to cloud storage or 3D model sharing platforms. Ensure you choose a file format that is widely compatible with other software or platforms.
By following these steps, you can effectively export and print your 3D designs from AutoCAD, facilitating professional presentations, physical model creation, and seamless collaboration.
_HOOK_
Tips and Tricks for Efficient 3D Design
Efficiency in 3D design with AutoCAD not only saves time but also enhances the quality of your work. Below are essential tips and tricks to streamline your 3D modeling process, enabling you to work smarter, not harder.
- Utilize AutoCAD\"s Full Range of 3D Tools
- AutoCAD offers a comprehensive suite of 3D tools. Familiarize yourself with commands like EXTRUDE, REVOLVE, SWEEP, and LOFT to create complex shapes easily. Leveraging these tools effectively can significantly speed up your modeling process.
- Master Keyboard Shortcuts
- Keyboard shortcuts can drastically reduce your design time. Memorize shortcuts for frequently used commands and operations. Customize your own shortcuts for complex sequences you use often to make your workflow more efficient.
- Create and Use Templates
- Start your projects with templates that have predefined settings like drawing units, layers, and styles. This practice ensures consistency across your designs and saves time setting up new projects.
- Implement Layer Management
- Organizing your model into layers makes it easier to edit, navigate, and visualize different elements of your design. Use meaningful layer names and colors to keep your project organized.
- Use Blocks and Groups for Repetitive Elements
- For design elements that are used repeatedly, create blocks or groups. This not only reduces file size but also simplifies modifications since changes to a block or group update all instances.
- Apply Modifiers and Editing Tools Wisely
- Modifiers like FILLET, CHAMFER, and ARRAY can enhance your design and reduce manual work. Use editing tools to adjust existing geometry instead of redrawing. This maintains accuracy and saves time.
- Keep Your Software Updated
- AutoCAD\"s latest versions often include new features, improved performance, and bug fixes. Regular updates ensure you have access to the best tools and a more stable platform.
- Practice Regular File Management
- Save versions of your work regularly and organize your files in a clear structure. Use descriptive file names and maintain backups to prevent data loss and streamline collaboration.
- Explore 3D Visualization Techniques
- Good visualization can make your design process more intuitive. Use shading, rendering, and the ViewCube to better understand the spatial relationships and aesthetics of your model.
- Learn from the AutoCAD Community
- Engage with the AutoCAD community through forums, tutorials, and user groups. Sharing experiences and solutions can provide new insights and techniques to improve your 3D design skills.
Implementing these tips and tricks can greatly enhance your efficiency and effectiveness in 3D design with AutoCAD, leading to better outcomes and more satisfying design experiences.
READ MORE:
Resources for Further Learning
Enhancing your AutoCAD 3D design skills requires continuous learning and practice. Below is a curated list of resources that can help you deepen your knowledge and stay updated with the latest trends and techniques in 3D modeling.
- AutoCAD Official Training Guides
- AutoCAD\"s official training materials are a great starting point for beginners and a useful reference for experienced users. These guides cover fundamental to advanced topics, offering structured learning paths.
- Online Courses and Tutorials
- Websites like LinkedIn Learning, Udemy, and Coursera offer comprehensive courses on AutoCAD 3D. These platforms feature tutorials by industry experts, catering to all skill levels from beginner to advanced.
- YouTube Channels
- YouTube is a valuable resource for visual learners. Channels dedicated to AutoCAD tutorials provide step-by-step instructions on specific tools and projects, making it easier to grasp complex concepts.
- AutoCAD Blogs and Forums
- Blogs and forums are great for staying updated with the latest features and getting tips from the community. Websites like Autodesk Forums and CADTutor host active discussions and advice from both new learners and seasoned professionals.
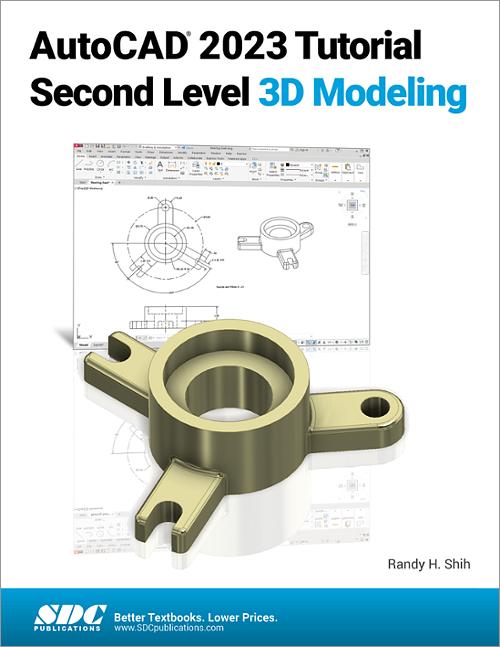
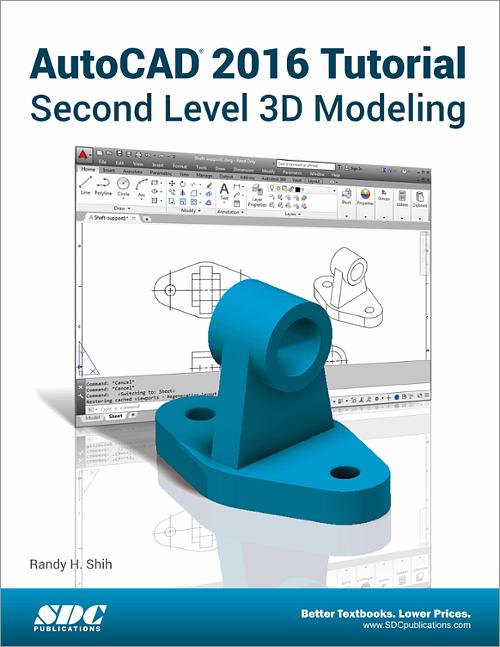
- Books and eBooks
- There are numerous books and eBooks available that focus on AutoCAD 3D design. They range from introductory guides to in-depth analyses of advanced techniques, suitable for self-study.
- Webinars and Workshops
- Participating in live webinars and workshops can provide interactive learning experiences. These sessions often include Q&A segments, allowing you to get immediate feedback on your queries.
- Professional Certifications
- Obtaining an AutoCAD certification can validate your skills and enhance your career prospects. Autodesk offers certification programs that assess your knowledge and proficiency in 3D design.
- Practice Projects
- Applying what you\"ve learned in real-world projects is one of the best ways to improve. Challenge yourself with new designs and use online communities to share your work and receive feedback.
By exploring these resources, you can continue to grow your AutoCAD 3D design skills, enabling you to create more sophisticated and efficient designs.
Embark on your journey to mastering 3D design with AutoCAD through our comprehensive tutorials. From basic concepts to advanced techniques, these guides offer valuable insights and tips to enhance your skills and bring your ideas to life.